Footsteps! Follow! (65M B.C. first time)
Hunting Range[edit]
| Trade: Ioka Hut | ||
| Ruby Gun | Petal | Fang |
| Sage Bow | Petal | Horn |
| Stone Arm | Petal | Feather |
| Flint Edge | Fang | Horn |
| Ruby Vest | Fang | Feather |
| Rock Helm | Horn | Feather |
You'll start out with Ayla in your party, you can talk to a few of the villagers and learn that you should follow the footprints in the Forest Maze, as well as receiving a free Tonic (or 4x Potions in the DS-Version). You can also trade in the upper right hut, although since they haven't exactly invented a stable system of monetary policy yet, you'll have to trade petals, fangs, horns, and feathers for different items.
Head to the hunting range to the northeast if you want an easy way to win some, and try fighting the Nu when it rains for a Third Eye. You can trade for a new weapon for each character except Ayla, as well as a Ruby Vest which cuts fire damage and a Rock Helm if you bring three of two different kinds of items. Fighting Nu is also a quick, easy way to rack up Tech points as well. Each time you fight him wins you 30 points. Each time it rains, Nu randomly emerges from the eastern jungle in one of three places; either along the shore in the northeastern corner, on the canopy (2nd floor) in the southeastern corner, or in the northwestern clearing. Sometimes Nu will decide not to come out at all. You can easily get to both locations without any conflict (note the frogs don't give tech points) by taking a right when you enter the hunting grounds. There's a vine to the left of the northeastern shore that makes checking both locations before the rain subsides easy.
You should also train Ayla until she learns Charm, which let you steal stuff from enemies, which is very useful to get rare items. Why don't you try it out on Nu? It will net you a Mop, the weakest Weapon for Crono. Drink some sweet water in one of the huts to restore your health when you're done, and head into the Forest Maze.
Forest Maze[edit]

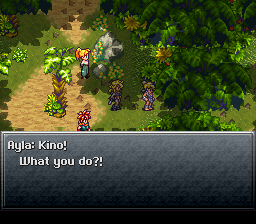
You'll learn that Kino was the one who stole the Gate Key, but the Reptites grabbed it from him and took off through the forest. You'll have to follow their footprints through the maze. The maze isn't actually that tough, it's fairly linear, with the path branching out at a few points for treasure chests. You'll fight a bunch of monsters which fall pretty well to physical attacks, then find your way out in front of the Reptite Lair.
While going down 2 vines get Mid Tonic and Revive from the chest. Go east over the dead tree and get Mid Tonic south and Mid Ether north and continue east around some tree to a chest with Revive. Go south to a chest with Shelter, then go up the ramp east until the fork. Go west of the fork to a chest with Mid Tonic, then go north in a big area with a chest which contain Heal. Now climb down the vine, but don't exit yet, instead go east to a chest with Mid Ether. Now you can exit and enter Reptite Lair.
Reptite Lair[edit]

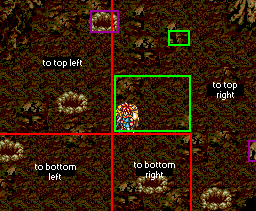
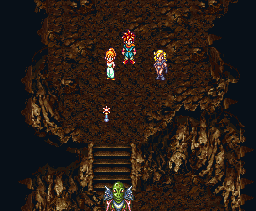
If you leave the Evilweevils alone in the Reptite Lair, they'll dig passages down for you to lower levels. If they dig in the wrong place, then talk to them and they will stop digging and search for another spot. There are at least five different ways down in the first room, and some of the exits fork further after that. If you want to see all of it and grab every treasure, then do it like this:
- The first hole (top-left) which exists already, leads to two Evilweevils followed by a room with a lone Megasaur. Neither room holds any treasure.
- The second hole (bottom-left) has a Fly Trap and an Evilweevil, along with a chest containing a Mid Ether. One level deeper has the same enemies and a chest with a Full Tonic.
- The third hole (bottom-right) leads to a room with a Fly Trap, an Evilweevil, and a chest containing another Full Tonic. Wait until the Evilweevil digs a hole on the right side. Use this hole to get to a room with a Megasaur, two Evilweevils, and a Fly Trap along with a chest which contains a Full Ether.
- Use the third hole (bottom-right) again, but take the original hole this time. It leads to a room with two Evilweevils and a Fly Trap, along with a chest containing a Ruby Vest.
- The fourth and final hole (top-right) leads to two Evilweevils and two Fly Traps, along with a chest that holds a Mid Ether. Wait again until an Evilweevil digs a hole on the right side. The original hole leads to the second level of the bottom-right hole—the room with two Evilweevils, a Fly Trap, and a Ruby Vest. Use the hole made by the Evilweevil to get an Elixir.
Once you reach the big bottom area with four Reptites running around, grab a Rock Helm and a Full Ether from the chests and exit on the right. In the next room, if you take the west exit, you can climb back up to the top and start over if you want. When fighting Winged Apes, kill the Shitakes first so the Apes won't throw them at you to counter-attack. Use multi-enemy attacks against the Reptites, and shock the Megasaurs with lightning first to lower their defense.
You should charm Dream Gun from Evilweevil, Aeon Blade from Megasaur, Dream Bow from Fly Trap and Magma Hand from Reptite. They're the stronger weapons you'll find so far. After you feel like you've explored enough, go to the save point, use a Shelter, and head north to confront Azala, Chief of the Reptites. You'll be asked to talk about the Gate Key, and regardless of what you say you'll have to fight one of Azala's most powerful minions.
Nizbel
| ||||
|---|---|---|---|---|
| HP 4,200 |
Weaknesses Lightning |
Strengths None |
Absorbs None | |
| Charmables Third Eye |
Drops None |
XP 500 |
TP 10 |
Gold 0 |
Attacks
| ||||
Description/Strategy
Don't forget to use Ayla to charm Nizbel for the Third Eye. Nizbel is similar to the Megasaurs in that it has insanely high defense unless you shock it with Crono's Lightning first. Make sure you have a lot of HP before shocking Nizbel. After being shocked, Nizbel will revert back to being protected. It will then unleash a devastating lightning attack that can wipe your party. You'll want to keep your HP above at least 200 or so — Aura Whirl works well, or just keep using Kiss and Cure Beam or something similar. A dual tech between Crono and Ayla, Volt Bite, works particularly well, although don't bother wasting any of your attacks when Nizbel isn't shocked. You should use these times when Nizbel is protected to heal up. Prepare to attack with everyone after shocking Nizbel. Go all out with double techs and more when Nizbel is shocked. If Ayla has Cat Attack, use it. It's priceless. Otherwise, Rollo Kick will suffice. Eventually Nizbel will release its Electrocution Energy. That'll do about 100-200 damage to your party, so heal up and start over with Lightning, following up with high-powered attacks. Crono and Ayla's Drill Kick and Crono and Marle's Ice Sword work well, as does replacing Marle with Lucca and using Crono and Lucca's Fire Sword. Ultimately you will want Marle in your party, rather than anyone else, because Aura Whirl will be helpful in reducing time taken to heal up your party after Nizbel's electrocution attack. Nizbel will be cut down to size soon enough, and you can continue your journey. If you've boosted Crono's speed, you can probably keep casting Lightning without giving Nizbel any chance to fight. | ||||

Once you beat him, you'll get the Gate Key back, and end up back at Ayla's hut. Go back to the Hunting Range if you want some more items, and head back to the Mystic Mountains to jump off the edge and into the time gate. When you pass through, you'll be in the next chapter.
