From StrategyWiki, the video game walkthrough and strategy guide wiki
Jump to navigation Jump to search
(Fixed Bwing components)
(Updated Bwing description)
Line 17: Line 17:
B-wings are always equipped with a mix of standard lasers and ion lasers: the standard lasers are mounted on the cockpit and the end of the long wing, with ion cannons being mounted on the S-foils. How these weapons behave depends on what cannon modification is equipped.


Bombers are similar to the forward position of a football or soccer game: they should be focused on scoring points by eliminating enemy AI fighters and attacking enemy objectives.  
While the Y-wing is capable of using goliath and multi-lock missiles to farm enemy AI fighters for large amounts of morale, the B-wing cannot and must dedicate itself to fighting enemy capital ships.  


'''Official Description:''' ''A blockade buster with built-in ion cannons, the B-wing needs support in dogfights but delivers unparalleled damage to enemy capital ships.''

Revision as of 01:32, 12 December 2020
SWS-Bwing.png
Hull 1600
Shield 400
Speed 100
Acceleration 50
Manoeuvrability 51

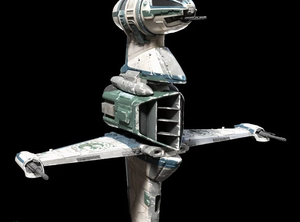
The B-wing is a variant of the bomber on the Y-wing. While easily the slowest ship in the game, the B-wing's firepower is unmatched: it is capable of equipping a myriad of ion weapons for knocking out enemy shields as well as standard weaponry for destroying the target itself. B-wings are extremely slow, requiring boosting and manoeuvring to get from place to place.

B-wings are always equipped with a mix of standard lasers and ion lasers: the standard lasers are mounted on the cockpit and the end of the long wing, with ion cannons being mounted on the S-foils. How these weapons behave depends on what cannon modification is equipped.

While the Y-wing is capable of using goliath and multi-lock missiles to farm enemy AI fighters for large amounts of morale, the B-wing cannot and must dedicate itself to fighting enemy capital ships.

Official Description: A blockade buster with built-in ion cannons, the B-wing needs support in dogfights but delivers unparalleled damage to enemy capital ships.

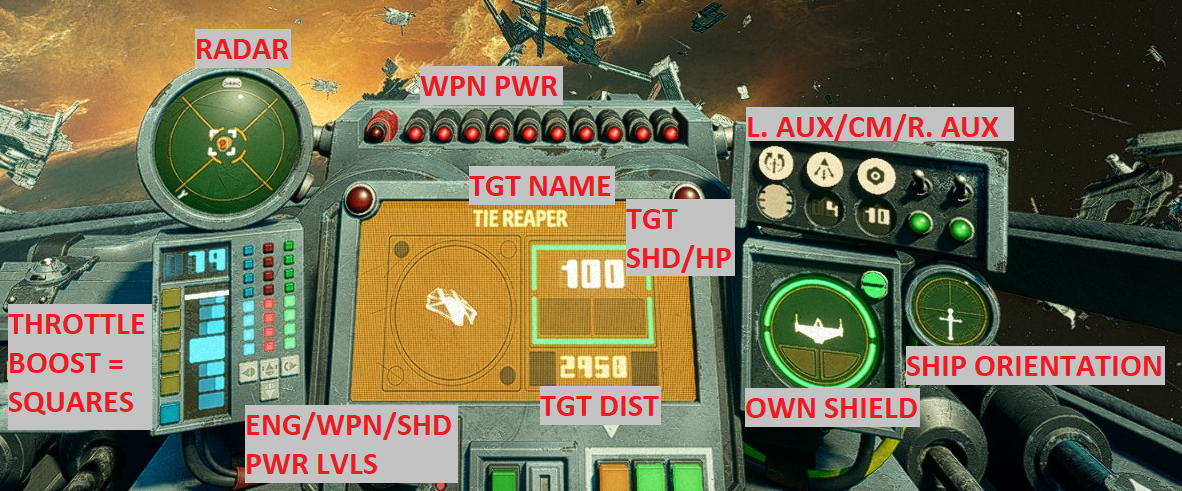
Cockpit

SWS-BwingCockpit.png

Components

For specific component numbers and statistics, see the Components page.

Weapons

Name Description
SWS-Icons-StandardCannon.svg Standard Taim & Bak KX8 Laser Cannon The default laser cannon/ion cannon combination on the B-wing is not often used, and is oftentimes replaced by the rotary cannon as soon as it is unlocked.
SWS-Icons-GuidedRotaryCannon.svg Krupx Krupx Guided Rotary Cannon The guided rotary cannon is rarely used on account of its reduced damage. While the auto-aim helps against mobile targets, your craft will have trouble turning while the cannon is firing.
SWS-Icons-GuidedCannon.svg Gyrhil EM-8V Auto-Aim Cannon Identical to the default cannon, but causes less damage and has auto-aim. The auto-aim on the cannon helps when tracking mobile targets like TIE Interceptors, but this upgrade is situational at best.
SWS-Icons-RotaryCannon.svg Krupx Rotary Cannon The most common weapon seen on the Y-wing. After a short wind-up time, the rotary cannon fires a flurry of blaster bolts with a DPS as good as the short-range gun on the A-wing, but with greater range. The wind-up time is negligible, as by the time players figure out they're in the sights of the rotary cannon, they are already dead. The rotary cannon's high damage also lends it well to dealing with capital ship subsystems.

Countermeasures

Name Description
SWS-Icons-Flares.svg ArMek HM Seeker Warheads Seeker Warheads, or sometimes called "flares", are the most common and flexible anti-missile countermeasure.
SWS-Icons-Chaff.svg Particle Burst The Particle Burst is part of the default B-wing loadout. As B-wings are often attacked by a large number of missiles, and oftentimes fly in a straight line while bombing targets, chaff can prove useful for them.
SWS-Icons-Jammer.svg Melihat Sensor Jammer The sensor jammer's short 4 second duration and single use make it not often used. Its biggest benefit is being able to shake missiles at any rate and from any direction.

Auxiliary

Name Description
SWS-Icons-ProtonTorpedo.svg Krupx MG7-A Proton Torpedo Proton torpedoes cause up to four times the damage of a regular concussion missile. They are ineffective against shielding, but pack a wallop when they hit. Deploy them carefully against corvettes, which can outrun the torpedo. Combine with an ion torpedo strike from a fighter or support for best effect. Stay at maximum range (1500) when you launch the torpedo and reduce speed so you don't get too close when you launch it. The long range lets you potentially even snipe enemy frigates while on defence.
SWS-Icons-IonBomb.svg Taim & Bak Ion Bomb Ion bombs cause extra damage to shielding and can disable subsystems, but do not cause raw damage. Follow up attacks will be required to damage the targets. Bombs will drop down relative to the ship (in the direction of the wing). This will not be down from the perspective of the pilot if you use the gyro control module to roll the ship.
SWS-Icons-ProtonBomb.svg Arakyd PW-16 Proton Bomb Proton bombs cause considerable damage to targets, but require the target be directly beneath you. Bombs will drop down relative to the ship (in the direction of the wing). This will not be down from the perspective of the pilot if you use the gyro control module to roll the ship.
SWS-Icons-SeekerMine.svg Czerka Seeker Mine Drops a mine behind you. The mine locks onto and chases any enemy that gets too close. Mines are most effective in narrow corridors where enemies will have to run near them. Particularly useful for bombers which have trouble shaking enemies off their tail.
SWS-Icons-AssaultShield.svg Chempat Emergency Assault Shield The Assault Shield, when activated, puts up a shield in front of you that blocks a large percentage of damage. It only lasts 3 seconds, making it more useful on bombers than on fighters for attacking capital ships. The assault shield can, however, be used to give you an edge in head-on attacks against enemy fighters.
SWS-Icons-CompositeBeam.svg Quarrie Composite Beam Cannon The composite beam cannon, sometimes called the "memebeam", is a powerful anti-capital ship weapon. While you can't alter your course with the beam active, it is more than capable of drilling through shields and hull to deal considerable damage - especially against enemy subsystems.
File:SWS-Icons-CompositeIonBeam.svg Quarrie Composite Ion Beam Cannon Unique to the B-wing, the Composite Ion Beam Cannon is identical to the standard beam cannon, but deals ion damage instead. This lets it slice through shielding quickly, or cause heavy damage to a flagship's power system. Equip with the standard beam cannon to become a one-man capital ship killing machine.
File:SWS-Icons-GyroAuxControl.svg Quarrie Gyro/Aux Control Module Unique to the B-wing, this stabilizes the cockpit while the rest of the ship rotates around you. Equipping this also doubles the ammunition capacity of your remaining auxiliary. This lets you carry as many as 10 proton bombs, 20 ion bombs, or 12 ion torpedoes. In case your other auxiliary uses power instead (the two composite beam cannons or the assault shielding, for example), it will recharge 50% faster.

Hull

Name Description
SWS-Icons-StandardHull.svg Incom Ferroceramic Hull The standard hull, with no strengths or weaknesses.
SWS-Icons-DampenerHull.svg Fabritech Dampener Hull The Dampener hull increases the amount of time an enemy needs to lock onto you with missiles. This benefit comes with a reduction in health, so it isn't often used since Y-wings are generally fairly easy to lock onto anyway.
SWS-Icons-ReflecHull.svg Carbanti Reflec Hull This hull makes you nearly invisible to enemies, at a significant cost to your maximum health. The reflec hull offers no benefit if you're spotted, but it should let you get into position to attack enemy capital ships. The significantly reduced health means you will be heavily reliant on shields and not getting spotted.
SWS-Icons-DeflectorHull.svg Chempat Deflector Hull This hull improves the shield capacity of your craft at the expense of health. This hull modification is best used for dogfights where it is possible to retreat and regenerate your shield. The default is preferable in bombing runs as it offers more total health, including shields.

Engines

Name Description
SWS-Icons-StandardEngine.svg Incom Sublight Engine The standard sublight engine with no benefits or drawbacks.
SWS-Icons-UnstableEngine.svg Unstable Sublight Engine This engine makes you lose a moderate amount of both health and shields, but offers greatly increased acceleration and speed. What really makes this engine stand out, however, is the large explosion you create when you are shot down. Some players use this explosion as an anti-capital ship weapon, hoping to take out the capital ship's turrets when they die.
SWS-Icons-JetEngine.svg Quadex Jet Engine This engine greatly increases the rate at which you generate boost power, but also greatly increases the rate at which you consume it. This engine is mostly designed for drifting, as it performs very poorly when boosting in straight lines.
SWS-Icons-SLAMEngine.svg Incom SLAM Engine The SLAM (Sublight Acceleration Motor) engine automatically produces boost power regardless of whether there is maximum power in the engines or not, at the cost of maximum speed. It is similar to the Jet Engine, in that it provides smaller boosting power but lets you boost more often. The SLAM engine reduces your overall speed, but lets you divert power from engines to other systems and receive a small trickle of boost power. Increasing power to engines will appropriately increase the boost meter respectively.

Shields

Name Description
SWS-Icons-StandardShield.svg Standard Incom Deflector Shield This shield offers no benefits or drawbacks.
SWS-Icons-ConversionShield.svg Krupx Conversion Shield When the conversion shield is depleted, this shield takes all your weapon power and dumps it into a brief but impenetrable barrier. With no weapon power, you are effectively a sitting duck, but it can give you time to temporarily withdraw from battle to make it to safety.
SWS-Icons-ResonantDeflector.svg Krupx Resonant Shield Reduces your maximum shield capacity, but overcharges your lasers automatically when your shields are maxed out. The shield also does not decay when you switch power away from them.
SWS-Icons-NimbleDeflector.svg Sirplex Nimble Deflector Increases shield regeneration, but decreases shield capacity. While good for hit and run attacks, the slow speed of the B-wing will make using this shield very difficult.