|
|
| (42 intermediate revisions by 19 users not shown) |
| Line 1: |
Line 1: |
| {{Header Nav|game=MapleStory|custom={{MapleStory/TOC}}{{MapleStory/TOC/Towns}}}} | | {{Header Nav|game=MapleStory|custom={{MapleStory/TOC/Towns}}}} |
| ==[[Image:MS Sleepywood - Dungeon Icon.png]] Sleepywood== | | |
| | {{floatingtoc}} |
| | {{-}} |
| | ==[[File:MS Sleepywood - Dungeon Icon.png]] Sleepywood== |
| *'''Region:''' Victoria Island | | *'''Region:''' Victoria Island |
| *'''Roads:''' Dungeon | | *'''Roads:''' Sleepywood, Swamp, Drake Cave |
| *'''Level Range:''' 1-35
| | Sleepywood is a small town located in the dungeon, at the center of Victoria Island. This town is a resting spot that leads deeper into the dungeon where strong monsters reside. There is a sauna to increase recovery to exhausted travelers. In the regular sauna, Mr. Sweatbottom sells the usual items which could be found in any potion shop in Victoria, except a few items which can only be bought here. In the VIP sauna, Mr. Wetbottom's only purpose is to give you a level 40 quest which culminates in the Sauna Robe. The Mysterious Statue leads you to jump quests. A player can walk to Sleepywood from the Six Path Crossway.{{-}} |
| Sleepywood is a small town located in the dungeon, at the center of Victoria Island. This town is a resting spot that leads deeper into the dungeon where strong monsters reside. There is a sauna to increase recovery to exhausted travelers. In the regular sauna, Mr. Sweatbottom sells the usual items which could be found in any potion shop in Victoria, except a few items which can only be bought here. In the VIP sauna, Mr. Wetbottom's only purpose is to give you a level 30 quest which culminates in the Sauna Robe. The Mysterious Statue leads you to jump quests. A player can walk to Sleepywood from [[MapleStory/Towns/Perion|Perion]], [[MapleStory/Towns/Kerning City|Kerning City]], and [[MapleStory/Towns/Henesys|Henesys]], via Warning Street. Alternatively, you can get to Ant Tunnel Park from [[MapleStory/Towns/Lith_Harbor|Lith Harbor]] and [[MapleStory/Towns/Ellinia|Ellinia]] via the VIP taxi for 10,000 mesos. | | |
| | ===Swamp, Drake Cave, Cursed Temple=== |
| | *'''Level Range:''' 66-85 |
| | [[Image:MS Cursed Sanctuary.jpg|thumb|right|The Jr. Balrog stalks the Cursed Sanctuary at the deepest layer of the Ant Tunnel.]] |
| | |
| | When you first enter the right portal in Sleepywood, you will end up in the Silent Swamp, which is full of Copper Drakes. You will encounter Ronnie at first, who is involved in Mr. Wetbottom's quest. At the top right of this map is a portal which leads to Root Abyss. As you trek deeper into the Swamp, you will eventually end up in the Drake Cave, where stronger Drakes reside. After the Cave Cliff, where Drakes and Red Drakes are found, the ground darkens, and the maps are referred to as being cold. You will then encounter Ice and Dark Drakes at this point. The last map is pure spawn Dark Drakes, and there are 3 portals moving onward. One leads to a mini-dungeon full of Dark Drakes, another leads to a map where Snack Bar can be found, and the last map leads to the Cursed Temple entrance. Along the way, you will spot several Shaman Rocks, which you must place Shaman Charms on by request of Chrishrama. |
|
| |
|
| :In KoreaMS, the World Tour has been removed so Snack Bar had its stats nerfed and has been moved to here.
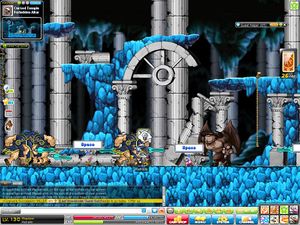
| | The last safe area is the Cursed Temple Entrance, where the path splits in two. The upper route leads to the Cursed Temple, where you will first encounter Wild Kargos. A separate path off of this map leads to 2 maps full of Wild Kargos. After the first map, you will encounter the Tauromacis, which are eventually joined by Taurospears, and culminates in the Cursed Temple, where the legendary Jr. Balrog spawns. The sanctuary was created by the Sharenian, and likely served a special purpose in their society. The lower route leads to the Underground Temple, where one can fight the legendary Giant Balrog.{{-}} |
|
| |
|
|
| |
|
| ;Monsters | | ;Monsters |
| *[[MapleStory/Monsters/Level 1-10#Snail|Snail]]
| | {{col|2|begin}} |
| *[[MapleStory/Monsters/Level 1-10#Slime|Slime]]
| | [[File:MS Monster Copper Drake.png]] [[MapleStory/Monsters/Level 61-70#Copper Drake|Copper Drake]] (66) |
| *[[MapleStory/Monsters/Level 1-10#Stump|Stump]]
| | |
| *[[MapleStory/Monsters/Level 1-10#Dark Stump|Dark Stump]]
| | [[File:MS Monster Drake.png]] [[MapleStory/Monsters/Level 61-70#Drake|Drake]] (67) |
| *[[MapleStory/Monsters/Level 21-30#Dark Axe Stump|Dark Axe Stump]]
| | |
| *[[MapleStory/Monsters/Level 11-20#Octopus|Octopus]]
| | [[File:MS Monster Red Drake.png]] [[MapleStory/Monsters/Level 61-70#Red Drake|Red Drake]] (68) |
| *[[MapleStory/Monsters/Level 11-20#Green Mushroom|Green Mushroom]]
| | |
| *[[MapleStory/Monsters/Level 21-30#Horny Mushroom|Horny Mushroom]]
| | [[File:MS Monster Ice Drake.png]] [[MapleStory/Monsters/Level 61-70#Ice Drake|Ice Drake]] (68) |
| *[[MapleStory/Monsters/Level 21-30#Jr. Necki|Jr. Necki]]
| |
| *[[MapleStory/Monsters/Level 31-40#Jr. Boogie|Jr. Boogie]]
| |
| *[[MapleStory/Monsters/Level 31-40#Lupin|Lupin]]
| |
| *[[MapleStory/Monsters/Level 31-40#Curse Eye|Curse Eye]]
| |
| *[[MapleStory/Monsters/Level 81-90#Snack Bar KMS|Snack Bar KMS]] - Boss (KoreaMS)
| |
| ===Ant Tunnel and Sanctuary Area===
| |
| [[Image:MS Zombie Mushmom Map.jpg|thumb|left|The Zombie Mushmom reels from an attack in the Ant Tunnel.]]
| |
| *'''Level Range:''' 22-80
| |
|
| |
|
| The Ant Tunnel Dungeon is one of the longest dungeons in the game. The monsters range from the low leveled Horny Mushrooms to Cold Eyes all the way up to the Island's Boss, the Jr. Balrog. There are a number of quests that involve wiping out either 99 or 999 of each species of monster here, activated by sign posts along the way. At the Ant Tunnel park, a last stop potion shop is located near the entrance portal. The initial platform is safe. It is from a map located off of Ant Tunnel Park that the Zombie Mushmom is found. The VIP taxi, found in [[MapleStory/Towns/Lith Harbor|Lith Harbor]] and [[MapleStory/Towns/Ellinia|Ellinia]], will bring a player directly to the park for a cost of 10,000 mesos. Deeper into the dungeon, there are several maps of Evil Eye, and the last area before the darkened part of the tunnel is the Drake Hunting ground. [[Image:MS Cursed Sanctuary.jpg|thumb|right|The Jr. Balrog stalks the Cursed Sanctuary at the deepest layer of the Ant Tunnel.]]
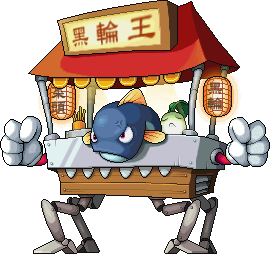
| | [[File:MS Monster Snack Bar.png]] [[MapleStory/Monsters/Level 81-90#Snack Bar|Snack Bar]] - Boss (85) |
| After the Drake's Hunting Grounds map, the ground darkens, and the maps are referred to as having "Lost Light". The monsters are instantly stronger at this point. Cold Eyes swarm the floor, inhibiting ranged characters from attacking. Drakes roam freely, and as one progresses deeper, they are joined by wild Kargo. The last safe area is the Sanctuary Entrance, where the path splits in two. The upper route leads to Drake's Meal table, where a variety of drake species are found, as well as a map of Kargo. The Ice Drakes and Dark Drakes, the two most powerful species, can be found in a new path off of this area. The lower route involves passing through Cold Eyes and 4 maps of Tauromaci, joined by Taurospears, and culminates in the Cursed Sanctuary, where the legendary Jr. Balrog spawns. The sanctuary was created by the Sharenian, and likely served a special purpose in their society.
| | {{col|2}} |
| {{-}}
| | [[File:MS Monster Dark Drake.png]] [[MapleStory/Monsters/Level 61-70#Dark Drake|Dark Drake]] (69) |
| ;Monsters
| | |
| *[[MapleStory/Monsters/Level 21-30#Zombie Mushroom|Zombie Mushroom]]
| | [[File:MS Monster Wild Kargo.png]] [[MapleStory/Monsters/Level 61-70#Wild Kargo|Wild Kargo]] (69) |
| *[[MapleStory/Monsters/Level 21-30#Horny Mushroom|Horny Mushroom]]
| | |
| *[[MapleStory/Monsters/Level 11-20#Stirge|Stirge]]
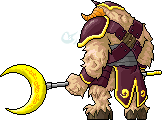
| | [[File:MS Monster Tauromacis.png]] [[MapleStory/Monsters/Level 61-70#Tauromacis|Tauromacis]] (70) |
| *[[MapleStory/Monsters/Level 21-30#Evil Eye|Evil Eye]]
| |
| *[[MapleStory/Monsters/Level 31-40#Jr. Boogie|Jr. Boogie]]
| |
| *[[MapleStory/Monsters/Level 31-40#Cold Eye|Cold Eye]]
| |
| *[[MapleStory/Monsters/Level 41-50#Drake|Drake]]
| |
| *[[MapleStory/Monsters/Level 61-70#Wild Kargo|Wild Kargo]]
| |
| *[[MapleStory/Monsters/Level 1-10#Snail|Snail]]
| |
| *[[MapleStory/Monsters/Level 1-10#Bob the Snail|Bob the Snail]] (Only found in GlobalMS)
| |
| *[[MapleStory/Monsters/Level 61-70#Zombie Mushmom|Zombie Mushmom]] - Boss
| |
| *[[MapleStory/Monsters/Level 61-70#Ice Drake|Ice Drake]] (Not available in EuropeMS)
| |
| *[[MapleStory/Monsters/Level 61-70#Dark Drake|Dark Drake]] (Not available in EuropeMS)
| |
| *[[MapleStory/Monsters/Level 61-70#Tauromacis|Tauromacis]]
| |
| *[[MapleStory/Monsters/Level 71-80#Taurospear|Taurospear]]
| |
| *[[MapleStory/Monsters/Level 71-80#Jr. Balrog|Jr. Balrog]] - Boss
| |
| {{-}}
| |
| ===Sleepy Dungeon===
| |
| *'''Level Range:''' 6-59
| |
| Sleepy Dungeon is a series of maps accessed by going through the door of a house in town. There are a number of large stone faces, similar to those seen outside of the town as well; these were also sculpted by the Sharenian. Monsters here range from Curse Eyes and Lupin, to several species of golem. Jr. necki crawl the floor, and the final map has a hidden street leading to the Forest of Golem. Forest of Golem is infamous as a great training spot for characters between level 60 and 80, with a very fast spawn of Mix and Dark golem.
| |
|
| |
|
| ;Monsters
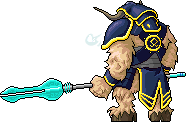
| | [[File:MS Monster Taurospear.png]] [[MapleStory/Monsters/Level 61-70#Taurospear|Taurospear]] (70) |
| *[[MapleStory/Monsters/Level 1-10#Slime|Slime]]
| |
| *[[MapleStory/Monsters/Level 21-30#Dark Axe Stump|Dark Axe Stump]]
| |
| *[[MapleStory/Monsters/Level 11-20#Octopus|Octopus]]
| |
| *[[MapleStory/Monsters/Level 11-20#Green Mushroom|Green Mushroom]]
| |
| *[[MapleStory/Monsters/Level 21-30#Horny Mushroom|Horny Mushroom]]
| |
| *[[MapleStory/Monsters/Level 21-30#Jr. Necki|Jr. Necki]]
| |
| *[[MapleStory/Monsters/Level 31-40#Jr. Boogie|Jr. Boogie]]
| |
| *[[MapleStory/Monsters/Level 31-40#Lupin|Lupin]]
| |
| *[[MapleStory/Monsters/Level 31-40#Curse Eye|Curse Eye]]
| |
| *[[MapleStory/Monsters/Level 51-60#Dark Golem|Dark Golem]]
| |
| *[[MapleStory/Monsters/Level 51-60#Mix Golem|Mix Golem]]
| |
|
| |
|
| Sleepywood is available to all versions, however the Ice and Dark Drake Area is currently not available to EuropeMS.
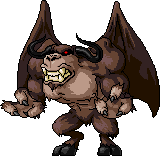
| | [[File:MS Monster Jr. Balrog.png]] [[MapleStory/Monsters/Level 61-70#Jr. Balrog|Jr. Balrog]] - Boss (70) |
| | {{col|2|end}} |
|
| |
|
| ===Underground Temple=== | | ===Underground Temple=== |
| *'''Level Range:''' 50-105 | | *'''Level Range:''' 55+ |
|
| |
|
| An evil spirit was once sealed in this Temple by Tristan, a legendary hero who died in place of Manji because of this evil spirit, Balrog. However, Balrog has been resurrected from the Darkness, the reason behind its resurrection is not known. Upon Balrog's death it mentions that one day his full power will be back back, and rule the Maple World again. | | An evil spirit was once sealed in this Temple by Tristan, a legendary hero who died in place of Manji because of this evil spirit, [[MapleStory/Lord Balrog|Balrog]]. However, Balrog has been resurrected from the Darkness, the reason behind its resurrection is not known. Upon Balrog's death it mentions that one day his full power will be back, and rule the Maple World again. |
|
| |
|
| Underground Temple is only available in KoreaMS.
| | ;Monsters |
| | {{col|2|begin}} |
| | [[File:MS Monster Balrog's Left Hand.png]] [[MapleStory/Monsters/Level 41-50#Balrog's Left Hand|Balrog's Left Hand]] (49) |
|
| |
|
| | [[File:MS Monster Balrog's Right Hand.png]] [[MapleStory/Monsters/Level 41-50#Balrog's Right Hand|Balrog's Right Hand]] - Boss (49) |
| | {{col|2}} |
| | [[File:MS Monster Balrog.png|500px]] [[MapleStory/Monsters/Level 41-50#Balrog|Balrog]] - Boss (45) |
| | {{col|2|end}} |
|
| |
|
| ;Monsters
| | ==NPCs== |
| *[[MapleStory/Monsters/Level 41-50#Baby_Balrog|Baby Balrog]]
| | To see the NPCs, visit [[MapleStory/NPCs#Sleepywood|this page]] |
| *[[MapleStory/Monsters/Level 71-80#Jr. Balrog|Jr. Balrog]] - Boss
| |
| *[[MapleStory/Monsters/Level 91-100#Crimson_Balrog|Crimson Balrog]] - Boss
| |
| *[[MapleStory/Monsters/Level 101-110#Balrog_Body|Balrog]] - Boss
| |
|
| |
|
| ==Regular Sauna==
| | {{Footer Nav|game=MapleStory|prevpage=Florina Beach|nextpage=Ereve}} |
| {| class="wikitable" | |
| !Item
| |
| !Price
| |
| |-
| |
| |Red Potion
| |
| |50
| |
| |-
| |
| |Orange Potion
| |
| |160
| |
| |-
| |
| |White Potion
| |
| |320
| |
| |-
| |
| |Blue Potion
| |
| |200
| |
| |-
| |
| |Mana Elixir
| |
| |620
| |
| |-
| |
| |Apple
| |
| |30
| |
| |-
| |
| |Egg
| |
| |50
| |
| |-
| |
| |Meat
| |
| |106
| |
| |-
| |
| |Orange
| |
| |100
| |
| |-
| |
| |Lemon
| |
| |310
| |
| |-
| |
| |Pure Water
| |
| |1650
| |
| |-
| |
| |Unagi
| |
| |1100
| |
| |-
| |
| |Return Scroll to Sleepywood
| |
| |600
| |
| |-
| |
| |Arrow for Bow
| |
| |1
| |
| |-
| |
| |Arrow for Crossbow
| |
| |1
| |
| |-
| |
| |Subi Throwing Star
| |
| |500
| |
| |}
| |
| ==Chrishrama: Warrior Shoes==
| |
| {| class="wikitable" | |
| !Item
| |
| !Price
| |
| |-
| |
| |Silver War Boots
| |
| |2 Silvers<br>1 Steel<br>15 Leathers<br>10 Screws<br>10000 Mesos
| |
| |-
| |
| |Gold War Boots
| |
| |2 Golds<br>1 Steel<br>15 Leathers<br>10 Screws<br>10000 Mesos
| |
| |-
| |
| |Dark War Boots
| |
| |1 Black Crystal<br>2 Steels<br>20 Leathers<br>10 Screws<br>12000 Mesos
| |
| |-
| |
| |Emerald Battle Grieve
| |
| |4 Emeralds<br>2 Steels<br>45 Leathers<br>15 Screws<br>20000 Mesos
| |
| |-
| |
| |Mithril Battle Grieve
| |
| |4 Mithrils<br>2 Steels<br>45 Leathers<br>15 Screws<br>20000 Mesos
| |
| |-
| |
| |Silver Battle Grieve
| |
| |4 Silvers<br>2 Steels<br>45 Leathers<br>15 Screws<br>20000 Mesos
| |
| |-
| |
| |Blood Battle Grieve
| |
| |4 Garnets<br>2 Steels<br>45 Leathers<br>15 Screws<br>20000 Mesos
| |
| |-
| |
| |Steel Tigger
| |
| |3 Steels<br>1 Opal<br>30 Leathers<br>20 Dragon Skins<br>25 Screws<br>22000 Mesos
| |
| |-
| |
| |Mithril Tigger
| |
| |3 Mithrils<br>1 Opal<br>30 Leathers<br>20 Dragon Skins<br>25 Screws<br>22000 Mesos | |
| |-
| |
| |Dark Tigger
| |
| |2 Black Crystals<br>1 Opal<br>30 Leathers<br>20 Dragon Skins<br>25 Screws<br>25000 Mesos
| |
| |-
| |
| |Brown OS Boots
| |
| |4 Adamantiums<br>100 Leathers<br>40 Dragon Skins<br>30 Screws<br>100 Croko Skins<br>38000 Mesos
| |
| |-
| |
| |Maroon OS Boots
| |
| |4 Orihalcons<br>1 Diamond<br>40 Dragon Skins<br>30 Screws<br>250 Stirge's Wings<br>38000 Mesos
| |
| |-
| |
| |Blue OS Boots
| |
| |4 Mithrils<br>1 Diamond<br>40 Dragon Skins<br>30 Screws<br>120 Malady's Experimental Frogs<br>38000 Mesos
| |
| |-
| |
| |Emerald Hildon Boots
| |
| |1 Black Crystal<br>3 Steels<br>6 Emeralds<br>65 Dragon Skins<br>45 Screws<br>50000 Mesos
| |
| |-
| |
| |Mithril Hildon Boots
| |
| |1 Black Crystal<br>3 Steels<br>6 Mithrils<br>65 Dragon Skins<br>45 Screws<br>50000 Mesos
| |
| |-
| |
| |Orihalcon Hildon Boots
| |
| |1 Black Crystal<br>3 Steels<br>6 Orihalcons<br>65 Dragon Skins<br>45 Screws<br>50000 Mesos
| |
| |-
| |
| |Gold Hildon Boots
| |
| |1 Black Crystal<br>3 Steels<br>6 Golds<br>65 Dragon Skins<br>45 Screws<br>50000 Mesos
| |
| |-
| |
| |Sapphire Camel Boots
| |
| |1 Black Crystal<br>1 Moon Rock<br>8 Sapphires<br>80 Dragon Skins<br>55 Screws<br>60000 Mesos
| |
| |-
| |
| |Orihalcon Camel Boots
| |
| |1 Black Crystal<br>1 Moon Rock<br>8 Orihalcons<br>80 Dragon Skins<br>55 Screws<br>60000 Mesos
| |
| |-
| |
| |Blood Camel Boots
| |
| |1 Black Crystal<br>1 Moon Rock<br>8 Garnets<br>80 Dragon Skins<br>55 Screws<br>60000 Mesos
| |
| |}
| |
| ==Chrishrama: Magician Shoes==
| |
| {| class="wikitable"
| |
| !Item
| |
| !Price
| |
| |-
| |
| |Blue Jewelry Shoes
| |
| |1 Sapphire<br>30 Leathers<br>5 Screws<br>3000 Mesos
| |
| |-
| |
| |Purple Jewelry Shoes
| |
| |2 Amethyst<br>30 Leathers<br>5 Screws<br>3000 Mesos
| |
| |-
| |
| |Red Jewelry Shoes
| |
| |1 Garnet<br>30 Leathers<br>5 Screws<br>3000 Mesos
| |
| |-
| |
| |Silver Windshoes
| |
| |1 Silver<br>35 Leathers<br>10 Screws<br>8000 Mesos
| |
| |-
| |
| |Yellow Windshoes
| |
| |1 Topaz<br>35 Leathers<br>10 Screws<br>8000 Mesos
| |
| |-
| |
| |Black Windshoes
| |
| |1 Opal<br>35 Leathers<br>10 Screws<br>8000 Mesos
| |
| |-
| |
| |Red Magicshoes
| |
| |2 Garnets<br>50 Leathers<br>15 Screws<br>18000 Mesos
| |
| |-
| |
| |Blue Magicshoes
| |
| |2 AquaMarines<br>50 Leathers<br>15 Screws<br>18000 Mesos
| |
| |-
| |
| |White Magicshoes
| |
| |2 Silvers<br>50 Leathers<br>15 Screws<br>18000 Mesos
| |
| |-
| |
| |Black Magicshoes
| |
| |1 Black Crystal<br>50 Leathers<br>15 Screws<br>18000 Mesos
| |
| |-
| |
| |Purple Salt Shoes
| |
| |3 Amethysts<br>1 Topaz<br>30 Leathers<br>15 Dragon Skins<br>20 Screws<br>20000 Mesos
| |
| |-
| |
| |Red Salt Shoes
| |
| |3 Garnets<br>1 Topaz<br>30 Leathers<br>15 Dragon Skins<br>20 Screws<br>20000 Mesos
| |
| |-
| |
| |Black Salt Shoes
| |
| |2 Black Crystals<br>1 Topaz<br>40 Leathers<br>25 Dragon Skins<br>20 Screws<br>22000 Mesos
| |
| |-
| |
| |Red Moon Shoes
| |
| |4 Garnets<br>40 Dragon Skins<br>35 Lorang's Claws<br>25 Screws<br>30000 Mesos
| |
| |-
| |
| |Blue Moon Shoes
| |
| |4 Sapphires<br>40 Dragon Skins<br>70 Bubbling's Huge Bubbles<br>25 Screws<br>30000 Mesos
| |
| |-
| |
| |Gold Moon Shoes
| |
| |2 Golds<br>1 Diamond<br>40 Dragon Skins<br>20 Wild Cargo's Eyes<br>25 Screws<br>35000 Mesos
| |
| |-
| |
| |Dark Moon Shoes
| |
| |2 Black Crystals<br>1 Diamond<br>1 Dragon Skin<br>30 Drake's Skulls<br>30 Screws<br>40000 Mesos
| |
| |-
| |
| |Pink Gold-Winded Shoes
| |
| |1 Rock of a Star<br>3 Golds<br>3 Garnets<br>60 Dragon Skins<br>40 Screws<br>50000 Mesos
| |
| |-
| |
| |Blue Gold-Winded Shoes
| |
| |1 Rock of a Star<br>3 Golds<br>3 Sapphires<br>60 Dragon Skins<br>40 Screws<br>50000 Mesos
| |
| |-
| |
| |Purple Gold-Winded Shoes
| |
| |1 Rock of a Star<br>3 Golds<br>3 Amethysts<br>60 Dragon Skins<br>40 Screws<br>50000 Mesos
| |
| |-
| |
| |Green Gold-Winded Shoes
| |
| |1 Rock of a Star<br>3 Golds<br>3 Emeralds<br>60 Dragon Skins<br>40 Screws<br>50000 Mesos
| |
| |-
| |
| |Pink Ankle Boots
| |
| |1 Rock of a Star<br>4 Golds<br>5 Orihalcons<br>70 Dragon Skins<br>50 Screws<br>60000 Mesos
| |
| |-
| |
| |Green Ankle Boots
| |
| |1 Rock of a Star<br>4 Golds<br>5 Emeralds<br>70 Dragon Skins<br>50 Screws<br>60000 Mesos
| |
| |-
| |
| |Orange Ankle Boots
| |
| |1 Rock of a Star<br>4 Golds<br>5 Adamantiums<br>70 Dragon Skins<br>50 Screws<br>60000 Mesos
| |
| |-
| |
| |Blue Ankle Boots
| |
| |1 Rock of a Star<br>4 Golds<br>5 AquaMarines<br>70 Dragon Skins<br>40 Screws<br>60000 Mesos
| |
| |}
| |
| ==Chrishrama: Thief Shoes==
| |
| {| class="wikitable"
| |
| !Item
| |
| !Price
| |
| |-
| |
| |Blue Lappy Boots
| |
| |1 Sapphire<br>35 Leathers<br>10 Screws<br>9000 Mesos
| |
| |-
| |
| |Red Lappy Boots
| |
| |1 Garnet<br>35 Leathers<br>10 Screws<br>9000 Mesos
| |
| |-
| |
| |Green Lappy Boots
| |
| |1 Emerald<br>35 Leathers<br>10 Screws<br>9000 Mesos
| |
| |-
| |
| |Black Lappy Boots
| |
| |1 Opal<br>35 Leathers<br>10 Screws<br>9000 Mesos
| |
| |-
| |
| |Iron Chain Boots
| |
| |3 Steels<br>50 Leathers<br>15 Screws<br>19000 Mesos
| |
| |-
| |
| |Bronze Chain Boots
| |
| |3 Bronzes<br>50 Leathers<br>15 Screws<br>19000 Mesos
| |
| |-
| |
| |Silver Chain Boots
| |
| |2 Silvers<br>50 Leathers<br>15 Screws<br>19000 Mesos
| |
| |-
| |
| |Gold Chain Boots
| |
| |2 Golds<br>50 Leathers<br>15 Screws<br>21000 Mesos
| |
| |-
| |
| |Red White-Line Boots
| |
| |3 Garnets<br>1 Opal<br>30 Leathers<br>15 Dragon Skins<br>20 Screws<br>20000 Mesos
| |
| |-
| |
| |Green White-Line Boots
| |
| |3 Emeralds<br>1 Opal<br>30 Leathers<br>15 Dragon Skins<br>20 Screws<br>20000 Mesos
| |
| |-
| |
| |Blue White-Line Boots
| |
| |3 Aquamarines<br>1 Opal<br>30 Leathers<br>15 Dragon Skins<br>20 Screws<br>20000 Mesos
| |
| |-
| |
| |Black Red-Lined Shoes
| |
| |5 Garnets<br>45 Dragon Skins<br>50 Croco Skins<br>30 Screws<br>40000 Mesos
| |
| |-
| |
| |Black Green-Lined Shoes
| |
| |4 Emeralds<br>45 Dragon Skins<br>30 Ligator Skins<br>30 Screws<br>32000 Mesos
| |
| |-
| |
| |Black Yellow-Lined Shoes
| |
| |4 Topazs<br>45 Dragon Skins<br>3 Mushmom's Spores<br>30 Screws<br>35000 Mesos
| |
| |-
| |
| |Black Blue-Lined Shoes
| |
| |4 Sapphires<br>45 Dragon Skins<br>70 Bubbling's Huge Bubbles<br>30 Screws<br>35000 Mesos
| |
| |-
| |
| |Blue Goni Shoes
| |
| |2 Moon Rocks<br>3 Sapphires<br>50 Dragon Skins<br>200 Bubbling's Huge Bubbles<br>35 Screws<br>50000 Mesos
| |
| |-
| |
| |Red Goni Shoes
| |
| |2 Moon Rocks<br>3 Garnets<br>50 Dragon Skins<br>150 Lorang's Claws<br>35 Screws<br>50000 Mesos
| |
| |-
| |
| |Green Goni Shoes
| |
| |2 Moon Rocks<br>3 Emeralds<br>50 Dragon's Skins<br>80 Tortie's Shells<br>35 Screws<br>50000 Mesos
| |
| |-
| |
| |Purple Goni Shoes
| |
| |2 Moon Rocks<br>3 Amethysts<br>50 Dragon's Skins<br>80 Medicine with Weird Vibes<br>35 Screws<br>50000 Mesos
| |
| |-
| |
| |Blood Moss Boots
| |
| |1 Diamond<br>1 Moon Rock<br>8 Garnets<br>75 Dragon Skins<br>50 Screws<br>60000 Mesos
| |
| |-
| |
| |Gold Moss Boots
| |
| |1 Diamond<br>1 Moon Rock<br>5 Gold Plates<br>75 Dragon Skins<br>50 Screws<br>60000 Mesos
| |
| |-
| |
| |Dark Moss Boots
| |
| |1 Diamond<br>1 Moon Rock<br>1 Black Crystal<br>75 Dragon Skins<br>50 Screws<br>60000 Mesos
| |
| |}
| |
| ==Chrishrama: Bowman Shoes==
| |
| {| class="wikitable"
| |
| !Item
| |
| !Price
| |
| |-
| |
| |Brown Jack Boots
| |
| |35 Leathers<br>3 Bronze Plates<br>10 Screws<br>9000 Mesos
| |
| |-
| |
| |Green Jack Boots
| |
| |35 Leathers<br>1 Emerald<br>10 Screws<br>9000 Mesos
| |
| |-
| |
| |Red Jack Boots
| |
| |35 Leathers<br>1 Garnet<br>10 Screws<br>9000 Mesos
| |
| |-
| |
| |Red Hunter Boots
| |
| |50 Leathers<br>2 Garnets<br>15 Screws<br>19000 Mesos
| |
| |-
| |
| |Blue Hunter Boots
| |
| |50 Leathers<br>2 Sapphires<br>15 Screws<br>19000 Mesos
| |
| |-
| |
| |Green Hunter Boots
| |
| |50 Leathers<br>2 Emeralds<br>15 Screws<br>19000 Mesos
| |
| |-
| |
| |Black Hunter Boots
| |
| |50 Leathers<br>2 Opals<br>15 Screws<br>19000 Mesos
| |
| |-
| |
| |Brown Hunter Boots
| |
| |50 Leathers<br>2 Topazs<br>15 Screws<br>19000 Mesos
| |
| |-
| |
| |Blue Silky Boots
| |
| |3 Aquamarines<br>1 Topaz<br>15 Dragon Skins<br>30 Leathers<br>20 Screws<br>20000 Mesos
| |
| |-
| |
| |Green Silky Boots
| |
| |3 Emeralds<br>1 Topaz<br>15 Dragon Skins<br>30 Leathers<br>20 Screws<br>20000 Mesos
| |
| |-
| |
| |Red Silky Boots
| |
| |3 Garnets<br>1 Topaz<br>15 Dragon Skins<br>30 Leathers<br>20 Screws<br>20000 Mesos
| |
| |-
| |
| |Red Pierre Shoes
| |
| |4 Garnets<br>30 Screws<br>45 Dragon Skins<br>20 Fire Boar's Tooth <br>32000 Mesos
| |
| |-
| |
| |Yellow Pierre Shoes
| |
| |4 Topazs<br>30 Screws<br>45 Dragon Skins<br>20 Wild Cargo's Eyes <br>32000 Mesos
| |
| |-
| |
| |Brown Pierre Shoes
| |
| |5 Adamantium Plates<br>30 Screws<br>45 Dragon Skins<br>40 Clang's Claws<br>40000 Mesos
| |
| |-
| |
| |Blue Pierre Shoes
| |
| |5 Aquamarines<br>30 Screws<br>45 Dragon Skins<br>120 Blue Mushroom Caps<br>40000 Mesos
| |
 Sleepywood
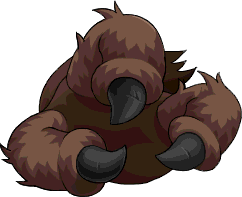 Balrog's Left Hand (49)
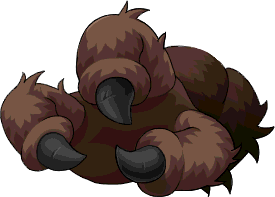 Balrog's Right Hand - Boss (49)
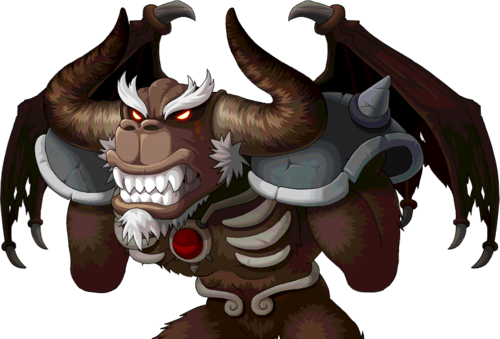 Balrog - Boss (45)


