
This Party Quest is located at Crimsonwood Keep, and can be reached by going to the upper right corner of the Hall of Mastery, clicking on the door, and then walking to Jack, where the quest can be started. This Party Quest requires 10-20 people, which is much larger than the size of a single party. Thus, it uses a Squad-type system, like that employed for big bosses like Zakum and Horntail. The group that intends to enter should form up parties, and then one of the party leaders has to register as the Squad leader. From here, the quest can begin!
To complete the CKPQ successfully, you will need at least 2 members of each job, preferably one from each class. At the moment, Night Lords are mandatory. The minimum level is 90, and there is no maximum level. Currently in GMS, CKPQ is closed pending renovations due to the Masteria Through Time revamp (v.171) reorganizing its associated continent.
Stage 1: Inner Sanctum Hallway[edit]
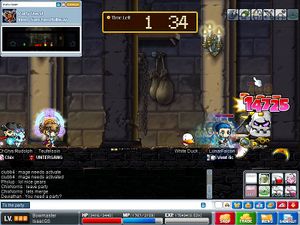
This is the rather simplistic first stage. Wait a few moments for everyone to enter (as once the Squad leader enters, each squad member must enter manually), and once you're all here, run down the hallway holding up. One of the pillars will give you the signal, "Speak to the one known as Jack Barricade." Turn around and speak to Jack, then go back to the Pillar and press up again to move to the next stage.
Beware, you can not wait here for very long, as the Master Guardians will soon come pouring in in huge numbers, leading to your inevitable defeat, so try to move past as quickly as you can. If you die in this stage, you will still be revived in the PQ as long as someone is still alive, so don't worry too much.
Stage 2: Forgotten Storage Chamber[edit]
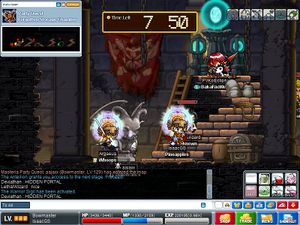
In this stage, there are 5 devices, known as Sigils, which must be activated. They can be activated by using a skill of each class: For Archers, use Golden Eagle or Silver Hawk; for thieves, Shadow Partner or Band of Thieves; for warriors, Panic, Charged Blow, or Dragon's Fury; for magicians, Holy Symbol, Ice Strike, or Explosion; and finally for pirates, Flash Fist or Gaviota. Once all the Sigils are activated, your group can move on.
Stage 3: Test of Agility[edit]
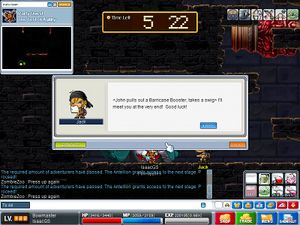
This stage is a long jump quest, with Sigils scattered throughout. The Menhir here deal exactly enough damage to leave a character 100 HP, regardless of your actual max. Thus, all one needs to do is keep their HP above 100 to ensure that they survive. Many of the Menhir will start out stationary, but they begin moving once the Sigils are activated. This is important, because otherwise the Jump Quest, and thus the stage, can't be completed. If a Menhir isn't moving, it is because a Sigil was missed, so immediately send someone back to get it. Do not try to continue onward until it starts moving, because it will be impossible to turn back. At one point, there is a jump which requires at least 120% jump to make it across, so it is likely that Haste will be necessary for all party members to pass. Reorganize parties as needed to make this possible.
Once all the Sigils are active, and everyone has reached the end of the JQ, 5 people will need to pass through the gate here, and they will be warped down to the starting point. Once the necessary number of people have passed, any members still waiting at the bottom can pass through as well, and everyone can go on to the next stage.
Stage 4: Test of Wit[edit]

In this room, there are a large number of short platforms. Half of them are on fire, while the other half are occupied by the invincible Blood Stirges. This makes jumping up it quite difficult for most jobs. If any jobs in your group have high-jump skills (such as Cannoneer's Cannon Jump or a Mechanic's Rocket Launcher), then make sure to have them make use of these skills. If not, the flames can be disabled by having members of the group stand on the bottom, flame-free row of platforms, which enables the remaining squad members to jump up to their sigil and activate it. In a 10 person crew, you will want to switch out the people who are standing on the bottom row based on what class sigils are left, but this shouldn't be an issue with larger crews. Once all the sigils are activated, go back down to the gate and enter the next stage.
Stage 5: Test of Unity[edit]
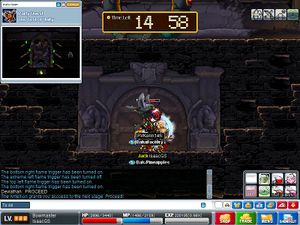
This can be the hardest stage. Your squad is given 15 minutes to split up and perform activities. There are 5 rooms, one for each job. In the center is a giant statue, similar to the one at Hall of Mastery, except it has no weapons. The weapons must be retrieved from each class-specific room.

- The Archer room requires an archer to talk to the Bowman Statue to summon 7 Master Guardians, which have 3.15 million HP each. Once all are defeated, talk to the Bowman Statue to retrieve the Ancestral Bow to place on the giant statue.
- The Warrior room houses a large number of ordinary Crimson Guardians, which must be defeated while making your way up to the top. Once all are defeated, talk to the Warrior Statue to retrieve the Master Sword to place on the giant statue.
- The Magician room involves a lot of teleporting to reach the end, and talking to the Magician Statue to retrieve the Staff of First Magic to place on the giant statue. There are 3 different rooms for magicians, so it can vary quite a bit.
- The Pirate room involves opening chests to obtain the Forbidden Gun, which is randomly found in one of the five chests. Pirates will also encounter Aqua Road monsters, such as Sharks and Gobies, underwater.
- The Thief room consists of several purple eyes that must be hit with regular attacks. One of the platforms is outside the reach of a normal jump, so a Flash Jump skill is absolutely mandatory to proceed. Once all the eyes are gone, talk to the Thief Statue to retrieve the Primal Claw to place on the giant statue.
Once the weapon from each room has been obtained, drop them in their proper locations on the statue, and they will disappear and change the statue. After all 5 weapons are on the statue, you can proceed to the boss stage.
Stage 6: Grand Master Hall[edit]
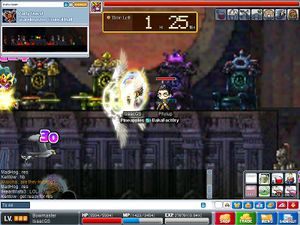
Upon entering, all squad members land near the four thrones at the top of the map. On the far right side of the room, the Battle Statue can be found. Once you speak to the Statue, the preliminary battle will begin, and various mobs of Crimsonwood Keep monsters will be summoned on the left side of the map. Kill them all, ans talk to the statue again to summon the Twister Masters. All five Twisted Masters will appear at once, so be prepared. To survive the battle, you'll need at least 3,400 HP. Be sure to bring All cures, as the Masters will Stun, Zombify, Seal, and inflict 2 different types of Poison.
The Mage master, Margana, appears up top, while the other four spawn on the floor. For this reason, she is the easiest to eliminate. You can have single target based jobs focus on taking Margana down, while the mobbers move the other four bosses to the left side of the map, so that they don't get in the way of the people killing Margana. Because she can Zombify, make sure the Bishops know not to heal until she dies.
Once Margana is dead, have a warrior rush Hsalf, the thief, to the far right side of the map. Hsalf has high avoid compared to the other masters, and possesses a haste-like ability to increase his (and the other twisted masters') speed. Luckily, his damage is rather low. Make sure a warrior stays behind, to keep Hsalf pinned in the right corner. Have all attackers focus on Hsalf while the other warriors keep Rellik and Red Nirg distracted.
Once Hsalf is dead, use the same strategy on Red Nirg; have a warrior rush him to the right side of the map, and pound on Red Nirg with all you've got. One of Red Nirg's attacks can super knockback anyone standing close by him, so be prepared to retreat if he manages to toss the warriors aside like rag dolls. Red Nirg can also summon windraiders, nightshadows, firebrands, and stormbreakers 10 at a time, and Crimson Guardians 5 at a time. This can prove slightly problematic, because they'll block attacks aimed at him. He also possesses an attack-up skill, which can increase his damage to nearly 6,000, so be sure to have bishops around, ready to cast dispel and eliminate the attack up. Upon his death, Red Nirg spawns two mini bosses, Azure Oscelot and Scarlet Phoenix. There isn't much strategy involved in killing them; make sure you take them out before you move on to the next boss though.
After Red Nirg's demise, move on to Rellik, the archer. He can inflict Seal in one attack, stun in another, and 1/1 and poison in yet another. The best way to take care of him is to leave him in the left corner where the warriors rushed him initially. Have all ranged attackers stand on the small platform nearby; from here, the attackers can hit Rellik yet are out of the range of his 1/1 and poison attack. A word of warning to close ranged attackers: the wrong combination of 1/1, poison, and lag can lead to a quick death. Stay on your toes. Make sure bishops are nearby to dispel the seal. Once you kill Rellik, you're ready for the bonus! Talk to the statue on the right side of the map and go through the doors neaby to be taken to the pre-bonus room.
Each Twisted Master will drop a Mark of Naricain after being defeated, so be sure to kill them in an open space so that you can loot the Mark before it disappears.
Stage 7: Crimsonwood Armory[edit]
You will first spawn in an empty room, occupied only by Jack Barricade. The 1 minute timer will have already started, so either screenshot his text quickly, or pass by him to the portal to enter the actual bonus. There are several chests here. Items can be found by popping boxes, just like in Amoria PQ and the Guild Quest.
- Rewards include
- Banana Graham Pie
- Blackfist Cloak
- Crimsonheart Cloak
- Crossheider
- Gelt Chocolate
- Goldensoul Cape
- [Storybook] Formula for Black Cloud
- Ssiws Cheese
- White Seal Cushion
- Tao of Sight
- Tao of Harmony
- Tao of Shadows
- Red Belly Duke
- Sugar-Coated Olives
- Mapleade
- Crushed Skull
- Stormshear
- Golden Neschere
- Green Dragon Sleeve
- Dragon Staff
- White Nisrock
- Golden Double Knife
- King Cent
- Concerto
- Khanjar
- Berzerker
- Green Mittens
- Brown Adventurer Cape
- Scroll for Knuckler for Attack 70%
- Scroll for Knuckler for Attack 60%
- Scroll for Gun for Attack 70%
- Sunblock
- Smoken Salmon
- Scroll for Cape for HP 30%
- [Storybook] Ancient Book
- [Storybook] Burning Book of Fire
- [Storybook] Frozen Book of Ice
- [Storybook] Black Book
