Entry Requirement: All removed. Just travel to the antechamber at the lowest level of El Nath.
![]() The Zakum Party Quest is available to players over level 50 (for easy mode) or level 90+ (normal and chaos mode).
The Zakum Party Quest is available to players over level 50 (for easy mode) or level 90+ (normal and chaos mode).
Zakum's room is located at the end of the Dead Mine, at the furthest point from El Nath. There are a few ways to reach there:
- Proceed to Chief's Residence in El Nath and talk to the matching NPC based on your job.
- Walk if you are strong enough to walk through monsters up to Level 136 with some maps having up to 55 Star Force requirements.
- Boss Queue system if someone else is also queueing to be transported.
To exit safely (if you are low levelled and have less than 55 Star Force), talk to Adobis and request to be transported back to El Nath. If you used the Boss Queue system, you can exit by the left portal to return to your original location instead, even though it is supposed to lead you to a map with 55 Star Force requirement. (Exit this portal within 24 hours or the return function will expire.)
Pre-requisites[edit]
- Level 50 or higher for Easy mode.
- Level 90 or higher for Normal and Chaos mode.
- One clear per day for either Easy or Normal and 1 clear per week for Chaos Mode.
- For all modes, it can be entered every 30 minutes if not cleared
Repeatable Quests[edit]
Note: These quests are no longer required to be completed to fight Zakum. You can do these quests for fun though and it awards very little EXP.
Adobis Mission I[edit]

When you first reach Adobis,
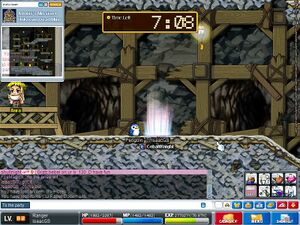
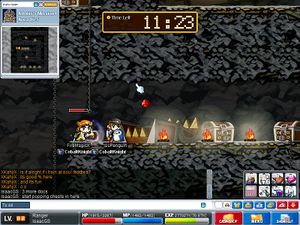
The party can consist of 1 to 6 members. The time limit is 30 minutes. The goal is to collect 7 keys. Additionally, the party has the option of collecting 30 document pieces. Once inside, there are 15 doors. Speed and Teleport do not work here. Each of these leads to a room which is made up of 1 or two parts. Inside rocks and treasure chests are scattered on the floor. These must be destroyed to get the Keys or Documents. Documents are always found in rocks, and Keys are usually found in Chests, though there are exceptions. A small note, the word Documents is blocked in game, so they're usually referred to as "Docs".
Unknown Dead Mine[edit]


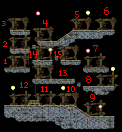
Once you enter stage 1, you will be in the room displayed on the left, with further rooms accessible as labelled.
Two rooms, 10 and 7, lead to a further room called Area 16 <A Dead Mine Somewhere>, which has 6 rooms branching off of if. The arrow in the diagram will lead back to the main area.
Documents and keys are always found in the same rooms, listed below, but the specific rock or chest is randomized. Documents are generally found in rocks, and keys are generally found in chests, unless otherwise noted.
| Room | Keys | Documents |
|---|---|---|
| Entry | 0 | 3 |
| 1-1 1-2 |
0 0 |
1 1 |
| 2-1 | 0 | 1 |
| 3-1 3-2 |
0 0 |
1 2 |
| 4-1 4-2 |
0 1 (rock) |
0 1 |
| 5-1 | 0 | 1 |
| 6-1 | 0 | 1 |
| 7-1 7-2 |
0 0 |
1 2 |
| 8-1 | 0 | 2 |
| 9-1 9-2 |
0 1 |
1 2 |
| 10-1 10-2 |
0 0 |
1 2 |
| 11-1 | 1 | 1 |
| 12-1 | 0 | 1 |
| 13-1 | 0 | 2 |
| 14-1 | 1 | 1 |
| 15-1 | 0 | 1 |
| Room | Keys | Documents |
|---|---|---|
| 16-1 | 0 | 0 |
| 16-2 | 1 | 0 |
| 16-3 | 1 | 0 |
| 16-4 | 0 | 1 |
| 16-5 | 1 (rock) | 1 (chest) |
| 16-6 | 0 | 1 |

Once all the keys are collected, they must be combined into one stack and dropped onto the large treasure chest located randomly at 16-5. For this reason, it is best to get the key in room 16-5 last. This causes the chest to open, and a complete Fire Ore is released. The Fire Ore must be returned to Aura located in the first room.
There are more than 30 documents, so get the ones that are easiest. It's recommended that one person focus on collecting keys while the others gather documents. Once everything is collected, hand it in to Aura, and walk through the portal. Anyone who does not make it through the portal will not receive a prize. Additionally, the leader must exit through the portal last, or the party members who had not yet passed through will not receive prizes.
Although it is fastest to complete with a larger party, it is possible, but much slower, to solo the quest.
Rewards[edit]
If completing the quest alone with just keys, the reward is 12000 EXP. If completing it alone with both Keys and documents, the reward is 20000 EXP. If completing it in a party, even if it is only made up of two members, with only keys, the EXP is 15000. If the party has both Keys and Documents, the reward is 20000 EXP. Any time that all Documents are collected, all players who finish are awarded with 5 Return to Dead Mine Scrolls.
Zakum Jump Quest[edit]
The second part of the Zakum Quest is a very long linear jump quest which requires the player to reach the end. Here, there are miniature statues that spew quick moving fireballs hindering the players progess. Below is a massive lake of lava therefore should the player fall, they'd be taking in a lot of damage getting back. Players cannot enter the Jump Quest until they completed Adobis's mission (the 1st Stage).
Zakum Quest (3rd Stage)
Unlocked after the jump quest, this stage involves forging the Eye of Fire, the player must be in possession of the Fire Ore (which is obtained from the 1st Stage) and 30 Zombies Lost Gold Tooth (which is obtained as a semi rare drop from Miner Zombies) to forge the Eye of Fire. Once the Eye is forged, the player can progress to the final Zakum boss stage.
The third stage is removed. To reiterate, there is no more requirement to do any Adobis Mission prequest stages to fight Zakum. Everybody can go fight Zakum directly: Adonis will supply you with Eye of Fire (debris) as is needed.
You can turn in any Zombie Lost Gold Tooth to the Orbis Exchange Quest.
Zakum Boss Fight[edit]
- Location: El Nath, Last Mission : Zakum's Altar
- Summoning Requirement: Eye of Fire

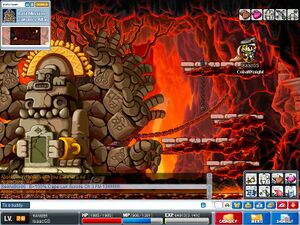
This quest involves a giant stone boss at the end of The Caves of Trial. In order to face this huge boss, it is required that the players speak to Adobis to obtain the Eye of Fire. The boss has eight arms which will assist Zakum in its attacks. Zakum is based on the Muslim belief in Zaqqum, a tree said to grow in hell which provides the only fruit that the damned may eat. This is consistent with the Zakum of MapleStory, as a giant tree can be seen in the background when fighting it, and it must be summoned with a "seed". The boss is supposed to be the physical representation of this tree.
To summon Zakum, drop the Eye of Fire within the length of the altar and leave it there, it will be absorbed.
Skills[edit]
- 10 seconds potion cooldown at all times.
- Arm Slam: Deals 90% damage on marked areas after awhile. (100% damage in Chaos mode)
(Chaos mode only)1 of the right arms will turn purple to reflect damage at the rate of around 4,000 damage.(Chaos mode only)Platform target: 3 lanes of platform spawn on left and right sides, floor will be covered in fire dealing 25% per sec. Every few seconds, a lane of platform will be marked, after 2 seconds the arms will attack that targeted platforms, dealing 100% damage.- (Chaos mode only) If not all arms are killed, arms respawn 30 seconds after its death, each arm has its own timer.
- Summon monsters (after all arms are killed and HP is above 20%). Opachu is summoned in Normal mode. Summons chaos monsters (higher strength) in Chaos mode.
- Full map explosion attack, dealing 99% damage (after all arms are killed and HP is above 20%)
- (When HP drops below 20%) Ground Slam: Zakum summons a green cube and jumps after 1 second, if you are not in the green cube you will be hit for 100% damage.
- Meteorite drops on targeted areas, dealing 25% damage and slowing the player. This makes it more difficult to get into the green cube safe zone.
Stats[edit]
Time limit is the total time allowed for the fight but you must spawn Zakum in 15 minutes.
- Easy mode
- Level: 50 (8 arms), 55 (3 bodies)
- Body HP: 2,200,000 (2.2 Million)
- Arm HP: 204,000 each (204 Thousand each)
- DEF: 30% (20% for arms)
- EXP: 130,000 when body is killed.
- Time Limit: 20 minutes
- 50 Death Counts
- Normal mode
- Level: 110
- Body HP: 7,000,000 (7 Million)
- Arm HP: 700,000 each (700 Thousand each)
- DEF: 40%
- EXP: 360,340 (body), 67,200 each (Top 2 arms), 44,800 each (2 Middle Upper arms), 56,000 each (2 Middle Lower arms), 51,520 each (Bottom 2 arms). Total: 799,380 EXP
- Time Limit: 30 minutes
- 5 Death Counts
- Chaos mode
- Level: 180
- Body HP: 84,000,000,000 (84 Billion)
- Arm HP: 10,500,000,000 each (10.5 Billion each)
- DEF: 100% (50% for arms)
- EXP: 161,200 per arm killed, body gives no EXP.
- Time Limit: 30 minutes
- 5 Death Counts
Drops[edit]
- Zakum Helmet 1 (Easy and Normal modes only, easy mode has a lower chance than normal mode)
- Chaos Zakum Helmet (Chaos mode only)
- Angry Zakum Hat (Chaos mode only)
- Angry Zakum Belt (Chaos mode only)
- Angry Zakum Cape (Chaos mode only)
- Aqua Eye Decoration
- Condensed Lens Crystalline Decoration
- Zakum's Poisonic Weapons
- Zakum's Soul Shards (individual drop, Collect 10 and swap for a random Zakum Weapon Soul)
- Glowing Soul Crystal (individual drop)
- Max 180 per world weekly, limit resets on Thursday 12am
- 5x value on Reboot servers
- The entire service will be adjusted the same way, and adjustment happens every Thursday 12am
- The price will be based on the time the crystal is obtained, not the time it is sold. You can check with NPC Collector to see the price and to sell the crystals.
- Price shown are by solo standards. The actual price is inversely proportional to party size when entering the boss fight
- Suspicious Cubes
- 0 for Easy mode
- 1 for Normal mode
- 12 for Chaos mode
- Boss Medal of Honor (individual drop, gives 100~200 Honor Points when picked)
- 0 for Easy mode
- 1 for Normal mode
- 12 for Chaos mode
- Potions
- 5 Elixirs for Easy mode
- 10 Elixirs for Normal mode
- 35 Power Elixirs for Chaos mode
- Zakum's Tree Branch (Easy and Normal modes only)
- Chaos Zakum's Tree Branch (Chaos mode only)
- Zakum's Certificate
