E-123Wario54 (talk | contribs) (work in progress) |
E-123Wario54 (talk | contribs) (added two bosses) |
||
| Line 18: | Line 18: | ||
Axel is the first boss in the game to use a Sleight, although he only has one and it's not all too powerful. He's also the very first member of Organization XIII that you fight, not counting the tutorial fight against the other Organization member in Traverse Town. All of Axel's attacks have something to do with fire. As such, he has a resistance to any fire attacks - not only that, but he's actually healed by fire attacks. This shouldn't come off as much of a problem though since you obtain the Fire [[Kingdom Hearts Re:Chain of Memories/Magic Cards|magic card]] after you defeat Axel. One of Axel's attacks will involve him throwing his Chakram at Sora when it's engulfed in flames. This move is hard to dodge, and so are his other attacks. Another one of his attacks is a simple combo, his chakrams giving this combo some flames as well. Axel's sleight is Fire Wall. It doesn't damage Sora too much, but the con is that it's unavoidable. You can't dodge it in any way, so your only option is to take the attack and then maybe use Cure. The sleight involves Axel putting his arms out and summoning a ring of fire, which moves out all the way to the end of the arena. Another annoying thing about the boss battle with Axel is his ability to teleport. It won't be too hard for one of your attack cards to miss him completely. Still, you'll be able to attack him once he's finished with one of his attacks or when he's doing a combo on you (if you card break). The battle shouldn't be too long since his health doesn't take many attacks to reduce either. Attack, card break, and obtain your Fire reward. | Axel is the first boss in the game to use a Sleight, although he only has one and it's not all too powerful. He's also the very first member of Organization XIII that you fight, not counting the tutorial fight against the other Organization member in Traverse Town. All of Axel's attacks have something to do with fire. As such, he has a resistance to any fire attacks - not only that, but he's actually healed by fire attacks. This shouldn't come off as much of a problem though since you obtain the Fire [[Kingdom Hearts Re:Chain of Memories/Magic Cards|magic card]] after you defeat Axel. One of Axel's attacks will involve him throwing his Chakram at Sora when it's engulfed in flames. This move is hard to dodge, and so are his other attacks. Another one of his attacks is a simple combo, his chakrams giving this combo some flames as well. Axel's sleight is Fire Wall. It doesn't damage Sora too much, but the con is that it's unavoidable. You can't dodge it in any way, so your only option is to take the attack and then maybe use Cure. The sleight involves Axel putting his arms out and summoning a ring of fire, which moves out all the way to the end of the arena. Another annoying thing about the boss battle with Axel is his ability to teleport. It won't be too hard for one of your attack cards to miss him completely. Still, you'll be able to attack him once he's finished with one of his attacks or when he's doing a combo on you (if you card break). The battle shouldn't be too long since his health doesn't take many attacks to reduce either. Attack, card break, and obtain your Fire reward. | ||
==Genie Jafar== | |||
[[File:KH character Genie Jafar.jpg|left|250px]][[File:KH RCoM boss Jafar attack.png|right|thumb|Jafar using one of his long-range attacks, eye beams.]][[File:KH RCoM boss Jafar attack 2.png|right|thumb|Jafar attacking Sora when he comes into his range.]][[File:KH RCoM boss Jafar attack 3.png|right|thumb|Jafar throws a large boulder at Sora when he's out of reach.]][[File:KH RCoM boss Jafar gimmick card.png|left|thumb|Use of the Gimmick Card gives you easy access to the lamp.]] | |||
*'''HP''': 550 | |||
*'''EXP''': 233 | |||
When Sora, Donald, and Goofy come to stop Jafar and save Jasmine in accordance with the plan, Jafar believes that Aladdin doesn't care about Jasmine anymore. He decides he's going to face the three himself, as using a wish to defeat them would be a waste. Sora then gives Aladdin the cue, and Jafar, surprised, orders Genie to attack him. Genie then proceeds to attack Aladdin, with Sora, Donald, Goofy, and Aladdin then revealing that Jafar fell for the plan - the plan to make him use his second wish. Having only one wish left, Jafar uses it to become an all-powerful Genie. The arena changes and it'll be time to battle Jafar - as a genie. | |||
The battle arena will be similar to the one in [[Kingdom Hearts/Agrabah|Kingdom Hearts]], where the platforms are constantly shifting and you have to make your way to Jafar's bird, Iago, who happens to be flying around aimlessly with Jafar's lamp. Your main focus will be the bird, so lock on and attack it any chance you get to finish the battle. Unfortunately, Iago isn't the only thing to pay attention too. Genie Jafar will be spewing attacks mercilessly, with a full arsenal of both long-range and short-range attacks. Travel too far and Jafar will target you with his eye beams, get too close and Jafar will punch Sora with a powerful hit. Not only can Jafar openly attack at any given time, but the constantly-moving platforms can be a nuisance as well, considering Iago can sometimes fly pretty high up. The thing to watch for the most though are Jafar's attacks. Not only can he punch and shoot beams from his eyes, but he also has the ability to pick up large molten rocks and lob them at Sora. This often happens when you're on a higher platform, so when you see this one coming, drop to the lower platform with a dodge roll. Be sure to always keep Jafar in your sights, since blind-siding can sometimes cost you the battle. Aside from Jafar's consistent attacks, the battle shouldn't be too tough. | |||
Using a Gimmick Card in this battle can make the battle much easier for a period of time. The platforms come together as one large platform and move according to Iago's movements. It'll be impossible to miss the lamp this way, so use the Gimmick Card if you have to. | |||
==Trickmaster== | |||
[[File:KH character Trickmaster.png|left]][[File:KH RCoM boss Trickmaster attack.png|right|thumb|The Trickmaster attacks Sora when he's on the floor.]][[File:KH RCoM boss Trickmaster attack 2.png|right|thumb|The Trickmaster prepares an attack on Sora while he's on the table.]] | |||
*'''HP''': 600 | |||
*'''EXP''': 372 | |||
When Sora, Donald, Goofy, and Alice enter the Bizarre Room, they're a bit surprised by the sudden change of scenery. Nevertheless, Alica suggests they look around the area. This is until she's stopped by the Queen of Hearts and her Card Soldiers once more. She's about to give Alice her sentence, but stops after she can't remember what she was about to say. Confused and frustrated, she decides to forget about everything and leaves. Sora suggests that it was probably her memory being stolen again. Suddenly, out of nowhere, the Heartless Trickmaster appears, and it's ready for a battle. | |||
The Trickmaster, like a couple of bosses you've faced already, has a specialty that lies in fire. This battle will be a lot different from the one in [[Kingdom Hearts: Chain of Memories|Chain of Memories]], considering the Trickmaster is much, much taller. To make up for this, a table has been added to the environment, and you can use it to get on an even level with the Trickmaster. Lock on to its weak spot and attack away. Eventually, it'll get stunned by your attacks and drop to its knees. This allows you to attack it from ground level for the short period of time that its frozen. It then rises back up and you'll have to start up the attack again by jumping up on the table. Locking on and using spells will be a bit easier, being projective attacks that don't involve Sora getting close. The Trickmaster will try to get you with its torches whether you're on the ground or on the table. While on the floor or on the chair, the Trickmaster will bring its torches down in a slam down on Sora. These slams often create a large blanket of fire when they land, so try to get away by dodge rolling when you have the chance. When on the table, the Trickmaster will put its torches together and out will come a couple of fireballs to try and get some damage on their target. Dodge rolling these will be a bit harder than the Trickmaster's ground attack, but it is possible. Other than these, the Trickmaster will juggle its torches and swing them around in a way to somehow attack Sora. As long as you're attacking its weak spot and are locked on to it, this battle shouldn't be all too hard, especially considering the fact that it isn't too hard to stun. | |||
{{Footer Nav|game=Kingdom Hearts Re:Chain of Memories|prevpage=Walkthrough|nextpage=Reverse Rebirth Bosses}} | {{Footer Nav|game=Kingdom Hearts Re:Chain of Memories|prevpage=Walkthrough|nextpage=Reverse Rebirth Bosses}} | ||
Revision as of 21:37, 16 June 2011
Guard Armor
- HP: 200
- EXP: 48
The battle will begin in Traverse Town after Sora, Donald, and Goofy have a conversation with Cid Highwind. Cid tells them that when the bell rings three times, a large Heartless will appear and come to attack. Cid advises them to leave while they can and he leaves the three to speak among themselves. Sora believes they should stay to see the Heartless while Donald and Goofy wish to follow Cid's advice. The bell will then ring three times (whereas in Kingdom Hearts, the Sora, Donald, and Goofy were actually the ones to ring the bell) and Guard Armor will show up.
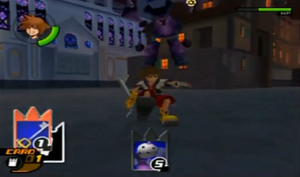
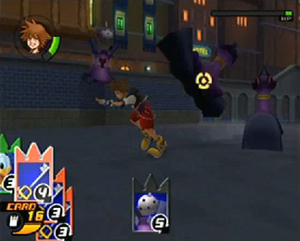
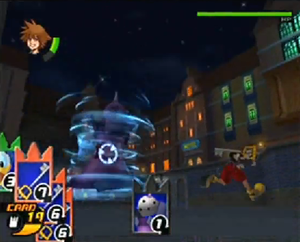
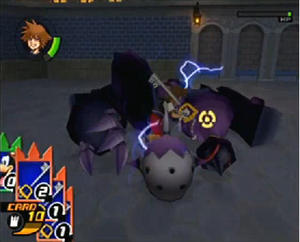
Being the first boss you battle, the worst shouldn't be expected. Guard Armor is split into three parts all put together on arrival: the Armored Torso, the Gauntlets, and the Hammerlegs. Pick off each part and the boss will be defeated. The first part to get out of the way should be the Gauntlets, or more simply, the arms. When it still has all of its body parts, its capable of pulling off a shock wave move. If Sora travels too far off, it'll jump after him and slam down to make a shock wave. Jump up and lock on to one of the Gauntlets, which shouldn't have much HP, until its out of the way. Once you're finished with the next, all the Guard Armor should have left are its legs and its torso. You'll have to be more careful when facing off against the Hammerlegs. They'll often split apart from the torso and come stomping after you. Dodge roll until they're finished attacking and then you can attack. Once the Armored Torso is the only one left, it'll start making use of a new attack in which it twirls around rapidly and bounces after you. Dodge roll, attack, and you'll obtain your reward.
Use the Gimmick Card in battle and the each part of Guard Armor that remains will split apart and fall to the ground in a clump. Take this chance to attack away until the Guard Armor can form itself again.
Axel
- HP: 420
- EXP: 75
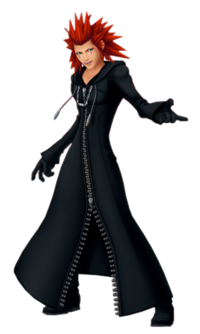
When Sora, Donald, and Goofy arrive back to Castle Oblivion from their trip to Traverse Town, they are greeted by the mysterious hooded figure once again. Shortly after the reunion, another figure shows up - except they aren't donning their hood. He tells the man that he's hogging the "hero", referring to Sora, and wishes to test his skills himself. He introduces himself as Axel and calls Sora a quick learner when he answers his question with an uneasy "sure" (the question being Axel's catch phrase, "got it memorized?"). The hooded figure then leaves them to battle.
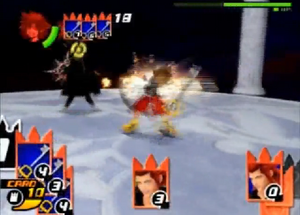
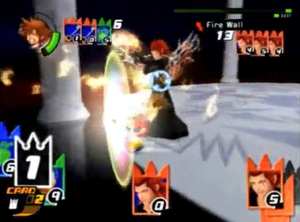
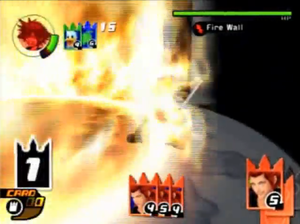
Axel is the first boss in the game to use a Sleight, although he only has one and it's not all too powerful. He's also the very first member of Organization XIII that you fight, not counting the tutorial fight against the other Organization member in Traverse Town. All of Axel's attacks have something to do with fire. As such, he has a resistance to any fire attacks - not only that, but he's actually healed by fire attacks. This shouldn't come off as much of a problem though since you obtain the Fire magic card after you defeat Axel. One of Axel's attacks will involve him throwing his Chakram at Sora when it's engulfed in flames. This move is hard to dodge, and so are his other attacks. Another one of his attacks is a simple combo, his chakrams giving this combo some flames as well. Axel's sleight is Fire Wall. It doesn't damage Sora too much, but the con is that it's unavoidable. You can't dodge it in any way, so your only option is to take the attack and then maybe use Cure. The sleight involves Axel putting his arms out and summoning a ring of fire, which moves out all the way to the end of the arena. Another annoying thing about the boss battle with Axel is his ability to teleport. It won't be too hard for one of your attack cards to miss him completely. Still, you'll be able to attack him once he's finished with one of his attacks or when he's doing a combo on you (if you card break). The battle shouldn't be too long since his health doesn't take many attacks to reduce either. Attack, card break, and obtain your Fire reward.
Genie Jafar

- HP: 550
- EXP: 233
When Sora, Donald, and Goofy come to stop Jafar and save Jasmine in accordance with the plan, Jafar believes that Aladdin doesn't care about Jasmine anymore. He decides he's going to face the three himself, as using a wish to defeat them would be a waste. Sora then gives Aladdin the cue, and Jafar, surprised, orders Genie to attack him. Genie then proceeds to attack Aladdin, with Sora, Donald, Goofy, and Aladdin then revealing that Jafar fell for the plan - the plan to make him use his second wish. Having only one wish left, Jafar uses it to become an all-powerful Genie. The arena changes and it'll be time to battle Jafar - as a genie.
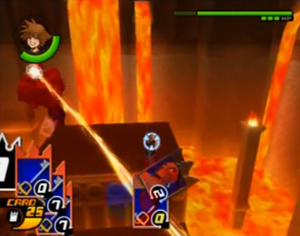
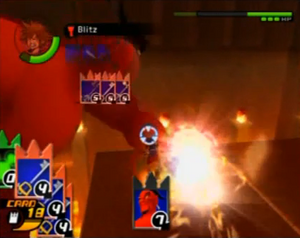
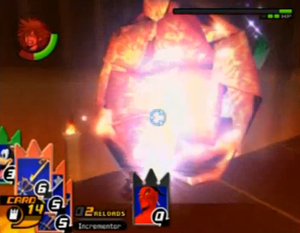
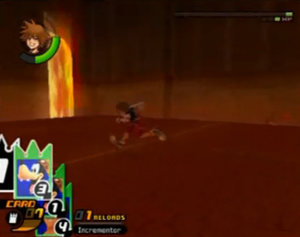
The battle arena will be similar to the one in Kingdom Hearts, where the platforms are constantly shifting and you have to make your way to Jafar's bird, Iago, who happens to be flying around aimlessly with Jafar's lamp. Your main focus will be the bird, so lock on and attack it any chance you get to finish the battle. Unfortunately, Iago isn't the only thing to pay attention too. Genie Jafar will be spewing attacks mercilessly, with a full arsenal of both long-range and short-range attacks. Travel too far and Jafar will target you with his eye beams, get too close and Jafar will punch Sora with a powerful hit. Not only can Jafar openly attack at any given time, but the constantly-moving platforms can be a nuisance as well, considering Iago can sometimes fly pretty high up. The thing to watch for the most though are Jafar's attacks. Not only can he punch and shoot beams from his eyes, but he also has the ability to pick up large molten rocks and lob them at Sora. This often happens when you're on a higher platform, so when you see this one coming, drop to the lower platform with a dodge roll. Be sure to always keep Jafar in your sights, since blind-siding can sometimes cost you the battle. Aside from Jafar's consistent attacks, the battle shouldn't be too tough.
Using a Gimmick Card in this battle can make the battle much easier for a period of time. The platforms come together as one large platform and move according to Iago's movements. It'll be impossible to miss the lamp this way, so use the Gimmick Card if you have to.
Trickmaster
- HP: 600
- EXP: 372
When Sora, Donald, Goofy, and Alice enter the Bizarre Room, they're a bit surprised by the sudden change of scenery. Nevertheless, Alica suggests they look around the area. This is until she's stopped by the Queen of Hearts and her Card Soldiers once more. She's about to give Alice her sentence, but stops after she can't remember what she was about to say. Confused and frustrated, she decides to forget about everything and leaves. Sora suggests that it was probably her memory being stolen again. Suddenly, out of nowhere, the Heartless Trickmaster appears, and it's ready for a battle.
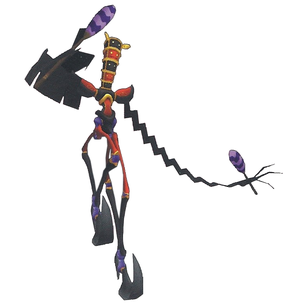
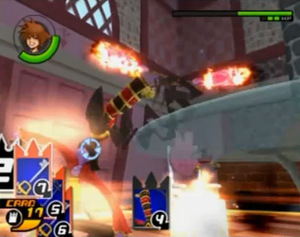
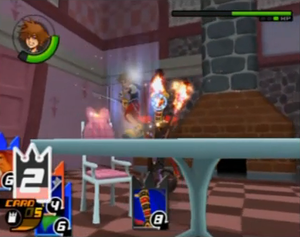
The Trickmaster, like a couple of bosses you've faced already, has a specialty that lies in fire. This battle will be a lot different from the one in Chain of Memories, considering the Trickmaster is much, much taller. To make up for this, a table has been added to the environment, and you can use it to get on an even level with the Trickmaster. Lock on to its weak spot and attack away. Eventually, it'll get stunned by your attacks and drop to its knees. This allows you to attack it from ground level for the short period of time that its frozen. It then rises back up and you'll have to start up the attack again by jumping up on the table. Locking on and using spells will be a bit easier, being projective attacks that don't involve Sora getting close. The Trickmaster will try to get you with its torches whether you're on the ground or on the table. While on the floor or on the chair, the Trickmaster will bring its torches down in a slam down on Sora. These slams often create a large blanket of fire when they land, so try to get away by dodge rolling when you have the chance. When on the table, the Trickmaster will put its torches together and out will come a couple of fireballs to try and get some damage on their target. Dodge rolling these will be a bit harder than the Trickmaster's ground attack, but it is possible. Other than these, the Trickmaster will juggle its torches and swing them around in a way to somehow attack Sora. As long as you're attacking its weak spot and are locked on to it, this battle shouldn't be all too hard, especially considering the fact that it isn't too hard to stun.

