m (Reverted edits by 76.91.218.179 (Talk) to last version by IsaacGS) |
m (fix link) |
||
| (75 intermediate revisions by 39 users not shown) | |||
| Line 1: | Line 1: | ||
{{Header Nav|game=MapleStory|custom= | {{Header Nav|game=MapleStory|custom={{MapleStory/TOC/Quests}}}} | ||
==[[ | In MapleStory, there are two basic types of Party Quests: The cooperative variety, where a party must work together to accomplish a task, and the competitive variety, where party members fight each other or other parties in a contest. In Cooperative Party Quests, there are several different types of obstacles, such as the "Flooded Room" where all the monsters in the area must be defeated, the box puzzle, boss fight, and so on. Typically, various classes are needed to get through successfully, usually because they offer certain skills (such as a Magician's teleport) to get past necessary obstacles. | ||
The difficulty of a Party Quest is typically scaled to the center of its applicable range (normal Aran, adventurers, and Cygnus Knights may find it easier), so that characters on the low end have a difficult time succeeding while characters on the upper end can clear it easily. Additionally, these Party Quests are usually themed after the town they are found in, and are part of that region's storyline, while Competitive Party Quests are usually accessible from several different towns and do not add significantly to the storyline. After the Big Bang Patch in KoreaMS, all co-op party quests had their maximum level limits removed. | |||
After the Jump patch, you can only attempt each PQ 10 times a day. For Romeo and Juilet PQ, you can only attempt a total of 10 times a day, regardless of whether you started from Romeo or Juilet. The levels of the monsters are the average levels of the party, so add people of your level. If you are more than 20 levels below the average level of the party, you will only receive 20% of the original EXP. If you obtained a certain number of PQ set items, EXP when clearing PQs will be boosted by up till 18% increase. | |||
Competitive Party Quests are the other variety. In competitive Party Quests, either two parties compete against each other, or groups of people compete individually for a ranking. Experience earned in these quests is usually given based off your standings against the opposing team or individuals, so it's important to do well in order to get the most Experience possible. | |||
==Starting a party quest== | |||
[[File:MS Kerning Party Quest.jpg|thumb|200px|right|Parties must wait before entering the Kerning PQ.]] | |||
To enter a party quest, a party must be created with the minimum number of required members. Some party quests also have a maximum number. The leader of the party will be required to start the PQ by speaking to the primary NPC, and then talking to the NPC in each room to continue. Only one party may start a PQ at any time in any one channel, so if the current channel is occupied, it is often best to move to another channel and try. | |||
Most party quests can be accessed by clicking on the Dimensional Mirrors located in most major towns. They will automatically transport you to the lobby of the relevant PQ. A PQ will only show up in the list if you are of the required level to participate. However, it is not always recommended to enter all PQs immediately upon availability. | |||
==[[File:MS Amoria Icon.png]] Amoria Premium Wedding== | |||
'''Requirements''': Wedding Invitation, attendance at a Premium Wedding | '''Requirements''': Wedding Invitation, attendance at a Premium Wedding | ||
:The Amoria Premium Wedding's Afterparty, while technically not a Party Quest, operates in many ways like one. It can occur in either the Chapel or Cathedral weddings. This guide will illustrate a Cathedral Wedding in GlobalMS. | :The Amoria Premium Wedding's Afterparty, while technically not a Party Quest, operates in many ways like one. It can occur in either the Chapel or Cathedral weddings. This guide will illustrate a Cathedral Wedding in GlobalMS. | ||
{{-}} | {{-}} | ||
===Entry=== | ===Entry=== | ||
If you are a guest at the wedding, the first stage will be in a waiting room outside the Cathedral. NPCs here will take gifts for the couple. By speaking to a nun, one can enter the main Cathedral. A timer counts down to the next stage. | If you are a guest at the wedding, the first stage will be in a waiting room outside the Cathedral. NPCs here will take gifts for the couple. By speaking to a nun, one can enter the main Cathedral. A timer counts down to the next stage. | ||
===Cathedral Altar=== | ===Cathedral Altar=== | ||
[[ | [[File:MS Amorian Cathedral Wedding.jpg|thumb|200px|left|The Wedding Altar.]] | ||
If you are the one getting married, you will immediately start at the Altar. In order to enter, you must only be in a party with your fiancé. Once the couple is waiting, guests may start to enter and take their seats. After all the guests are seated, the partners-to-be can start the ceremony at their discretion, but it must be before the timer expires. The Priest will begin speaking, and guests are given the option of "blessing" the couple. For each successful bless, the newly-weds will receive EXP. The music in this map is very unique and this area is renowned as one of the most beautiful in the whole game. | If you are the one getting married, you will immediately start at the Altar. In order to enter, you must only be in a party with your fiancé. Once the couple is waiting, guests may start to enter and take their seats. After all the guests are seated, the partners-to-be can start the ceremony at their discretion, but it must be before the timer expires. The Priest will begin speaking, and guests are given the option of "blessing" the couple. For each successful bless, the newly-weds will receive EXP. The music in this map is very unique and this area is renowned as one of the most beautiful in the whole game. | ||
{{-}} | {{-}} | ||
===Cherished Visage Photos=== | ===Cherished Visage Photos=== | ||
[[ | [[File:MS Cherished Photo.jpg|thumb|200px|left|The Wedding Cake. Photos are taken here.]] | ||
After the ceremony is completed, both the couple and the guests are warped to a new map. Beyond this point, both Chapel and Cathedral weddings are identical. A one minute timer appears, and the players must arrange themselves on the cake. Typically, the Bride and Groom stand at the top of the cake, and everyone smiles. Once the timer reaches 0, a picture is taken that will be posted on the MapleGlobal website. Next, a 5 minute timer appears, to allow players to take their own pictures. Often the favored guests will take turns posing with the couple. This map, being very small, has a tendency to lag people out, especially when all 50 invites are used. | After the ceremony is completed, both the couple and the guests are warped to a new map. Beyond this point, both Chapel and Cathedral weddings are identical. A one minute timer appears, and the players must arrange themselves on the cake. Typically, the Bride and Groom stand at the top of the cake, and everyone smiles. Once the timer reaches 0, a picture is taken that will be posted on the MapleGlobal website. Next, a 5 minute timer appears, to allow players to take their own pictures. Often the favored guests will take turns posing with the couple. This map, being very small, has a tendency to lag people out, especially when all 50 invites are used. | ||
{{-}} | {{-}} | ||
===Untamed Hearts Hunting Ground=== | ===Untamed Hearts Hunting Ground=== | ||
[[ | [[File:MS Untamed Hearts.jpg|thumb|200px|left|This is the Hunting Grounds after the wedding.]] | ||
Once the photo time is over, all players will be warped to the Untamed Hearts Hunting Ground. Here, each member, Guests and the newly-weds alike, must collect 5 keys from the Cake and Candle Monsters that roam the area. These monsters are worth 0 experience. At this point, the married couple receives the EXP from the blessings and their prizes for getting married. The keys are not too difficult to find, but they each take up an ETC slot, which can pose problems to first time guests. Also, the Cake Monsters can be rather dangerous to lower leveled guests. The map is rather large, but with 52 people hunting on it in a limited amount of time, kill stealing can be a problem. It is recommended that higher levels help their friends and leave once they have enough keys, so that everyone can finish. | Once the photo time is over, all players will be warped to the Untamed Hearts Hunting Ground. Here, each member, Guests and the newly-weds alike, must collect 5 keys from the Cake and Candle Monsters that roam the area. These monsters are worth 0 experience. At this point, the married couple receives the EXP from the blessings and their prizes for getting married. The keys are not too difficult to find, but they each take up an ETC slot, which can pose problems to first time guests. Also, the Cake Monsters can be rather dangerous to lower leveled guests. The map is rather large, but with 52 people hunting on it in a limited amount of time, kill stealing can be a problem. It is recommended that higher levels help their friends and leave once they have enough keys, so that everyone can finish. | ||
{{-}} | {{-}} | ||
===The Love Piñata=== | ===The Love Piñata=== | ||
[[ | [[File:MS Love Pinata.jpg|thumb|200px|left|This is the Bonus Prize Map.]] | ||
[[ | [[File:MS Love Pinata Key.jpg|thumb|200px|Right|The Keys needed.]] | ||
When each person has acquired 5 keys, they can progress to the next stage on their own. Once Inside, there are numerous boxes that can be broken by hitting them. After they are broken, an item called Onyx Chest appears. These items '''will''' disappear, so only break '''one''' box. Each player can only pick up one, and there are already not enough for every guest at the wedding. The timer on this map has the same time as the outside hunting grounds map, so whether you have entered or not, all players are ejected at the same time. The Onyx Chests and Amoria Heart Keys expire approximately 20 minutes after the wedding ends. After getting your chest, or, if they have already all been taken, the players can talk to Robin the Huntress to exit the wedding party. | When each person has acquired 5 keys, they can progress to the next stage on their own. Once Inside, there are numerous boxes that can be broken by hitting them. After they are broken, an item called Onyx Chest appears. These items '''will''' disappear, so only break '''one''' box. Each player can only pick up one, and there are already not enough for every guest at the wedding. The timer on this map has the same time as the outside hunting grounds map, so whether you have entered or not, all players are ejected at the same time. The Onyx Chests and Amoria Heart Keys expire approximately 20 minutes after the wedding ends. After getting your chest, or, if they have already all been taken, the players can talk to Robin the Huntress to exit the wedding party. | ||
{{-}} | {{-}} | ||
===Wedding Exit=== | ===Wedding Exit=== | ||
[[ | [[File:MS Wedding Exit.jpg|thumb|Right|The exit map.]] | ||
This is the exit map. It was added later, after all the other stages. Click Ames the Wise to return to Amoria, and then by talking to Pila Present at the top of the map, the players can get their prize. Prizes range from Miso Ramen Soup to Pineapple Candies, and for the Bride and Groom's special chests, Scrolls. Wedding Invitations will remain in each guest's inventory until they drop it. | This is the exit map. It was added later, after all the other stages. Click Ames the Wise to return to Amoria, and then by talking to Pila Present at the top of the map, the players can get their prize. Prizes range from Miso Ramen Soup to Pineapple Candies, and for the Bride and Groom's special chests, Scrolls. Wedding Invitations will remain in each guest's inventory until they drop it. | ||
{{-}} | {{-}} | ||
| Line 260: | Line 55: | ||
The English School Party Quiz is a special quest only available on TaiwanMS and ChinaMS. | The English School Party Quiz is a special quest only available on TaiwanMS and ChinaMS. | ||
To enter on the Party Quest you just need to create a Party.(This quest is like the Zakum Quest, you can do with a party or solo). | To enter on the Party Quest you just need to create a Party.(This quest is like the Zakum Quest, you can do with a party or solo). You must talk with Dr.Mushrooms, he can be found at Henesys, Perion, Lith Harbor, Orbis, Ludibrium and Leafre. There are 3 stages for this quest. Once you enter the Map, a question will appear on the top of the screen and you will have 5 minutes to solve the question. You will have to pay 3000 mesos to enter in any level of the Party Quest. | ||
You must talk with Dr.Mushrooms, he can be found at Henesys, Perion, Lith Harbor, Orbis, Ludibrium and Leafre. | |||
There are 3 stages for this quest. | |||
Once you enter the Map, a question will appear on the top of the screen | |||
and you will have 5 minutes to solve the question. | |||
You will have to pay 3000 mesos to enter in any level of the Party Quest. | |||
{{-}} | {{-}} | ||
===Easy Level=== | ===Easy Level=== | ||
[[ | [[File:MapleStory_English_School_TW.jpg|thumb|right|The Easy Level of the English School Party Quest.]] | ||
This is the first level of the English School Party Quest, here you can find some monsters, they drop letters. | This is the first level of the English School Party Quest, here you can find some monsters, they drop letters. | ||
You will need them to answer the question that appears in the top of the screen. | You will need them to answer the question that appears in the top of the screen. | ||
| Line 275: | Line 65: | ||
Then, talk with the NPC on the map and you will be on the Reward Area. | Then, talk with the NPC on the map and you will be on the Reward Area. | ||
{{-}} | {{-}} | ||
===Normal Level=== | ===Normal Level=== | ||
This stage is like others, but the question asked here is even harder than questions asked on the Easy Level, and there are more monsters here. | This stage is like others, but the question asked here is even harder than questions asked on the Easy Level, and there are more monsters here. | ||
Once you finish this stage, click on the NPC and you will be on the Reward Area. | Once you finish this stage, click on the NPC and you will be on the Reward Area. | ||
{{-}} | {{-}} | ||
===Hard Level=== | ===Hard Level=== | ||
This stage has lots of monsters and the question asked is a lot harder than others. | This stage has lots of monsters and the question asked is a lot harder than others. | ||
You will need to answer the question within 5 minutes or you will be forced to get out from the Party Quest. | You will need to answer the question within 5 minutes or you will be forced to get out from the Party Quest. | ||
| Line 287: | Line 77: | ||
===Reward Area=== | ===Reward Area=== | ||
Once you finish the Quest, talk to Dr.Mushrooms and you will receive your reward. | Once you finish the Quest, talk to Dr.Mushrooms and you will receive your reward. | ||
You will be rewarded with some Experience. | You will be rewarded with some Experience. | ||
{{-}} | {{-}} | ||
==Other Boss Quests== | ==Other Boss Quests== | ||
=== | ===Lovers' PQ/Grandma Tree=== | ||
*'''Location''': | [[File:MS_Valentine_PQ_Boss.jpg|thumb|right|Fighting Grandma Tree.]] | ||
*''' | *'''Location''': Korean Folk Town | ||
*'''Requirements''': a male and female character partied together | |||
:This Quest is currently only available in ChinaMS and TaiwanMS. | |||
Much like Papulatus, this is a series of quests culminating in a boss fight. It is available to all players, but only if in a party of 2 with a character of the opposite gender. The first step is to talk to Xiao Di, in Korean Folk Town. She's located in between the Well and the Helios entrance. She gives the quest only if in a party of two with a character of the opposite sex. The first task in her series is to collect | |||
50 Pink Teddy Omok pieces. The next Quest needs the pair to gather 50 Sea Horse Horns. The third quest is to get 50 Star Pixie's Starpieces. Lastly, get 20 Fierry tentacles. The reward for all that is a safety charm. She then asks a series of questions about a famous Chinese poem. Provided these are all answered correctly, the pair can move on. For completing this part, each person gets a special Pendant that adds 20 Defense and Magic defense and has 5 slots. | |||
:Finally, it's the PQ part. The male and female companions have to party to enter the map. Xiao Di will then send them to the Boss room. The boss has a lot of defense, but a very low knockback. It does a fair amount of damage, so archers and assassins may want to consider bringing a Dragon Knight for Hyperbody. The object is to kill the Grandma Tree, and get a ghost spirit it drops. The boss respawns every 10 minutes, and once in the special event map, players can change channels. This quest is also repeatable. At last, the pair get the final prize, 100% Shield ATT scrolls. | |||
===Boss Rush=== | |||
: | *'''Also known as''': "Bosshunter Challenge", "Special Agent Training: Monster Battle". | ||
*'''Availability''': ChinaMS, GlobalMS, KoreaMS, ThailandMS, MapleSEA, EuropeMS and BrazilMS. | |||
This is a Party Quest, similar to the Mu Lung Training Centre, that is part of the '''[[MapleStory/Quests/Special Events#Find Master M|Find Master M]]''' event. By speaking with '''Agent Gaga''', you will enter '''Hidden Street: Exclusive Training Center''', a Perion themed map with two cat NPCs (Agent Meow on the left and Agent Kitty on the right) that resemble the cat from the cheese warehouse monster. From there you can choose to solo the PQ (speak with Agent Meow), or organize a party of 3-6 players (level range is the lowest level player in the group + 30; i.e. 32-62). | |||
''' | ;Objective | ||
The goal of this PQ is to gather '''agent points''' by killing every boss in the game, one by one, starting from the lowest level boss (Mano) to the strongest boss (Pianus). There are no World Tour bosses currently involved in this PQ. | |||
;The basics | |||
Every time you kill a boss and then exit through the portal on the right you will be rewarded with EXP and a certain amount of agent points based on the position of the boss in the PQs boss order (i.e. Faust gives five points; see below). After every 5 bosses are killed, you will enter a Perion-themed map with '''Agent Meow''' and a portal on the right. Taking the portal exits the PQ, and Agent Meow gives the choice to continue to the next set of bosses, or kick everyone out of the PQ. | |||
;Agent points and reward(s) | |||
You win the Boss Points by killing a boss and then using the portal to the right. After gathering 200 points, you can speak with either '''Agent Meow''' or '''Agent Kitty''' to ask for equipment. You will receive '''Agent N's Disposable Receiver''' for the first four times (800 points), and '''Agent N's Receiver''' for the fifth reward (1000 points). Both of these are low level hats, however the disposable ones have a 3-day duration; Agent N's Receiver is permanent and has better stats. '''Agent N's Disposable Receiver''' gives +2 to all stats and +5 HP (6 upgrades available) and '''Agent N's Receiver''' gives +3 to all stats and +10 HP. | |||
;Rushing tips | |||
The point of the boss rush is to use your party to effectively farm points. It is not about killing the most powerful boss, because there is no quest reward and the bosses do not drop equipment like they normally would. Using your party, push as far as you can through the boss rush, but when you get to a hard boss that takes over a minute or two, you know you're probably wasting your time. As such, have everyone leave the PQ and re-join immediately for another rush. Some bosses can bottle neck your group (based on accuracy and damage), so if it takes a little bit longer, but you know that your team can take out the next few bosses, it may be more efficient to continue. For example, a group under level 40 may not be able to pass Faust; thus your plan should be to defeat King Slime, use the portal, then speak with '''Agent Meow''' to return to the PQ lobby. | |||
;Boss order | |||
#Mano | |||
#Stumpy | |||
#Deo | |||
#King Slime | |||
#Faust | |||
;Rest Point | |||
<ol start="6"><li>King Clang | |||
<li>Alishar | |||
<li>Timer | |||
<li>Mushmom | |||
<li>Dile</ol> | |||
;Rest Point | |||
<ol start="11"><li>Geno (Omega Sector boss) | |||
<li>Nine Tailed Fox (Old Fox) | |||
<li>Lord Pirate | |||
<li>Tae Ryun | |||
<li>Papa Pixie</ol> | |||
= | |||
= | ;Rest Point | ||
<ol start="16"><li>Master Goblin | |||
<li>Jr. Balrog | |||
<li>Franken Roid | |||
<li>Elliza | |||
<li>Chimera</ol> | |||
;Rest Point | |||
<ol start="21"><li>Snowman | |||
<li>Crimson Balrog | |||
<li>Manon | |||
<li>Griffey | |||
<li>Leviathan</ol> | |||
;Rest Point | |||
<ol start="26"><li>Papulatus Clock (Clock only) | |||
<li>Pianus (Right Side)</ol> | |||
{{Footer Nav|game=MapleStory|prevpage=Quests/Coke Town|prevname=Coke Town|nextpage=Moon Bunny's Rice Cake}} | |||
Latest revision as of 21:25, 19 February 2018
In MapleStory, there are two basic types of Party Quests: The cooperative variety, where a party must work together to accomplish a task, and the competitive variety, where party members fight each other or other parties in a contest. In Cooperative Party Quests, there are several different types of obstacles, such as the "Flooded Room" where all the monsters in the area must be defeated, the box puzzle, boss fight, and so on. Typically, various classes are needed to get through successfully, usually because they offer certain skills (such as a Magician's teleport) to get past necessary obstacles.
The difficulty of a Party Quest is typically scaled to the center of its applicable range (normal Aran, adventurers, and Cygnus Knights may find it easier), so that characters on the low end have a difficult time succeeding while characters on the upper end can clear it easily. Additionally, these Party Quests are usually themed after the town they are found in, and are part of that region's storyline, while Competitive Party Quests are usually accessible from several different towns and do not add significantly to the storyline. After the Big Bang Patch in KoreaMS, all co-op party quests had their maximum level limits removed.
After the Jump patch, you can only attempt each PQ 10 times a day. For Romeo and Juilet PQ, you can only attempt a total of 10 times a day, regardless of whether you started from Romeo or Juilet. The levels of the monsters are the average levels of the party, so add people of your level. If you are more than 20 levels below the average level of the party, you will only receive 20% of the original EXP. If you obtained a certain number of PQ set items, EXP when clearing PQs will be boosted by up till 18% increase.
Competitive Party Quests are the other variety. In competitive Party Quests, either two parties compete against each other, or groups of people compete individually for a ranking. Experience earned in these quests is usually given based off your standings against the opposing team or individuals, so it's important to do well in order to get the most Experience possible.
Starting a party quest[edit]

To enter a party quest, a party must be created with the minimum number of required members. Some party quests also have a maximum number. The leader of the party will be required to start the PQ by speaking to the primary NPC, and then talking to the NPC in each room to continue. Only one party may start a PQ at any time in any one channel, so if the current channel is occupied, it is often best to move to another channel and try.
Most party quests can be accessed by clicking on the Dimensional Mirrors located in most major towns. They will automatically transport you to the lobby of the relevant PQ. A PQ will only show up in the list if you are of the required level to participate. However, it is not always recommended to enter all PQs immediately upon availability.
 Amoria Premium Wedding[edit]
Requirements: Wedding Invitation, attendance at a Premium Wedding
- The Amoria Premium Wedding's Afterparty, while technically not a Party Quest, operates in many ways like one. It can occur in either the Chapel or Cathedral weddings. This guide will illustrate a Cathedral Wedding in GlobalMS.
Entry[edit]
If you are a guest at the wedding, the first stage will be in a waiting room outside the Cathedral. NPCs here will take gifts for the couple. By speaking to a nun, one can enter the main Cathedral. A timer counts down to the next stage.
Cathedral Altar[edit]
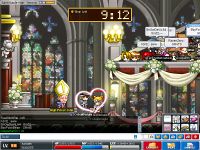
If you are the one getting married, you will immediately start at the Altar. In order to enter, you must only be in a party with your fiancé. Once the couple is waiting, guests may start to enter and take their seats. After all the guests are seated, the partners-to-be can start the ceremony at their discretion, but it must be before the timer expires. The Priest will begin speaking, and guests are given the option of "blessing" the couple. For each successful bless, the newly-weds will receive EXP. The music in this map is very unique and this area is renowned as one of the most beautiful in the whole game.
Cherished Visage Photos[edit]

After the ceremony is completed, both the couple and the guests are warped to a new map. Beyond this point, both Chapel and Cathedral weddings are identical. A one minute timer appears, and the players must arrange themselves on the cake. Typically, the Bride and Groom stand at the top of the cake, and everyone smiles. Once the timer reaches 0, a picture is taken that will be posted on the MapleGlobal website. Next, a 5 minute timer appears, to allow players to take their own pictures. Often the favored guests will take turns posing with the couple. This map, being very small, has a tendency to lag people out, especially when all 50 invites are used.
Untamed Hearts Hunting Ground[edit]

Once the photo time is over, all players will be warped to the Untamed Hearts Hunting Ground. Here, each member, Guests and the newly-weds alike, must collect 5 keys from the Cake and Candle Monsters that roam the area. These monsters are worth 0 experience. At this point, the married couple receives the EXP from the blessings and their prizes for getting married. The keys are not too difficult to find, but they each take up an ETC slot, which can pose problems to first time guests. Also, the Cake Monsters can be rather dangerous to lower leveled guests. The map is rather large, but with 52 people hunting on it in a limited amount of time, kill stealing can be a problem. It is recommended that higher levels help their friends and leave once they have enough keys, so that everyone can finish.
The Love Piñata[edit]


When each person has acquired 5 keys, they can progress to the next stage on their own. Once Inside, there are numerous boxes that can be broken by hitting them. After they are broken, an item called Onyx Chest appears. These items will disappear, so only break one box. Each player can only pick up one, and there are already not enough for every guest at the wedding. The timer on this map has the same time as the outside hunting grounds map, so whether you have entered or not, all players are ejected at the same time. The Onyx Chests and Amoria Heart Keys expire approximately 20 minutes after the wedding ends. After getting your chest, or, if they have already all been taken, the players can talk to Robin the Huntress to exit the wedding party.
Wedding Exit[edit]

This is the exit map. It was added later, after all the other stages. Click Ames the Wise to return to Amoria, and then by talking to Pila Present at the top of the map, the players can get their prize. Prizes range from Miso Ramen Soup to Pineapple Candies, and for the Bride and Groom's special chests, Scrolls. Wedding Invitations will remain in each guest's inventory until they drop it.
English School Party Quiz[edit]
- Location: English School Town
- Requirements:1~6 Characters in a Party.
The English School Party Quiz is a special quest only available on TaiwanMS and ChinaMS. To enter on the Party Quest you just need to create a Party.(This quest is like the Zakum Quest, you can do with a party or solo). You must talk with Dr.Mushrooms, he can be found at Henesys, Perion, Lith Harbor, Orbis, Ludibrium and Leafre. There are 3 stages for this quest. Once you enter the Map, a question will appear on the top of the screen and you will have 5 minutes to solve the question. You will have to pay 3000 mesos to enter in any level of the Party Quest.
Easy Level[edit]
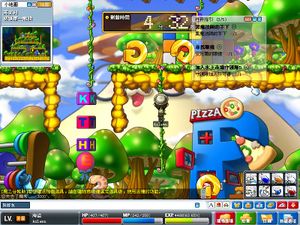
This is the first level of the English School Party Quest, here you can find some monsters, they drop letters. You will need them to answer the question that appears in the top of the screen. Once you know the answer, start getting letters from the monsters inside. Then, talk with the NPC on the map and you will be on the Reward Area.
Normal Level[edit]
This stage is like others, but the question asked here is even harder than questions asked on the Easy Level, and there are more monsters here. Once you finish this stage, click on the NPC and you will be on the Reward Area.
Hard Level[edit]
This stage has lots of monsters and the question asked is a lot harder than others. You will need to answer the question within 5 minutes or you will be forced to get out from the Party Quest.
Reward Area[edit]
Once you finish the Quest, talk to Dr.Mushrooms and you will receive your reward. You will be rewarded with some Experience.
Other Boss Quests[edit]
Lovers' PQ/Grandma Tree[edit]
- Location: Korean Folk Town
- Requirements: a male and female character partied together
- This Quest is currently only available in ChinaMS and TaiwanMS.
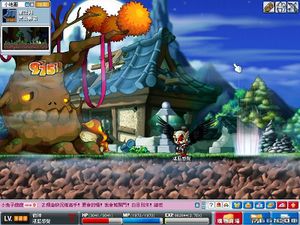
Much like Papulatus, this is a series of quests culminating in a boss fight. It is available to all players, but only if in a party of 2 with a character of the opposite gender. The first step is to talk to Xiao Di, in Korean Folk Town. She's located in between the Well and the Helios entrance. She gives the quest only if in a party of two with a character of the opposite sex. The first task in her series is to collect 50 Pink Teddy Omok pieces. The next Quest needs the pair to gather 50 Sea Horse Horns. The third quest is to get 50 Star Pixie's Starpieces. Lastly, get 20 Fierry tentacles. The reward for all that is a safety charm. She then asks a series of questions about a famous Chinese poem. Provided these are all answered correctly, the pair can move on. For completing this part, each person gets a special Pendant that adds 20 Defense and Magic defense and has 5 slots.
- Finally, it's the PQ part. The male and female companions have to party to enter the map. Xiao Di will then send them to the Boss room. The boss has a lot of defense, but a very low knockback. It does a fair amount of damage, so archers and assassins may want to consider bringing a Dragon Knight for Hyperbody. The object is to kill the Grandma Tree, and get a ghost spirit it drops. The boss respawns every 10 minutes, and once in the special event map, players can change channels. This quest is also repeatable. At last, the pair get the final prize, 100% Shield ATT scrolls.
Boss Rush[edit]
- Also known as: "Bosshunter Challenge", "Special Agent Training: Monster Battle".
- Availability: ChinaMS, GlobalMS, KoreaMS, ThailandMS, MapleSEA, EuropeMS and BrazilMS.
This is a Party Quest, similar to the Mu Lung Training Centre, that is part of the Find Master M event. By speaking with Agent Gaga, you will enter Hidden Street: Exclusive Training Center, a Perion themed map with two cat NPCs (Agent Meow on the left and Agent Kitty on the right) that resemble the cat from the cheese warehouse monster. From there you can choose to solo the PQ (speak with Agent Meow), or organize a party of 3-6 players (level range is the lowest level player in the group + 30; i.e. 32-62).
- Objective
The goal of this PQ is to gather agent points by killing every boss in the game, one by one, starting from the lowest level boss (Mano) to the strongest boss (Pianus). There are no World Tour bosses currently involved in this PQ.
- The basics
Every time you kill a boss and then exit through the portal on the right you will be rewarded with EXP and a certain amount of agent points based on the position of the boss in the PQs boss order (i.e. Faust gives five points; see below). After every 5 bosses are killed, you will enter a Perion-themed map with Agent Meow and a portal on the right. Taking the portal exits the PQ, and Agent Meow gives the choice to continue to the next set of bosses, or kick everyone out of the PQ.
- Agent points and reward(s)
You win the Boss Points by killing a boss and then using the portal to the right. After gathering 200 points, you can speak with either Agent Meow or Agent Kitty to ask for equipment. You will receive Agent N's Disposable Receiver for the first four times (800 points), and Agent N's Receiver for the fifth reward (1000 points). Both of these are low level hats, however the disposable ones have a 3-day duration; Agent N's Receiver is permanent and has better stats. Agent N's Disposable Receiver gives +2 to all stats and +5 HP (6 upgrades available) and Agent N's Receiver gives +3 to all stats and +10 HP.
- Rushing tips
The point of the boss rush is to use your party to effectively farm points. It is not about killing the most powerful boss, because there is no quest reward and the bosses do not drop equipment like they normally would. Using your party, push as far as you can through the boss rush, but when you get to a hard boss that takes over a minute or two, you know you're probably wasting your time. As such, have everyone leave the PQ and re-join immediately for another rush. Some bosses can bottle neck your group (based on accuracy and damage), so if it takes a little bit longer, but you know that your team can take out the next few bosses, it may be more efficient to continue. For example, a group under level 40 may not be able to pass Faust; thus your plan should be to defeat King Slime, use the portal, then speak with Agent Meow to return to the PQ lobby.
- Boss order
- Mano
- Stumpy
- Deo
- King Slime
- Faust
- Rest Point
- King Clang
- Alishar
- Timer
- Mushmom
- Dile
- Rest Point
- Geno (Omega Sector boss)
- Nine Tailed Fox (Old Fox)
- Lord Pirate
- Tae Ryun
- Papa Pixie
- Rest Point
- Master Goblin
- Jr. Balrog
- Franken Roid
- Elliza
- Chimera
- Rest Point
- Snowman
- Crimson Balrog
- Manon
- Griffey
- Leviathan
- Rest Point
- Papulatus Clock (Clock only)
- Pianus (Right Side)
