(adding more from Winter Assault walkthrough page) |
(rewrote IG part for insane difficulty, added sceens) |
||
| Line 1: | Line 1: | ||
{{Header Nav|game=Warhammer 40,000: Dawn of War: Winter Assault}} | {{Header Nav|game=Warhammer 40,000: Dawn of War: Winter Assault}} | ||
You can play this mission with either the Imperial Guard or the Eldar. You can switch sides anytime you want until one of the factions either wins or fails. Trying to support one faction with the other is pretty useless so just pick one and ignore the other. | You can play this mission with either the Imperial Guard or the Eldar. You can switch sides anytime you want until one of the factions either wins or fails. Trying to support one faction with the other is pretty useless so just pick one and ignore the other. This walkthrough assumes Insane difficulty. | ||
==Imperial Guard== | ==Imperial Guard== | ||
[[Image:W40k-dow-wa_mission04_ss01.jpg|thumb|Bring the transport through here.]] | |||
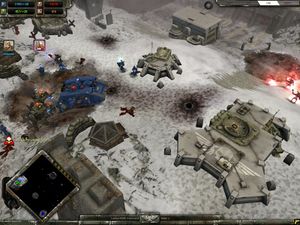
Your goal is to escort the Ultramarines' Land Raider from the bottom to the top and through the Psychic Shield. You can't control the Land Raider directly, but you can call it to your Command Squad (Sturnn to be specific) within a limited range. You need to use this ability to call it through the last gate. On the way you will be harassed by massive amounts of Chaos Space Marines and Orks spawning from the bottom edge. You can only build Listening Posts and Plasma Generators, but there are some structures you can commandeer to raise your Squad/Vehicle Cap. | Your goal is to escort the Ultramarines' Land Raider from the bottom to the top and through the Psychic Shield. You can't control the Land Raider directly, but you can call it to your Command Squad (Sturnn to be specific) within a limited range. You need to use this ability to call it through the last gate. On the way you will be harassed by massive amounts of Chaos Space Marines and Orks spawning from the bottom edge. You can only build Listening Posts and Plasma Generators, but there are some structures you can commandeer to raise your Squad/Vehicle Cap. | ||
[[Image:W40k-dow-wa_mission04_ss02.jpg|thumb|Then stop the attacks here...]] | |||
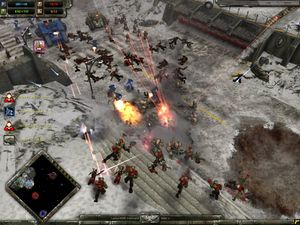
This mission can be close to impossible or very easy depending on how you play it. The easy version will be described. | |||
[[Image:W40k-dow-wa_mission04_ss03.jpg|thumb|...or here, while you win the mission up north.]] | |||
Start by getting the last Sentinel and Enginseer out of the Valkyrie transport. Destroy the turrets just east with the Sentinels, then move the Sentinels somewhere out of harm's way (you can easily lose some to Horror raids and you need them shortly). Send the Command Squad and Guardsmen to clear the Chaos outpost just north. Commandeer the Imperial base by moving your Command Squad close enough. Start upgrading the base, build a Listening Post and a couple of Plasma Generators. | |||
Now here comes the key: '''tell the Land Raider to move up through your base.''' Move a bit east behind the base and destroy the enemy Leman Russ here - go early and use your Sentinels, the Land Raider following you and the Command Squad. If you wait too long, the tank will destroy the Infantry Command here, meaning you can't raise your Squad Cap during the whole mission. When the tank is dead, set up a defense at the crossroads right next to your base. The second key: '''don't go east or try to capture any more SPs.''' Going there will only make the mission more difficult. | |||
Now you should hold here for a bit while you upgrade a little and send your Command Squad up north along the left side to commandeer some more buildings (a Mechanized Command and a Mars Pattern Command, marked by light pillars). This has two benefits: 1) you get a higher Vehicle Cap and a Baneblade, and 2) the Horrors will attack wherever your Command Squad goes, taking pressure off your defense and making vehicles more useful there. You have to prevent the Land Raider from wandering away, however; either Sturnn must come back periodically to call it, or you can block it with a couple of vehicles. | |||
For your defense, you want a couple of Hellhounds for the infantry masses, a squad of Ogryns and a couple of Kasrkin. Fill up your Vehicle Cap with the Baneblade and Leman Russes. For your Command Squad, take along a Guardsmen Squad (to capture the Relic and Critical Location up north, and to finish Horrors faster) and an Enginseer (to repair allied vehicles that help you along the way, and to LP that Relic). | |||
So, when you think the time is right, just bring Sturnn back to lead the Land Raider up along the left side, the same route you took to the Mars Pattern Command. You only need one infantry squad (and an Enginseer) to help - there will be Horrors again but nothing else. All your other troops will be next to your base, blocking the enemy waves right there. You can wait until the Baneblade, or you can try to go earlier before all the fancy stuff to finish the mission faster. | |||
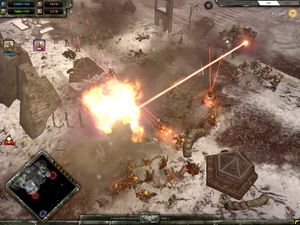
You win when you bring the Land Raider trough the gate. You must first capture the Critical Location to open the gate (do this in advance), then walk Sturnn trough and call the transport to him. | |||
==Eldar== | ==Eldar== | ||
Revision as of 20:22, 11 December 2009
You can play this mission with either the Imperial Guard or the Eldar. You can switch sides anytime you want until one of the factions either wins or fails. Trying to support one faction with the other is pretty useless so just pick one and ignore the other. This walkthrough assumes Insane difficulty.
Imperial Guard

Your goal is to escort the Ultramarines' Land Raider from the bottom to the top and through the Psychic Shield. You can't control the Land Raider directly, but you can call it to your Command Squad (Sturnn to be specific) within a limited range. You need to use this ability to call it through the last gate. On the way you will be harassed by massive amounts of Chaos Space Marines and Orks spawning from the bottom edge. You can only build Listening Posts and Plasma Generators, but there are some structures you can commandeer to raise your Squad/Vehicle Cap.

This mission can be close to impossible or very easy depending on how you play it. The easy version will be described.

Start by getting the last Sentinel and Enginseer out of the Valkyrie transport. Destroy the turrets just east with the Sentinels, then move the Sentinels somewhere out of harm's way (you can easily lose some to Horror raids and you need them shortly). Send the Command Squad and Guardsmen to clear the Chaos outpost just north. Commandeer the Imperial base by moving your Command Squad close enough. Start upgrading the base, build a Listening Post and a couple of Plasma Generators.
Now here comes the key: tell the Land Raider to move up through your base. Move a bit east behind the base and destroy the enemy Leman Russ here - go early and use your Sentinels, the Land Raider following you and the Command Squad. If you wait too long, the tank will destroy the Infantry Command here, meaning you can't raise your Squad Cap during the whole mission. When the tank is dead, set up a defense at the crossroads right next to your base. The second key: don't go east or try to capture any more SPs. Going there will only make the mission more difficult.
Now you should hold here for a bit while you upgrade a little and send your Command Squad up north along the left side to commandeer some more buildings (a Mechanized Command and a Mars Pattern Command, marked by light pillars). This has two benefits: 1) you get a higher Vehicle Cap and a Baneblade, and 2) the Horrors will attack wherever your Command Squad goes, taking pressure off your defense and making vehicles more useful there. You have to prevent the Land Raider from wandering away, however; either Sturnn must come back periodically to call it, or you can block it with a couple of vehicles.
For your defense, you want a couple of Hellhounds for the infantry masses, a squad of Ogryns and a couple of Kasrkin. Fill up your Vehicle Cap with the Baneblade and Leman Russes. For your Command Squad, take along a Guardsmen Squad (to capture the Relic and Critical Location up north, and to finish Horrors faster) and an Enginseer (to repair allied vehicles that help you along the way, and to LP that Relic).
So, when you think the time is right, just bring Sturnn back to lead the Land Raider up along the left side, the same route you took to the Mars Pattern Command. You only need one infantry squad (and an Enginseer) to help - there will be Horrors again but nothing else. All your other troops will be next to your base, blocking the enemy waves right there. You can wait until the Baneblade, or you can try to go earlier before all the fancy stuff to finish the mission faster.
You win when you bring the Land Raider trough the gate. You must first capture the Critical Location to open the gate (do this in advance), then walk Sturnn trough and call the transport to him.
Eldar
With the Eldar, you must move your Webway Assembly to the other side of the Psychic Gate. This means backstabbing the Imperial Guard, destroying their Thermal Plasma Generators to open the Gate, moving a Bonesinger through, building a Webway Gate on the other side and using the Relocate ability.
You start at the corner, safe for the moment so start teching but move on eventually, because you're very close to a rather large Ork base and you don't have much space to build. Taldeer tells you to move your base and then to scout the Psychic Gate entrance so just do what she says. When you approach the place you should move to, the Imperial Guard get pissed and turn hostile. Basically you just kill some Imperials, set up your base, take a Ranger Squad and some firepower up north along the right edge to scout/destroy and slip a Bonesinger through (teleport from maximum range once the way is open). Relocate one structure. Not much more to it.
You will be attacked by Imperials coming from the top and Orks from the bottom. From the Imperials you'll see lots of Guardsmen Squads and the occasional vehicle (no Leman Russ tanks, luckily) and you should also be prepared to blast the Infantry Commands they go hide in. Use Warp Spiders and Fire Dragons when you move up (be sure to get Fleet of Foot). The Orks come with their basic infantry setup and vehicles (mostly Wartraks) so the same works for defense. The Guardsmen have a long range so a Dark Reaper Squad or two may be useful. For vehicles, go for Fire Prisms or Wraithlords. Use your Seer Council where you need it most and save the Farseer for defense so you can hit Eldritch Storm if overwhelmed.
When you move the Webway Assembly, the mission is won and the Imperial Guard is stuck outside their own barrier. You now get the Ancestral Powers final mission.