Character Creation
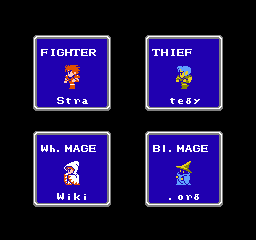
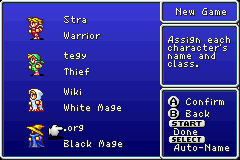
To start the game, you must choose a name for each of four characters, and their character class. The available character classes are Warrior, Thief, Monk, Red Mage, White Mage, and Black Mage. These classes will determine the way the rest of the game goes, and you can't change the basic makeup of your party afterwards, so you are advised to choose carefully. Strong combinations include Warrior/Thief/White Mage/Black Mage, and Warrior/Warrior/Red Mage/White Mage.
Getting Around
- See also: Controls
Moving your character around the world map is fairly self-explanatory. The Final Fantasy landscape consists of plains, grasslands, forests, swamps, deserts, oceans, ports, rivers, and mountains. Oceans can only be traversed by ship, and ships may only dock at ports, which are usually located near points of interest in the southern hemisphere. Rivers may only be traversed by canoe; however, the Light Warriors are apparently able to carry the canoe with them, so it is automatically activated when you reach a river. (Rivers are shown as stagnant-looking narrow waterways cutting through land.) Mountains may not be traversed at all. With an airship, you can fly over anything, but can only land on plains and grasslands.
Occasionally you will reach points of interest such as towns, castles, and caves. When you step onto one of these, the game "zooms in" and you control the Light Warriors inside the point of interest. Here, you will often find people that will yield some information when you talk to them. Sometimes the information is useless, other times vitally important to the story. You will also occasionally find treasure chests, many contain only mundane items, but others contain rare equipment or key items. In towns, you will find several different kinds of shops that will exchange goods and services for money. These include item stores (sell curative and utilitarian items), White and Black Magic stores, weapon and armor stores, clinics (can revive slain allies), and inns (restores living Light Warriors to full status, and saves the game).
When wandering throughout the world map and in dungeons, you will fight "random encounters". The enemies you face in these encounters depend on the area of the world you are currently traveling in and the terrain. Oceans and rivers have their own set of enemies. There are no random encounters while riding on the airship or in towns/castles. Sometimes battles are preprogrammed (usually directly in front of key items).
Subscreen
On the subscreen you can view data relating to the Light Warriors and perform miscellaneous actions. These actions are:
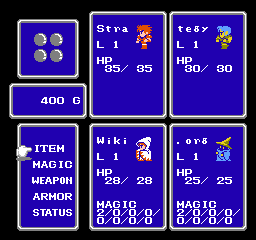
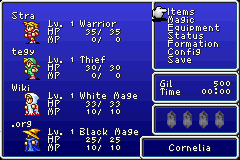
- Items: Use items such as potions, tents, etc. or key items. Battle items and equipment that can be used as items cannot be used from this menu. "Using" a piece of equipment will show you which classes can equip it.
- Magic: Magic that has been purchased from a magic shop can be used here, assuming the character has enough MP. Learned magic can also be discarded if needed.
- Equipment: Weapons and armor can be equipped or removed from this menu. Along with seeing what is equipped you can also see the character's ATK, ACC, DEF, and EVA stats and what effect the equipment has on it.
- Status: View the attributes of each Light Warrior in greater detail including experience needed for the next level, stats, current equipment, HP, MP, and current level.
- Formation: Change the order of the party.
- Memo (Origins only) quick save your game to the system's temporary memory at any point. When the power is shut off this file is erased.
- Config Change video, audio, and gameplay options. Also view the bestiary (DoS/20AE) or Collections (Origins).
- Save (DoS and 20AE) Save the game.
Saving
- Saving (Original version and Origins): This is the standard way to save in the game and there are two methods of doing it. The first way is to just go into an inn and then save your game when it prompts you. The second way is to use a bag, tent, or cottage on the world map and then save your game when it prompts you.
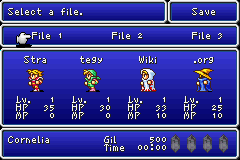
- Saving (DoS and 20AE): The game can be saved at any point (except during a battle) from the subscreen. Simply open up the subscreen and select "Save".
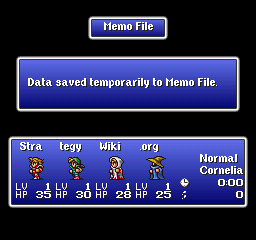
- Memo Saving (Final Fantasy Origins only): This is more of a precautionary method of temporarily saving your game inside a dungeon in case you die. While purists of the original game may dislike Memo Saving, it's definitely helpful for beginners and the like. To use the Memo Save feature, go into the main menu and select the Memo option. After that, select yes when it prompts you to save your game. Note that this type of save is only temporary - if you shut off the console without doing a normal save, you will lose your data.
Config
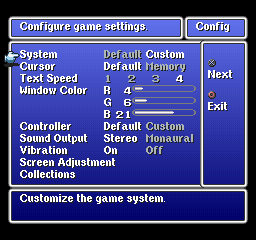
- System (Origins only): Allows you to disable certain changes made from the NES version and Origins.
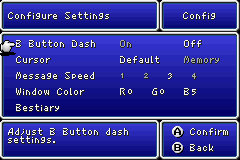
- B Button Dash (DoS and 20AE only): If on, the character will always run, otherwise you have to hold B to run.
- Cursor: If "Memory" is selected, the next time a menu appears, the cursor will start at the last option chosen, otherwise the cursor always returns to the top of the menu.
- Text/Message Speed: Adjust the speed that dialog appears when talking and how fast the text changes during battle.
- Window Color: Mix red, green, and blue to make a custom background color for the subscreen.
- Controller (Origins only): Customize the controller layout.
- Sound Output (Origins only): Switch between mono and stereo sound.
- Vibration (Origins only): Turn off/on the PS1 rumble feature.
- Screen Adjustment (Origins only): Position the screen so it fits properly on your TV.
- Collections (Origins only): View the collections.
- Bestiary (DoS and 20AE only): View the bestiary.
System
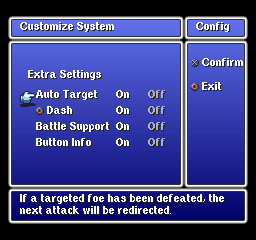
- Auto Target: If on and a character is directed to attack a dead enemy, they will select a random target to attack instead. If off they will simply attack empty space.
- O Dash: Allows the party to run in towns and dungeons if the O button is held. This does not affect the encounter rate.
- Battle Support Allows the use of various curative items during battle, especially Gold Needles.
- Button Info If on, text describing what each command will do when the cursor is pointed to it will be displayed during battle.
Combat
- See also: Battle commands
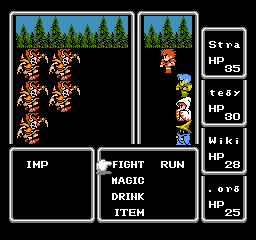
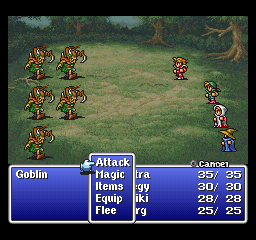
In combat, you are presented with your party on one side and your enemies on the other. One by one, each Light Warrior steps forth and awaits your orders. (Sometimes, the Light Warriors may be surprised by an enemy, in which case the enemy gets a free round of attacks.)
After the warriors receive their orders, they carry them out one by one while the enemy also attacks using its own set of orders. If one side is completely incapacitated by status aliments, the other side gets free rounds of attacks until at least one member recovers; if one side is killed or turned to stone, the battle is over. If that one side happens to be yours, the game is over.

