(One intermediate revision by one other user not shown)
Line 3:
Line 3:
== Area Briefing ==
== Area Briefing ==
[[File:Castlevania SotN area map Necro Lab.png|center]]
[[File:Castlevania SotN area map Necro Lab.png|center]]
*'''Save Rooms''': (46,24), (45,16), and (54,21)
* '''Save Rooms''': (46,24), (45,16), and (54,21)
*'''Warp Room''': none
* '''Warp Room''': none
*'''Exits''': (44,15) to {{~|Reverse Entrance}}, (40,25) to {{~|Black Marble Gallery}}, and (57,23) to {{~|Anti-Chapel}}
* '''Exits''': (44,15) to [[../Reverse Entrance/]], (40,25) to [[../Black Marble Gallery/]], and (57,23) to [[../Anti-Chapel/]]
*'''Powerups''': Life Vial x1, Heart Container x1
* '''Powerups''': Life Vial x1, Heart Container x1
*'''Relics''': none
* '''Relics''': none
*'''Enemies''': Bitterfly, Ctulhu, Fire Demon, Gremlin, Imp, Lesser Demon, Salem Witch
* '''Enemies''': Bitterfly, Ctulhu, Fire Demon, Gremlin, Imp, Lesser Demon, Salem Witch
*'''Bosses''': Beelzebub (49,23)
* '''Bosses''': Beelzebub (49,23)
*'''Items''': Goddess Shield, High Potion, Katana, Manna Prism, Resist Dark, Ring of Arcana, Turquoise
* '''Items''': Goddess Shield, High Potion, Katana, Manna Prism, Resist Dark, Ring of Arcana, Turquoise
{{-}}
{{-}}
==Details==
==Details==
Assume that you come from {{~|Black Marble Gallery}}.
Assume that you come from [[../Black Marble Gallery/]].
;(41,25)
;(41,25)
:The room seems to be empty, but if you stand still, you can see a few Bitterflies around. They are only visible when you do not move. Grab a Turqoise from upper right, and proceed through a passage of Gremlins.
:The room seems to be empty, but if you stand still, you can see a few Bitterflies around. They are only visible when you do not move. Grab a Turqoise from upper right, and proceed through a passage of Gremlins.
;(47,25)
:Take the save room on the left. The upper right leads to a boss room. Caution: '''Grotesque inside'''.
;(44,23)
:After another passage of Gremlins, this seemingly empty shaft is full of annoying Imps. In the middle room you can find Goddess Shield.
;(46,17)
:Lesser Demons again, in a horde, and they copy themselves. There is a Fire Demon in the lower floor, and a Ctulhu in the upper floor with a Manna Prism. Use the save room when necessary.
;(46,15)
:The left exit leads to [[../Reverse Entrance/]]. Grab the Resist Dark on the right.
;(48,18)
:A single Fire Demon guards a High Potion in the room behind.
;(49,17)
:You will be facing Salem Witch with Gremlins. Behind the right wall is a '''Heart Container''', and above the "ceiling" is a Katana.
;(51,20)
:Imps, Bitterflies and Salem Witch combo. Beware of spike contraptions on the floor. The lower left leads to a '''Life Vial'''.
;(53,21)
:Another two Salem Witches. Save before going lower left to the grotesque boss. The lower right exit leads to a passage to [[../Anti-Chapel/]].
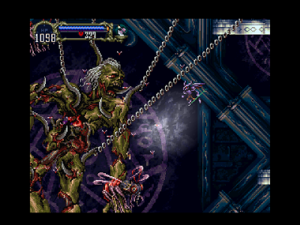
:Hope you are not just after a meal. This disgusting boss is composed of many rotten body parts, which continuously attract giant flies, and drop poisonous maggots on the ground. He does not attack directly though.
;Strategy
;Strategy
:
:Get your Topaz Circlet to ignore the maggots. You will need some ranged weapons to deal with his various body parts, like Axe and Cross.
;Afterwards
:The lower left room has another Ring of Arcana, your friend of treasure hunt.
{{-}}
{{-}}
{{Footer Nav|game=Castlevania: Symphony of the Night|prevpage=Reverse Cursed Prison|nextpage=Reverse Entrance}}
{{Footer Nav|game=Castlevania: Symphony of the Night|prevpage=|nextpage=}}
The room seems to be empty, but if you stand still, you can see a few Bitterflies around. They are only visible when you do not move. Grab a Turqoise from upper right, and proceed through a passage of Gremlins.
(47,25)
Take the save room on the left. The upper right leads to a boss room. Caution: Grotesque inside.
(44,23)
After another passage of Gremlins, this seemingly empty shaft is full of annoying Imps. In the middle room you can find Goddess Shield.
(46,17)
Lesser Demons again, in a horde, and they copy themselves. There is a Fire Demon in the lower floor, and a Ctulhu in the upper floor with a Manna Prism. Use the save room when necessary.
(46,15)
The left exit leads to Reverse Entrance. Grab the Resist Dark on the right.
(48,18)
A single Fire Demon guards a High Potion in the room behind.
(49,17)
You will be facing Salem Witch with Gremlins. Behind the right wall is a Heart Container, and above the "ceiling" is a Katana.
(51,20)
Imps, Bitterflies and Salem Witch combo. Beware of spike contraptions on the floor. The lower left leads to a Life Vial.
(53,21)
Another two Salem Witches. Save before going lower left to the grotesque boss. The lower right exit leads to a passage to Anti-Chapel.
Hope you are not just after a meal. This disgusting boss is composed of many rotten body parts, which continuously attract giant flies, and drop poisonous maggots on the ground. He does not attack directly though.
Strategy
Get your Topaz Circlet to ignore the maggots. You will need some ranged weapons to deal with his various body parts, like Axe and Cross.
Afterwards
The lower left room has another Ring of Arcana, your friend of treasure hunt.