[[File:Castlevania SotN area map Underground Caverns.png|center|800px]]
[[File:Castlevania SotN area map Underground Caverns.png|center|800px]]
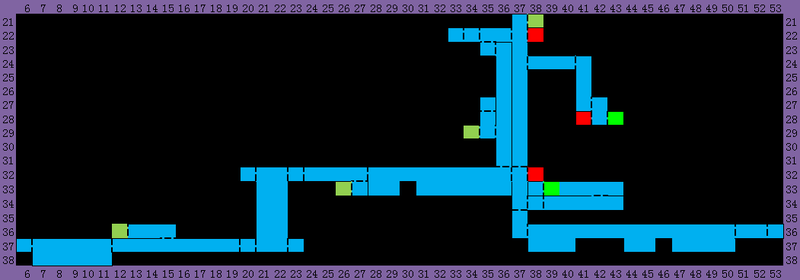
*'''Save Room''': (38,22), (38,32) and (41,28)
* '''Save Room''': (38,22), (38,32) and (41,28)
*'''Warp Room''': none
* '''Warp Room''': none
*'''Exits''': (38,21) to {{~|Marble Gallery}}, (34,29) to {{~|Cursed Prison}} (Sega Saturn only), (12,36) to {{~|Entrance}}, and (26,33) to {{~|Abandoned Mine}}
* '''Exits''': (38,21) to [[../Marble Gallery/]], (34,29) to [[../Cursed Prison/]] (Sega Saturn only), (12,36) to [[../Entrance/]], and (26,33) to [[../Abandoned Mine/]]
*'''Powerups''': Life Vial x5, Heart Container x2
* '''Powerups''': Life Vial x5, Heart Container x2
*'''Relics''': Merman Statue (6,37), Holy Symbol (53,36)
* '''Relics''': Merman Statue (6,37), Holy Symbol (53,36)
*'''Enemies''': Bat, Bone Archer, Fishhead, Frog, Frozen Shade, Killer Fish, Scylla Wyrm, Skeleton Ape, Spear Guard, Toad
* '''Enemies''': Bat, Bone Archer, Fishhead, Frog, Frozen Shade, Killer Fish, Scylla Wyrm, Skeleton Ape, Spear Guard, Toad
Right after buying '''Jewel of Open''', you can access this area early.
Right after buying '''Jewel of Open''', you can access this area early.
;(37,21):The first thing is to snatch a Zircon from the pot in front. Drop down the shaft with a few Spear Guards, now taking advantage of the platforms. The first exit to the right leads to a save room, the second cannot be accessed without '''Soul of Bat''', and below is a pit leading to the room below. The left exit leads to another shaft where you can climb up from the bottom.
;(37,21):The first thing is to snatch a Zircon from the pot in front. Drop down the shaft with a few Spear Guards, now taking advantage of the platforms. The first exit to the right leads to a save room, the second cannot be accessed without '''Soul of Bat''', and below is a pit leading to the room below. The left exit leads to another shaft where you can climb up from the bottom.
;(36,22) to (36,31):Other than Spear Guards, you will also face Bone Archers in the shaft. Take in mind that Spear Guards can utilize their extendable spears. Note the exit on the left at (36,29), and the Toadstool at (36,31).
;(36,22) to (36,31):Other than Spear Guards, you will also face Bone Archers in the shaft. Take in mind that Spear Guards can utilize their extendable spears. Note the exit on the left at (36,29), and the Toadstool at (36,31).
;(34,22):You can find a '''Heart Container''', but this room has a secret on the left wall, with a Bandanna in the room behind.
;(34,22):You can find a '''Heart Container''', but this room has a secret on the left wall, with a Bandanna in the room behind.
;(35,29):Move up to find a '''Life Vial''' in another room. For those playing Sega Saturn version, there will be a door on the left, leading to {{~|Cursed Prison}}.
;(35,29):Move up to find a '''Life Vial''' in another room. For those playing Sega Saturn version, there will be a door on the left, leading to [[../Cursed Prison/]].
;(37,32):To the right is another save room. At the bottom of the room, move to the right to encounter a boss, and you may want to break the floor to discover a hidden area, only finding it a watery-end. Instead, proceed to the left.
;(37,32):To the right is another save room. At the bottom of the room, move to the right to encounter a boss, and you may want to break the floor to discover a hidden area, only finding it a watery-end. Instead, proceed to the left.
;Intro - (38,34):You will first encounter a single Scylla Wyrm, which is easy. Move right afterwards.
;Intro - (38,34):You will first encounter a single Scylla Wyrm, which is easy. Move right afterwards.
;(39,34):The path you came will be blocked and the water will rise. Hurry up to the right and move up in the middle, if you have not obtained '''Holy Symbol'''.
;(39,34):The path you came will be blocked and the water will rise. Hurry up to the right and move up in the middle, if you have not obtained '''Holy Symbol'''.
;(42,33):The water will stop rising. Move to the right and get a Pot Roast from a pot, then move left to see...
;(42,33):The water will stop rising. Move to the right and get a Pot Roast from a pot, then move left to see...
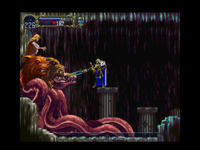
[[File:Castlevania SotN Underground Caverns 3.png|thumb|right|200px|As ugly as her heart.]]
[[File:Castlevania SotN Underground Caverns 3.png|thumb|right|200px|As ugly as her heart.]]
;Characteristics:She comes with three Scylla Wyrms. For herself, she calls out droplets and turn them into skulls and shoot at you, occasionally with a water blade. She may also cause debris to fall off the ceiling.
;Characteristics:She comes with three Scylla Wyrms. For herself, she calls out droplets and turn them into skulls and shoot at you, occasionally with a water blade. She may also cause debris to fall off the ceiling.
;Strategy:As she is stationery, keep your distance and remove those Scylla Wyrms first. The rest thing is standard fare.
;Strategy:As she is stationery, keep your distance and remove those Scylla Wyrms first. The rest thing is standard fare.
;Afterwards - (38,33):This lone room contains a Crystal Cloak, which makes you somewhat transparent. For Sega Saturn players, the cloak will be Glaring Cloth, which glimmers instead.
;Afterwards - (38,33):This lone room contains a Crystal Cloak, which makes you somewhat transparent. For Sega Saturn players, the cloak will be Glaring Cloth, which glimmers instead.
;Afterwards - (42,34):The water is gone. There is a Scimitar in the right end, and a Resist Ice on the left.
;Afterwards - (42,34):The water is gone. There is a Scimitar in the right end, and a Resist Ice on the left.
;(36,32):You can find a Shiitake on the ground, and there are more in the area. On the ground, the main enemies are Toads and Frogs. Four Spear Guards block the path to the left. In order to clear them forever, push the wooden box to the left, closing the water drain, and they will be drown. There are other goods in the water, but ignore them now. Instead, proceed to the left.
;(36,32):You can find a Shiitake on the ground, and there are more in the area. On the ground, the main enemies are Toads and Frogs. Four Spear Guards block the path to the left. In order to clear them forever, push the wooden box to the left, closing the water drain, and they will be drown. There are other goods in the water, but ignore them now. Instead, proceed to the left.
;(27,32):Ignore the powerups under the wooden bridge, as you cannot reach them now. The long cave has more Frogs and Toads.
;(27,32):Ignore the powerups under the wooden bridge, as you cannot reach them now. The long cave has more Frogs and Toads.
;(23,32):A Pentagram is in the water flow. You can take it in the expense of some water damage, or return here later.
;(23,32):A Pentagram is in the water flow. You can take it in the expense of some water damage, or return here later.
;(22,32):It is a waterfall. The upper left is too far away, so just go down. You can find Shiitake, Secret Boots and Toadstool on the cliffs during your falling. At the bottom of the waterfall, you can exit from the left, but there is a cave behind the waterfall.
;(22,32):It is a waterfall. The upper left is too far away, so just go down. You can find Shiitake, Secret Boots and Toadstool on the cliffs during your falling. At the bottom of the waterfall, you can exit from the left, but there is a cave behind the waterfall.
;(23,37):A lone Frozen Shade is guarding a '''Life Vial'''.
;(23,37):A lone Frozen Shade is guarding a '''Life Vial'''.
;(19,37):After an empty room, you will encounter some Frozen Shades. Beware that the thin ice will shatter if you set foot on it. There is an exit in the middle, but ignore it now and proceed to the left.
;(19,37):After an empty room, you will encounter some Frozen Shades. Beware that the thin ice will shatter if you set foot on it. There is an exit in the middle, but ignore it now and proceed to the left.
;(11,37):A ferryman is waiting for you with his boat, and he will speak to you when you take his ride for the first time. His speech in Japanese version is taken from [[Castlevania II: Simon's Quest|Simon's Quest]]. Beware of Bats on your ride. The boat will fall off and go through a lower channel, where a candle containing $2000 is high in the ceiling. The machine will pick up the boat and drop it on the higher part, proceeding to the end. In the lone room to the far left you can find '''Merman Statue''', which is necessary to call a second ferryman. Now leave this place by taking another boat ride.
;(11,37):A ferryman is waiting for you with his boat, and he will speak to you when you take his ride for the first time. His speech in Japanese version is taken from [[Castlevania II: Simon's Quest|Simon's Quest]]. Beware of Bats on your ride. The boat will fall off and go through a lower channel, where a candle containing $2000 is high in the ceiling. The machine will pick up the boat and drop it on the higher part, proceeding to the end. In the lone room to the far left you can find '''Merman Statue''', which is necessary to call a second ferryman. Now leave this place by taking another boat ride.
;(15,36):If you cannot fly, this will be the only exit you can take, which leads you to {{~|Entrance}}. Do not forget the Shiitake.
;(15,36):If you cannot fly, this will be the only exit you can take, which leads you to [[../Entrance/]]. Do not forget the Shiitake.
{{-}}
{{-}}
== The Second Ride ==
== The Second Ride ==
With '''Merman Statue''', you can find a method to swim safely.
With '''Merman Statue''', you can find a method to swim safely.
;(37,34):Now you can break the floor and move down. Beware of Frozen Shades.
;(37,34):Now you can break the floor and move down. Beware of Frozen Shades.
;(38,36):The '''Merman Statue''' is necessary to call the second ferryman, who uses the same speech to the hidden [[Castlevania II: Simon's Quest/Braham Mansion|Braham Mansion]]. The longer ride has more Bats, and you must crouch down when passing narrow tunnels. Ignore the Onyx in the middle of the ride. The ferryman will open a heavy door at the far right in order to let Alucard proceed. Richter and Maria will simply be blocked from going further.
;(38,36):The '''Merman Statue''' is necessary to call the second ferryman, who uses the same speech to the hidden [[Castlevania II: Simon's Quest/Braham Mansion|Braham Mansion]]. The longer ride has more Bats, and you must crouch down when passing narrow tunnels. Ignore the Onyx in the middle of the ride. The ferryman will open a heavy door at the far right in order to let Alucard proceed. Richter and Maria will simply be blocked from going further.
;(53,36):After another empty room, you can finally get '''Holy Symbol''', or "holy snorkel" from the shape. With this item you will not take damage while under water.
;(53,36):After another empty room, you can finally get '''Holy Symbol''', or "holy snorkel" from the shape. With this item you will not take damage while under water.
;(50,36):On your way return, there are some items in the water, including an Elixir, a '''Life Vial''' and a Knuckle Duster. The Onyx may be a little high, but you can ride the boat and collect it without double jump.
;(50,36):On your way return, there are some items in the water, including an Elixir, a '''Life Vial''' and a Knuckle Duster. The Onyx may be a little high, but you can ride the boat and collect it without double jump.
;(36,32):Now you can collect the goods in the water, including a Nunchaku, a '''Life Vial''' and more.
;(36,32):Now you can collect the goods in the water, including a Nunchaku, a '''Life Vial''' and more.
{{-}}
{{-}}
== Move Deeper ==
== Move Deeper ==
You must have '''Leap Stone''' to discover a new area.
You must have '''Leap Stone''' to discover a new area.
;(22,32):Start from top of the waterfall. With double jump you can reach the upper left.
;(22,32):Start from top of the waterfall. With double jump you can reach the upper left.
;(20,32):Push the button on the left wall, and a Skeleton Ape will appear and throw his barrel, blowing up the wooden bridge below. You will also get a message of something appearing at the other side of waterfall. Pick up the Herald Shield and move all the way right.
;(20,32):Push the button on the left wall, and a Skeleton Ape will appear and throw his barrel, blowing up the wooden bridge below. You will also get a message of something appearing at the other side of waterfall. Pick up the Herald Shield and move all the way right.
;(27,32):Another Skeleton Ape appears in this cave. Enter this room from the right, lure him to the wooden bridge and let him destroy the bridge with his barrel. Before going down to {{~|Abandoned Mine}}, pick up the '''Life Vial''' and '''Heart Container'''.
;(27,32):Another Skeleton Ape appears in this cave. Enter this room from the right, lure him to the wooden bridge and let him destroy the bridge with his barrel. Before going down to [[../Abandoned Mine/]], pick up the '''Life Vial''' and '''Heart Container'''.
{{-}}
{{-}}
== Riddle of the Castle ==
== Riddle of the Castle ==
Finally, with '''Soul of Bat''', you can start solving the mystery.
Finally, with '''Soul of Bat''', you can start solving the mystery.
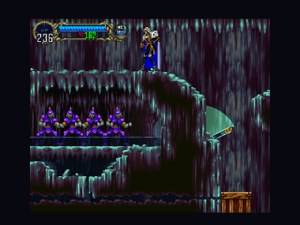
[[File:Castlevania SotN Underground Caverns 4.png|thumb|right|200px|The odd save room.]]
[[File:Castlevania SotN Underground Caverns 4.png|thumb|right|200px|The odd save room.]]
;(37,24):The candle on the left contains $400. Move to the right and go through a few rooms without enemies. Pick up Claymore before going down.
;(37,24):The candle on the left contains $400. Move to the right and go through a few rooms without enemies. Pick up Claymore before going down.
;(42,27):Four of the pots contain Meal Ticket, and the last with Moonstone. Take a rest in the bottom left save room, then go right.
;(42,27):Four of the pots contain Meal Ticket, and the last with Moonstone. Take a rest in the bottom left save room, then go right.
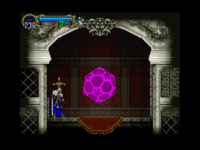
;(43,28):It looks like a save room, but the object in the middle is purple. Use this room and... Richter and Maria will only find an empty room.
;(43,28):It looks like a save room, but the object in the middle is purple. Use this room and... Richter and Maria will only find an empty room.
{{-}}
{{-}}
== Boss: Succubus ==
== Boss: Succubus ==
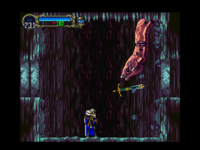
[[File:Castlevania SotN Underground Caverns 5.png|thumb|right|200px|Alucard still has something he cannot forget.]]
[[File:Castlevania SotN Underground Caverns 5.png|thumb|right|200px|Alucard still has something he cannot forget.]]
[[File:Castlevania SotN Underground Caverns 6.png|thumb|right|200px|But it is someone else playing with him.]]
[[File:Castlevania SotN Underground Caverns 6.png|thumb|right|200px|But it is someone else playing with him.]]
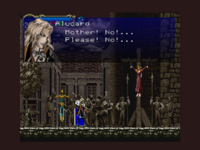
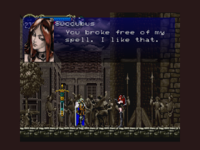
;Intro:It seems that Alucard returns to the scene when his mother Lisa is going to be burnt. But this "Lisa" talks a bit weird. It is actually Succubus playing the trick.
;Intro:It seems that Alucard returns to the scene when his mother Lisa is going to be burnt. But this "Lisa" talks a bit weird. It is actually Succubus playing the trick.
;Characteristics:She will always be flying. Her first attack extends some spikes from her wing. Her second attack creates some illusion and shoots energy balls. Finally, she can shoot flower petals which can curse you.
;Characteristics:She will always be flying. Her first attack extends some spikes from her wing. Her second attack creates some illusion and shoots energy balls. Finally, she can shoot flower petals which can curse you.
;Strategy:Stay below her and watch her attacks. If she duplicates herself, just slash the duplicates until the real one takes damage and interrupts her attack. Otherwise, just dodge them and attack from safe zones.
;Strategy:Stay below her and watch her attacks. If she duplicates herself, just slash the duplicates until the real one takes damage and interrupts her attack. Otherwise, just dodge them and attack from safe zones.
;Afterwards:After defeat, Succubus finally realizes that her opponent is someone she shall not play with. But it is too late, Alucard just cannot forgive her playing with his painful memory. Out of the nightmare, the '''Gold Ring''', which is related to the secret of castle, will appear.
;Afterwards:After defeat, Succubus finally realizes that her opponent is someone she shall not play with. But it is too late, Alucard just cannot forgive her playing with his painful memory. Out of the nightmare, the '''Gold Ring''', which is related to the secret of castle, will appear.
{{-}}
{{-}}
{{Footer Nav|game=Castlevania: Symphony of the Night|prevpage=Long Library|nextpage=Royal Chapel}}
{{Footer Nav|game=Castlevania: Symphony of the Night|prevpage=Long Library|nextpage=Royal Chapel}}
Right after buying Jewel of Open, you can access this area early.
(37,21)
The first thing is to snatch a Zircon from the pot in front. Drop down the shaft with a few Spear Guards, now taking advantage of the platforms. The first exit to the right leads to a save room, the second cannot be accessed without Soul of Bat, and below is a pit leading to the room below. The left exit leads to another shaft where you can climb up from the bottom.
(36,22) to (36,31)
Other than Spear Guards, you will also face Bone Archers in the shaft. Take in mind that Spear Guards can utilize their extendable spears. Note the exit on the left at (36,29), and the Toadstool at (36,31).
(34,22)
You can find a Heart Container, but this room has a secret on the left wall, with a Bandanna in the room behind.
(35,29)
Move up to find a Life Vial in another room. For those playing Sega Saturn version, there will be a door on the left, leading to Cursed Prison.
(37,32)
To the right is another save room. At the bottom of the room, move to the right to encounter a boss, and you may want to break the floor to discover a hidden area, only finding it a watery-end. Instead, proceed to the left.
You will first encounter a single Scylla Wyrm, which is easy. Move right afterwards.
(39,34)
The path you came will be blocked and the water will rise. Hurry up to the right and move up in the middle, if you have not obtained Holy Symbol.
(42,33)
The water will stop rising. Move to the right and get a Pot Roast from a pot, then move left to see...
As ugly as her heart.
Characteristics
She comes with three Scylla Wyrms. For herself, she calls out droplets and turn them into skulls and shoot at you, occasionally with a water blade. She may also cause debris to fall off the ceiling.
Strategy
As she is stationery, keep your distance and remove those Scylla Wyrms first. The rest thing is standard fare.
Afterwards - (38,33)
This lone room contains a Crystal Cloak, which makes you somewhat transparent. For Sega Saturn players, the cloak will be Glaring Cloth, which glimmers instead.
Afterwards - (42,34)
The water is gone. There is a Scimitar in the right end, and a Resist Ice on the left.
You can find a Shiitake on the ground, and there are more in the area. On the ground, the main enemies are Toads and Frogs. Four Spear Guards block the path to the left. In order to clear them forever, push the wooden box to the left, closing the water drain, and they will be drown. There are other goods in the water, but ignore them now. Instead, proceed to the left.
(27,32)
Ignore the powerups under the wooden bridge, as you cannot reach them now. The long cave has more Frogs and Toads.
(23,32)
A Pentagram is in the water flow. You can take it in the expense of some water damage, or return here later.
(22,32)
It is a waterfall. The upper left is too far away, so just go down. You can find Shiitake, Secret Boots and Toadstool on the cliffs during your falling. At the bottom of the waterfall, you can exit from the left, but there is a cave behind the waterfall.
(23,37)
A lone Frozen Shade is guarding a Life Vial.
(19,37)
After an empty room, you will encounter some Frozen Shades. Beware that the thin ice will shatter if you set foot on it. There is an exit in the middle, but ignore it now and proceed to the left.
(11,37)
A ferryman is waiting for you with his boat, and he will speak to you when you take his ride for the first time. His speech in Japanese version is taken from Simon's Quest. Beware of Bats on your ride. The boat will fall off and go through a lower channel, where a candle containing $2000 is high in the ceiling. The machine will pick up the boat and drop it on the higher part, proceeding to the end. In the lone room to the far left you can find Merman Statue, which is necessary to call a second ferryman. Now leave this place by taking another boat ride.
(15,36)
If you cannot fly, this will be the only exit you can take, which leads you to Entrance. Do not forget the Shiitake.
With Merman Statue, you can find a method to swim safely.
(37,34)
Now you can break the floor and move down. Beware of Frozen Shades.
(38,36)
The Merman Statue is necessary to call the second ferryman, who uses the same speech to the hidden Braham Mansion. The longer ride has more Bats, and you must crouch down when passing narrow tunnels. Ignore the Onyx in the middle of the ride. The ferryman will open a heavy door at the far right in order to let Alucard proceed. Richter and Maria will simply be blocked from going further.
(53,36)
After another empty room, you can finally get Holy Symbol, or "holy snorkel" from the shape. With this item you will not take damage while under water.
(50,36)
On your way return, there are some items in the water, including an Elixir, a Life Vial and a Knuckle Duster. The Onyx may be a little high, but you can ride the boat and collect it without double jump.
(36,32)
Now you can collect the goods in the water, including a Nunchaku, a Life Vial and more.
Start from top of the waterfall. With double jump you can reach the upper left.
(20,32)
Push the button on the left wall, and a Skeleton Ape will appear and throw his barrel, blowing up the wooden bridge below. You will also get a message of something appearing at the other side of waterfall. Pick up the Herald Shield and move all the way right.
(27,32)
Another Skeleton Ape appears in this cave. Enter this room from the right, lure him to the wooden bridge and let him destroy the bridge with his barrel. Before going down to Abandoned Mine, pick up the Life Vial and Heart Container.
Alucard still has something he cannot forget.But it is someone else playing with him.
Intro
It seems that Alucard returns to the scene when his mother Lisa is going to be burnt. But this "Lisa" talks a bit weird. It is actually Succubus playing the trick.
Characteristics
She will always be flying. Her first attack extends some spikes from her wing. Her second attack creates some illusion and shoots energy balls. Finally, she can shoot flower petals which can curse you.
Strategy
Stay below her and watch her attacks. If she duplicates herself, just slash the duplicates until the real one takes damage and interrupts her attack. Otherwise, just dodge them and attack from safe zones.
Afterwards
After defeat, Succubus finally realizes that her opponent is someone she shall not play with. But it is too late, Alucard just cannot forgive her playing with his painful memory. Out of the nightmare, the Gold Ring, which is related to the secret of castle, will appear.