| (22 intermediate revisions by 8 users not shown) | |||
| Line 1: | Line 1: | ||
{{Header Nav|game=Warcraft III: Reign of Chaos}} | |||
== Chapter Introduction == | |||
The next morning, on the outskirts of Andorhal... | |||
==Mission Objectives== | ==Mission Objectives== | ||
;Main | {{col|3|begin}} | ||
;Main Quest - Recover Remains | |||
: | :Kill the Paladin | ||
: | :Bring Arthas to Kel'thuzad's tomb | ||
:-Arthas | :Arthas must Survive | ||
{{col|3}} | |||
;Main Quest - Establish A Base | |||
:Build a Necropolis | |||
:Haunt a Gold Mine | |||
:Build a Crypt | |||
:Build 3 Ziggurats | |||
:Build a Graveyard | |||
{{col|3}} | |||
;Main Quest - Claim The Urn | |||
:Kill the Paladins | |||
:Recover the Urn | |||
{{col|3|end}} | |||
==Starting Units== | |||
[[Image:W3_Mission2StartingTroops.PNG|Right|thumb|These are the units you start with.]] | |||
When this mission starts, you will have 5 Ghouls, 3 Meat Wagons and, of course, Arthas. Since Arthas must survive for the first part of the mission, you'll never want to send him without escort. | |||
{{-}} | |||
==The Paladin and Kel'Thuzad's tomb== | |||
[[Image:W3_Kel'Thuzad's_Tomb.PNG|Right|thumb|Kel'Thuzad's tomb.]] | |||
Move to the right of your screen until you see an orange scout tower. You can use your Meat Wagons to destroy the Tower easily when used in combination with the rest of your units or just by themselves. Not much farther down the path are two Footmen that you can overwhelm easily with your small force. Further down the path is a level two Paladin that will retreat to the right of your screen when you approach him. You can use your Meat Wagons to destroy the Guard Tower without having to take damage. You can destroy the rest of the buildings if you wish, but it is not necessary, as they do no damage and yield no items. | |||
Move toward the right of your screen slowly and you will meet four Footmen and some buildings. The Barracks farther in the base will remain inactive. The Paladin and Footman near the back of the orange base will attack you when you start attacking the Barracks, and when you kill the Paladin, he drops a Scroll of Healing. It's okay to lose a couple of Ghouls at this point, as you will be getting your base started once you complete this quest. Once you defeat the Paladin and footmen and you destroy the base, head toward the right of your screen and you will see a graveyard with a circle of power. Send Arthas to the circle and this will trigger a cutscene. Note that this Paladin is not part of the 3-Paladin quest. | |||
Your force will then be teleported to a completely separate part of the map. | |||
{{-}} | |||
==The Urn and the 3 Paladins== | |||
: | [[Image:W3_Rock_golem.PNG|Right|thumb|The Rock Golem.]] | ||
After your cutscene, you will have five Acolytes at your disposal. You will also be given an additional two Ghouls making seven if none of them died fighting the first Paladin. Start your base-building by Haunting the Gold Mine and building a Necropolis, then build a Crypt once you have blight to summon on, then start building about 8 Ziggurats at the north end of the base for defense tower upgrades later. once these buildings are done, start summoning a Graveyard near the trees for fast drop-off for your Ghouls. Upgrade your Ghouls' offensive and defensive abilities by researching Unholy Strength and Unholy Armor at the Graveyard when you have the gold. While you are training Arthas and building your base, the humans will send 3 Footmen around every 5 or 6 minutes. This is where your Spirit Towers come into play if you have built the Ziggurats near the northern edge of your base. You can upgrade these into Spirit Towers and have them deal with the Footmen, but be sure to group them together, and it's a good idea to build them around your Necropolis because when you upgrade it to the Halls Of The Dead it has a ranged attack to add to the Spirit Towers' defense | |||
[[Image:W3_Sasquatch.PNG|left|thumb|Sasquatch.]] | |||
If you wish, you can head to the bottom of your screen and fight a Rock Golem while you are waiting for your base to be finished. Regardless of when you fight him, make sure you have Arthas with you as well as seven Ghouls, or you may have a hard time beating him. Head towards the bottom of your screen and you well see a second Rock Golem. When fighting your second Golem, be careful not to have any of your units go too far to the right until everyone has healed and you have some backup, because there is a level nine Granite Golem over there. Note that a Granite Golem wastes Ghouls, because it does splash damage. When the Granite Golem is beaten, it drops a Pendant of Energy which gives Arthas an extra 150 Mana points; this will also probably level him up to level three. If you are running short on resources, you can have all your units wait in the base and wait while your Acolytes and Ghouls chop wood and mine gold while letting your Spirit Towers kill the Footmen that the navy blue base sends at you every 5 or 6 minutes, but don't forget to repair the Towers if they take damage. | |||
: | |||
Once you've beaten the Golems, head to the left of your screen, and you will enter a town. Follow the path down to find a Sasquatch hidden in the trees. One of the boxes to the right of the Sasquatch yields a healing potion. Head back up the path and head to the right and back to your base. Head toward the top of your screen and you will see a path leading north. Follow it around to the right, and you will find three Renegade Wizards. You can get a Voodoo Doll from them. Head back to your base and make preparations for fighting the Paladins. Just before re-entering your base, where the path bends south sharply, blow up some trees with your catapults to reveal a hidden path heading off to the left. At the end of this path are a couple of Sasquatches. They give you Claws of Attack +6. | |||
Before fighting the first of your three quest Paladins, train as many Ghouls as you can and, if you haven't already, upgrade your offense and defense for your Ghouls. | |||
{{-}} | |||
==The | ==The three Paladins== | ||
[[Image: | [[Image:W3_Paladin3.PNG|left|thumb|Number 2]] | ||
For the first Paladin, you should only need two full groups of units, made of Ghouls, in addition to Arthas. Make sure you heal your Ghouls whenever they need it with Arthas' Death Coil. Once you attack the Paladin, the 5 villagers will turn into militia and attack you. The Paladin is further in towards the back of the town from the villagers with a single Footman. The best way to kill the Paladin is to have all of your Ghouls attack him at the same time. After killing the first Paladin, he will drop a Potion Of Greater Healing. Move to the west and destroy the rest of the turquoise buildings with your Meat Wagons. A box in this area contains a Potion of Mana. | |||
[[Image:W3_Paladin2.PNG|right|thumb|The first of your 3 Paladins.]] | |||
On your way to the next Paladin, there is a knight patrolling between the buildings. The next Paladin you have to face will be level five so you should use three groups of Ghouls to attack at this point. Send in your Ghouls first and have Arthas' group attack the knight and Footman. Arthas can use his Death Coil to either heal an ally or damage the Paladin. When defeated, the Paladin drops Gloves of Haste, which increase attack speed for Arthas. There is a Barracks located to the north that will continue to produce units until destroyed. | |||
[[Image:W3_Uther.PNG|left|thumb|The Final Confrontation with Uther]] | |||
After destroying the rest of the dark blue buildings, regroup and train any reinforcements you will need. Have as many Ghouls as possible for the final Paladin, the level 10 Uther. This looks like it would be a difficult fight, but with three full groups of Ghouls it shouldn't last long; even when Uther uses Divine Shield, he will not last long once it has expired. | |||
Once he is defeated, avoid the Urn and collect some other items. You can follow the trail south and you will come to a farm with a quartet of sheep fenced in. One of them will drop a Goblin Night Scope. You can use the Meat Wagons to attack and destroy the trees blocking the fence - there is also a Scroll of Protection in a box near Uther's camp. Once you are done getting all of the items around the area, go back and collect the Urn from where Uther dropped it. You will trigger a cutscene and the end of this mission. | |||
You have plenty of resources in this scenario, so you can keep using Ghouls as cannon fodder, but if you want to reduce your casualties, you can push your static defences forward after each enemy attack wave. This is not quite a trivial proposition here, but you might want to learn how to do it now, because it is a useful strategy element. | |||
There are a couple of hidden areas on this map that have not been described, because they are window dressing only. | |||
== | ==Treasures== | ||
* '''Scroll of Healing''': from first Paladin | |||
* '''Pendant of Energy''': from Granite Golem | |||
* '''Potion of Healing''': from Sasquatch south of the town | |||
* '''Voodoo Doll''': from Rogue Wizards | |||
* '''Claws of Attack +6''': from hidden Sasquatch | |||
* '''Potion of Greater Healing''': from first quest Paladin | |||
* '''Potion of Mana''': box in middle of map | |||
* '''Gloves of Haste''': from second quest Paladin | |||
* '''Goblin Night Scope''': from sheep near Uther | |||
* '''Scroll of Protection''': from box near Uther | |||
== | {{Footer Nav|game=Warcraft III: Reign of Chaos|prevpage=Trudging through the Ashes|nextpage=Into the Realm Eternal}} | ||
Latest revision as of 05:07, 16 June 2019
Chapter Introduction[edit]
The next morning, on the outskirts of Andorhal...
Mission Objectives[edit]
- Main Quest - Recover Remains
- Kill the Paladin
- Bring Arthas to Kel'thuzad's tomb
- Arthas must Survive
- Main Quest - Establish A Base
- Build a Necropolis
- Haunt a Gold Mine
- Build a Crypt
- Build 3 Ziggurats
- Build a Graveyard
- Main Quest - Claim The Urn
- Kill the Paladins
- Recover the Urn
Starting Units[edit]
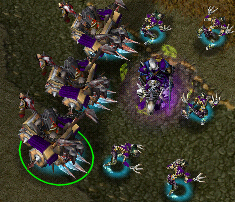
When this mission starts, you will have 5 Ghouls, 3 Meat Wagons and, of course, Arthas. Since Arthas must survive for the first part of the mission, you'll never want to send him without escort.
The Paladin and Kel'Thuzad's tomb[edit]
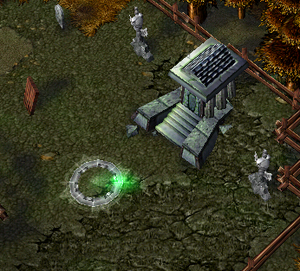
Move to the right of your screen until you see an orange scout tower. You can use your Meat Wagons to destroy the Tower easily when used in combination with the rest of your units or just by themselves. Not much farther down the path are two Footmen that you can overwhelm easily with your small force. Further down the path is a level two Paladin that will retreat to the right of your screen when you approach him. You can use your Meat Wagons to destroy the Guard Tower without having to take damage. You can destroy the rest of the buildings if you wish, but it is not necessary, as they do no damage and yield no items.
Move toward the right of your screen slowly and you will meet four Footmen and some buildings. The Barracks farther in the base will remain inactive. The Paladin and Footman near the back of the orange base will attack you when you start attacking the Barracks, and when you kill the Paladin, he drops a Scroll of Healing. It's okay to lose a couple of Ghouls at this point, as you will be getting your base started once you complete this quest. Once you defeat the Paladin and footmen and you destroy the base, head toward the right of your screen and you will see a graveyard with a circle of power. Send Arthas to the circle and this will trigger a cutscene. Note that this Paladin is not part of the 3-Paladin quest.
Your force will then be teleported to a completely separate part of the map.
The Urn and the 3 Paladins[edit]

After your cutscene, you will have five Acolytes at your disposal. You will also be given an additional two Ghouls making seven if none of them died fighting the first Paladin. Start your base-building by Haunting the Gold Mine and building a Necropolis, then build a Crypt once you have blight to summon on, then start building about 8 Ziggurats at the north end of the base for defense tower upgrades later. once these buildings are done, start summoning a Graveyard near the trees for fast drop-off for your Ghouls. Upgrade your Ghouls' offensive and defensive abilities by researching Unholy Strength and Unholy Armor at the Graveyard when you have the gold. While you are training Arthas and building your base, the humans will send 3 Footmen around every 5 or 6 minutes. This is where your Spirit Towers come into play if you have built the Ziggurats near the northern edge of your base. You can upgrade these into Spirit Towers and have them deal with the Footmen, but be sure to group them together, and it's a good idea to build them around your Necropolis because when you upgrade it to the Halls Of The Dead it has a ranged attack to add to the Spirit Towers' defense
If you wish, you can head to the bottom of your screen and fight a Rock Golem while you are waiting for your base to be finished. Regardless of when you fight him, make sure you have Arthas with you as well as seven Ghouls, or you may have a hard time beating him. Head towards the bottom of your screen and you well see a second Rock Golem. When fighting your second Golem, be careful not to have any of your units go too far to the right until everyone has healed and you have some backup, because there is a level nine Granite Golem over there. Note that a Granite Golem wastes Ghouls, because it does splash damage. When the Granite Golem is beaten, it drops a Pendant of Energy which gives Arthas an extra 150 Mana points; this will also probably level him up to level three. If you are running short on resources, you can have all your units wait in the base and wait while your Acolytes and Ghouls chop wood and mine gold while letting your Spirit Towers kill the Footmen that the navy blue base sends at you every 5 or 6 minutes, but don't forget to repair the Towers if they take damage.
Once you've beaten the Golems, head to the left of your screen, and you will enter a town. Follow the path down to find a Sasquatch hidden in the trees. One of the boxes to the right of the Sasquatch yields a healing potion. Head back up the path and head to the right and back to your base. Head toward the top of your screen and you will see a path leading north. Follow it around to the right, and you will find three Renegade Wizards. You can get a Voodoo Doll from them. Head back to your base and make preparations for fighting the Paladins. Just before re-entering your base, where the path bends south sharply, blow up some trees with your catapults to reveal a hidden path heading off to the left. At the end of this path are a couple of Sasquatches. They give you Claws of Attack +6.
Before fighting the first of your three quest Paladins, train as many Ghouls as you can and, if you haven't already, upgrade your offense and defense for your Ghouls.
The three Paladins[edit]
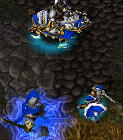
For the first Paladin, you should only need two full groups of units, made of Ghouls, in addition to Arthas. Make sure you heal your Ghouls whenever they need it with Arthas' Death Coil. Once you attack the Paladin, the 5 villagers will turn into militia and attack you. The Paladin is further in towards the back of the town from the villagers with a single Footman. The best way to kill the Paladin is to have all of your Ghouls attack him at the same time. After killing the first Paladin, he will drop a Potion Of Greater Healing. Move to the west and destroy the rest of the turquoise buildings with your Meat Wagons. A box in this area contains a Potion of Mana.
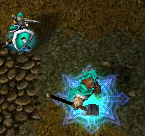
On your way to the next Paladin, there is a knight patrolling between the buildings. The next Paladin you have to face will be level five so you should use three groups of Ghouls to attack at this point. Send in your Ghouls first and have Arthas' group attack the knight and Footman. Arthas can use his Death Coil to either heal an ally or damage the Paladin. When defeated, the Paladin drops Gloves of Haste, which increase attack speed for Arthas. There is a Barracks located to the north that will continue to produce units until destroyed.
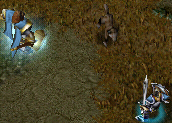
After destroying the rest of the dark blue buildings, regroup and train any reinforcements you will need. Have as many Ghouls as possible for the final Paladin, the level 10 Uther. This looks like it would be a difficult fight, but with three full groups of Ghouls it shouldn't last long; even when Uther uses Divine Shield, he will not last long once it has expired.
Once he is defeated, avoid the Urn and collect some other items. You can follow the trail south and you will come to a farm with a quartet of sheep fenced in. One of them will drop a Goblin Night Scope. You can use the Meat Wagons to attack and destroy the trees blocking the fence - there is also a Scroll of Protection in a box near Uther's camp. Once you are done getting all of the items around the area, go back and collect the Urn from where Uther dropped it. You will trigger a cutscene and the end of this mission.
You have plenty of resources in this scenario, so you can keep using Ghouls as cannon fodder, but if you want to reduce your casualties, you can push your static defences forward after each enemy attack wave. This is not quite a trivial proposition here, but you might want to learn how to do it now, because it is a useful strategy element.
There are a couple of hidden areas on this map that have not been described, because they are window dressing only.
Treasures[edit]
- Scroll of Healing: from first Paladin
- Pendant of Energy: from Granite Golem
- Potion of Healing: from Sasquatch south of the town
- Voodoo Doll: from Rogue Wizards
- Claws of Attack +6: from hidden Sasquatch
- Potion of Greater Healing: from first quest Paladin
- Potion of Mana: box in middle of map
- Gloves of Haste: from second quest Paladin
- Goblin Night Scope: from sheep near Uther
- Scroll of Protection: from box near Uther