Chapter Three
The next day, near the outskirts of the sacred Moonglade…
Mission Objectives
- Main Quest - Furion Stormrage
- Reach Moonglade Isle behind the Orc base
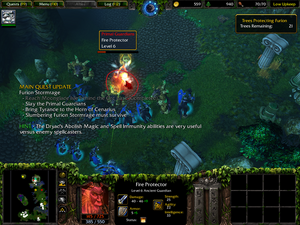
- Slay the Primal Guardians
- Bring Tyrande to the Horn of Cenarius
- Slumbering Furion Stormrage must survive
Overview
This mission is very easy at normal level, and very hard at hard level. There are two major differences. First, you get more than 3 full days to complete the mission at normal difficulty, but the timer runs shockingly faster at hard level, where you get at most two full days. The normal-mode strategy presented here, which allows you to complete the mission comfortably within the time limit while playing normally, and allows you to do all the secondary tasks, and allows you to minimize your casualties, simply cannot work on hard level. Second, the Orcs fight back viciously on hard mode, much stronger than on normal mode. Accordingly, the hard mode approach requires the usual cheats of clairvoyance (you need to know where everything is) and prescience (you need to know exactly what will happen). Even then, the strategy needs to minimize time; the cost being a loss of potential income and heavy casualties while abandoning all secondary issues.
Tower Attack
Any race except the Undead can do a Tower Attack. However, the Night Elves get the additional feature that, after they have built their "Towers" outside the enemy base (for example), they can walk them forward, fighting on the move. Perhaps the proper phrase is "crawl forward", because trees walk very slowly.
Overproduce workers
Because building a Night Elf "Tower" uses up a Wisp, if you know or expect that you will be building a bunch of "Towers", you can overproduce a bunch of Wisps early, and collect extra resources. Later on, you will free up those spots in the population roster.
The Undead
Don't waste any time or energy scouting the Undead positions to see how you can get at them. You can't, and the quest instructions actually explicitly tell you so. You are on a timer in this scenario, and the Undead have no function whatsoever here except to put a lot of window dressing on the timer.
Fire-and-forget Owl scouts
Queuing commands is a standard feature of Warcraft 3. You can generally assign multiple sequential commands to units by holding down the Shift key. In particular, this applies to the Owl scout. There are good reasons for following the Owl around in the main map window as it flies around, because it might be hard to determine what the Owl actually saw after it has left an area. However, if you simply want to reveal the terrain, or especially if you are pressed for time, you can spit out an Owl, select it, then R-click somewhere on the minimap, then Shift-R-click somewhere else on the minimap, and so on, and then deal with other matters while the Owl explores autonomously.
The plan
Hard Mode strategy
This is the first mission in the Night Elf campaign which really has the Hard Mode flavour to it. One hundred trees protecting Furion equals roughly 15 minutes. There’s no room for any mistakes. The focus of this strategy is to build an outpost early and close to the Orc base to deliver reinforcements directly to the battlefield.
There are a number of competing considerations that go into devising a strategy, such as minimizing the loss of gold to taxation. Due to the extreme time pressure in this scenario, the only consideration that matters is minimizing time spent. If you lose a bunch of gold to upkeep, it is irrelevant, because the scenario will not last longer than 2 full days, and there is no need to reserve any gold for later. There is no time to delay for any reason whatsoever. You have to pour the maximum number of troops possible into the enemy positions.
You will not be doing any exploring or scouting in this scenario. Either you've already played the scenario multiple times or you've read the walkthrough, so you already know exactly where everything is and exactly what will happen in the future.
Preparations

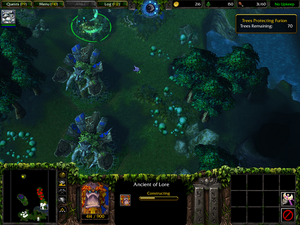
Build 5 additional Wisps and order them to collect lumber. Right away, uproot your Ancient of War and Ancient Protector and move them to the Fountain of Health found just outside the Orc Base to the NE. By the time both Ancients arrive, the Orc Raiders that are guarding the fountain will be killed by Tyrande.
Don’t build any units just yet. After Wisps are produced, the very first upgrade you need is Tree of Ages, because it lets you build Ballistas. While Tree of Ages is being researched, spend some of your gold on unit upgrades and build another Tree of Life next to the second Gold Mine in the east.
The initial army is enough to defeat the first (and the only) Orc attack of 4 Grunts. After dealing with them, your outpost should already be half completed. Build two Moon Wells west of the Fountain, another Ancient of War and one Ancient of Lore. Now you may expand your army. Start with Ballistas, then add Archers and Huntresses.
Counter-attack

Once your outpost is established and you have at least 3 Archers, 3 Huntresses, 3 Dryads, 3 Ballistas (and more in-production), you may start harassing the Orc Base. Attack their Watch Tower and get back to the Fountain. Do not enter(!) the Orc Base before defeating most of their forces. The Orcs are quick to train troops. You will simply find yourself overwhelmed.
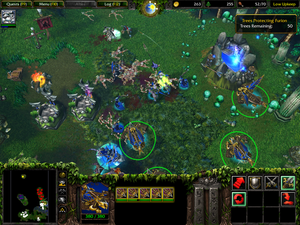
The most important battle will take place when the Blademaster Hero will come out at you. Fight him between the Fountain and the Moon Wells with Ballistas at the back. There is only one attempt. You either emerge victorious or you will start over again. It’s very important not to lose any Ballistas. Not even one.
After defeating the main Orc army, start pushing into their base right away. Your army is wounded, so take it slow and be careful, demolishing one building at a time. Keep units together. Focus fire. At this point you have 5 Ballistas; use them also to help your troops at the frontline. Ballistas are not to be used solely on buildings.
The attack should be executed as one single movement which might be slower at times, but without interruption. Throughout the attack, you are constantly producing new units on the background. Make sure to add them into your group to assign attack targets. Rally points should be set to Tyrande. Don’t let your attack die out. Meet the Orc reinforcements one by one.
Primal Guardians

Destroying the Orc base is not among the requirements (you only need to reach Moonglade), but it’s wise to get rid of the Great Hall and Peons. The Primal Guardians are quite powerful, and should you require reinforcements, it’s important that they meet no obstacles on the way. Do not underestimate the Orcs' ability to rebuild their base from scratch.
Take all of your assault force north. Ballistas once again will prove very useful. Continue producing reinforcements up until the last Primal Guardian, the Lightning Protector, is defeated. You’re doing it right if by the end of the mission you have accumulated no spare resources.
Mission checkpoints
At best, your buffer is roughly 10 trees, which is 1-2 minutes. The map has only two items of any real value given that Tyrande got many powerful treasures in the previous mission.
95 trees left: you are already building second Tree of Life
85 trees left: Ancients are rooted south of the Fountain
80 trees left: the first and the last attack by the Orcs defeated (4 Grunts)
70 trees left: outpost is almost completed
60 trees left: time to lure enemy Hero out (initial attack force produced)
50 trees left: Orc Hero and main army is defeated (slowly assault begins)
30 trees left: Orc base is going down
20 trees left: First Primal Guardian is engaged
10 trees left: Tyrande is at the Horn of Cenarius
Treasures
- Jade Ring outside the cave past the first Primal Guardian
- Anti-magic Potion in a crate to the right from the Horn of Cenarius
- Boots of Speed in a Murloc Hut
- Healing Wards next to gold mine within the Orc Base
The Healing Wards can be very useful. Expend one per Guardian. Drink the Anti-magic Potion just before the final battle. If you arrange things properly, you can still pick up the item you dropped to clear space in your pocketses before finishing the level. The Goblin Merchant sells several items that are fairly useful in this situation, due especially to the time pressure, but the time pressure means that you may not have time to go there.