Jump to navigation
Jump to search
m (cleanup) |
(some content from https://strategywiki.org/w/index.php?title=Super_Mario_World/Bosses&oldid=1008226) |
||
| (4 intermediate revisions by 4 users not shown) | |||
| Line 1: | Line 1: | ||
{{Header Nav|game=Super Mario World}} | {{Header Nav|game=Super Mario World}} | ||
{{SMW/Level | |||
|name=Lemmy's Castle | |||
|type=Castle | |||
|entrance=[[../Vanilla Dome 4/]] | |||
* | |exit=[[../Cheese Bridge Area/]] | ||
|timer=400 | |||
* | }} | ||
The final level inside Vanilla Dome is Lemmy's Castle. | |||
* | |||
** | ==Walkthrough== | ||
{{Scrolling map|SMW-VDCastle-1.png}} | |||
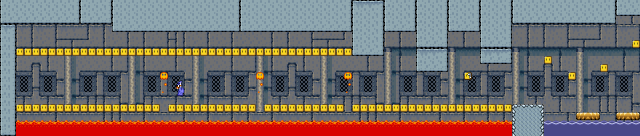
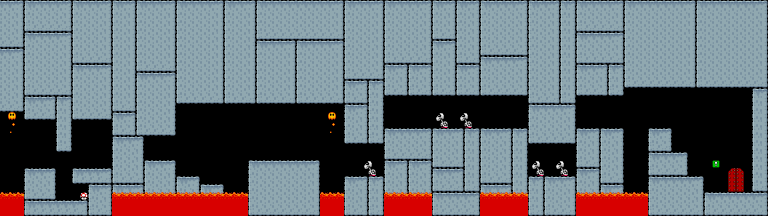
* {{s|Enemies|Magikoopa}} is patrolling this area and trying to hit you with his magic wand. If his spell hits a turn block, it will turn into a Koopa Troopa (or a Thwimp if you're below him). While you can stomp on him, he only disappears for a short while. | |||
* You will appear at the top. Let Magikoopa destroy one of the turn blocks and you can easily drop down to the lower level. | |||
* The lava pit shouldn't be too difficult to cross, just look out for the Podoboos. Near the end, you can grab a feather from the ? block. | |||
{{Footer Nav|game=Super Mario World|prevpage=Vanilla Dome 4|nextpage= | * When you reach the water area, use the wooden platforms to cross the water safely. | ||
{{Scrolling map|SMW-VDCastle-2.png}} | |||
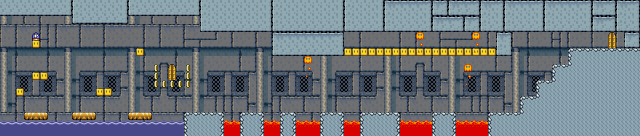
* Get up to the P-Switch and hit the turn block it's standing on from below so it falls down. Carry it over to the door enclosed in coins and collect some of the coins to create an opening. Now step on the P-Switch and the coins will turn into brown blocks which allows you to enter the door. It leads to the midway tape, which is certainly helpful in this level. | |||
* The Podoboos in the next area jump much higher - and you will still be attacked by Magikoopa. The door at the end leads to the third area - you will not get the opportunity to hit the midway tape if you go this path. | |||
{{Scrolling map|SMW-VDCastle-3.png}} | |||
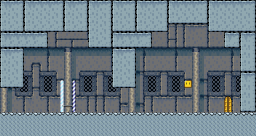
* If you went through the first door in the previous area, you will end up here. Hit the midway type and collect the 1-up mushroom from the turn block, then continue onward by going through the door. | |||
{{Scrolling map|SMW-VDCastle-4.png}} | |||
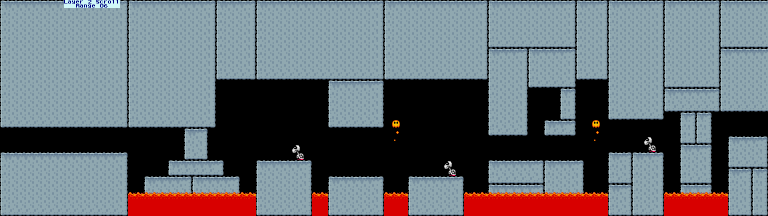
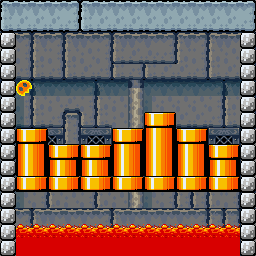
* The blocks move up and down and you will need to use them to cross the lava pit. This room is very difficult, because you'll need to time your jumps so you don't fall in the lava and don't get crushed by the blocks either. | |||
* For the first block, jump on it as it is rising. Once it moves down, quickly cross it and get on solid land before it sinks into the lava. | |||
* The other blocks are more straightforward to cross. If you don't do anything completely stupid, you should be fine. Remember to use the alcoves on your way to be safe from the lava. | |||
{{Scrolling map|SMW-VDCastle-5.png}} | |||
* Grab the mushroom from the small alcove if you need it, then continue onward. | |||
* The Dry Bones at the end can be really annoying. Stay away from them as the blocks are moving so they don't simply run into you. | |||
* At the end you can get a feather from the green switch block before continuing onward to the boss. | |||
===BOSS: Lemmy Koopa=== | |||
{{Scrolling map|SMW-VDCastle-6.png}} | |||
Lemmy Koopa will pop up from one of the various pipes, along with two easily distinguished fakes. You will need to stomp on the correct one three times to defeat him. Lemmy Koopa won't attack and the only real danger is the fireball patrolling the room. Use the spin jump to avoid the fireballs roaming the area. It is possible to jump on Lemmy's head after hitting one of his decoys, you just have to be quick about it. | |||
Once Lemmy Koopa is defeated, Mario destroys Lemmy's Castle. You will then continue onward to the Twin Bridges area. | |||
{{Footer Nav|game=Super Mario World|prevpage=Vanilla Dome 4|nextpage=Cheese Bridge Area}} | |||
Latest revision as of 23:50, 26 July 2023
| Lemmy's Castle | |
|---|---|
| Level type | Castle |
| Entrance | |
| Exit | |
| Secret Exit | None |
| Time at Start | 400 |
The final level inside Vanilla Dome is Lemmy's Castle.
Walkthrough[edit]

- Magikoopa is patrolling this area and trying to hit you with his magic wand. If his spell hits a turn block, it will turn into a Koopa Troopa (or a Thwimp if you're below him). While you can stomp on him, he only disappears for a short while.
- You will appear at the top. Let Magikoopa destroy one of the turn blocks and you can easily drop down to the lower level.
- The lava pit shouldn't be too difficult to cross, just look out for the Podoboos. Near the end, you can grab a feather from the ? block.
- When you reach the water area, use the wooden platforms to cross the water safely.

- Get up to the P-Switch and hit the turn block it's standing on from below so it falls down. Carry it over to the door enclosed in coins and collect some of the coins to create an opening. Now step on the P-Switch and the coins will turn into brown blocks which allows you to enter the door. It leads to the midway tape, which is certainly helpful in this level.
- The Podoboos in the next area jump much higher - and you will still be attacked by Magikoopa. The door at the end leads to the third area - you will not get the opportunity to hit the midway tape if you go this path.

- If you went through the first door in the previous area, you will end up here. Hit the midway type and collect the 1-up mushroom from the turn block, then continue onward by going through the door.

- The blocks move up and down and you will need to use them to cross the lava pit. This room is very difficult, because you'll need to time your jumps so you don't fall in the lava and don't get crushed by the blocks either.
- For the first block, jump on it as it is rising. Once it moves down, quickly cross it and get on solid land before it sinks into the lava.
- The other blocks are more straightforward to cross. If you don't do anything completely stupid, you should be fine. Remember to use the alcoves on your way to be safe from the lava.

- Grab the mushroom from the small alcove if you need it, then continue onward.
- The Dry Bones at the end can be really annoying. Stay away from them as the blocks are moving so they don't simply run into you.
- At the end you can get a feather from the green switch block before continuing onward to the boss.
BOSS: Lemmy Koopa[edit]

Lemmy Koopa will pop up from one of the various pipes, along with two easily distinguished fakes. You will need to stomp on the correct one three times to defeat him. Lemmy Koopa won't attack and the only real danger is the fireball patrolling the room. Use the spin jump to avoid the fireballs roaming the area. It is possible to jump on Lemmy's head after hitting one of his decoys, you just have to be quick about it.
Once Lemmy Koopa is defeated, Mario destroys Lemmy's Castle. You will then continue onward to the Twin Bridges area.