Walkthrough[edit]
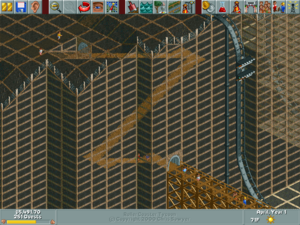
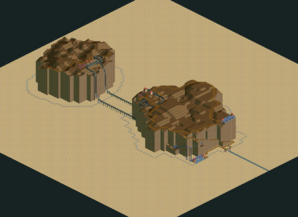
The sequel to Thunder Rock brings us not one but two giant rocks in the middle of a desert. With a larger area to work with, you'll need to lure in a larger amount of guests than the first Thunder Rock. Despite the elevation bringing in some issues with ride construction, beating this scenario should be a breeze as long as you plan carefully.
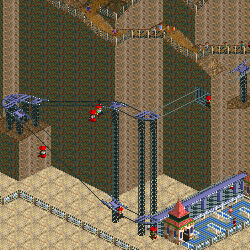
The park already comes with a Chairlift and a Vertical Roller Coaster. The thing about the coaster is that it has multiple stations which drops guests off at the other rock and if they want to go home, they have to take the coaster again. Guests don't know that the coaster is the only way for them to get back; if they get lost by being stranded on that rock, your park rating will go down. First, set the rides to ten-minute inspection times and raise the price of the coaster by two or three dollars. Set research to maximum and focus on roller coasters to get the classic Steel variant. Finally, add benches, stalls, bins, and handymen to keep the park well maintained.
Pathways have a maximum support height of 15, which means that making a path from rock to rock will require some expensive landscaping. However, building underground ignores the support limit. Before starting, go to view options and turn on "Height Marks on Paths" to guide you. Next, find a spot on the first rock where you can lower the ground. Have the path build downward at the spot where you lowered the ground until the path goes underground. Keep the path going downward until you reach a suitable elevation, then turn the path to build out of the first rock and go across to the second where you'll make another tunnel. Have the path slant upward until you finally reach the top of the second rock. Alternatively, you can also remove the Vertical Coaster entirely and using the second rock only for ride space if building the path is too much of a hassle.
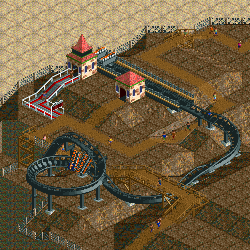
Once the path is dealt with, it's time to focus on building rides for the park. Like before, only certain tracked rides can be built handing over the edge of the rocks, so it's better to stay within the rock's boundaries. While the first rock has plenty of good areas to build rides, the second one is a lot more jagged and may require some landscaping to make reasonable spots for rides. If you find yourself out of space, you can always build into the rocks for underground rides or even build on top of the rock and have the coaster tunnel into it with a big drop. Unfortunately, the coasters with tiny turns like the Wild Mouse coasters are far down on the research list, so you'll have to dedicate some time to unlock them if you want compact coasters.

You should easily reach 700 guests by the end of the first year, if not more. As always, keep the park growing with a steady supply of coasters as they'll always be the biggest draw. Despite the rough terrain, you should be able to fit at least a half dozen coasters easily. If guests aren't coming in as much, make sure to advertise to keep the growth going.
Starting Rides[edit]
| Roller Coaster 1 |
| Excitement: 7.18 · Intensity: 6.52 · Nausea: 2.87 |
| Max Speed: 65 mph/104 kmh · Average Speed: 15 mph/25 khm |
| Ride Time · 29s, 38s · Ride Length: 800 ft, 1,112 ft /244 m, 339 m |
| Positive Vert Gs: 4.15g · Negative Vert Gs: -1.33g · Lateral Gs: 1.13g |
| Air Time: n/a · Drops: 9 |
| Highest Drops: 114 ft/35 m · Inversions: n/a |
| Thunder Rock Chairlift |
| Excitement: 2.41 · Intensity: 0.55 · Nausea: 0.51 |
| Max Speed: 4 mph/6 kmh · Average Speed: 4 mph/6 khm |
| Ride Time · 1m 9s, 1m 33s · Ride Length: 623 ft, 767 ft/190 m, 234 m |
| Positive Vert Gs: n/a · Negative Vert Gs: -n/a · Lateral Gs: n/a |
| Air Time: n/a · Drops: n/a |
| Highest Drops: n/a · Inversions: n/a |
Available Items[edit]
Researchable Items[edit]
- Steel Roller Coaster
- Inverted Roller Coaster
- Wooden Twister Roller Coaster
- Suspended Single-Rail Roller Coaster
- Heartline Twister Roller Coaster
- Reverse Whoa Belly Roller Coaster
- Steel Corkscrew Roller Coaster
- Wooden Roller Coaster
- Bobsled Roller Coaster
- Wooden Crazy Rodent Roller Coaster
- Stand-Up Steel Roller Coaster
- Steel Twister Roller Coaster
- Virginia Reel
- Steel Wild Mouse Roller Coaster
- Suspended Looping Coaster
- Air Powered Vertical Coaster
- Inverted Wild Mouse Coaster
- Flying Roller Coaster
- None


