m (small fix) |
No edit summary |
||
| (9 intermediate revisions by 5 users not shown) | |||
| Line 2: | Line 2: | ||
==Back in Moonshade== | ==Back in Moonshade== | ||
You are back in MageLord's | {{floatingtoc}} | ||
[[File:Ultima_VII_-_SI_-_back_from_MoF.png|left|thumb|Back in Moonshade again]] | |||
You are back in he MageLord's house and Stefano will leave you and give you back his gear. Now you have to search for your friends to join you once again. | |||
*Dupre is drinking | *Dupre is drinking at the Tavern | ||
*Shamino is in West Forest at the | *Shamino is in West Forest at the street to the port. | ||
*Boydon is by Bucio's | *Boydon is by Bucio's side whenever she is. (If you have him in your party, that is) | ||
*Iolo is in Gustacio's House | *Iolo is in Gustacio's House | ||
[[File:Ultima_VII_-_SI_-_meet_Great_Earth_Serpent.png|right|thumb|You hear the Voice of Great Earth Serpent the first Time, but not the last Time.]] | |||
Shamino will give you 3 items: an apology-letter from Frigidazzi, [[File:Ultima_VII_-_SI_-_Serpent_Earrings.png]] '''Serpent Earrings''' and [[File:Ultima_VII_-_SI_-_Magic_Scroll.png]] '''Chill''' Scroll. When you got the Earring you will hear the voice of the Great Earth Serpent. Iolo will also tell you that he befriended Gustacio and you should talk with him. Go back to where you teleported from prison to take your stuff and sort it out with your Party. There is one key on the desk and two more in it. | |||
Talk to Ducio about the daemon sword and he will send you to Gustacio. Talk with him to learn that Mortegro was hit by lighting and disappeared. Don't worry you will find him later in the game. Ask him about the Demon Sword and he tell you that the Flux Analyzer, that can fix it, was stolen years ago. Now talk about Spells. If you help him with the Experiment, then he will teach you Spells for free. That is a good deal, so say yes. He will explain the Experiment in more detail and give you an [[File:Ultima_VII_-_SI_-_Energy_Globe.png]] '''Energy Globe'''. | |||
[[File:Ultima_VII_-_SI_-_Gustacios_Experiment.png|left|thumb|Gustacios Experiment is done here.]] | |||
Go to the Place at (36S, 142E) and place the [[File:Ultima_VII_-_SI_-_Energy_Globe.png]] Energy Globe on the Altar. Now pull up the Winch and pull all 8 Levers to observe the results of the Teleport Storms. Use the winch again to stop the storm and you get teleported to the Pit South of it. Go to the Altar again to collect your Friends and go back to Gustacio to give him your Reports. He will send you to Fedabiblio. Do so and talk with him about the Experiment. He gives the advice to look in the Crystal Ball and come back to him. Look in the Crystal Ball and you will see how Edrin was transformed into Ale the Parrot. Talk with Fedabiblio about that and he will send you back to Gustacio. Tell him that Ale is in fact Edrin himself. He will give you a new [[File:Ultima_VII_-_SI_-_Energy_Globe.png]] Energy Globe and a [[File:Ultima_VII_-_SI_-_Bird_Cage.png]] bird cage to put Ale into. | |||
Go back to the Altar once again. Put the new [[File:Ultima_VII_-_SI_-_Energy_Globe.png]] Energy Globe on the Altar and put the [[File:Ultima_VII_-_SI_-_Bird_Cage.png]] Cage with Ale on one of any 8 Pillars. Use the Winch then pull the Lever to change Ale back in Edrin. Talk with him about different things. One special note is his Dreams with Siranush. This Woman will be important later on. | |||
Go back to Gustacio and talk about Experiment. He is glad that you completed it and will give you the [[File:Ultima_VII_-_SI_-_Mirror_of_Truth.png]] '''Mirror of Truth'''. Then ask him about Spells. He will theach you all Spells for free. Pick '''Detect Trap''', '''Conjure''', '''Delayed Blast''' and '''Spiral Missiles'''. All other Spells are already learned by Scrolls or buyed. Now you have the Chill Spell transcribed into your [[File:Ultima_VII_-_SI_-_Spellbook.png]] Spellbook, you can buy the Key to the Catacombs from Julia for 40 [[File:Ultima_VII_-_SI_-_Guilders.png]] Guilders. | |||
Go back to Gustacio and talk about Experiment. He is glad that you completed it and will give you the Mirror of Truth. Then ask him about Spells. He will theach you all Spells for free. Pick Detect Trap, Conjure, Delayed Blast and Spiral Missiles. All other Spells are already learned by Scrolls or buyed. Now you have the Chill Spell transcribed into Spellbook, you can buy the Key to the Catacombs from Julia for 40 Guilders. | |||
==Furnace== | ==Furnace== | ||
[[File:Ultima_VII_-_SI_-_Catacomb.png|left|thumb|Map of Catacomb]] | |||
[[File:Ultima_VII_-_SI_-_Furnace.png|right|thumb|Map of Furnace]] | |||
{{-}} | |||
[[File:Ultima_VII_-_SI_-_Catacomb_Entrance.png|left|thumb|This is the Entrance to Furnace]] | |||
The Entrance to the Catacombs is at (96S, 132E) and Ernesto, a Ranger is wandering around there. Unlock the Door with the Key from Julia and go down. | The Entrance to the Catacombs is at (96S, 132E) and Ernesto, a Ranger is wandering around there. Unlock the Door with the Key from Julia and go down. | ||
It | It doesn't matter which path you take, since both lead to the same place. When you get to the bellows on the other side, search for a path leading east. You will come to a small "Village" where [[File:Ultima_VII_-_SI_-_Ratman.png]] Ratmen live. You may put them to sleep with the Magic Harp or you can kill them all for Exp. The first Crate you see in there are 78 [[File:Ultima_VII_-_Gold_Coins.png]] Gold Coins. Leave the Ratmen Village to the East. When you come across to a Crossing go West first. | ||
{{sidebar|width=200px|title=Keys|contents=The Key of Fire and Key of Ice cannot be put on Keyring, because they are needed to merge into the Blackrock Key.}} | |||
Remove the trash blocking the Path to the West. Kill the [[File:Ultima_VII_-_Undead.png]] Undead and take [[File:Ultima_VII_-_Sword_of_Defense.png]] Sword of Defense, 25 [[File:Ultima_VII_-_Gold_Coins.png]] Gold Coins and 2 Potions. Behind the Door to the West live a [[File:Ultima_VII_-_SI_-_Fire_Elemental.png]] Fire Elemental. Go back to the Crossing and go East until you come across a House where some [[File:Ultima_VII_-_SI_-_Wildman.png]] Wildmen are. Go West and take the Stairs. | |||
Go South to the Bridge and talk with Zhelkas. Say yes to taking the Test of Purity. Don't forget to cast Chill, otherwise you will suffer in the Heat. The Lever on Ground is stuck so push the Button on the Wall. Go through the open Door over the Bridge to the East ignoring the Stairs. You will then come to the Underground City. | |||
{{-|right}} | |||
If you go North passing a Room with some Ice Wine and then go West you will find 2 doubledoors that are magically locked. Unlock them both and push the Button to open another Door to the Startpoint. Go back to the City and go East to a Pool. Southwest from the Pool is a Corpse with another [[File:Ultima_VII_-_SI_-_Magic_Scroll.png]] '''Chill''' Scroll and 3 [[File:Ultima_VII_-_SI_-_Worm_Heart.png]] Worm Hearts. On the Ground near the Pool are 13 [[File:Ultima_VII_-_Gold_Coins.png]] Gold Coins. One of the corpses on North-side of the Pool has the Key of Fire. | |||
[[File:Ultima_VII_-_SI_-_found_Goblet.png|left|thumb|The filled Goblet is on the Table.]] | |||
If you go North passing a Room with some Ice Wine and then go West you will find 2 | {{sidebar|width=200px|title=Phospor|contents=You need to place 1 Serpentinium, 1 Agnium and 1 Zerine on the Pedal. Push the Button to create 1 Phospor. With it you can light up the Lamp in Furnace.}} | ||
Go North in the Library. There is only 3 available Books to read. All the other Books are unreadable. One Book tell how to use some Reagents to make Phospor and one tell what the use is for the Key of Fire and Ice and the last book tell about the Civil War. The Corpse in West Room has the Key to the Room under the Library. Unlock the Doors below and get Create Automaton Scroll, Telekinesis Scroll, Serpent Bond Scroll, Invoke Snow Serpent Scroll and 7 Worm Hearts. North of the Library is the Conjury. On the Table is the Everlasting Goblet. With that you never need to worry about Food ever again. In the Lab are alots Reagents to grab, but beware of taking it | Go North in the Library. There is only 3 available Books to read. All the other Books are unreadable. One Book tell how to use some Reagents to make Phospor and one tell what the use is for the Key of Fire and Ice and the last book tell about the Civil War. The Corpse in West Room has the Key to the Room under the Library. Unlock the Doors below and get [[File:Ultima_VII_-_SI_-_Magic_Scroll.png]] '''Create Automaton''' Scroll, [[File:Ultima_VII_-_SI_-_Magic_Scroll.png]] '''Telekinesis''' Scroll, [[File:Ultima_VII_-_SI_-_Magic_Scroll.png]] '''Serpent Bond''' Scroll, [[File:Ultima_VII_-_SI_-_Magic_Scroll.png]] '''Invoke Snow Serpent''' Scroll and 7 [[File:Ultima_VII_-_SI_-_Worm_Heart.png]] Worm Hearts. North of the Library is the Conjury. On the Table is the [[File:Ultima_VII_-_SI_-_Everlasting_Goblet.png]] '''Everlasting Goblet'''. With that you never need to worry about Food ever again. In the Lab are alots Reagents to grab, but beware of taking it, since some Tables are trapped. The Bedroom upstairs have more Reagents and Potions to take. | ||
East of the Pool is the Arena. Pull the Winch and enter it. The Gate will close and 4 Doors with 1 Automaton each will open. Kill all 4 Automatons and the Door to the Northeast will open. Get the Key which | East of the Pool is the Arena. Pull the Winch and enter it. The Gate will close and 4 Doors with 1 [[File:Ultima_VII_-_SI_-_Automaton_(Silver).png]] Automaton each will open. Kill all 4 [[File:Ultima_VII_-_SI_-_Automaton_(Silver).png]] Automatons and the Door to the Northeast will open. Get the Key on the floor which opens the Doubledoor just East from there. Enter it and ignore the magically Door and search the Corpse in Southeast Corner of the Mushroom Garden. It has the Key of Ice and a '''Serpent Tooth''' (it leads to Monitor). Another Corpse in the Middle of Room has one more [[File:Ultima_VII_-_SI_-_Magic_Scroll.png]] '''Chill''' Scroll and 3 [[File:Ultima_VII_-_SI_-_Worm_Heart.png]] Worm Hearts. South of it another Corpse has [[File:Ultima_VII_-_SI_-_Magic_Scroll.png]] '''Unlock Magic''' Scroll. Use it on the Door you ignored before and go North. You come across a Temple with the Fire and Ice Pillar. | ||
==Test of Purity== | ==Test of Purity== | ||
{{sidebar|width=200px|title=Fail Test|contents=In case if you fail the Test of | {{sidebar|width=200px|title=Fail Test|contents=In case if you fail the Test of Purity, then you need to get the Everlasting Goblet for Zhelkas to receive the [[File:Ultima_VII_-_SI_-_Serpent_Ring.png]] '''Serpent Ring'''.}} | ||
[[File:Ultima_VII_-_SI_-_found_Serpent_Staff.png|left|thumb|The Troll with the Sword has a Key to Serpent Staff.]] | |||
Click on the Fire Pillar and you will take to the Test of Purity. | Click on the Fire Pillar and you will take to the Test of Purity. | ||
*In the | *In the left room is Shamino who says to press the left button. It makes the women want to have sex with you. If you resist and press the right button, you will free the people here. | ||
*In the | *In the north is Iolo, who tries to convince you to go home through the Moongate. Say no repeatedly. | ||
*In the Last Room to the Right is Dupre and will explain the Rules to the Worm-Game. You need to kill 10 Worms with the Hammer. | *In the Last Room to the Right is Dupre and will explain the Rules to the Worm-Game. You need to kill 10 Worms with the Hammer. | ||
After you're done with the Test. You will receive the Serpent Ring from Zhelkas. Talk with him again to ask to leave Furnace. Go in the right Building and place the Key of Fire and Ice on | After you're done with the Test. You will receive the [[File:Ultima_VII_-_SI_-_Serpent_Ring.png]] '''Serpent Ring''' from Zhelkas. Talk with him again to ask to leave Furnace. Go in the right Building and place the Key of Fire and Ice on the altar to get the Blackrock Key. This key can now be put on Keyring and it opens the Door on second floor. The Teleporter behind it leads to a Serpent Gate and a Corpse with 3 [[File:Ultima_VII_-_SI_-_Magic_Scroll.png]] Magic Scrolls, but you already took it [[../Mad_Mage_Isle#Phoenix_Egg|before]]. | ||
The Left Buiding | The Left Buiding has 6 [[File:Ultima_VII_-_SI_-_Magic_Scroll.png]] '''Chill''' Scrolls to take. Go back to the starting point where you meet Zhelkas the first time. Ask him again to leave Furnace and he will pull the Lever to open the Door. Go South in the àtTroll infected lair. Go West from there to find the destroyed [[File:Ultima_VII_-_SI_-_Spellbook.png]] Spellbook and [[File:Ultima_VII_-_SI_-_Serpent_Staff.png]] '''Serpent Staff'''. One of the [[File:Ultima_VII_-_Troll.png]] Trolls here has the Key to Serpent Staff. Go South in the dirty Path the west to a dead end where a [[File:Ultima_VII_-_Magic_Axe.png]] Magic Axe is hidden under the Trash. Go back and go South and West. Go over the Bridge until you reach the Exit. You are now back on [[../World of Dreams|Mainland]]. | ||
{{-}} | |||
==Opportunities== | ==Opportunities== | ||
===Pit=== | ===Pit=== | ||
Try to get | Try to get into the Pit at (46S, 141E). You will fall in the Cave below. The dead Ranger has a [[File:Ultima_VII_-_SI_-_Magic_Bow.png]] Magic Bow and some [[File:Ultima_VII_-_Arrows.png]] Arrows. The Cave also have some [[File:Ultima_VII_-_Gazer.png]] Gazers. The Chest is locked and have [[File:Ultima_VII_-_Magic_Sling.png]] Magic Sling, [[File:Ultima_VII_-_SI_-_Door_Shield.png]] Door Shield and 85 [[File:Ultima_VII_-_Gold_Coins.png]] Gold Coins. Go up and take the Purple Key behind the Tree (It's hard to see it). | ||
==Reclaimed== | ==Reclaimed== | ||
===Spellbook=== | ===[[File:Ultima_VII_-_SI_-_Spellbook.png]] Spellbook=== | ||
The Spellbook is near the northren Fur Pallet, but if you try to take it, it'll get destroyed for good. At last | The [[File:Ultima_VII_-_SI_-_Spellbook.png]] Spellbook is near the northren Fur Pallet, but if you try to take it, it'll get destroyed for good. At last the [[File:Ultima_VII_-_SI_-_a_ruddy_Rock.png]] Stoneheart is still in your Possession. | ||
{{Footer Nav|game=Ultima VII Part Two: Serpent Isle|prevpage=Mountains of Freedom|nextpage=World of Dreams}} | {{Footer Nav|game=Ultima VII Part Two: Serpent Isle|prevpage=Mountains of Freedom|nextpage=World of Dreams}} | ||
Latest revision as of 19:30, 28 October 2022
Back in Moonshade[edit]
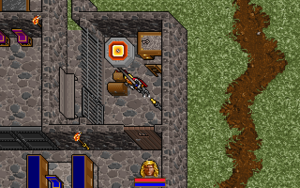
You are back in he MageLord's house and Stefano will leave you and give you back his gear. Now you have to search for your friends to join you once again.
- Dupre is drinking at the Tavern
- Shamino is in West Forest at the street to the port.
- Boydon is by Bucio's side whenever she is. (If you have him in your party, that is)
- Iolo is in Gustacio's House
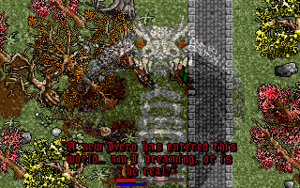
Shamino will give you 3 items: an apology-letter from Frigidazzi, ![]() Serpent Earrings and
Serpent Earrings and ![]() Chill Scroll. When you got the Earring you will hear the voice of the Great Earth Serpent. Iolo will also tell you that he befriended Gustacio and you should talk with him. Go back to where you teleported from prison to take your stuff and sort it out with your Party. There is one key on the desk and two more in it.
Chill Scroll. When you got the Earring you will hear the voice of the Great Earth Serpent. Iolo will also tell you that he befriended Gustacio and you should talk with him. Go back to where you teleported from prison to take your stuff and sort it out with your Party. There is one key on the desk and two more in it.
Talk to Ducio about the daemon sword and he will send you to Gustacio. Talk with him to learn that Mortegro was hit by lighting and disappeared. Don't worry you will find him later in the game. Ask him about the Demon Sword and he tell you that the Flux Analyzer, that can fix it, was stolen years ago. Now talk about Spells. If you help him with the Experiment, then he will teach you Spells for free. That is a good deal, so say yes. He will explain the Experiment in more detail and give you an ![]() Energy Globe.
Energy Globe.
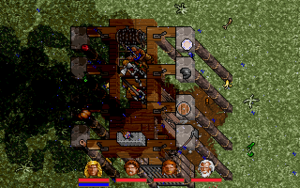
Go to the Place at (36S, 142E) and place the ![]() Energy Globe on the Altar. Now pull up the Winch and pull all 8 Levers to observe the results of the Teleport Storms. Use the winch again to stop the storm and you get teleported to the Pit South of it. Go to the Altar again to collect your Friends and go back to Gustacio to give him your Reports. He will send you to Fedabiblio. Do so and talk with him about the Experiment. He gives the advice to look in the Crystal Ball and come back to him. Look in the Crystal Ball and you will see how Edrin was transformed into Ale the Parrot. Talk with Fedabiblio about that and he will send you back to Gustacio. Tell him that Ale is in fact Edrin himself. He will give you a new
Energy Globe on the Altar. Now pull up the Winch and pull all 8 Levers to observe the results of the Teleport Storms. Use the winch again to stop the storm and you get teleported to the Pit South of it. Go to the Altar again to collect your Friends and go back to Gustacio to give him your Reports. He will send you to Fedabiblio. Do so and talk with him about the Experiment. He gives the advice to look in the Crystal Ball and come back to him. Look in the Crystal Ball and you will see how Edrin was transformed into Ale the Parrot. Talk with Fedabiblio about that and he will send you back to Gustacio. Tell him that Ale is in fact Edrin himself. He will give you a new ![]() Energy Globe and a
Energy Globe and a ![]() bird cage to put Ale into.
bird cage to put Ale into.
Go back to the Altar once again. Put the new ![]() Energy Globe on the Altar and put the
Energy Globe on the Altar and put the ![]() Cage with Ale on one of any 8 Pillars. Use the Winch then pull the Lever to change Ale back in Edrin. Talk with him about different things. One special note is his Dreams with Siranush. This Woman will be important later on.
Cage with Ale on one of any 8 Pillars. Use the Winch then pull the Lever to change Ale back in Edrin. Talk with him about different things. One special note is his Dreams with Siranush. This Woman will be important later on.
Go back to Gustacio and talk about Experiment. He is glad that you completed it and will give you the ![]() Mirror of Truth. Then ask him about Spells. He will theach you all Spells for free. Pick Detect Trap, Conjure, Delayed Blast and Spiral Missiles. All other Spells are already learned by Scrolls or buyed. Now you have the Chill Spell transcribed into your
Mirror of Truth. Then ask him about Spells. He will theach you all Spells for free. Pick Detect Trap, Conjure, Delayed Blast and Spiral Missiles. All other Spells are already learned by Scrolls or buyed. Now you have the Chill Spell transcribed into your ![]() Spellbook, you can buy the Key to the Catacombs from Julia for 40
Spellbook, you can buy the Key to the Catacombs from Julia for 40 ![]() Guilders.
Guilders.
Furnace[edit]
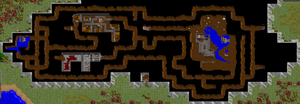
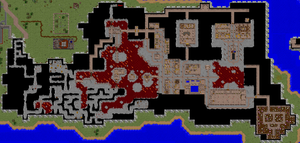
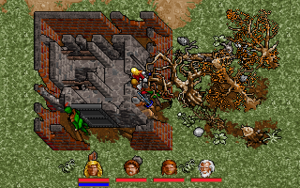
The Entrance to the Catacombs is at (96S, 132E) and Ernesto, a Ranger is wandering around there. Unlock the Door with the Key from Julia and go down.
It doesn't matter which path you take, since both lead to the same place. When you get to the bellows on the other side, search for a path leading east. You will come to a small "Village" where ![]() Ratmen live. You may put them to sleep with the Magic Harp or you can kill them all for Exp. The first Crate you see in there are 78
Ratmen live. You may put them to sleep with the Magic Harp or you can kill them all for Exp. The first Crate you see in there are 78 ![]() Gold Coins. Leave the Ratmen Village to the East. When you come across to a Crossing go West first.
Gold Coins. Leave the Ratmen Village to the East. When you come across to a Crossing go West first.
Remove the trash blocking the Path to the West. Kill the ![]() Undead and take
Undead and take ![]() Sword of Defense, 25
Sword of Defense, 25 ![]() Gold Coins and 2 Potions. Behind the Door to the West live a
Gold Coins and 2 Potions. Behind the Door to the West live a ![]() Fire Elemental. Go back to the Crossing and go East until you come across a House where some
Fire Elemental. Go back to the Crossing and go East until you come across a House where some ![]() Wildmen are. Go West and take the Stairs.
Go South to the Bridge and talk with Zhelkas. Say yes to taking the Test of Purity. Don't forget to cast Chill, otherwise you will suffer in the Heat. The Lever on Ground is stuck so push the Button on the Wall. Go through the open Door over the Bridge to the East ignoring the Stairs. You will then come to the Underground City.
Wildmen are. Go West and take the Stairs.
Go South to the Bridge and talk with Zhelkas. Say yes to taking the Test of Purity. Don't forget to cast Chill, otherwise you will suffer in the Heat. The Lever on Ground is stuck so push the Button on the Wall. Go through the open Door over the Bridge to the East ignoring the Stairs. You will then come to the Underground City.
If you go North passing a Room with some Ice Wine and then go West you will find 2 doubledoors that are magically locked. Unlock them both and push the Button to open another Door to the Startpoint. Go back to the City and go East to a Pool. Southwest from the Pool is a Corpse with another ![]() Chill Scroll and 3
Chill Scroll and 3 ![]() Worm Hearts. On the Ground near the Pool are 13
Worm Hearts. On the Ground near the Pool are 13 ![]() Gold Coins. One of the corpses on North-side of the Pool has the Key of Fire.
Gold Coins. One of the corpses on North-side of the Pool has the Key of Fire.
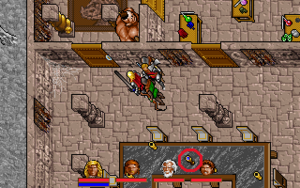
Go North in the Library. There is only 3 available Books to read. All the other Books are unreadable. One Book tell how to use some Reagents to make Phospor and one tell what the use is for the Key of Fire and Ice and the last book tell about the Civil War. The Corpse in West Room has the Key to the Room under the Library. Unlock the Doors below and get ![]() Create Automaton Scroll,
Create Automaton Scroll, ![]() Telekinesis Scroll,
Telekinesis Scroll, ![]() Serpent Bond Scroll,
Serpent Bond Scroll, ![]() Invoke Snow Serpent Scroll and 7
Invoke Snow Serpent Scroll and 7 ![]() Worm Hearts. North of the Library is the Conjury. On the Table is the
Worm Hearts. North of the Library is the Conjury. On the Table is the ![]() Everlasting Goblet. With that you never need to worry about Food ever again. In the Lab are alots Reagents to grab, but beware of taking it, since some Tables are trapped. The Bedroom upstairs have more Reagents and Potions to take.
Everlasting Goblet. With that you never need to worry about Food ever again. In the Lab are alots Reagents to grab, but beware of taking it, since some Tables are trapped. The Bedroom upstairs have more Reagents and Potions to take.
East of the Pool is the Arena. Pull the Winch and enter it. The Gate will close and 4 Doors with 1 ![]() Automaton each will open. Kill all 4
Automaton each will open. Kill all 4 ![]() Automatons and the Door to the Northeast will open. Get the Key on the floor which opens the Doubledoor just East from there. Enter it and ignore the magically Door and search the Corpse in Southeast Corner of the Mushroom Garden. It has the Key of Ice and a Serpent Tooth (it leads to Monitor). Another Corpse in the Middle of Room has one more
Automatons and the Door to the Northeast will open. Get the Key on the floor which opens the Doubledoor just East from there. Enter it and ignore the magically Door and search the Corpse in Southeast Corner of the Mushroom Garden. It has the Key of Ice and a Serpent Tooth (it leads to Monitor). Another Corpse in the Middle of Room has one more ![]() Chill Scroll and 3
Chill Scroll and 3 ![]() Worm Hearts. South of it another Corpse has
Worm Hearts. South of it another Corpse has ![]() Unlock Magic Scroll. Use it on the Door you ignored before and go North. You come across a Temple with the Fire and Ice Pillar.
Unlock Magic Scroll. Use it on the Door you ignored before and go North. You come across a Temple with the Fire and Ice Pillar.
Test of Purity[edit]
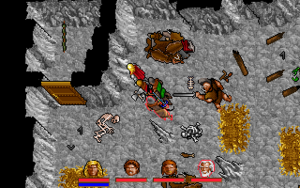
Click on the Fire Pillar and you will take to the Test of Purity.
- In the left room is Shamino who says to press the left button. It makes the women want to have sex with you. If you resist and press the right button, you will free the people here.
- In the north is Iolo, who tries to convince you to go home through the Moongate. Say no repeatedly.
- In the Last Room to the Right is Dupre and will explain the Rules to the Worm-Game. You need to kill 10 Worms with the Hammer.
After you're done with the Test. You will receive the ![]() Serpent Ring from Zhelkas. Talk with him again to ask to leave Furnace. Go in the right Building and place the Key of Fire and Ice on the altar to get the Blackrock Key. This key can now be put on Keyring and it opens the Door on second floor. The Teleporter behind it leads to a Serpent Gate and a Corpse with 3
Serpent Ring from Zhelkas. Talk with him again to ask to leave Furnace. Go in the right Building and place the Key of Fire and Ice on the altar to get the Blackrock Key. This key can now be put on Keyring and it opens the Door on second floor. The Teleporter behind it leads to a Serpent Gate and a Corpse with 3 ![]() Magic Scrolls, but you already took it before.
Magic Scrolls, but you already took it before.
The Left Buiding has 6 ![]() Chill Scrolls to take. Go back to the starting point where you meet Zhelkas the first time. Ask him again to leave Furnace and he will pull the Lever to open the Door. Go South in the àtTroll infected lair. Go West from there to find the destroyed
Chill Scrolls to take. Go back to the starting point where you meet Zhelkas the first time. Ask him again to leave Furnace and he will pull the Lever to open the Door. Go South in the àtTroll infected lair. Go West from there to find the destroyed ![]() Spellbook and
Spellbook and ![]() Serpent Staff. One of the
Serpent Staff. One of the ![]() Trolls here has the Key to Serpent Staff. Go South in the dirty Path the west to a dead end where a
Trolls here has the Key to Serpent Staff. Go South in the dirty Path the west to a dead end where a ![]() Magic Axe is hidden under the Trash. Go back and go South and West. Go over the Bridge until you reach the Exit. You are now back on Mainland.
Magic Axe is hidden under the Trash. Go back and go South and West. Go over the Bridge until you reach the Exit. You are now back on Mainland.
Opportunities[edit]
Pit[edit]
Try to get into the Pit at (46S, 141E). You will fall in the Cave below. The dead Ranger has a ![]() Magic Bow and some
Magic Bow and some ![]() Arrows. The Cave also have some
Arrows. The Cave also have some ![]() Gazers. The Chest is locked and have
Gazers. The Chest is locked and have ![]() Magic Sling,
Magic Sling, ![]() Door Shield and 85
Door Shield and 85 ![]() Gold Coins. Go up and take the Purple Key behind the Tree (It's hard to see it).
Gold Coins. Go up and take the Purple Key behind the Tree (It's hard to see it).
Reclaimed[edit]
 Spellbook[edit]
The ![]() Spellbook is near the northren Fur Pallet, but if you try to take it, it'll get destroyed for good. At last the
Spellbook is near the northren Fur Pallet, but if you try to take it, it'll get destroyed for good. At last the ![]() Stoneheart is still in your Possession.
Stoneheart is still in your Possession.