No edit summary |
|||
| Line 64: | Line 64: | ||
When the ten minutes are up, your Drone will reappear. Escort it back to your base with the Hydralisks (pretty much no one attacks you, so the rest of the units can stay or go with them), and have it step on the beacon to complete the mission. | When the ten minutes are up, your Drone will reappear. Escort it back to your base with the Hydralisks (pretty much no one attacks you, so the rest of the units can stay or go with them), and have it step on the beacon to complete the mission. | ||
==Alternate Strategy== | |||
You can actually beat this mission more easily if you use a complete attack force of just Mutalisks and Guardians. In fact, you can even eliminate the Protoss with them without too much trouble. The setup for this attack is essentially the same; but remember that you only need light defenses in your main base (mostly against Zealots). Take the two unoccupied expansions to the east quickly, and rack up on minerals and gas. Take your time creating Mutalisks, and don't worry too much about occasional attacks. Your ratio of Mutalisks to Guardians should be around 2:1, more fundamentally 24 Mutalisks and 12 Guardians per attack. Don't try to fight the teal base with ground units; Guardians can do a much better job. Either way, when you have enough forces, start attacking the east Yellow base with the Guardians. Clean up any air units with the Mutalisks, but Dragoons can be easily handled by your massive Guardian force. You may need to replace your fleet halfway, but it shouldn't be a problem if you are effectively mining. Take the left base shortly after, except with more Mutalisks. If you need more resources, you can build a new base on the runis of the right Yellow Protoss base. If you want to go further south and destroy the Orange base, you will need 12 additional Mutalisks to fight against Arbiters, which will freeze any large clumps of your units. Don't panic if Arbiters freeze you up; you have time to reassemble your force. The rest of the attack will be straight-forward and easy. | |||
{{-}} | {{-}} | ||
{{Footer Nav|game=StarCraft|prevpage=Zerg mission 8: Eye for an Eye|nextpage=Zerg mission 10: Full Circle}} | {{Footer Nav|game=StarCraft|prevpage=Zerg mission 8: Eye for an Eye|nextpage=Zerg mission 10: Full Circle}} | ||
Revision as of 20:53, 26 September 2010
Building the Initial Attack Force
You start out with a sizeable base in the upper left corner of the map. Basically, what you have to do is send a Drone to the Khaydarin Crystal Formation (the location of which is shrouded in fog of war but visible nontheless), protect the area around it for 10 minutes, and bring the Drone with the Crystal back. But there's a lot of fighting involved... you don't have to raze any bases, but since about 80% of the map area is controlled by the Protoss, you will have to go through their bases. Zerg strike forces in the campaign usually involve air units, but your base doesn't yield enough gas for that. Which means, of course, that you must expand.
After building your economy and an adequate system of static defense, concentrate on teching up to Mutalisks. You need these guys because the Protoss will use Reavers aggressively in this mission, sometimes airdropping them directly into your base. Sunken Colonies have shorter range than the Reavers, so they're useless, and of course there's pretty much no Zerg ground unit that can stand up to a Reaver for long. So keep a healthy number of Mutalisks near your base at all times to deal with this threat.
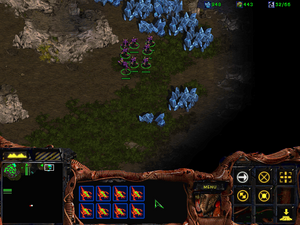
Luckily for your gas needs, there's a free resource deposit in the top right corner of the map. To break through the light defenses there are hold the deposit, you won't need any more than a full group of Hydralisks and some Zerglings, so start on that. Also, it's a very good idea to have an additional Hatchery going; the faster unit production will help all throughout this mission.
There is also another free resource deposit southeast of that resource node, again with a Vespene Geyser. If you plan to use Mutalisks and Guardians as a main strike force, you should expand here as well.
Securing the Expansion
Once you have the requisite force, take them plus a couple Overlords (hopefully their speeds have been upgraded) over east. Take out the Pylons and Photon Cannons along the way, plus any Dragoons that might be guarding. When you reach the expansion (it's near a body of water), get busy building the outpost. The gas from this location will allow you to build your army. Keep the Hydralisks stationed here, and make new ones for use elsewhere. Also, if you like, build Nydus Canals to connect your bases for speedy unit transfer.
You should make sure you take out the Teal Protoss base before moving on; they will attack you the most aggressively in the early points of the game. They only have ground weapons, which makes the use of Mutalisks and Guardians an ideal choice. You do have to watch out for Orange (Auriga Tribe)'s attacks, however. Orange will attack you with both ground and air units, sometimes involving an Arbiter. Do not worry about the Yellow though; they won't attack your base unless you drag their units there.
The Buildup
You should be at Hive tech by now. Start building lots of units; you'll need a force that's a bit larger than the size of the final force at the end of the last mission. This means 12 each of Hydralisks, Guardians, and Mutalisks, anywhere from 24 to 48 Zerglings, half a dozen Ultralisks, a couple Defilers, and 12 Scourge. The Scourge are there solely to counter Carriers, the most powerful Protoss unit. These things carry up to eight Interceptors in their hangars, which swarm and swarm until there's nothing left to kill. Obviously, this makes them very dangerous, but Scourge deal 110 damage per suicide; that means theoretically, five or six Scourge can destroy one. But because some get killed while trying to crash into the Carrier, it's a good idea to throw more than that at one. When you actually do meet one and spend your Scourge on it, quickly build more from your bases; you don't want to let other Carriers live long enough to do damage.
As for upgrades, do the usual: everything researched at the Spawning Pool and Hydralisk Den, and everything at the Chamber and Spire researched to at least level 2. Also, Defilers need Plague and Consume upgraded.
Fighting to the Crystal Area
No matter how large your attack force is, the Protoss will have more. This is because the enemy is consisted of two separate tribes—which means they can build up to 400 supply's worth of units, while you can only do 200. Luckily, they won't throw them all at once; your sizeable army, combined with the Defilers' Plague, can beat them back.
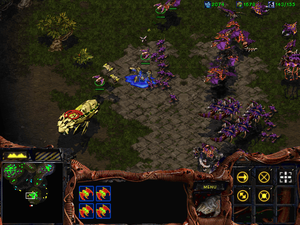
Stage all your units in the valley area between your two bases. Along with the attack force, you should bring Overlords (for Observer detection) and two Drones (one to harvest the Crystal, one for... something else). Also, as you're setting out, hotkey the three Hatcheries so you can keep building reinforcements (you'll need make a lot of Zerglings and Scourge in particular), and set rally points for them.
As you go deeper into the valley and destroy the enemy settlements there, lead with the Guardians, following closely with Ultralisks and Mutalisks, followed by Zerglings, and with the Hydralisks bringing up the rear and keeping the defenseless units (Drones, Defilers, and Overlords) safe. You don't have to move in this order if you don't want to, but it will ensure efficient base razing. Guardians will do most of the work as always, and unless the Protoss has lots of Reavers, you shouldn't lose a lot of the ground units yet.

You'll reach the Crystal in no time. Now this is where it gets tricky; as soon as a Drone touches that beacon, a 10-minute counter will start, and large Protoss forces will periodically attack the Crystal. You have to defend against all these attacks. To make this easier, don't have the Drones touch the beacon yet; instead, have one morph into a Hatchery right next to the Crystal while your forces take up defensive positions around the Crystal. As soon as the Hatchery is complete, build Spore and Sunken Colonies all around. When you have about four of each, have the other Drone step on the beacon and start the timer.
Holding the Crystal Area
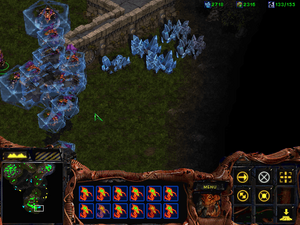
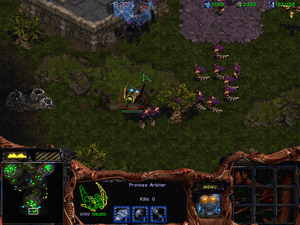
The Protoss will hit you with everything they've got. Expect Zealots, Dragoons, High Templar and their Psionic Storms, Archons, Reavers, Scouts, Carriers, and even Arbiters. This last unit you should be very cautious of. First of all, Arbiters Cloak all friendly units within a radius of itself (except other Arbiters), making them invulnerable unless you have Overlords or splash damage attacks. They also have an ability called Stasis Field, which puts all (even friendly) units within the targeted area in stasis. Sure, your units might not be vulnerable to attack while in stasis, but by the time they come out of it the rest of your units may be dead. Finally, Arbiters can Recall (instantly teleport) a number of friendly units to anywhere on the map.
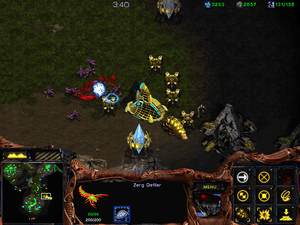
The Colonies will hold off all the Scouts and most of the ground units with the help of your units, but dangerous ones like Archons and Reavers need to be dealt with at once by the Guardians. High Templar can also do a lot of damage, but if you have enough Zerglings they can stand by the perimeter and chase them off. Carriers should be swiftly dealt with by Scourge, and usually you have enough Scourge around to spare a few for Arbiters. Finally, whenever you're attacked by a large number of enemies, cast Plague on them to kill them faster, and whenever Zerglings and Ultralisks face off against ranged units, cast Dark Swarm to help them out.
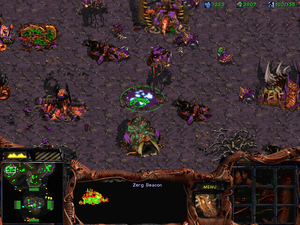
When the ten minutes are up, your Drone will reappear. Escort it back to your base with the Hydralisks (pretty much no one attacks you, so the rest of the units can stay or go with them), and have it step on the beacon to complete the mission.
Alternate Strategy
You can actually beat this mission more easily if you use a complete attack force of just Mutalisks and Guardians. In fact, you can even eliminate the Protoss with them without too much trouble. The setup for this attack is essentially the same; but remember that you only need light defenses in your main base (mostly against Zealots). Take the two unoccupied expansions to the east quickly, and rack up on minerals and gas. Take your time creating Mutalisks, and don't worry too much about occasional attacks. Your ratio of Mutalisks to Guardians should be around 2:1, more fundamentally 24 Mutalisks and 12 Guardians per attack. Don't try to fight the teal base with ground units; Guardians can do a much better job. Either way, when you have enough forces, start attacking the east Yellow base with the Guardians. Clean up any air units with the Mutalisks, but Dragoons can be easily handled by your massive Guardian force. You may need to replace your fleet halfway, but it shouldn't be a problem if you are effectively mining. Take the left base shortly after, except with more Mutalisks. If you need more resources, you can build a new base on the runis of the right Yellow Protoss base. If you want to go further south and destroy the Orange base, you will need 12 additional Mutalisks to fight against Arbiters, which will freeze any large clumps of your units. Don't panic if Arbiters freeze you up; you have time to reassemble your force. The rest of the attack will be straight-forward and easy.