Jump to navigation
Jump to search
Route 106 in Emerald
m (migrated to Custom Nav) |
Trig Jegman (talk | contribs) mNo edit summary |
||
| (3 intermediate revisions by 2 users not shown) | |||
| Line 1: | Line 1: | ||
{{Header Nav|game=Pokémon Ruby and Sapphire}} | {{Header Nav|game=Pokémon Ruby and Sapphire}} | ||
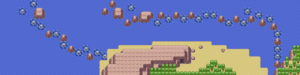
[[File:PKMN Emerald Route106.png|right|thumb|Route 106 in Emerald]] | |||
Route 106 is, more water, and more trainers. | Route 106 is, more water, and more trainers. | ||
==Pokémon found== | |||
{| {{prettytable|text center=1}} | {| {{prettytable|text center=1}} | ||
|+ Pokémon found ( | |+ Pokémon found (Surfing) | ||
! style="background-color:#a82c2a;color:#fff" | Ruby | |||
! style="background-color:#a82c2a;color:#fff" | Encounter Rate | |||
! style="background-color:#36c;color:#fff" | Sapphire | ! style="background-color:#36c;color:#fff" | Sapphire | ||
! style="background-color:#36c;color:#fff" | Encounter Rate | ! style="background-color:#36c;color:#fff" | Encounter Rate | ||
! style="background-color:#008000;color:#fff" | Emerald | |||
! style="background-color:#008000;color:#fff" | Encounter Rate | |||
|- valign="center" | |||
||[[File:Pokemon_072Tentacool.png|40px]]{{bp|Tentacool}} | |||
|60% | |||
||[[File:Pokemon_072Tentacool.png|40px]]{{bp|Tentacool}} | |||
|60% | |||
||[[File:Pokemon_072Tentacool.png|40px]]{{bp|Tentacool}} | |||
|60% | |||
|- | |||
||[[File:Pokemon_278Wingull.png|40px]]{{bp|Wingull}} | |||
|35% | |||
||[[File:Pokemon_278Wingull.png|40px]]{{bp|Wingull}} | |||
|35% | |||
||[[File:Pokemon_278Wingull.png|40px]]{{bp|Wingull}} | |||
|35% | |||
|- | |||
||[[File:Pokemon_279Pelipper.png|40px]]{{bp|Pelipper}} | |||
|5% | |||
||[[File:Pokemon_279Pelipper.png|40px]]{{bp|Pelipper}} | |||
|5% | |||
||[[File:Pokemon_279Pelipper.png|40px]]{{bp|Pelipper}} | |||
|5% | |||
|} | |||
{| {{prettytable|text center=1}} | |||
|+ Pokémon found (Fishing) | |||
! style="background-color:#a82c2a;color:#fff" | Ruby | ! style="background-color:#a82c2a;color:#fff" | Ruby | ||
! style="background-color:#a82c2a;color:#fff" | Encounter Rate | ! style="background-color:#a82c2a;color:#fff" | Encounter Rate | ||
! style="background-color:#36c;color:#fff" | Sapphire | |||
! style="background-color:#36c;color:#fff" | Encounter Rate | |||
! style="background-color:#008000;color:#fff" | Emerald | |||
! style="background-color:#008000;color:#fff" | Encounter Rate | |||
|- valign="center" | |- valign="center" | ||
| | ! style="background-color:#49c;color:#fff" colspan="6" | Old Rod | ||
| | |- | ||
|[[ | ||[[File:Pokemon_129Magikarp.png|40px]]{{bp|Magikarp}} | ||
| | |70% | ||
||[[File:Pokemon_129Magikarp.png|40px]]{{bp|Magikarp}} | |||
|70% | |||
||[[File:Pokemon_129Magikarp.png|40px]]{{bp|Magikarp}} | |||
|70% | |||
|- | |||
||[[File:Pokemon_072Tentacool.png|40px]]{{bp|Tentacool}} | |||
|30% | |||
||[[File:Pokemon_072Tentacool.png|40px]]{{bp|Tentacool}} | |||
|30% | |||
||[[File:Pokemon_072Tentacool.png|40px]]{{bp|Tentacool}} | |||
|30% | |||
|- | |||
! style="background-color:#49c;color:#fff" colspan="6" | Good Rod | |||
|- | |||
||[[File:Pokemon_129Magikarp.png|40px]]{{bp|Magikarp}} | |||
|60% | |||
||[[File:Pokemon_129Magikarp.png|40px]]{{bp|Magikarp}} | |||
|60% | |||
||[[File:Pokemon_129Magikarp.png|40px]]{{bp|Magikarp}} | |||
|60% | |||
|- | |||
||[[File:Pokemon_072Tentacool.png|40px]]{{bp|Tentacool}} | |||
|20% | |||
||[[File:Pokemon_072Tentacool.png|40px]]{{bp|Tentacool}} | |||
|20% | |||
||[[File:Pokemon_072Tentacool.png|40px]]{{bp|Tentacool}} | |||
|20% | |||
|- | |- | ||
| | ||[[File:Pokemon_320Wailmer.png|40px]]{{bp|Wailmer}} | ||
| | |20% | ||
|[[ | ||[[File:Pokemon_320Wailmer.png|40px]]{{bp|Wailmer}} | ||
| | |20% | ||
||[[File:Pokemon_320Wailmer.png|40px]]{{bp|Wailmer}} | |||
|20% | |||
|- | |- | ||
|- | |- | ||
! style="background-color:#49c;color:#fff" colspan="6" | Super Rod | |||
| | |||
|- | |- | ||
| | ||[[File:Pokemon_320Wailmer.png|40px]]{{bp|Wailmer}} | ||
| | |100% | ||
|[[ | ||[[File:Pokemon_320Wailmer.png|40px]]{{bp|Wailmer}} | ||
| | |100% | ||
||[[File:Pokemon_320Wailmer.png|40px]]{{bp|Wailmer}} | |||
|100% | |||
|} | |} | ||
{{ | |||
==Items== | |||
*Heart Scale - hidden on the water's edge, southeast of the signpost | |||
*Stardust - hidden on a rock, northwest of the signpost (available earlier when you were in Dewford Town) | |||
*Poké Ball - hidden on the water's edge, northeast of Fisherman Elliot (available earlier when you were in Dewford Town) | |||
*Protein - western-most part of the shoreline | |||
==Trainers== | |||
* Swimmer Nicole | |||
** {{bp|Wailmer|27}} | |||
* Swimmer Douglas | |||
** {{bp|Tentacool|26}} | |||
** {{bp|Tentacool|26}} | |||
As soon as you can, get to the sandy beach to the south, because after Douglas there isn't anything interesting in the water. There is, however, a Protein on the beach. | |||
{{Footer Nav|game=Pokémon Ruby and Sapphire|prevpage=Route 105|nextpage=Route 107}} | {{Footer Nav|game=Pokémon Ruby and Sapphire|prevpage=Route 105|nextpage=Route 107}} | ||
Latest revision as of 18:07, 15 September 2022

Route 106 is, more water, and more trainers.
Pokémon found[edit]
| Ruby | Encounter Rate | Sapphire | Encounter Rate | Emerald | Encounter Rate |
|---|---|---|---|---|---|
| 60% | 60% | 60% | |||
| 35% | 35% | 35% | |||
| 5% | 5% | 5% |
| Ruby | Encounter Rate | Sapphire | Encounter Rate | Emerald | Encounter Rate |
|---|---|---|---|---|---|
| Old Rod | |||||
| 70% | 70% | 70% | |||
| 30% | 30% | 30% | |||
| Good Rod | |||||
| 60% | 60% | 60% | |||
| 20% | 20% | 20% | |||
| 20% | 20% | 20% | |||
| Super Rod | |||||
| 100% | 100% | 100% | |||
Items[edit]
- Heart Scale - hidden on the water's edge, southeast of the signpost
- Stardust - hidden on a rock, northwest of the signpost (available earlier when you were in Dewford Town)
- Poké Ball - hidden on the water's edge, northeast of Fisherman Elliot (available earlier when you were in Dewford Town)
- Protein - western-most part of the shoreline
Trainers[edit]
As soon as you can, get to the sandy beach to the south, because after Douglas there isn't anything interesting in the water. There is, however, a Protein on the beach.