Jump to navigation
Jump to search
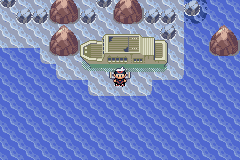
The Abandoned Ship
(→Items: Changed item name "Harbor" to "Harbor Mail", the correct name for the item) Tags: Mobile edit Mobile web edit |
Trig Jegman (talk | contribs) mNo edit summary |
||
| Line 2: | Line 2: | ||
{{Header Nav|game=Pokémon Ruby and Sapphire}} | {{Header Nav|game=Pokémon Ruby and Sapphire}} | ||
[[ | [[File:PRS&E Abandonedship.png|frame|The Abandoned Ship]] | ||
The '''Abandoned Ship''' is at [[../Route 108/]], in the sea between Dewford Island and Slateport City. Enter it and keep using your Itemfinder to collect fallen items which include the keys to various doors of the ship. You will also find the only '''Luxury Ball''' of the Game here. This Poké Ball ensures that the Pokémon captured will be friendly. | The '''Abandoned Ship''' is at [[../Route 108/]], in the sea between Dewford Island and Slateport City. Enter it and keep using your Itemfinder to collect fallen items which include the keys to various doors of the ship. You will also find the only '''Luxury Ball''' of the Game here. This Poké Ball ensures that the Pokémon captured will be friendly. | ||
| Line 27: | Line 27: | ||
==Maps== | ==Maps== | ||
<gallery> | <gallery> | ||
File: | File:PKMN Emerald AbandonedShipExterior.png|Outside of Floor 1 and Floor 2 | ||
File: | File:PKMN Emerald AbandonedShip1F.png|Inside of Floor 1 | ||
File: | File:PKMN Emerald AbandonedShipB1F-1.png|Basement floor east | ||
File: | File:PKMN Emerald AbandonedShipB1F-2.png|Basement floor dive path | ||
File: | File:PKMN Emerald AbandonedShipB1F-3.png|Basement floor west | ||
</gallery> | </gallery> | ||
| Line 44: | Line 44: | ||
! style="background-color:#008000;color:#fff" | Encounter Rate | ! style="background-color:#008000;color:#fff" | Encounter Rate | ||
|- valign="center" | |- valign="center" | ||
||[[ | ||[[File:Pokemon 072Tentacool.png|40px]]{{bp|Tentacool}} | ||
|99% | |99% | ||
||[[ | ||[[File:Pokemon 072Tentacool.png|40px]]{{bp|Tentacool}} | ||
|99% | |99% | ||
||[[ | ||[[File:Pokemon 072Tentacool.png|40px]]{{bp|Tentacool}} | ||
|99% | |99% | ||
|- | |- | ||
||[[ | ||[[File:Pokemon 073Tentacruel.png|40px]]{{bp|Tentacruel}} | ||
|1% | |1% | ||
||[[ | ||[[File:Pokemon 073Tentacruel.png|40px]]{{bp|Tentacruel}} | ||
|1% | |1% | ||
||[[ | ||[[File:Pokemon 073Tentacruel.png|40px]]{{bp|Tentacruel}} | ||
|1% | |1% | ||
|} | |} | ||
| Line 69: | Line 69: | ||
! style="background-color:#49c;color:#fff" colspan="6" | Old Rod | ! style="background-color:#49c;color:#fff" colspan="6" | Old Rod | ||
|- | |- | ||
||[[ | ||[[File:Pokemon 129Magikarp.png|40px]]{{bp|Magikarp}} | ||
|70% | |70% | ||
||[[ | ||[[File:Pokemon 129Magikarp.png|40px]]{{bp|Magikarp}} | ||
|70% | |70% | ||
||[[ | ||[[File:Pokemon 129Magikarp.png|40px]]{{bp|Magikarp}} | ||
|70% | |70% | ||
|- | |- | ||
||[[ | ||[[File:Pokemon 072Tentacool.png|40px]]{{bp|Tentacool}} | ||
|30% | |30% | ||
||[[ | ||[[File:Pokemon 072Tentacool.png|40px]]{{bp|Tentacool}} | ||
|30% | |30% | ||
||[[ | ||[[File:Pokemon 072Tentacool.png|40px]]{{bp|Tentacool}} | ||
|30% | |30% | ||
|- | |- | ||
! style="background-color:#49c;color:#fff" colspan="6" | Good Rod | ! style="background-color:#49c;color:#fff" colspan="6" | Good Rod | ||
|- | |- | ||
||[[ | ||[[File:Pokemon 129Magikarp.png|40px]]{{bp|Magikarp}} | ||
|60% | |60% | ||
||[[ | ||[[File:Pokemon 129Magikarp.png|40px]]{{bp|Magikarp}} | ||
|60% | |60% | ||
||[[ | ||[[File:Pokemon 129Magikarp.png|40px]]{{bp|Magikarp}} | ||
|60% | |60% | ||
|- | |- | ||
||[[ | ||[[File:Pokemon 072Tentacool.png|40px]]{{bp|Tentacool}} | ||
|40% | |40% | ||
||[[ | ||[[File:Pokemon 072Tentacool.png|40px]]{{bp|Tentacool}} | ||
|40% | |40% | ||
||[[ | ||[[File:Pokemon 072Tentacool.png|40px]]{{bp|Tentacool}} | ||
|40% | |40% | ||
|- | |- | ||
! style="background-color:#49c;color:#fff" colspan="6" | Super Rod | ! style="background-color:#49c;color:#fff" colspan="6" | Super Rod | ||
|- | |- | ||
||[[ | ||[[File:Pokemon 072Tentacool.png|40px]]{{bp|Tentacool}} | ||
|80% | |80% | ||
||[[ | ||[[File:Pokemon 072Tentacool.png|40px]]{{bp|Tentacool}} | ||
|80% | |80% | ||
||[[ | ||[[File:Pokemon 072Tentacool.png|40px]]{{bp|Tentacool}} | ||
|80% | |80% | ||
|- | |- | ||
||[[ | ||[[File:Pokemon 073Tentacruel.png|40px]]{{bp|Tentacruel}} | ||
|20% | |20% | ||
||[[ | ||[[File:Pokemon 073Tentacruel.png|40px]]{{bp|Tentacruel}} | ||
|20% | |20% | ||
||[[ | ||[[File:Pokemon 073Tentacruel.png|40px]]{{bp|Tentacruel}} | ||
|20% | |20% | ||
|} | |} | ||
Revision as of 14:05, 13 September 2022

The Abandoned Ship is at Route 108, in the sea between Dewford Island and Slateport City. Enter it and keep using your Itemfinder to collect fallen items which include the keys to various doors of the ship. You will also find the only Luxury Ball of the Game here. This Poké Ball ensures that the Pokémon captured will be friendly.
To fully explore the ship, you will need the Dive HM.
Items
- Harbor Mail - 1F, northwest room of the eastern part
- Revive - 1F, north room of the western part
- Dive Ball - B1F, in the room with the broken door
- Escape Rope - B1F, southwest room
- TM13 (Ice Beam)(needs Storage Key) - B1F, northeast room
- Storage Key - Captain's office
Once you have HM move Dive, through the lower middle room of the basement you'll find a path to another section of the basement with six rooms where you can also collect the following:
- Room 1 Key - in Room 3, hidden in the northeast corner
- Room 2 Key - in Room 5, hidden below left trash can
- Room 4 Key - in Room 1, hidden on the left side
- Room 6 Key - in Room 4, hidden in the trash can
- Water Stone - in Room 3
- TM18 - in Room 1
- Luxury Ball - in Room 6
- Scanner - in Room 2; may be traded to Captain Stern for a Deep Sea Tooth or Deep Sea Scale.
Maps
-
Outside of Floor 1 and Floor 2
-
Inside of Floor 1
-
Basement floor east
-
Basement floor dive path
-
Basement floor west
Pokemon Found
| Ruby | Encounter Rate | Sapphire | Encounter Rate | Emerald | Encounter Rate |
|---|---|---|---|---|---|
| 99% | 99% | 99% | |||
| 1% | 1% | 1% |
| Ruby | Encounter Rate | Sapphire | Encounter Rate | Emerald | Encounter Rate |
|---|---|---|---|---|---|
| Old Rod | |||||
| 70% | 70% | 70% | |||
| 30% | 30% | 30% | |||
| Good Rod | |||||
| 60% | 60% | 60% | |||
| 40% | 40% | 40% | |||
| Super Rod | |||||
| 80% | 80% | 80% | |||
| 20% | 20% | 20% | |||