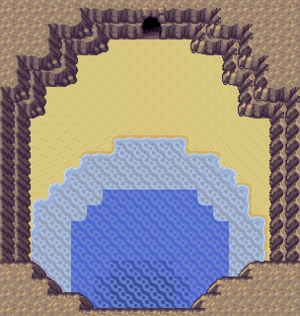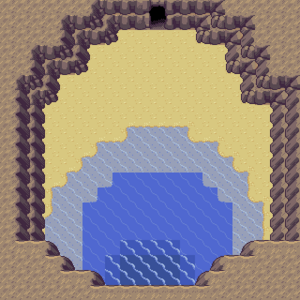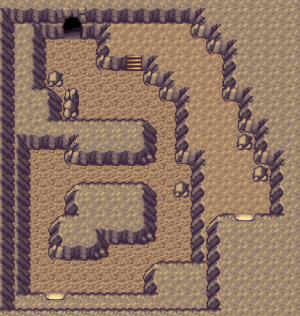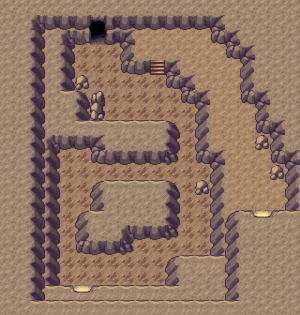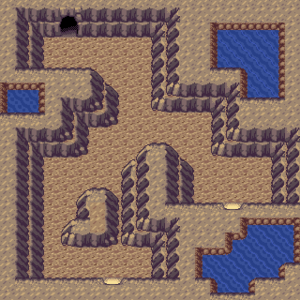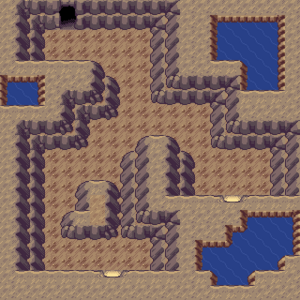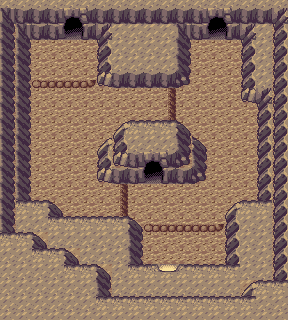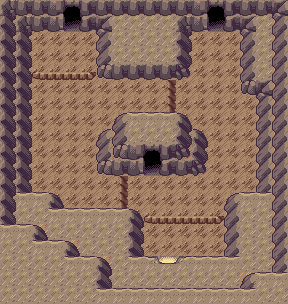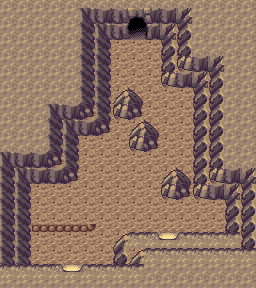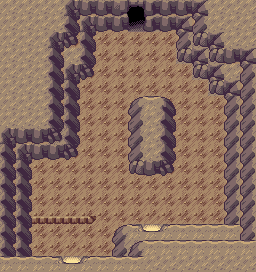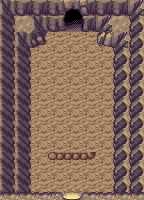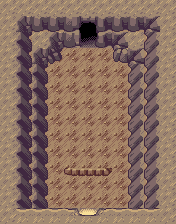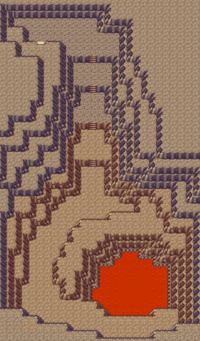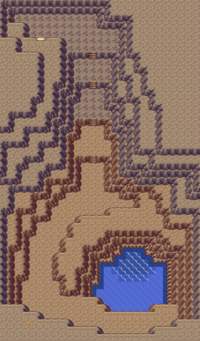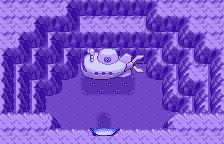
Seafloor Cavern is a subterranean cave deep beneath the waves of Route 128. The cavern is somewhat maze-like, and constantly requires the use of Rock Smash and Strength. In a misty cave, you'll discover TM26 (Earthquake). For more details on getting through the Seafloor Cavern check below. You'll initially find the stolen submarine docked in the underwater entrance, so dive to find the rest of the cave.
Room 1
Well, you made it, the Seafloor Cavern. Now all that's left is to go inside to Room 1. Use rock smash on the left rock, then use Strength to push the boulder down. You may then push the other boulder to the right. Room 1 has two Team Aqua/Magma Grunts and three doorways leading to the Entrance behind you, Room 2 in the southeast, and Room 4 in the north.
| Ruby | ||
|---|---|---|
| Picture | Pokémon | Reward |
 | ||
 | ||
| Sapphire | ||
|---|---|---|
| Picture | Pokémon | Reward |
 | ||
 | ||
| Emerald | ||
|---|---|---|
| Picture | Pokémon | Reward |
 | ||
 | ||
Room 2
Room 2 is first accessed from Room 1's Southeast exit. The Southwest exit leads to Room 3's Centre exit, and the Southeast exit leads to Room 3's Northwest exit.
Before the Southwest exit, there will be two boulders next to each other horizontally, and two spaces below will be a Smashable rock. In order to reach the south west corner, push the right-hand boulder down two spaces, and walk through the gap between the boulders to reach the Smashable rock.
Before the Southeast exit, there will be another pair of boulders, sitting diagonally from each other, followed by a Smashable rock to the right of the bottom boulder. Push the top boulder two spaces to the right, and the bottom boulder one space down. Then use Rock Smash to get past the Smashable rock.
Room 3
When entering from Room 2's Southeast exit, you will emerge in the centre of Room 3. Head North to reach the Southwest exit of Room 4, and head South and hop off the ledge to return to the cave entrance.
When entering from Room 2's Southwest exit, you will emerge in the Northwest corner of Room 3. Hop off the ledge to encounter a Team Aqua/Magma Grunt (In Emerald, there are two grunts that can be battled in a Double Battle). After the battle, hop off the ledge to the right and go North to Room 4, or South to the Floor's entrance and the cave exit.
| Ruby | ||
|---|---|---|
| Picture | Pokémon | Reward |
 | ||
| Sapphire | ||
|---|---|---|
| Picture | Pokémon | Reward |
 | ||
| Emerald | ||
|---|---|---|
| Picture | Pokémon | Reward |
 | ||
 | ||
Room 4
This is the first room in the Cavern that changes depending on what version of the game you're playing.
The gist of this room is that you can only initially cross it diagonally - meaning that the Northeast corner is inaccessible from the Southeast corner, and vice versa for the west side. However, it is possible for the player to access the Northern corners from each other, negating the need to backtrack through previous rooms to get from one corner to the other.
Layout in Pokémon Ruby & Sapphire
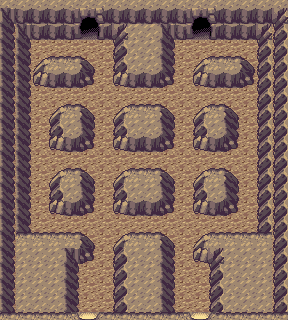
To get to the Northwest corner from the Southeast corner, push the first boulder North one space. Turn right and push the second boulder North two spaces. Turn left, and push the third boulder West one space. Turn right, and Smash the rock. Head North, and push the fourth boulder North one space. Turn left, and Smash the second rock. Push the final boulder West one space. The Northwest corner leads to the Southern entrance/exit of Room 5.
To do the opposite (Southeast from Northwest), push the first boulder South one space. Turn left and keep going down the path until the T-junction. Turn right and push the second boulder one space East. Head South and push the third boulder one space South. Head East and push the final boulder one space East. You can also access the Southwest corner this way by pushing the third boulder further South.
To get to the Northeast corner from the Southwest corner, push the first boulder one space North. Head along the West paths and turn right at the T-Junction. Push the second boulder East and turn left. Head North and push the third boulder North, and then smash the rock to your right. Head East and push the final boulder to the East. The Northeast corner leads to the Southwest entrance/exit of Floor 6.
To do the opposite (Southwest from Northeast), do essentially the same steps but in reverse. Unlike the Northwest to Southeast route, you cannot access the other Southern corner this way.
Layout in Pokémon Emerald
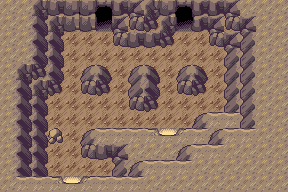
In Pokémon Emerald, the room has a completely different layout, and thus different methods to get from one corner to another.
Room 5
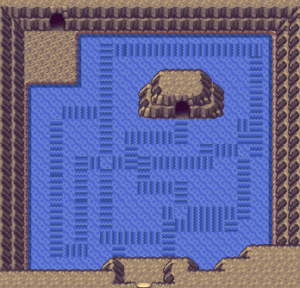
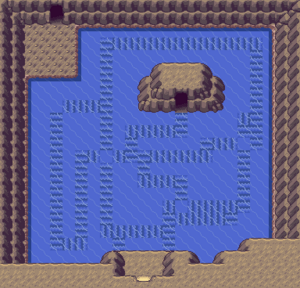
Room 5 is filled with currents that cannot be fought against. In order to get to the centre and North entrance/exits, use the currents to your advantage!
To start off with, use Surf and head straight North into the current. Go with the flow until it stops you to the bottom right of the centre island. Pick the current heading North to continue. It will loop you around until you are on the left side. Now, you have a choice: Head South to the beginning of the Room, West and wrap around to the Northwest entrance/exit, or East to get to the Centre entrance/exit. The Northwest path takes you to the Southwest corner of Room 7, and the Centre path takes you to the entrance of the cave.
Floor 6
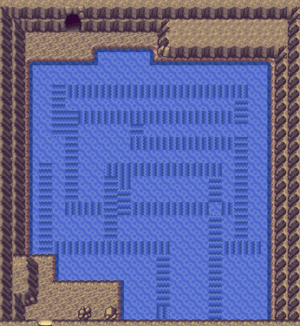
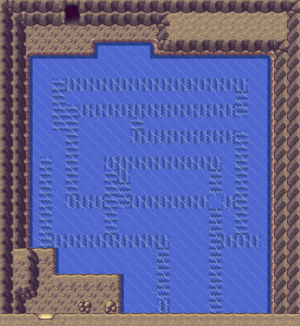
Room 6 is similar to Room 5 in that it has strong currents. When you emerge from Room 4, you can only go one direction: West. Be sure to stick to the very bottom however, or you might risk getting caught in the wrong current and looping back around!
Get caught in the second current to get to a 4-way Junction. Heading East loops you around, and heading West just takes you back to the beginning of the Floor, so heading North is your only real option. From where the current spits you out, head North and get right onto the third current. This takes you to the West side of the Floor, and gives you a clear path to the Northern entrance/exit. The Northern entrance/exit leads to the Southeastern entrance/exit of Room 7.
Room 7
Room 7 is comprised of a boulder puzzle that looks confusing at first glance (but is actually really easy), and a battle against the Team Admin. The Southeast corner leads to Room 6, and the Southwest corner leads to Room 5. In Pokémon Emerald, the Team Admin is further into the cavern.
In Ruby
The boulder puzzle is arranged in a sort of upside down pyramid, with the "base" on the North side and the "peak" at the South side. It's relatively simple when approaching from the Southeast. Begin by pushing the "peak" boulder one space two the left, and turn right into the newly created gap. Push the boulder to your left West one space, and walk into the above opening. Push the boulder to your right East one space, and walk up to the scenery rock. Then just push the final boulder to the right to encounter the Team Admin, and gain access to Floor 8.
In order to complete the puzzle from the Southwest corner, push the boulder next to the ledge North one space, and the "peak" boulder East one space. After that, just continue the puzzle using the same steps as the Southeast method.
| Magma Admin Courtney | 1st | 2nd | Reward |
|---|---|---|---|
Courtney's Camerupt has the ability Magma Armor, which nullifies freezing effects. For moves, it has Earthquake for STAB with its Fire/Ground duel typing, Rock Slide and Take Down for coverage, and Amnesia to raise its Special Defense.
Courtney's Mightyena has the ability Intimidate, which lowers the rival Pokémon's Attack. For moves, it has an all-Normal type lineup, with Take Down, Scary Face, Roar, and Swagger.
In Sapphire
The layout of the room is the same as in Ruby, but Courtney has been replaced by Aqua Admin Shelly.
| Aqua Admin Shelly | 1st | 2nd | Reward |
|---|---|---|---|

|
Shelly's Mightyena is exactly the same as Courtney's, so see hers for information on it.
Shelly's Sharpedo has the ability Rough Skin, which causes any Pokémon that inflicts it with physical attacks to be damaged themselves. For moves, it has Crunch for STAB with its duel Water/Dark typing, Screech and Taunt to affect your Pokémon's stats, and Slash for coverage.
In Emerald
In Pokémon Emerald, the room has a different layout, and while there are some boulders to push around, they can also be completely ignored. Additionally, you'll have to battle Shelly in a double battle with a regular grunt.
| Emerald | ||
|---|---|---|
| Picture | Pokémon | Reward |
 | ||
| Aqua Admin Shelly | 1st | 2nd | Reward |
|---|---|---|---|

|
Shelly... really isn't harder than she was in Sapphire. In fact, you could say she is even easier, since her Pokémon are now both level 37 instead of 38. Speaking of which:
Shelly's Sharpedo still has Rough Skin, but its moves have been altered. It now sports Scary Face, Crunch, Screech, and Slash.
Shelly's Mightyena, likewise, also still has Intimidate, and also has a new moveset. It now has Roar, Swagger, Scary Face, and Take Down.
Room 8
Floor 8 has the most complicated puzzle out of all of them. Begin by going to the first trio of boulders and pushing the side ones North, and the centre boulder to either side. Push the boulder above you one space North, and the boulders beside you West and East respectively. Now just do the same thing to the top three boulders as you did to the first three - Sides to the North, Centre to the side.
Room 9
And at last, you've reached the deepest part of the cavern, and the place where the Legendary Pokémon slumber. All that's left is to defeat the Team Leader, and retrieve the orb.
In Ruby
| Magma Leader Maxie | 1st | 2nd | 3rd | Reward |
|---|---|---|---|---|
Maxie has three Pokémon to stop you with: a Mightyena and Crobat at level 41 and a Camerupt at level 43. His Mightyena has the ability Intimidate, much like Courtney's. Its moveset is similar too - it has Roar, Swagger, Scary Face, and Take Down.
Maxie's Crobat has the ability Inner Focus, which prevents the Pokémon from being flinched. For moves, it has Bite, Wing Attack, Confuse Ray, and Air Cutter. Curiously, Crobat has no way to use its Poison typing.
Camerupt is Maxie's ace, and can be dangerous to some teams. It holds the ability Magma Armor, which prevents it from being frozen, and has the moves Take Down, Amnesia, Rock Slide, and Earthquake. Amnesia can often cause it to survive any Special attacks you throw its way, and Earthquake is the strongest Ground type move in the game (this is exacerbated even more with the STAB bonus Camerupt gets with it). Caution is advised with it. Or, alternatively, if you have Swampert (or any water type, really) then just one-shot it with Surf, Hydro Pump, or some other equally powerful move.
In Sapphire and Emerald
| Aqua Leader Archie | 1st | 2nd | 3rd | Reward |
|---|---|---|---|---|
Archie's Mightyena and Crobat are exactly the same as Maxie's so see the Ruby section for info on those.
His Sharpedo is more of an annoyance than a threat. It has Rough Skin, which causes any Pokémon to take damage upon hitting it with a Physical attack, and its moves are Screech, Slash, Taunt, and Swagger. Annoying, but definitely not dangerous. Also, it has a secondary Dark typing on top of its Water typing, so it is pretty easy to one-shot it with Hariyama or Blaziken... assuming you can survive the recoil, that is.
Climate Change Any%
After the battle with the team leaders, the orb stolen from Mt. Pyre will begin to glow on its own, and the Legendary Pokémon will awaken! However, the legendary will simply escape from the cave, with Team Members messaging The Team Leader that the situation has become rather dire outside. And thus, your work here is done. Time to head back to the surface and see what has... oh.
"Dire" only begins to describe it. In Pokémon Ruby, harsh sunlight will envelop all of Eastern Hoenn. During this period, all Fire-type moves will have their power increased by 50%, and Water-type moves will have their power decreased by 50%. Solar Beam will be able to be used instantly. Multiple abilities like Chlorophyll will be activated, and Castform will change to its Sunny Form while in the affected routes. Pokémon will not be able to be frozen while in the affected routes by any means (already frozen Pokémon will not thaw out upon entering an affected route). The moves Moonlight, Synthesis, and Morning Sun will recover two thirds of the Pokémon's max HP instead of half, Thunder will have its accuracy lowered by 50%, and Weather Ball will change to Fire type and double in power. Additionally, all music that otherwise would have played while exploring the routes and settlements will not play, leaving you in silence.
In Pokémon Sapphire, Eastern Hoenn will be caught in a severe rainstorm. Water-type moves will have their attack power increased by 50%, and Fire-type moves will have their attack power decreased by 50%. Solar Beam will have its power halved. Water-based abilities like Forecast will be activated, and Castform will change to its Rainy Form. Moonlight, Synthesis, and Morning Sun will only heal a quarter of the Pokémon's Max HP, Thunder will always hit, and Weather Ball will change to Water type and double in power. Like in Ruby, any music that would have otherwise played while exploring the affected areas will not be present.
In Pokémon Emerald, Eastern Hoenn will alternate between being affected by harsh sunlight and the rainstorm, as Groudon and Kyogre fight to dominate each other.
Pokémon Found
| Ruby, Sapphire, & Emerald | Level | Encounter Rate |
|---|---|---|
| 28-35 | 90% | |
| 33-36 | 10% | |
| Surfing | ||
| 5-35 | 60% | |
| 5-35 | 35% | |
| 30-35 | 5% | |
| Old Rod | ||
| 5-10 | 70% | |
| 5-10 | 30% | |
| Good Rod | ||
| 10-30 | 60% | |
| 10-30 | 20% | |
| 10-30 | 20% | |
| Super Rod | ||
| 20-45 | 100% | |
Items Found
- TM26 Earthquake - In the deepest room, near the doorway (Requires Strength)
