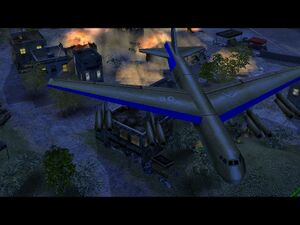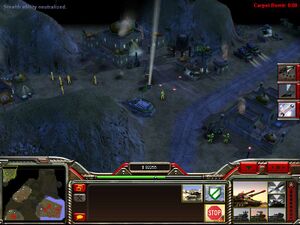
This is a night mission on a large map containing four GLA bases that must be destroyed. Not every GLA building on the map must be located and attacked. The narrator will tell you when a base is considered neutralized.
Keys to Success[edit]
- This map has a myriad of demo traps. They are all bundled in groups, so hitting one demo trap will destroy an Overlord tank each and every time. Upgrade your Overlord tanks with Gatling cannons and you will be able to detect the mines!! The Gatling cannon upgrade will also allow the Overlord tanks to be practically impervious to infantry attacks. (Troop carriers can also detect demo traps.)
- Have your Overlord tanks guard the front of your base with the security of a Gatling cannon and Battlemaster tanks next to them. This will help promote your Overlord more quickly, although it is still a somewhat long process.
- Be careful when you are not babysitting your Overlord, as it can be destroyed by a rocket buggy without any form of audio warning of this event.
- Create a dozen or so hackers and hack the Internet for plentiful cash flow.
- Upgrade the Capture command at the barracks and capture the oil derricks on the southwest side of the map with your Red Guard troops. These oil derricks must be protected or they will be destroyed by the GLA. You can finish this mission easily with over 100,000 in extra credits.
- Have a fleet of five or more Battlemaster tanks guarding the front of your base to protect from rocket buggy attacks.
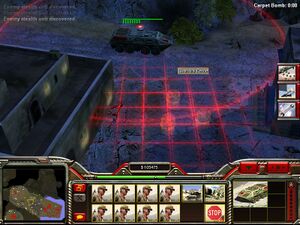
- The carpet bombing ability is controlled from the air field.
Getting Started[edit]

You start with a rather extensive base, with a comforting number of Gatling cannons and bunkers for initial security.
First build an extra supply truck at the supply center, as cash is a bit tight at the beginning. Empty the troop carriers and put the soldiers inside bunkers. Build the Weapons Factory reasonably close to the front of your base for quicker repairs, then a barracks. Next build an extra Nuclear Reactor or you will go “offline” after further structures are built and the gattling cannons will quit operating.
Choose the General's Powers of your choice. Artillery Barrage, Emergency Repair and Cluster Mines are highly recommended.
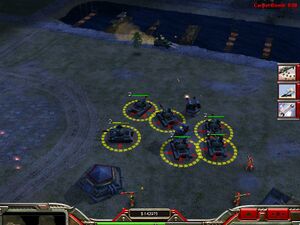
Start to build at least five Battlemaster tanks or Gatling tanks to protect your base from varied attacks. The most “irritating attacks” will come from Rocket Buggies, as they fire from so far away.Build a few MiGs and use these whenever a buggy bugs you.Don't set them on guard in the areas around your base yet-there are stinger sites nearby. Battlemaster tanks appear much more sturdy and your Gatling Cannons can handle incoming infantry. Continue to repair and replace as necessary while you research and build your Overlord tanks in the future.
Build a Propaganda Center for important upgrades. Build an extra Gatling Cannon in the upper northwest part of your base. If you place it too near the water edge, a Rocket Buggy on the other side of the water will destroy it.
Although it may seem unusual, it can be handy to build extra Gatling Cannons also on the back side, or northeast side of the base. The reason for this is the tech vehicles zoom by so fast, sometimes they reach the back of the base.
At every opportunity, lay down your cluster mines to slow down attacks. Use your Carpet Bombers from the Airfield and the Artillery Barrage to target nearby targets of concern.
Garrisoning your troops in nearby buildings can be somewhat futile, as the Rocket Buggies will just destroy the buildings from a distance when you are not babysitting these troops.
Research Nationalism and Chain Guns.
By now, hopefully you can start building your first Overlord tank. Upgrade all Overlord tanks with Gatling cannons.
As funds permit, start building hackers. Twelve or more should take stress off the cash flow situation.
Repair damage to your base, as necessary, and build up your fleet of Overlords to at least three, parking them in the northwest corner of your base to receive experience and promotions.
Offensive Operations[edit]

A frontal assault of the complex of buildings immediately to the northwest of your base (toward the center of the map) can be disastrous, as the counterattack is fierce with RPG troopers and rocket buggies. Overlord tanks will be lost. It is suggested to tackle this area later in the game.
That being said, it is good, clean fun moving your Overlords slightly forward of your base, to the northwest, causing massive damage to the lightly armored vehicles zipping around in the area.
Aerial assaults are a great advantage in this mission, but partially damaged stinger sites will rebuild if they are not completely destroyed. Use a double strike of Artillery Barrage and Carpet Bombing to permanently remove these fixtures.
Although there is an additional supply depot north of your base, it is not necessary to set up a second base in this area. Your cash flow from hackers and eventually the oil derricks to the west will be more than sufficient.
Once you feel secure with your base and you have at least three Overlords ready to rock n roll, head west, moving along the far south edge of the map. Have a few backup troops for security. Use the Emergency Repair when necessary.
By now, you should be able to afford more Overlords, and Overlords receiving too much damage can be sent back for repair and replaced by another.
Thankfully, with the Gatling gun upgrade, you can now spot and destroy demo traps along the street heading due west. Carefully take out all enemy troops along the way until you come to the oil derricks. Send a troop carrier to capture these two oil derricks. Research Capture Building at the Barracks if you have not done so already.
Leave sufficient troops at this location to protect the oil derricks.
There is also a third structure that can be captured, but it will be destroyed immediately by GLA troops if you have not cleared the area just west of these structures.
Although there are many ways to beat the mission from here, the upgraded Overlord tanks make the rest of this mission a fun, GLA-bashing epic. With three Overlord tanks (hopefully at least some of them upgraded to two bars for self-repair) you can now work your way from this southwest part of the map to the northeast, destroying the three smaller GLA posts in the process.
Note: It is not necessary to explore and destroy every GLA structure on the map. The game's narrator will inform you when a GLA outpost has been destroyed.

When this is done, have a few more Overlord tanks (or destructive vehicles of choice) join you to destroy the final base in the northwest.
Mission accomplished!
Note:If you spend a general point on nuke cannons and build one or two you will find it easier to destroy the GLA, although these have to be used carefully and slow things down. It is suggested that when you destroy a GLA base, build airfields on it's ruins, and start making MiGs-you can't build many airfields in your original base as it'll become too clogged. Protect the airfields with Gatling cannons. You can use the MiGs to protect your original base so that you don't have to babysit your troops there. You can also use them to hit important enemy structures, or to support your ground troops when they come under heavy fire.
Alternate strategy[edit]
This strategy has been tested in Brutal mode with minimal losses, so it will work for any mode. This mission will reward a systematic approach (and test your multitasking skills). It utilizes a simultaneous three-prong advance in alternating stages.
- Task Force West: utilizing Black Lotus, clear Demo traps and occupied buildings, capture structures, Oil derricks and Refinery, hack Supply stash for cash, use workers to build Tunnel networks and other structures enabling GLA assets.
- Task Force North: clear and control north region, exploit additional Supply dock while denying it to the GLA.
- Northwest Diagonal: utilizing off-map assets (Cluster mines, Artillery barrage, Carpet bombing run) and MiGs, achieve air control over the diagonal progressively towards the ultimate GLA base in the northwest.
As usual, the early game focuses on defense; the offensive needs to wait until you can build Overlords. Create a 2nd Supply truck immediately (when your Supply dock runs out, you should be in control of the north one). Load bunkers initially with Infantry from the Troop crawlers, then with Rocket soldiers when available and guarded by Gatling tank(s). Use MiGs to guard area immediately in front of base, first taking out nearby Stinger sites with Artillery barrage. Drop Cluster mines and set mines for structures, especially Gatling sites and Bunkers. Be on the lookout for Rocket buggy stand-off attacks, Technical base-rushing and Suicide bomber attacks (originating from train station to the west).
- Task Force unit disposition
West:
- Black Lotus: use to scout ahead identifying threats (especially the ubiquitous Demo traps), capture buildings and structures, hack for cash.
- Gatling tank: use to eliminate Demo traps and troops.
- Flame tank: use to clear occupied buildings.
- Overlords; one of each variant: use to eliminate Stinger sites (and other threats), repair vehicles and transport and heal troops. Note: Overlords have difficulty negotiating the urban terrain here.
- Optional: an additional Propaganda Overlord bringing up the rear (a "spare", just in case); a hacker (transported in Bunker Overlord) to disable buildings while being captured.
North:
- Note: these units should advance in formation (Ctrl + F) to avoid exposing Troop crawlers to threats or other units to Demo traps.
- Troop crawler: these expose Demo traps and can transport troops. Recommend loading with a mix of Infantry, Rocket troops and an (optional) hacker.
- Overlords; one of each variant (as with the west): navigation is not as difficult here. An optional "spare" Propaganda tank is recommended at the rear.
- Flame tank: use to clear occupied buildings.
- Gatling tank: somewhat optional, but always useful.
- Bulldozer: build a Supply depot (optional) or wait for a worker from Task Force West to build a Supply stash and Tunnel network.
Diagonal (air):
- Cluster mines: these reveal territory and expose Stinger sites while providing some protection. They also destroy Demolition traps.
- Artillery barrage: eliminate Stinger sites.
- Carpet bombing: mass destruction. Note: likely to fail if there are any Stingers in the area.
- MiGs: use to guard areas cleared of anti-air threats. Two groups of two MiGs each works well using a leap-frog technique, advancing along the diagonal as areas become clear.
Once each ground Task force reaches the end of their respective map direction, use them in a coordinated advance to the northwest: north force advancing west, and west force advancing north. It is not necessary to eliminate everything, but it is more satisfying.