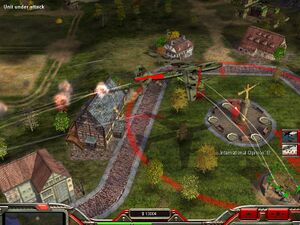
This mission attempted on the hard level is extremely frustrating. The time constraints placed on the player are rigid. There is practically no room for error. Many strategies that initially appear promising will lead to disappointing results because of lack of time for execution.
The GLA has demonstrated their domination of the region by erecting six statues. The longer the statues remain, the lower China’s international prestige will drop. If the “prestige meter” drops to zero, the mission will be lost.
Five of the statues are in the southern region, while one is located in the heavily-fortified northern base of the GLA.
Throughout the mission, you will be harassed by Rocket Buggies attacking your base defenses. Scud Launchers will wreak havoc on your tank battalions if they successfully launch against them.
Establishing Your Base - Destroying the First Statue[edit]
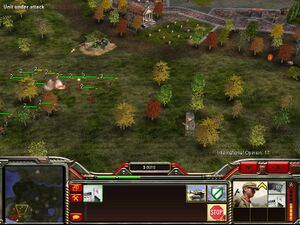
Start by building a Nuclear Reactor and Barracks. Move the hackers to the northeast of the Command Center, what will be a somewhat safe area in the middle of your base, and have them hack the Internet for cash.
Upgrade to Red Guard Training and create nine pairs of Red Guard. These will come in handy taking out local Stinger Sites.
Start building two Supply Centers simultaneously, to the west of the lower Supply Dock and to the south of the northern Supply Dock. While these are building, place one Gatling Tank on Guard mode on the far western part of your base, one on Guard mode to the southeast, and one directly south of your Command Center. You will be attacked immediately by Ambush forces, but these units should be able to take care of them.
Build an extra Supply Truck at each of the Supply Centers.
Have one of your units blow up the Demo Trap visible slightly to the east of your base. Move up your Listening Post slightly to the north to highlight the Demo Trap and destroy it. Don’t agitate the Stinger Site slightly to the north with your tanks.
Move up your Red Guard troops and destroy the Stinger Site. They are more effective than your tanks because they can quickly shoot the soldiers that are contained therein.
While sending your Red Guard further north, have your bulldozer build a Gatling Cannon north of the eastern Supply Dock. Have your Red Guard destroy the two Stinger Sites while this is building, then the statue. Immediately run back toward the safety of the base, as there will be an immediate counterattack.
Repel the counterattack with the assistance of your tanks, Gatling Cannon and the Tank Hunters located inside your Listening Outposts.
Repair your tanks. If you haven’t done so already, start cranking out vehicles. Start with two more Listening Outposts and five more tanks.
Move one of the Listening Outposts slightly below the cemetery (with the headstones) north of the base to await the Rocket Buggies that are about to attack. When the Rocket Buggies target your tanks and Gatling Cannon, the Tank Hunters can destroy these irritating, cowardly little vehicles.
It is challenging getting the Outposts in position without being seen, and they will often be destroyed. Keep rebuilding and replacing these Outposts as necessary. It is the best way to fight off these Rocket Buggy attacks.
Build a second Gatling Cannon closer to the north Supply Depot when you have the opportunity, being sure there is a Listening Outpost to the north of there. You may have to drop a cluster bomb on the rocket troops, so that troops exiting the tunnel network will be destroyed as you assault it with a small group of tanks.
Build a second War Factory and devote this one to building up surplus tanks. Have the Rally Point set to the south of the base and stockpile tanks as you get the opportunity.
The goal is to maintain your base intact, while suffering peripheral losses with a few tanks and Listening Outposts.
Destroying the Second Statue[edit]
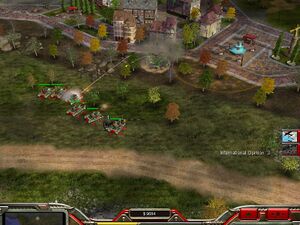
International Opinion will be lowering throughout your defending of the base. Before it gets too low, send a battalion of tanks due east to destroy the next hidden Stinger Site that pops up. In conjunction with this, lay down Cluster Mines on the path between this Stinger Site and the next statue slightly further to the east. Carpet Bomb the second statue. This will trigger a counterattack. Hopefully, the Cluster Mines will destroy some of the enemy forces. Pull back your remaining forces back to the base and repair your tanks. Hopefully, the Scud Launcher trailing your forces will be destroyed by Listening Outposts previously stationed in the area.
Strengthen your northern defense by moving five tanks over to the Gatling Cannon, being sure to maintain a Listening Outpost north of the area. Continue to have at least five tanks to the east also.
Build up another contingent of 18 or so Red Guard (or send five or six Battlemasters) to clear out the Stinger Site around the second statue previously destroyed. Continue north and destroy at least one more Stinger Site. If you shoot for destroying a third Stinger Site, there probably won’t be any survivors.
Destroying the Third and Fourth Statues[edit]
As the clock continues to tick away, there should be no problem Carpet Bombing the next statue a bit further to the east.
If the Red Guard or tanks were successful in destroying at least two Stinger sites, it is now possible to bomb the statue on the far east side of the map. It may not be successful every time, as there may be random Quad Cannons in the area. If the assault was not successful in destroying these two Stinger Sites, send other units to destroy at least those two sites. If opportunity presents itself, destroy at least one more Stinger in the area.
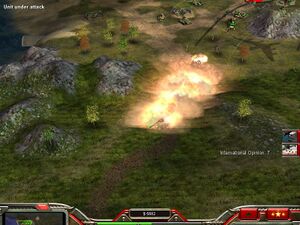
Do not expend any more energy heading to the east.
Practically all of your time and attention will be devoted to fending off attacks from the north, the east and Rocket Buggies coming from the northeast. Continually replace units lost. If the Listening Outposts are not properly replaced, one Scud attack can take out an entire battalion of tanks. Don’t forget to constantly add to your reserve forces to the south for the final assault of the sixth statue, including five or six Dragon Tanks.
When opportunity presents itself, Cluster Mine the pass which is directly to the north of your base.
If you have a chance, Carpet Bomb the area below the western entrance to the northern base to destroy a string of GLA units.
Carpet Bombing the last statute can be tricky if you have the updated version of this game due to a glitch (see below). Therefore, you may have to destroy the next statues with ground forces. Diversion is one tactic you can use to destroy statues 3, 4, and the others. With a horde of tanks, gatling guns, a couple of troop crawlers and a few Listening posts targeting land mines and statues, use a about 10-15 (more is better) soldiers to attack the stinger sites and the motorized patrols. If (or when) you lose the soldiers, then split the horde of tanks, gatling guns, etc., into two or more groups. Leave one group to attack the remaining statues and other group(s) to respond to the GLA counterattack and stinger sites. Once the statues 3 and 4 are gone, immediately retreat everything back to base for repairs. Station remaining soldiers and tank busters inside buildings. The GLA counterattack will go after the buildings while you are retreating back to base. As stated above, while you are attacking, keep building new tanks, listening posts, gatling guns, and soldiers.
Destroying the Fifth and Sixth Statues[edit]
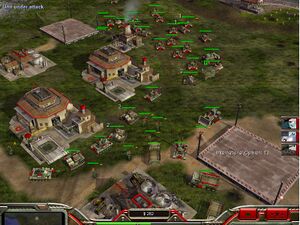
The fifth statue can be easily Carpet Bombed. This will set the timer running for the final assault on the northernmost statue.
~~If you have the updated version of the game, (no carpet bombing), send a group of 15-20 tanks along the path to the east. Watch out for a demo trap between the entrance to the path and the first oil derrick, and drop a mine cluster just slightly north of the oil derrick to the east, to destroy enemies exiting the tunnel network as your tanks approach.~
By now, you should have a gigantic army of Dragon Tanks and Battlemasters. Move them en masse to the north, along with all other available units, destroying everything in their path. Have the Dragon Tanks slightly lag the Battlemasters, but not too far, as Rocket Buggies will sneak up to destroy them.
Suggestion: Garrison troops and tank busters inside building while heading north. This will divert attention away from the main assault and delay any counterattack from the rear of the main assault.
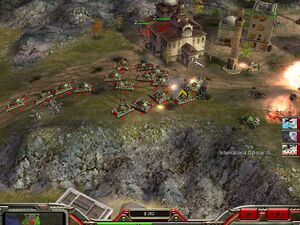
It will be a true slugfest as you fight your way through the units and the Stinger Sites at the western entrance. Depending on the timing, there may be a scud launcher southeast of the stinger sites. Protect your Dragon Tanks as best as possible and move them to the far north behind the buildings as you approach the sixth statue. Burn out at least three of the garrisoned buildings. A GLA tank stationed next to the statue will harass your Dragon Tanks and may destroy them all. If this happens, move your Battlemasters in between the buildings -- shielding them from the fourth garrisoned building that is still occupied. From this shielded position, destroy this tank and the statue.
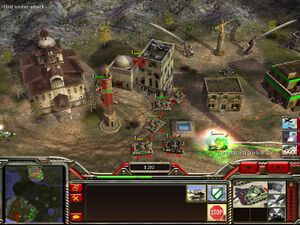
Mission accomplished!!
Side Note: For some reason, it is not possible to Carpet Bomb this last statue. The plane will veer to the west each time to drop its load. This is a bit disappointing that Westwood would alter the rules of combat without informing us.
CORRECTION: It is possible to Carpet Bomb the last statue. If you aim the Carpet Bomb at the occupied buildings to the southwest of the statue rather than at the statue itself then the rules change works in your favour. You need to aim such that the Carpet Bomb looks like it is roughly on the right line but will fall a bit short. When the plane actually drops bombs, they will inexplicably fly forwards towards the statue and destroy it. This has been repeatedly tested on hard difficulty mode.
Side Note2: Westwood made it even harder in the Command and Conquer First Decade release, Zero Hour 1.4 there you have NO carpet bomber at all.
Side Note3: Call it cheating, but you might consider saving your game under a new file before the final assault...it might take multiple tries to accomplish, and it's very irritating to start an entire mission over because a single scud launcher ruined your army.
Side Note4: CALL it cheating, but there is another way to destroy the last statue. Instead of wasting hordes of units by pummeling your way through to the north you can use a "glitch" to make the gla do your work. Use your dozer to build a bunker/speaker tower right behind the statue. Make sure your dozer doesn't run off and watch enemy tanks or RPG-soldiers wreck your building with one shot, causing splash damage. Repeating this process will destroy the statue on the long run. Speaker towers tend to work better on this since they are smaller. If you're low on funds, sell all the buildings you don't need to defend (command centre, supply stash or even weapon factories). Remember that destroying the statue that way will take some time, so best start with it immediately after having destroyed the fifth statue, or even before. If needed, this trick can be repeated with other statues too (even though it might be easier and faster to destroy them the traditional way).
Alternate strategy[edit]
The abundant, if limited, resources allow for aggressive mass infantry rushes and makes for a viable, and perhaps less annoying strategy than a more defensive one.
- Build two supply depot and additional workers for each.
- Build two barracks and pump out infantry units non-stop.
- Spread your Gatling tanks and listening vans around the base to deal with ambushes. Send your battle masters to guard the north.
- Defensive structures will be unnecessary. Your attacking forces should cut down their attacking forces.
- Enemy assaults comes from bottom east and north, which is also where you should start sending your waves.
- Leave small pockets of surviving units around the map to distract, scout and attack.
- Troop Crawler are optional. They can spot traps but requires more care, a war factory and die easily.
- Keep an eye on your units and do not be too wasteful as resources are limited. Hackers will not be able to keep up.
Zero Hour 1.4[edit]
In Zero Hour 1.4 there is no carpet bombing making this mission exceedingly difficult on Hard, quite possibly the hardest mission of the entire C&C series. The GLA have everything and you have been stripped of all weapons of mass destruction and artillery.
The rocket buggies are annoying but the primary cause of failure is scud launchers destroying clusters of tanks and infantry - what is worse the scuds can instantly level up to heroic and become even more dangerous. Both the buggies and scuds will retreat from units sent to try and kill them which make them frustrating to kill.
- Save and reload mercilessly. I hate to give this advice, but a hero scud can obliterate your entire army in moments if your attention is elsewhere.
- The most useful units I found to be battle masters and troop crawlers. Red Guard are invaluable on this mission but they are best transported to keep them safe from scud toxins, also the crawlers are a lot faster than hoofing it and mobility is one thing the chinese army lacks.
- When a rocket buggy is bugging you, set a couple of red guard to attack it, the missiles don't home on infantry and the buggy will retreat from the red guard. It will probably lead the red guard to their deaths which is well worth it if it saves your vehicles from taking even a single volley of hits, but sometimes the infantry will even catch it either because the buggy doesn't recognize them as a threat or makes a "mistake". Also garrisoning infantry in buildings, or even putting them behind a building will distract the buggy and buy time for your attack force to destroy a statue.
- When a Scud launcher shows itself, assign about 5 red guard or a couple of battle masters to kill it, while retreating or scattering the rest of forces. Scud dodging is essential, but chasing the scuds away (and hopefully catching and killing it) is more effective. Send forces to kill the scud even if its protected by other GLA forces as the scud will attack or retreat from the units approaching it so it will stop bothering your main forces, which can then kill the supporting GLA units. Whatever you do don't send the whole army forward to try and kill the scud, chinese forces are too slow for that to work.
- Troop crawlers are also effective at "sniping" scuds as they are fast and can reach the scud and unload troops on it before it can react. Also with the scud gone you'll probably get some good mileage out of the infantry.
- In general a good approach is to build attack groups of battle masters and troop crawlers then send sorties across the map to take out 1 or 2 statues, retreating to heal at a speaker tower once the battle masters are too weak to continue. Retreating rather than fighting to the bitter end seemed effective in helping to lure GLA forces to their deaths. There's no point in retreating infantry, just stick them individually in buildings to be nuisances to buggies.
- Sending attack groups across the bottom of the map then up to a statue is safer, as you don't run into as many GLA forces while in transit. You can also grab the supply crates and oil derricks from the bottom pass on the way to killing the east most statue (beware: there is a tunnel network on this pass, so either bring enough forces to fight the tunnel defense forces, or bait them out and destroy them at the tunnel network near your base)
- For the final assault send all the units you have (heck, even dozers and supply trucks) to the northern statue and rally the war factory up there set to building troop crawlers which pack the most punch and are fast. The northern statue is the only statue where you have to contend with garrisoned buildings, 3 troop crawlers would probably provide enough forces to overwhelm the garrisoned buildings and destroy the statue.
- The GLA base does not appear to have any toxic units, just scorpions, marauders, quad cannons and technicals, this makes it easy to use red guard against it.
- Although I didn't try it, chances are it would be quite easy to eliminate the GLA base early in the mission using red guard and battlemasters, red guard can eliminate the stinger sites no problem and compared with the city units it is quite low tech.
- As a final micro tip: I put all battle masters and red guard in group 1 as my "attack move" group, and all other vehicles including troop crawlers in group 2 as the "don't attack" group - by not using attack commands with group 2 that kept the infantry safely inside the troop crawlers until I wanted them deployed. After deploying the infantry I added them to group 1 and allow the empty troop crawler to be destroyed.