This walkthrough strategy will work on all difficulty levels.
Overview:
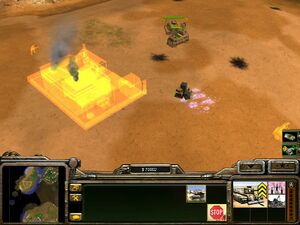
There are three goals that must be accomplished:
- Capture the Command Center to the north to gain the GPS Scrambler (Cloaking) ability.
- Capture the Command Center to the west of the river to gain the Sneak Attack (Magic Tunnel) ability.
- Destroy the Command Center up in the northwest hills that can only be reached via the Sneak Attack Tunnel.
This is an extremely difficult mission to fend off the cloaked GLA soldiers. A strong defense around your base must be established before moving forward offensively.
Establishing Your Base[edit]
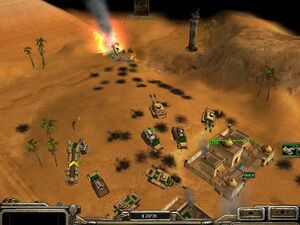
Speed is important, as the GLA attack begins immediately. Build a barracks and immediately build four Rebels. Build a Supply Stash close to the supply pile. Research the Capture command after the Rebels. Build an Arms Dealer and immediately begin building Quad Cannons and tanks.
Save one General's Power for the Scud Launcher for later use in the mission. Selecting Marauder tanks is suggested.
After building enough Quad Cannons and tanks to defend the northern part of your base, build a Technical. Put a Rebel inside the Technical to give him a safe ride to the oil derrick south of the base. Escort the Technical with two Marauders. Park the Marauders at the pass that leads up to the southern oil derrick.
Bring over a radar van to this area, along with Quad Cannons as you slowly build up your units.
Build a Palace. If you place a Palace on the northern edge of your base, you can put RPG soldiers inside of it to help protect your base. Buy the upgrades Toxin Shells and Anthrax Beta at the Palace to help your armored units fight off infantry attacks.
Build Jarmen Kell and place him in an area north of the base and put him on the Guard setting so he will automatically fire at infantry.
Put a Technical to the east of your base to deal with occasional Ambush attacks.
Build up enough units to secure the area around the oil derrick to the west. Be sure a radar unit is in this convoy so the sniper can be found and eliminated. Once the area is secure, drive a Rebel over inside of a Technical to capture that oil derrick. Set up strong defenses to defend the oil derrick from both the northwest and east of the pyramid.
Secure scraps left in the battlefield to help build stronger armored units. Replace units lost in battle and repair them at the Arms Dealer as time permits.
As soon as possible, send a Marauder, a Quad Cannon and a Radar Van to secure the area by the Supply Dock to the west. Bring over a worker in a Technical to build a Supply Stash once this is accomplished. Keep these vehicles in this location to defend the area.
Note: A great trick to keep the pressure off the units guarding the northern part of your base is to create Scud Launchers and have them "force fire" the area north of your position. Since the enemy is cloaked, you never know what you are going to hit. Accomplish the force fire by hitting Control and then clicking on the area to attack.
Capturing the First Command Center[edit]
After capturing two oil derricks and having a second Supply Stash established to the west, funds will not be an issue. The oil derrick to the north of the base can either be captured or destroyed. It is a difficult area to defend because of the narrow slots created by the rows of buildings in the town.
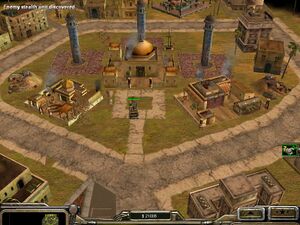
Immediately east of the oil derrick is a Tunnel Network that will cause issues for your armor. Destroy this now or leave it for later.
Offensive moves to the north with a small amount of troops will probably be overrun and destroyed by the enemy. The enemy will fiercely defend the area and, again, it is a difficult area to fight in around the oil derrick because of crowding in the area.
One strategy that worked well is to build an "embarrassingly large" number of armored units before pushing north all the way to the Command Center in the north, avoiding the Tunnel Network to the east of the derrick. (Take your troops due north but to the west of the line of buildings or down the middle of the village.) Massive armor buildup can be accomplished more quickly by building a second or even a third Arms Dealer. Expect a high rate of attrition among your troops.
There is another strategy which works even on the hardest mode. Build 20-30 rebels with the camouflage upgrade which can be purchased from the palace and you can capture the command centre to the top with ease. The rationale behind this strategy is that oncoming enemy troops would not see your stealth rebels as they walk to the North, and they will not suffer large casualties like the other armoured troops. Beware of the 2 PATHFINDERS/SNIPERS located on the hill before entering the base. After the 2 snipers are down, you can easily garrison your stealth rebels in the buildings to the north to fight off all enemies/defensive structures. No need to build large amounts of armoured units, where even 10 maurauder tanks would be hard to push to the North. You would probably need about 50 tanks to deal with the camouflaged terrorists, hijackers and RPG troopers. Once your radar van is down your tanks are sitting ducks to these irritating infantry. Even the best unit against them, a 3 striped Jarmen Krell will not be able to fire instantly at them due to the tanks and buildings "blocking" his line of fire. Putting him in front of your tanks will risk him getting killed by his friendly SCUD launcher missiles as they do fire automatically on enemies nearby.
Be sure a number of Radar Vans are included in your assault to the north.
It is also possible to go to the west of the pyramids before looping back to the Command Center, but the resistance is just as strong.
On the small plateau to the southwest of the Command Center, a large number of cloaked Quad Cannons are awaiting to pounce on your troops. Force fire on this plateau with your Scud Launchers by pressing Control and then clicking on this area.
There will be cloaked Tunnel Networks and Arms Dealers in front of the Command Center that must be destroyed. The minarets around the Command Center have a tendency to fall and damage it, but you may not lose the mission if the Command Center is inadvertently destroyed versus captured. In the episodes I played, I was still granted the Scrambling ability despite the Command Center being destroyed. I am not sure if this is a glitch or not.
When the area is secured, set your troops on Guard mode and bring up another Radar Van or two if they have been lost in combat or cloaked suicide bombers can destroy large portions of your force. Go back and destroy the Tunnel Network by the oil derrick to the south if you haven't done this already and the partially destroyed barracks to the east of there.
Set up a new base in the area by bringing up workers in a Technical. Make sure snipers have been cleared from the area with the assistance of your Radar Vans before letting them out of the vehicle.
"Suppression fire" by your Scud Launchers along the road leading to the western bridge can "soften up" approaching cloaked enemy units.
Capturing the Second Command Center[edit]
Scramble (cloak) as many of your units as possible while reorganizing for an assault toward the Second Command Center on the west side of the river. Destroy the two bunkers on the west side of the river with Scud Launchers.
When crossing the river, your units will become uncloaked and the Artillery Platform will start tearing apart your troops. The Artillery Platform must be destroyed immediately before it does too much damage.
Continue to move to the southwest, using the assistance of a Radar Van to find cloaked enemy buildings and units. Be sure to have extra Radar Vans ready to go in case some are lost in battle. Use the Radar Scan command on your side console to locate Stinger sites and Tunnel Networks to target with your Scud Launchers.
While moving forward, also have your Scud Launchers force fire into the ground on the plateau to your west in preparation for attacking the third Command Center. The area appears empty, but is actually filled with a large number of enemy units.
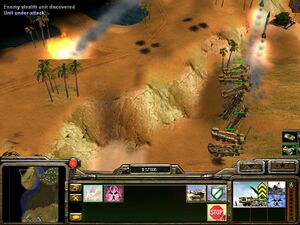
Capture the second Command Center to receive the Sneak Attack ability.
Destroying the Third Command Center[edit]
Soon after the second Command Center is captured, two separate Scud Storms will begin their countdown.
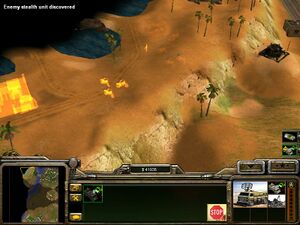
The only way to reach the third Command Center is by use of the Sneak Attack, the ability to open up a Tunnel Network at a location of your choosing. You can have an assault force of ten units initially -- choose them wisely.
If the area around the Sneak Attack Tunnel is not cleared first by Scud Launcher attacks, it will be destroyed before your troops can be deployed.
Scramble (cloak) all of your units before the assault. Include a Radar Van, as there may be two Jarmen Kells ready to shoot the drivers of your armored units. Include Scud Launchers so Tunnel Networks and Bunkers can be easily destroyed from a distance. Tanks and Quad Cannons are also suggested.
Once the initial ten units go through the Sneak Attack Tunnel, other troops can continue to go through it, as long as it is not destroyed.
Destroy the Command Center and the mission is accomplished.