This mission consists of two parts. The first part is to protect the port while ten supply vehicles unload at the dock. When all ten arrive, they must be safely escorted to the warehouse.
The action really starts once the ten supply trucks arrive at the warehouse and you are provided a bulldozer to start construction of your base. This is not a warm-up mission. You will have to defend yourself from a full-scale assault from the GLA. Your base will be overrun if your defensive focus is lax.
Go to the bottom left corner of the map and you will see your aircraft carrier. Select it and you will see the option to guard/protect your base. Using this ability will force all aircraft on board to fly to that area. Note that any craft destroyed will be automatically and freely replaced. Note that losing aircraft does not stop further airstrikes.
Note: the full-scale assault can be prevented by early destruction of the GLA base. You can try the mission both ways for two totally different experiences.
Protecting the Dock[edit]
This part of the mission is not difficult. Protect yourself from a few attacks and achieve a few objectives while waiting for the final supply truck to arrive.
A new icon appears to the right that gives the ability to call in artillery strikes from your battleships. Move a sentry drone to the east far enough to reveal two bunkers. Destroy these two by calling in missile barrages. These are the main deterrents from moving your supply trucks to the warehouse once all ten arrive.
Go ahead and destroy the bunker immediately to the north of your base. This bunker poses a danger to your Comanches later in the mission. You should also have enough time to destroy a few stinger sites on the far right side of the map.
Keep that sentry drone located where it is and move another one to the other side of the bridge, far enough to locate the GLA vehicles at the warehouse. Call in an airstrike to destroy these vehicles.
Keep this sentry drone located here, as this will give you a great "heads-up" for approaching GLA – especially important to protecting your Comanches from incoming Quad Cannons.
Position your missile defenders inside the two civilian structures to the right of the docks. (Once the bulldozer arrives, these buildings will be destroyed by Rocket Buggies and Scud Launchers if you don't baby-sit them with your Comanches.)
It is not necessary that all supply trucks survive to achieve this part of the mission. You don't have to physically escort them to the warehouse if this will disrupt where you want to have your units positioned.
Go ahead and position one of your Pathfinders to the west of the base north of the Tech Repair Bay. This lone sniper can defend the western part of your base from GLA infantry.
Pick up the U.N. crates to the eastern side of the dock for a few quick credits.
Move Colonel Burton inside the parking lot area away from the main action until you are ready to use him. He may be lost in the general melee that follows.
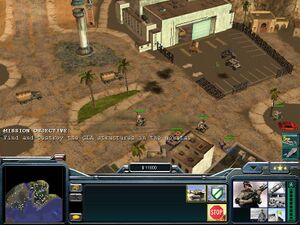
Applause is heard as the convoy arrives at the warehouse. But the mission is not over. It is just beginning.
Establishing the Base[edit]
A basic defend-and-hold strategy is great fun. The onslaught of incoming GLA armor will keep you on your toes. Over 650 GLA units will be engaged in this manner. The mission can be shortened by targeting GLA facilities with your Spy Drone and regular radar facilities.
- Capture the oil derrick on the west side of the map.
- Build a Cold Fusion Reactor, Supply Center and then a Command Center before your Barracks and War Factory. This is so that the GLA base can be more quickly revealed and attacked with your Spy Drone and Spy Satellite capabilities.
- Select your Generals' Power of Spy Drone and Paladin Tank.
- Build War Factory. Start pumping out Paladin tanks while you use the Spy Drone and Spy Satellite to reveal the GLA base to the northeast.
- Immediately start targeting GLA facilities, beginning with the two Arms Dealers. Attack other structures as opportunity presents itself.
- The Arms Dealers and other structures will start to rebuild. Destroy them every time they are rebuilt.
- Upgrade the Paladin tanks with your choice of either Battle Drones or Hellfire Drones. Battle Drones are best for anti-infantry firepower, plus have the added bonus of healing your tanks.
- Build a Strategy Center for upgrades. Use upgrades available at the Strategy Center as funds permit.
Offensive Operations[edit]
If the Arms Dealers are destroyed rapidly, it is quite simple to defend your base – a much different scenario than if the GLA base remains hidden.
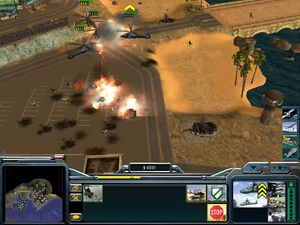
- If you decide to fight a land battle, soften up the brunt of the attack with your Comanche helicopters. With your Sentry Drones properly positioned, you will have plenty of warning to move them to a safe location if Quad Cannons or RPG troops appear.
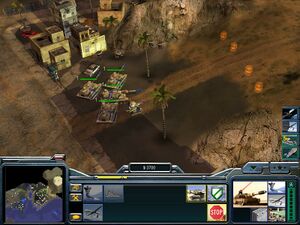
- When your base is secure, build up a contingent of Paladin tanks. Have a Sentry Drone join them to detect Demo Traps. A Pathfinder can also come in handy if stray GLA infantry are encountered. Alternate between moving these units to the east and using the Battleship Bombardment to destroy Bunkers, Stinger sites and GLA buildings.
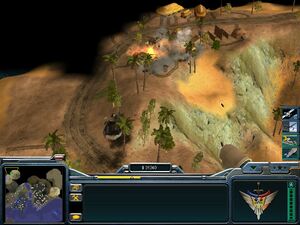
- Reveal the northwest side of the map, where a GLA Barracks is located. Destroy it to stop the flow of GLA infantry. If it rebuilds, destroy it again.
- Destroy Stinger sites far ahead of your Paladins with the Battleship Bombardment so that Battle Drones are not lost. Destroy Bunkers also in this manner.
- Note: Vehicles and infantry can be boarded on the Chinook supply helicopter for rapid transport.
- Continue moving northward through the GLA base and then back west.
- Not every Bunker and Stinger site must be destroyed, but all of the other buildings on the northeast plateau and the single barracks to the northwest must be destroyed to win this mission.
Side Note: If you elect not to immediately destroy the GLA base by Battleship Bombardment, it is a great "insurance policy" to build a backup bulldozer, in case your initial bulldozer and Command Center are lost in the battle. This can happen, as the GLA onslaught is quite heavy.
Easier Way[edit]
With this method, you should be able to do the job in something like 20 minutes. You won't even have to build anything, thanks to the one man army guy, Colonel Burton. It is advisable to get a Command Center to use the Temporary Scan skill, which can be useful.
First thing to do: take Colonel Burton accross the bridge in order to get closer to the stack of enemies waiting in the spotlight. Place him in a building right after the bridge. Launch an aircraft attack on this GLA units to get rid of any trouble later in the mission. What survived will attack your base immediately, but make sure Burton intercepts them before they can have the chance to. Now back to your base.
The Northern part of the map only contains barracks. After bombing the closest bunkers from your base (on the North side, and why not the East too), send a sniper up North, in one of the first buildings located in the area. Picking a house where all paths converge to your base will insure you that nobody will reach the harbour from there. Then, make sure the choppers will kill anything that may come from the east, even though they probably won't even have the time to be useful.
Now, the main job is to clean the GLA base on the East side as fast as possible, so they won't have the chance to trigger attacks on your base. To do so, select a sniper to join Burton. All you need to do is bombing the bunkers, tunnels and Stinger sites from the sea so this brilliant pair can move safely all along the way. Watch for traps as well; the sniper is with Burton mainly for this reason. As you're getting close to the first enemy buildings, leave the sniper a bit behind cos his job is done for now. Carefully, destroy one by one the GLA quarters. Motorized units will attack you. As long as there isn't any Quad or couple of Technicals, there's no danger. Kill them one by one or just wait until they can't see you anymore and leave, then go on with the demolition. If Quads are in the perimeter, bomb them thanks to your float before attacking the other ones. Note that every time you'll shoot, enemy units will come back at you. That will be a bit annoying, however this is a way to prevent your base from attacks cos all these vehicles were meant to meet the rest of your troops, on the docks.
Once everything is gone, the fastest way to end it is to use your satellite and make light on the North-West part of the map, where the last barracks stand. As soon as you've found them, send your aircraft there and take a break before mission 3.