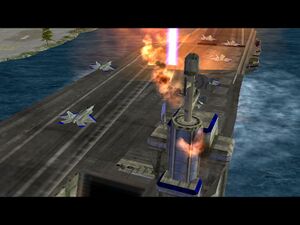
The ultimate goal of the campaign is to destroy the U.S. aircraft carrier in the region. It will be necessary to capture the American Particle Cannon and then engage in a series of island hopping to achieve the goal.
This level has interesting puzzle-like features – combined with active combat situations.
Although this is not a timed mission, there is a sense of urgency as the American air power will continue to strike at your facilities and units throughout the mission.
Island 1[edit]
You start the mission with eight Rebels, four RPG Troopers, three Hijackers, three Technicals and a Quad Cannon. The many Rebels will come in handy for commandeering USA vehicles that Jarmen Kell has previously disabled.
The first goal is to eliminate the squad of rangers on patrol near the tank (it's a Paladin on Hard difficulty.) Your elite technical will be more than adequate for that job. Now get all your hijackers to the tank (one hijacker is a waste; it will be eliminated by the Paladin's laser). Once done, get your quad cannon rolling to the east and pick off the two packs of infantry (about five rangers and a missile defender) in that direction. Once done, that quad cannon will be promoted to elite and would be pretty adequate in defending the particle cannon. Now have it pick up the scraps for a much needed boost of firepower. Oh, and get that Heroic technical of yours down there; 20 rangers via paradrop later on will eat that quad cannon for lunch through superior numbers.
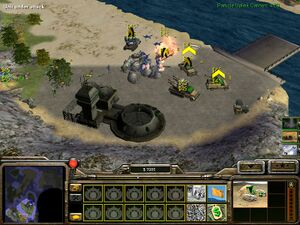
It will be announced you are low on power and must capture Cold Fusion Reactors to enable the device.
Island 2 – Capturing the Tomahawk[edit]
A Tunnel Network is revealed on the island to the north. Take over the Paladin, your Hijackers and Tank Killers and a few Rebels. The Rebels will be needed to capture disabled units in the area.
The announcement is made: "We must not let the pilot reach the Tomahawk." This is actually misleading, because trying to kill the pilot will most likely lead to the destruction of the Tomahawk also. You don't want that to happen! The Tomahawk will play a key role in winning this mission.
Run the two Hijackers up on the path that separates the Tomahawk from your newly discovered base to the west. When the pilot enters the Tomahawk, it will roll toward your Hijackers and you can easily capture the vehicle.
Hard Difficulty/Paladin promotion[edit]
Get that new hijacker back into the tunnel and get it out on the other island. You can try to jack that tomahawk if you want to, but with this difficulty, it's got a high consistency of getting away to the American-held barracks of yours. Now get your Paladin and 'rabbits' for the American guards to shoot at. A bunch of rebels will do the trick. Have them distract the guards (3 Crusader tanks) while the paladin shoots at them with (hopefully) impunity. The tanks' destruction will give it probably an elite rank. Now Jarmen Kell appears. The tomahawk, in the meantime, is just lounging beside the palace. Now get your hijacker to that sitting duck. Further north, the cluster of cold fusion reactors are guarded by 4 more Crusader tanks. Decide whether you want to use your RPG troops, the newly promoted Paladin, the Tomahawk or a combination of all the above to eliminate them. And check up on your Particle cannon guards; they could, by now, be coming under attack from paratroops and raptors.
Island 2 – Capturing the Reactors[edit]
Without great delay, as soon the air assault will begin, position your Crusaders and RPG Troopers between the Tomahawk and three enemy tanks. Engage the tanks and your base will be liberated. Quickly run your Rebels over to capture the two Quad Cannons and the Toxin Tractor. As the Rebels are doing this, assign Jarmen Kell a number and have him starting shooting the drivers of the four American tanks up near the Reactors to the north.
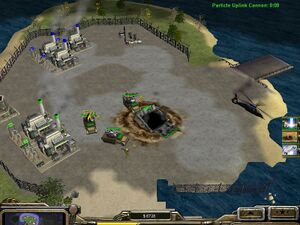
Immediately run the captured Quad Cannons back to the Tunnel Network and place them by the Particle Cannon. Have the initial Quad Cannon join them. For the rest of your mission, they will be kept busy fending off paratroopers and air assaults near the Particle Cannon.
The Toxin Tractor will play a key role in reaching the Arms Dealer on Island 3, so place it in the Tunnel Network for future use.
With the Quad Cannons now protecting the Particle Cannon and Jarmen Kell having "sniped" the four tanks in the area, immediately start destroying the four Fire Bases with Jarmen Kell scattered throughout the reactors. Build four Rebels at the Barracks to capture the disabled tanks.
Research Toxin Shells at the Palace to help your tanks fend off infantry attacks. There will be American paratroopers dropped in the area. Both the Reactors to the north and the liberated Barracks and Palace will be destroyed if not adequately protected.
By now, the first air strike will have occurred and hopefully all of your Quad Cannons survived. Capture no more than three Reactors to put the Particle Cannon online. Capture the Artillery Platform for added protection.
Have a RPG Trooper or Rebel head to the far west of the island so that the third island will be exposed enough to open up a Sneak Attack Tunnel on it. Build ten Rebels, positioning a tank and five Rebels at both the liberated base and the Reactors.
Place Jarmen Kell, three tanks, the Toxin Tractor and some RPG Troopers in the Tunnel Network to prepare them for attacking the third island.
Island 3 – Liberating the Arms Dealer[edit]
It is probably a good time to save your game – as you don't want to permanently lose your Tomahawk in the upcoming battle.
Have Jarmen Kell start sniping tanks until you feel it is safe for the Toxin Tractor to attack the garrisoned civilian structure immediately to the west of the Sneak Attack Tunnel. Continue to have Jarmen Kell snipe armored units until you can safely have the Toxin Tractor attack the next two garrisoned buildings.
This will likely bring on a counterattack. Use Jarmen Kell, the tanks, the Tomahawk and the Tank Hunters to repel the attack. Do not lose your Tomahawk!!
After the battle, have Jarmen Kell head due west, liberating the Arms Dealer in the area, destroying all troops encountered and disabling the Ambulance in the area.
Important: Without pausing, build as many Quad Cannons and Marauder Tanks as possible, since it is likely an air strike will soon destroy the Arms Dealer if it is not heavily defended by Quads.
Create a Sneak Attack Tunnel for convenience at the Arms Dealer. Send four of your Quad Cannons to the Reactor area on Island 2 – after strengthening them by picking up scraps in the area. Keep three more Quad Cannons near the Arms Dealer. When time permits, create another Sneak Attack Tunnel at the Reactor area for more rapid deployment of troops.
Build or move over Rebels to capture any disabled American units.
Island 3 – Moving North[edit]
The narrow valley leading to the north is heavily defended. Fight your way north to liberate the Command Center. A save here is recommended.
Have a large contingent of Marauders on hand in case things don't go as expected.
You will first encounter two bunkers, two Patriot sites, four Tomahawks and four Paladins. Use your Particle Cannon to attack the four Tomahawks first, as they can do the most damage to your Marauders. Slowly "snipe" the drivers of the American tanks and destroy any infantry units.
Destroy the Patriot sites and Bunkers with your Tomahawk, using Jarmen Kell to shoot all infantry units that appear after their destruction. You can speed up the destruction of the Patriot sites by having your Marauders join the attack. Another way to speed up their destruction is to play "cat and mouse" with Jarmen Kell and the Patriot sites. When the Patriot site is shooting at Jarmen Kell, it will not be able to defend itself from the Tomahawk.
Move northward and destroy the Bunker and Patriot site at the far northwest of the valley with the Particle Cannon. The remaining Bunker and Patriot site at the northeast end can easily be taken out with your Tomahawk. Sneak Jarmen Kell onto the base and go to the east and disable the three tanks found there and dispatch any infantry found.
Island 3 – Liberating the Command Center[edit]
When the Command Center is liberated, it will be attacked by the Patriots. Destroy one Patriot with your Particle Cannon and the other with your Marauders.
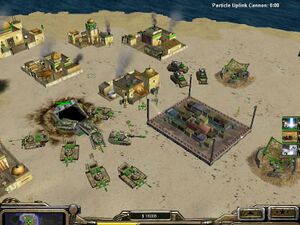
Start building up your base for the battle to come on the fourth island. Build a Supply Stash, Barracks, and Arms Dealer. Rebuild the Palace if it has been lost previously. Have workers start collecting supplies. Build two Stinger sites and three Quad Cannons to protect the area from air attacks.
Research Junk Repair and AP Bullets at the Black Market. Research the Rocket Buggy technologies if you enjoy using Rocket Buggies.
Build a Sneak Attack Tunnel in the area for speedy deployment to the fourth island. Build a large attack force for the coming battle. You will need plenty of firepower.
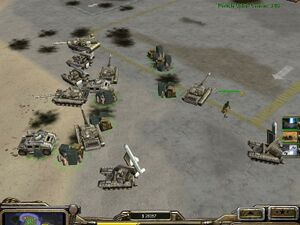
Island 4 – Attacking the American Base[edit]
This is a fun and challenging part of the mission. It will take a few attempts to successfully establish a foothold in the northern part of the base, but it can be accomplished a step at a time.
Send over Jarmen Kell and whatever armor you desire. You will eventually be overrun but be sure that Jarmen Kell survives. Continue to neutralize tanks and Tomahawks while waiting for the next Sneak Attack Tunnel.
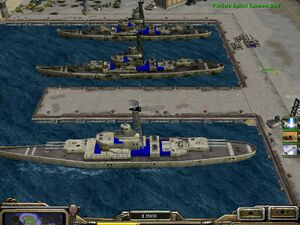
If all of your troops are destroyed on the first Sneak Attack (including Jarmen Kell) you will be in worse condition on your second attack, because now all of the enemy troops will be stationed right on top of the next Sneak Attack Tunnel and it could be destroyed before it can be deployed.
You can turn the American base into what looks like a "stone graveyard" by Jarmen Kell neutralizing a large number of vehicles. Be sure to snipe some Tomahawks for future use. Send over large number of Rebels to capture these vehicles when opportunity and time permits.
Send over however many waves of attacks that are necessary to control and destroy the northern part of the base. It is not necessary to destroy non-offensive units -- like the Reactors and the battleships that sit harmlessly in the harbor.
Be sure to have Quad Cannons in your mix of troops before moving south, as Commanche helicopters are in the area.
You will probably be overrun a few times as you move further south before realizing the extent of the USA defense. Build armored units as fast as possible to replace a high rate of attrition. You cannot have too large of an attack force!! Up to 1,000 enemy units can be encountered on this mission!!
Build Sneak Attack Tunnels as you move further south for more rapid troop deployment.

Rocket Buggies or Tomahawks can be used to take out the Patriots sites. Use the Guard command with the Rocket Buggies or they will get too close and be destroyed by the Patriots.
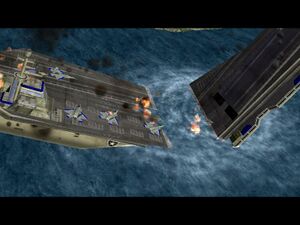
When all structures are destroyed at the south end of the base (including the Chinook helicopter) a cut scene will appear showing the destruction of the U.S. aircraft carrier.
Mission accomplished!!
Expedited Version[edit]
Bypass the southern part of Island 3 by using the Particle Cannon on an area in the northern area of Island 4. This will reveal the area so that a Sneak Attack Tunnel can be placed -- totally bypassing the southern part of the island.
Alternatively, capture the Arms Dealer on the southern part of Island 3, crank out a large number of Marauders, but bypass the dangerous trip up the northern valley by using the Particle Cannon in the north and placing a Sneak Attack Tunnel in the area.
Super-Expedited Version[edit]
Capture the particle cannon and move to the second island. Capture all of the power plants on the second island. Train a lot of RPG soldiers. Use the first particle cannon to destroy the USA Strategy Center in the north east of the map. This will remove the USA Search and Destroy battle plan that would otherwise spot Jarmen Kell. Sweep the beam to get the troops and tank on the other side of the warehouse building. At the same time, use the Sneak Attack in the same area to get Jarmen Kell and the RPG troopers in the area. Use the troopers to destroy the power plants and the occasional Humvee that comes to attack, and Jarmen Kell to eliminate infantry. After the power plants are gone, the USA power should be down. March Jarmen Kell past all of the base defenses to the southern end of the USA base. Use the next particle cannon to destroy the aircraft carrier. Done in a fraction of the time! This variant is likely impossible on Hard difficulty, and requires careful management of troops while working through the USA defenses on Normal.
Hard Difficulty Expedited[edit]
Follow the usual mission walkthrough until you reclaim an arms dealer, then have Jarmen Kell get on a Combat Cycle and get into the sneak attack used on the arms dealer island. Once your particle cannon is ready, fire it a short distance up the road to the USA base, then use the sneak attack on your right hand side. Have Jarmen Kell leave the sneak attack and ride up the cliff. Hug the right side of the cliff but not too far right, and send him down to the USA base. Have him wait next to the USA command centre until the particle cannon is charged, then send him past the war factory to the edge of the water and fire the particle cannon at the aircraft carrier to win the mission.