| Line 1,292: | Line 1,292: | ||
===Reward Area=== | ===Reward Area=== | ||
[[Image:MS Ariant Coliseum Reward.png|thumb|right|The reward area for Ariant Coliseum.]] | [[Image:MS Ariant Coliseum Reward.png|thumb|right|The reward area for Ariant Coliseum.]] | ||
After the time is up, players talk to the queen. She will take the Spirit Jewels and grant experience based on how many Scorpions were captured and what place the player ranked amongst the competitors. The points are based on 1 per 10 jewels, the maximum being 3 for 2 players and 8 or more for at least 5 players. The last place player gets only 1 point, unless they are unable to get 5 jewels. Additionally, after gaining 200 points from Coliseum battles, players can obtain a Palm Tree chair from the King, which is tradeable. | After the time is up, players talk to the queen. She will take the Spirit Jewels and grant experience based on how many Scorpions were captured and what place the player ranked amongst the competitors. The points are based on 1 per 10 jewels, the maximum being 3 for 2 players and 8 or more for at least 5 players. The last place player gets only 1 point, unless they are unable to get 5 jewels. Additionally, after gaining 200 points from Coliseum battles, players can obtain a Palm Tree Beach chair from the King, which is tradeable. | ||
{|{{prettytable|notwide=1}} | |||
!Number of Players!!Max Points Acquirable | |||
|- | |||
|2||3 | |||
|- | |||
|3||4 | |||
|- | |||
|4|| | |||
|- | |||
|5|| | |||
|- | |||
|6|| | |||
|} | |||
{{-}} | {{-}} | ||
Revision as of 04:00, 20 August 2008
Party quests ("PQs") are organized quests in which a party of several people must be created in order to enter. Unlike regular quests, they can be done again and again. Party quests are extremely popular because they give items and thousands of experience points.
Party Quest Availability Chart
|
Main Party Quests | |||||||||
|---|---|---|---|---|---|---|---|---|---|
| Content | Korea | Japan | China | Taiwan | S.E.A. | Global | |||
Nautilus Harbor |
Yes | ||||||||
Magatia |
Yes | ||||||||
Ariant |
Yes | ||||||||
Chryse |
Yes | ||||||||
Eos Tower |
Yes | ||||||||
Herb Town |
Yes | ||||||||
Crimsonheart Castle |
Yes | ||||||||
Lion King's Castle |
Yes | ||||||||
Party Quest |
Yes | ||||||||
Leafre |
Yes | ||||||||
Aquarium |
Yes | ||||||||
El Nath |
Yes | ||||||||
|
Cross World Quests | |||||||||
|---|---|---|---|---|---|---|---|---|---|
| Content | Korea | Japan | China | Taiwan | S.E.A. | Global | |||
Henesys |
Yes | ||||||||
Kerning City |
Yes | ||||||||
Ellin Forest |
Yes | ||||||||
Orbis |
Yes | ||||||||
Ariant |
Yes | ||||||||
|
Battle Content | |||||||||
|---|---|---|---|---|---|---|---|---|---|
| Content | Korea | Japan | China | Taiwan | S.E.A. | Global | |||
Mu Lung |
Yes | ||||||||
|
Boss Quests | |||||||||
|---|---|---|---|---|---|---|---|---|---|
| Content | Korea | Japan | China | Taiwan | S.E.A. | Global | |||
Sleepywood |
Yes E | ||||||||
Dead Mine |
Yes E/N/C | ||||||||
Aquarium |
Yes N | ||||||||
Clocktower Bottom Floor |
Yes E/N/C | ||||||||
Leafre |
Yes E/N/C | ||||||||
Temple of Time |
Yes N/C | ||||||||
Lion King's Castle |
Yes E/N/H | ||||||||
Knight Stronghold |
Yes E/N | ||||||||
Dimensional Schism |
Yes E/N | ||||||||
Azwan |
Yes N/H | ||||||||
Tyrant's Castle |
Yes E/N/H | ||||||||
Dead Mine |
No | Yes N |
Yes | Yes N/M |
Yes N/M |
Yes N/M |
No | ||
Tynerum |
No | Yes E/N/H/HE |
Yes E/N/H/HE |
Yes E/N/H/HE |
No | Yes E/N/H/HE |
No | ||
 Hieizan |
No | Yes N |
Yes | Yes N |
Yes N |
Yes N |
No | ||
 Monad |
No | Yes N |
Yes | Yes N |
Yes N |
Yes N |
No | ||
Kritias |
Yes N |
Yes N |
No | No | Yes N |
No | Yes | ||
Omega Sector |
Yes N | ||||||||
 |
Yes N/C | ||||||||
| Yes N | |||||||||
 |
Yes N/H | ||||||||
 |
Yes N/H | ||||||||
 |
Yes N/H | ||||||||
 |
Yes N/H | ||||||||
 |
Yes N | ||||||||
 |
Yes H | ||||||||
 |
Yes N | ||||||||
|
Yes H | ||||||||
| E = Easy / N = Normal / H = Hard / C = Chaos / HE = Hell / M = Madman | |||||||||
|
Extra Quests | |||||||||
|---|---|---|---|---|---|---|---|---|---|
| Content | Korea | Japan | China | Taiwan | S.E.A. | Global | |||
Amorian |
No | No | No | Yes | Yes | Yes | |||
Party Quest |
No | Yes | Yes |
Yes | No | Yes | No | ||
Crimsonwood Keep |
No | Removed | Removed | No | Removed | Removed |
No | ||
| Yes | |||||||||
| Yes | |||||||||
Guild Party Quest |
Removed | Removed | Removed | Removed | Yes | Yes |
No | ||
Party Quest |
No | Yes | Yes | Yes |
Yes | Yes | No | ||
|
Blockbusters | |||||||||
|---|---|---|---|---|---|---|---|---|---|
| Content | Korea | Japan | China | Taiwan | S.E.A. | Global | |||
Spin-Off |
Yes | ||||||||
First Blockbuster |
Yes | ||||||||
Exclusive Blockbuster |
No | Yes |
No | No | No | No | No | ||
Second Blockbuster |
Yes | ||||||||
Exclusive Blockbuster |
No | No | No | No | No | Yes |
No | ||
 Amoria Premium Wedding
Requirements: Wedding Invitation, attendance at a Premium Wedding
- The Amoria Premium Wedding's Afterparty, while technically not a Party Quest, operates in many ways like one. It can occur in either the Chapel or Cathedral weddings. This guide will illustrate a Cathedral Wedding in GlobalMS.
Entry
If you are a guest at the wedding, the first stage will be in a waiting room outside the Cathedral. NPCs here will take gifts for the couple. By speaking to a nun, one can enter the main Cathedral. a timer counts down to the next stage.
Cathedral Altar

If you are the one getting married, you will immediately start at the Altar. In order to enter, you must only be in a party with your fiancé. Once the couple is waiting, guests may start to enter and take their seats. After all the guests are seated, the partners-to-be can start the ceremony at their discretion, but it must be before the timer expires. The Priest will begin speaking, and guests are given the option of "blessing" the couple. For each successful bless, the newly-weds will receive EXP. The music in this map is very unique and this area is renowned as one of the most beautiful in the whole game.
Cherished Visage Photos

After the ceremony is completed, both the couple and the guests are warped to a new map. Beyond this point, both Chapel and Cathedral weddings are identical. A one minute timer appears, and the players must arrange themselves on the cake. Typically, the Bride and Groom stand at the top of the cake, and everyone smiles. Once the timer reaches 0, a picture is taken that will be posted on the MapleGlobal website. Next, a 5 minute timer appears, to allow players to take their own pictures. Often the favored guests will take turns posing with the couple. This map, being very small, has a tendency to lag people out, especially when all 50 invites are used.
Untamed Hearts Hunting Ground

Once the photo time is over, all players will be warped to the Untamed Hearts Hunting Ground. Here, each member, Guests and the newly-weds alike, must collect 5 keys from the Cake and Candle Monsters that roam the area. These monsters are worth 0 experience. At this point, the married couple receives the EXP from the blessings and their prizes for getting married. The keys are not too difficult to find, but they each take up an ETC slot, which can pose problems to first time guests. Also, the Cake Monsters can be rather dangerous to lower leveled guests. The map is rather large, but with 52 people hunting on it in a limited amount of time, kill stealing can be a problem. It is recommended that higher levels help their friends and leave once they have enough keys, so that everyone can finish.
The Love Piñata


When each person has acquired 5 keys, they can progress to the next stage on their own. Once Inside, there are numerous boxes that can be broken by hitting them. After they are broken, an item called Onyx Chest appears. These items will disappear, so only break one box. Each player can only pick up one, and there are already not enough for every guest at the wedding. The timer on this map has the same time as the outside hunting grounds map, so whether you have entered or not, all players are ejected at the same time. The Onyx Chests and Amoria Heart Keys expire approximately 20 minutes after the wedding ends. After getting your chest, or, if they have already all been taken, the players can talk to Robin the Huntress to exit the wedding party.
Wedding Exit

This is the exit map. It was added later, after all the other stages. Click Ames the Wise to return to Amoria, and then by talking to Pila Present at the top of the map, the players can get their prize. Prizes range from Miso Ramen Soup to Pineapple Candies, and for the Bride and Groom's special chests, Scrolls. Wedding Invitations will remain in each guest's inventory until they drop it.
 Henesys Party Quest
Requirements: Level 10 and up
Entrance.
The Henesys PQ is a new Party Quest originating in KoreaMS. A party of any number greater than 3 is needed, as long as they are all over the level of 10. It is especially great experience between levels 10 and 15, as the EXP is a constant 1,600, a significant amount at low levels. The time limit is separated by each stage. Some of the monsters and platforms plus the background originate from Korean Folk Town, despite its location in Henesys. An NPC named Tory is located in Henesys Park wearing a bunny suit, and lets you inside. It is currently available in KoreaMS and GlobalMS. JapanMS and Taiwan removed because players used glitches.
Primrose Hill, Collecting Seeds

gathering seeds.
In the first portion, the players run around hitting brown plants and collecting seeds. Certain plants always drop the same seeds, so knowing which plant drops which seed will greatly speed up the time it takes to complete the Party Quest. Approximately one seed is found for every 5-10 plants hit. These seeds must be dropped on each platform surrounding the center of the map to proceed. A flower will sprout on a platform after the seed disappears. Once this has been done, a bunny will spawn in the middle of the map.
- This stage has a time limit of 10 minutes.
Primrose Hill, Protect Moon Bunny!

defending the bunny.
The bunny that spawns has a health bar like an ordinary party member, and must be protected. Waves of flying enemies comes towards the center of the map. Your party must move to the center of the map to protect it. Ranged characters have an advantage here. It is recommended that lower leveled party members stand in the center so as to avoid being hit as well. The monsters are nerfed, and range from Flyeyes and Stirges to the Goblin Fire of Korean Folk Town. The Bunny drops a Rice Cake from time to time while the party protects it, which the Party leader must collect. Once ten cakes have been collected, the PQ is over. Also, if the Bunny dies or time expires before acquiring enough cakes, the PQ is failed.
- This stage is continued from the previous stage, and therefore, the time limit is the time remaining from the first stage.
Shortcut
Shortcut.
This is an intermediate stage. The party can choose whether to attempt a rush or move to Pig Town from here. Talk to Tommy to go to Pig Town, or Tory to exit.
Pig Town
Pig bonus stage.
There is a bonus stage full of Pigs. It is similar to that after Kerning PQ. Sometimes an Iron Hog spawns here, but it is weaker than an ordinary Iron Hog and gives more EXP. Iron Hogs spawn about 1-3 times.
The Pigs seem to have a higher drop rate and drop different items than those outside. They drop wide range of weapons, armors and scrolls.
- The time limit for this stage is 5 minutes.
Rewards
Exit.
The reward for Henesys PQ is 1600 Experience. Originally, players could receive a Golden Coin, which acted as a safety charm. It had an expiration date, so higher levels would do this PQ every few days after losing it. Unfortunately, this prize was removed from all versions several months ago.
 Kerning City Party Quest
Requirements: Level 21-30
The original first party quest is in Kerning City. A party of 4, ranging from levels 21 to 30, progresses through 5 stages in fewer than thirty minutes by solving puzzles and killing monsters. At the end, a prize is given to each participant; these range from ores, equipment, scrolls, or potions. Only one party can be inside the party quest at any given time on one channel.
The Kerning City Party Quest is one of the fastest ways to gain experience during levels 21-30. To complete the party quest, one must complete the following stages under the 30 minute time limit.
Party Makeup
Following are suggested party setups for the Kerning accompaniment. Keep in mind that there are many ways to go about selecting a party, depending on what the leader finds is most important.
- Party #1 - Offensive Tactic
- This party setup allows players to move through the first and last stages of the Kerning accompaniment through brute force.
- One Warrior (Level 23+)
- Two Rogues (Level 25+)
- One Magician (Level 25+)
- Party #2 - Defensive Tactic
- This party setup is friendlier to people of lower levels who wish to participate in the Kerning accompaniment. Using a Cleric with the Heal skill, lower-level characters can remain in the fray without having to worry too much about death. Although haste at level 1 is nearly useless, it has more benefit for the whole group over any of the other skills.
- 1 Assassin (Level 30 with Haste)
- 1 Cleric (Level 30 with Heal)
- Any other two people (Level 21+)
- Party #3 - Tanking
- This party is for parties who want to train in stage one, and blow through the last stage
- Two Magicians (Lv. 25+)
- One Rogue (Lv. 25+)
- One Warrior (Lv. 26+)
Starting a party quest

Because only one party can enter at a time in each channel, parties can not enter the quests whenever they want to. In the Kerning PQ, the party leaders must constantly click on Lakelis, or other party leaders may enter before them once the other party has finished. Because the party leader must constantly click on Lakelis, some leaders use an Auto-Clicking hack, although it is clearly illegal.
Often the quests can be difficult enter due to the high popularity of the party quests. Channel 1 would not be recommended if you want to do a party quest. Also, Scania would be the world with the most demand for the party quests, since it has the most people. The newest server is usually easiest to get into PQs.
Make sure you have the required number of members in your party. You can not do the PQ if there are less than the minimum (Though some PQs allow you to have more), and they must not die or quit party/game in order to complete the quest.
Try not to be bored while waiting. If you are not the leader, you may do something else for 5 minutes, but make sure you know what is going on in the game. Leaders should not leave the computer and closely watch. Try to track the party that has just entered and see which stage they are at by locating them (using /find).
Kerning Stage 1

Stage 1
This is the first part of the Kerning City Party Quest/Accompaniment. It is a combat section, where you are asked a question by Cloto and slay monsters based on the answer. Once you have the answer, slay that many Ligators to get that many coupons. When you have obtained the correct amount of coupons, talk to Cloto to receive a pass and give the pass to your party's leader. After all three passes are collected, have your leader click on Cloto, to open a portal to Part 2.
Questions
- Level needed to become a Magician: 8 (Stated as "Wizard")
- Level needed for any of the other classes: 10
- Experience needed to level from 1 to 2: 15
- INT needed to become a Magician: 20
- DEX needed to become an Archer or a Thief: 25
- STR needed to become a Warrior: 35
Kerning Stage 2

Stage 2
This part of the Accompaniment/Party Quest consists of 4 ropes. The objective is to arrange 3 of your members on these ropes to try to find the right combination, while the leader clicks Cloto to determine if the combination is correct. It is wise to have only 1 member move at a time, in a clockwise or counter clockwise direction, as this will prevent confusion. After discovering the correct combination, continue through the portal for yet another puzzle.
Kerning Stage 3

Stage 3
This area consists of 5 platforms labeled 1-5, indicated by the number of cats on the stump. The objective is to arrange 3 of your members on these platforms to try to find the right combination, while the leader clicks Cloto to determine if the combination is correct. It is recommended that you follow this pattern to prevent confusion:
123 - 124 - 125 - 134 - 135 - 145 - 234 - 235 - 245 - 345
Now continue through the portal for the final puzzle area of the Accompaniment/Party Quest.
Kerning Stage 4

Stage 4
The final puzzle consists of 6 barrels labeled 1-6. The objective is to arrange 3 of your members on these platforms to try to find the right combination, while the leader clicks Cloto to determine if the combination is correct. It is recommended that you follow this pattern to prevent confusion:
123 - 124 - 125 - 126 - 134 - 135 - 136 - 145 - 146 - 156
234 - 235 - 236 - 245 - 246 - 256
345 - 346 - 356
456
Now continue to enter the final stage.
Kerning Final Stage

Last Stage
This is it, the final stage. Once again, it is a combat stage. Here you must kill 3 Curse Eyes, 6 Jr. Neckis (modified with less avoidability) and the King Slime to obtain the passes they drop. The "corner kill glitch" has been fixed, and therefore even if you corner kill the monsters will still drop passes. The first 9 enemies will be easier than the King Slime. Once you have the 10 passes, click on Cloto to finish the main section of the Party Quest.
- Note: Sometimes the game is glitchy, and will only spawn 8-9 monsters, including the King Slime. If this happens, your party cannot complete the Accompaniment/Party Quest. Most of the said 'glitches' are because of an earlier problem in which a corner kill would lead to a lack of a pass. The glitches have been dramatically reduced. There is, or was, the chance that if only 8-9 monsters spawned another would spawn after the King Slime. Theres also the large possibility that a party member has your passes.
- Note: Killing the curse eyes provides much more exp(100+) than soloing king slime(300+).
King Slime
- HP: 8000
- MP: 100
- EXP: 1000 (shared)
- Primary Attack: Its primary attack is to jump, causing an earthquake which does 200 or so damage to anyone on the ground within a certain distance. As long as you keep a fair distance away, and have your HP over 300, this attack will not be a problem. (Note to Magicians: If you get hit and you don't have Magic Guard activated, you will likely die.)
- Supportive Skill: The King Slime also has a supportive skill, which summons Slimes. As you can most likely one hit kill them, there will be no difficulty in eliminating them. A large number of Slimes are also spawned when the King Slime is defeated.
- The Slimes mentioned above can also drop slime drops.
- Soloing King Slime is often quite useful if you are at least Level 26. You'll probably get upwards of 490 exp if you kill it. Remember to ask for permission from your party first though.
Kerning Bonus Stage
Bonus Stage
This Bonus Stage is filled with Horny Mushrooms and Green Mushrooms. It is a good place to train while waiting for your timer to run out, or to prepare for a "rush". Talk to Nella when you wish to leave the party quest. However, if you don't plan to train here, leave quickly so that you can be nice to the next group. The party quest can only be started when you leave, and it is generally rude to stay too long.
 Ludibrium Party Quest
Similarly to the Kerning PQ, the stages are beaten by collecting a certain amount of passes by doing specific tasks and only one party is allowed to enter the PQ on any channel. However, there are several key differences between this PQ and the first one. First off, you need a full party (6 members) that are between levels 35 and 50 to get in. It is also a longer to complete PQ with 11 stages rather than 5, and you get an hour to complete it. This is a much more difficult PQ than the Kerning PQ.
To enter the PQ, you must travel to the Eos Tower, found to the left of where you arrive in Ludibrium. The tower has 101 floors and you enter the tower on the 100th floor. Climb up and go through a door to get to the 101st floor. You will find the PQ NPC here; a red stop-sign. You need a party of 6 to enter the PQ. Only 1 party member can die on stages 1 to 8, and the last stage can be finished with no less then 2 people. The party leader must not die at all.
A party of 6, ranging from levels 35 to 50, progresses through 9 stages in less than one hour by solving puzzles and killing monsters. The skills specific character classes possess, such as Haste, Heal, Dark Sight, and Teleport, are eminently used to help pass some of the stages. The skills Dark Sight and Teleport are required to complete the accompaniment. Prizes consist of potions, ores, equipment, scrolls, or summoning bags.
Probably the best party is the following (with all characters 40+):
- 1 Assassin
- 1 Cleric
- 1 Bandit
- 1 Bowman / Crossbowman
- 1 Spearman / Fighter / Page
- 1 Ice/Lightning Wizard / Fire/Poison Wizard
- NOTE
- To hit Alishar, the Party Quest boss monster, at least 80% of the time, you will need to have
| Level | ACC |
|---|---|
| 35 | 157 |
| 40 | 140 |
| 45 | 124 |
| 50 | 107 |
Warriors and Thieves at level 40 will typically have about 80 DEX and 140 LUK/STR. Along with a maxed Mastery skill, the accuracy of Warriors would be approximately 84 and thieves 115 (if max nimble body). This means that warriors will almost always miss Alishar and thieves will only hit it about 65% the time. Bowmen at level 40 will have accuracies of around 125. Therefore, it is imperative for any PQ team to have at least 1 bowman that is above level 40, or a higher level assassin because double stab does too little damage without critical, and savage blow will suffer too much weapon defense penalty.
Ludibrium Stage 1

- Enemies
- Ratz From Another Dimension (3700 hp, 260 exp), Black Ratz From Another Dimension (4300hp, 280 exp)
- Required classes
- Mage OR Thief with max Haste
- Completion
- 25 passes required to finish this stage. Each monster drops a pass, passes can be Stolen.
Kill, kill, and more kill. This is kind of like a Jump Quest but where you have to fight monsters to claim passes. The monsters are spread all around the map, from the bottom to top. Everyone kills the mice, and the leader collects the passes they drop. Note that they are passes, not coupons. The mages need to teleport to some mice, and any Bandits with Steal should be trying to steal passes. Once all the passes have been collected, click the red balloons to advance to the next stage.
- Note
- Have 2 people go into the next stage and have 4 others wait. In stage 2 one of the party members needs to attack the 2nd box from the top. Once it breaks, the members in Stage 2 will be teleported to Towers Trap. At this time there should be 4 members in Stage 1 and 2 in Towers Trap. After entering Towers Trap the 2 people will have to party chat to the party and tell the 4 people to enter Stage 2.
Ludibrium Stage 2
- Enemies
- None.
- Etc.
- Boxes
- Required classes
- None.
- Completion
- 15 passes required to finish this stage.
The 2 members of the party that goes through first should go down to the second box from the top, and break it. Once you're moved to the other map, tell the rest of the party it's okay to come through. All party members should now break the boxes open for passes. After collecting enough passes between Tower's Trap and Stage 2 map, double click the Orange Balloons at the top. NOTE Be sure you get all 4 passes from Tower's Trap, if you go out without all of them you'll have to restart the PQ.
Ludibrium Stage 3
- Enemies
- Bloctopus from another dimension(4900hp,288 exp)
- Etc.
- Summoning Boxes
- Required classes
- None
- Completion
- 32 passes required to finish this stage. Each monster drops a pass, passes can be Stolen.
In Stage 3 you must defeat monsters for the passes. Breaking the boxes will spawn 3 more Blocktopuses. It is recommend sending Warriors, Clerics, and Bandits to the bottom and Ice Wizards, Fire Wizards, Sins and Archers to the top. Bandits should attempt to steal passes. Double click the Yellow Balloons after collecting the passes to advance.
Ludibrium Stage 4
- Enemies
- Dark Eye from Another Dimension (Room 4,5), Shadow Eye from Another Dimension (Room 1-3)
- Required classes
- 1 Magician, 1 Non-Magician
- Completion
- 6 passes required to finish this stage. Each monster drops a pass.
In Stage 4 there are 5 different rooms. Every room contains a shadow monster, except room 4 which has 2, each of which drops a pass. Rooms 1-3 feature Shadow Eye from Another Dimension, who have high Weapon defense and low Magic defense. Mages go against those. Rooms 4 and 5 have the opposite, Dark Eye from Another Dimension, who have high Magic defense and low Weapon defense. Everyone else takes them out. Pick your door and tell PQ members you are already in the door so they don't come in yours. Another way instead of telling PQ members is to drop 10 mesos in front of the door to tell them there is already someone in the selected door. The rooms are completely dark, and only the enemies eyes are visible, so you must wait until they open their eyes in order to hit them. Talking to the Green Balloons after collecting the passes to continue.
Ludibrium Stage 5

- Enemies
- King Block Golem from another dimension( semi-invincible, 1 exp )
- Etc.
- Boxes
- Required classes
- Mage with Teleport, Thief with Dark Sight, Thief with haste (Recommended, but not required)
- Completion
- 24 passes required to finish this stage.
There are 6 individual rooms in this stage. The Thief goes down to room #6 using Dark Sight to pass through Invincible King Block Gollems that are rigged to do about 8000 damage. One mage goes up to to room #1 using Teleport to get there. The mage will need to use Teleport and the Thief will need to use Dark Sight in their rooms to obtain the passes. Everyone else chooses a room and destroys boxes to collect passes (tricky jumps abound). Each room contains four boxes. Once all the passes have been collected talk to the Dark Green Balloon to advance to Stage 6.
- Actually, it is possible to kill the King Block Golems. However, to do so, you will need an HP Warrior (A warrior with lots of points in HP) that has max or close to max Power Guard. Since Power Guard never misses, it will damage the King Block Golems. Make sure to lure the Golems to the left side so a Cleric can jump down and heal the warrior. It is risky but rewards about 3000 Experience that is dispersed throughout the party.
- Passes also will drop from killing these golems.
((WARNING)) There is a glitch in the thief and mage portals in this stage, since a server check in September. Once you go into the bottom portal in the mage portal, you won't go out but your skills will get locked. Same goes for the thief portal, but the thief portal has 50% chance of getting skill locked.Regardless, there is a way to get through the mage portal. Once you collected all the passes, do not go into the bottom portal, you need your teleport skill to get out. After collecting all the passes go back up.Jump normally and before you touch the ground, press the teleport button quickly.This method takes a lot of time to master and a lot of practise though. As for the thief portal, I'm not sure.
Ludibrium Stage 6
- Enemies
- None
- Etc
- Numbered Boxes
- Required classes
- None
- Completion
- Follow boxes in order to reach the top.
This map contains many boxes in sets of 3 with the numbers 1 through 3 written on each box. Standing on the correct box and pressing UP will teleport you to the next set. Other boxes will teleport you back to the bottom. The balloon NPC will say the order, which doesn't change. The correct order is: 1, 3, 3, 2, 2, 1, 3, 3, 3, 1, 2, 3, 1, 1, 1. After getting to the top, go through the portal to advance to Stage 7.
- NOTE
- If that above combo was hard to follow use this format
- 133, 221, 333, 123, 111
Ludibrium Stage 7
- Enemies
- Black Ratz, Ratz, Bloctopus, Rombot all from another dimension
- Etc
- Pass Boxes
- Required classes
- Assassin or Archer with maxed Keen eyes or Eye of Amazon
- Completion
- 3 passes required to finish this stage.
The Assassin or Archer (recommended) goes up to kill the enemies by the boxes on the wall on the right, one at a time, or all at the same time if the party wants a challenge. When the pass touches the box, one Rombot will spawn. While the sin or archer is getting the Rombot to spawn, the rest kill the Rombot at the bottom of the map, who can cause a ground-impact and spawn Block Golem monsters. Repeat for all 3 boxes at the top, each Rombot drops a pass. After collecting the passes, talk to the Light Blue Balloon to advance to the next stage.
Ludibrium Stage 8
- Enemies
- None
- Etc.
- Numbered Boxes
- Required classes
- None
- Completion
- Standing on correct combination of boxes
Similar to Kerning Stage 4, except it's 9 boxes and 5 people per combination. Each character apart from the leader stands on a different box. If the characters are standing on the correct combination of boxes, you will be able to progress to the next stage. It is suggested that you begin with characters on boxes 1-2-3-4-5, then continue with 1-2-3-4-6, 1-2-3-4-7, 1-2-3-4-8, 1-2-3-4-9, 1-2-3-5-6, 1-2-3-5-7, 1-2-3-5-8 and so on until you get to the right combination. Check if it is the correct combination each time you try a combination. For people who hate this type of stage it'll be hell for them IF they get a totally random and deep value. So just be patient and make sure you don't skip any number otherwise you will usually end up with either no time left or frustration enough to leave the pq.
There are 126 combinations in total: 12345, 12346, 12347, 12348, 12349, 12356, 12357, 12358, 12359, 12367, 12368, 12369, 12378, 12379, 12389, 12456, 12457, 12458, 12459, 12467, 12468, 12469, 12478, 12479, 12489, 12567, 12568, 12569, 12578, 12579, 12589, 12678, 12679, 12689, 12789, 13456, 13457, 13458, 13459, 13467, 13468, 13469, 13478, 13479, 13489, 13567, 13568, 13569, 13578, 13579, 13589, 13678, 13679, 13689, 13789, 14567, 14568, 14569, 14578, 14579, 14589, 14678, 14679, 14689, 14789, 15678, 15679, 15689, 15789, 16789, 23456, 23457, 23458, 23459, 23467, 23468, 23469, 23478, 23479, 23489, 23567, 23568, 23569, 23578, 23579, 23589, 23678, 23679, 23689, 23789, 24567, 24568, 24569, 24578, 24579, 24589, 24678, 24679, 24689, 24789, 25678, 25679, 25689, 25789, 26789, 34567, 34568, 34569, 34578, 34579, 34589, 34678, 34679, 34689, 34789, 35678, 35679, 35689, 35789, 36789, 45678, 45679, 45689, 45789, 46789, 56789.
Another way is to start with players on boxes 1-3-6-7-4, and have them follow the pattern 136748259 rather than 123456789. This potentially makes jumping between boxes easier. This sequence is known as JMS (it was invented there), while the above is called GMS. A third sequence (SMS for 'Simplified MapleStory') follows the pattern 637148259. This pattern is even more diagonal than JMS, the non-diagonal jumps are easier, and the pattern is simpler for newbies to learn.
NOTE The Boxes work in a diagonal pattern. For example, to get to 8 you'll have to go from 1 to 4 to 8 or 4 to 8. If you are a beginner at Ludibrium PQ let the other members handle it and you will slowly catch on.
Ludibrium Crack on the Wall
- Ludibrium PQ Boss
- Alishar
- Summoned By Alishar
- Chronos, Platoon Chronos, Master Chronos
- Required classes
- Ranged hitter with maxed Keen eyes or Eye of Amazon(or a magician or a well hasted 2-handed weapon warrior will do), Cleric with maxed Heal highly recommended
- Completion
- Obtain Key Ring from Alishar
Alishar
- HP: 125000
- MP: 2500
- EXP: 4800 (shared)
This is a very difficult and long boss fight. Having a Cleric in the party is very highly recommended. If the party members are all level 50 then it isn't required, although it will make the fight much easier. A ranged person kills the Black Ratz to open the box and Alishar will spawn. If there is a Cleric in the party, they should begin spamming heal. Everyone else attacks the boss and tries to stay alive. Based on his health, the boss will spawn different types of Chronos. Near 3/4 HP he will spawn regular Chronos, at 1/2 HP he will spawn either Chronos or Platoon Chronos, and when he is near death, he will spawn Master Chronos along with Platoon and regular Chronos. Clerics are able to damage these with heal as well, though it will slow down their healing of party members. While fighting the boss, characters may be afflicted with various status ailments. Everyone will need either Eyedrops and Holy Water or only All-Cure potions. Mages don't have to worry about losing accuracy so they only need Holy Water, though All-Cure potions work as well. When he dies, he drops a Key Ring. The leader should pick that up, and talk to the Purple Balloons to exit.
The combination of party members can greatly affect the difficulty of beating Alishar.
- Combination 1
- Healer Combo - This one is for people who don't mind taking slightly longer or shorter on Alishar due to the fact that with two clerics you can split the party up on two sides with a spearman on the left and hunter/crossbow(wo)man on the right with clerics healing both sides.
- 2x Cleric - Level 38+
- 2x Assassin - Level 38+
- 1x Spearman - lv. 40+ with Hyperbody or else replace with a Bandit also lv. 40+
- 1x Crossbowman/Hunter - Level 38+
- Combination 2
- Fast Destroyer - This Combination is to speedily move through Alishar due to the Multiple hitters and the high power hitters.
- 1x Cleric - Max Heal or level 45+
- 2x Warrior Classes - Spearman or Fighter recommended(In GMS fighter is optional)
- 1x Assassin - Level 40+
- 1x Bandit - With savage blow doing at least 3 hits
- 1x Crossbowman/Hunter - Level 40+ with Iron Arrow/Arrow Bomb would be so useful here
- Combination 3
- Fast Destroyer (also) - This combination defeated Alishar in less than 1 minute, if you fight quickly.
- 1x Cleric - Max Heal
- 3x Warrior Classes - Spearman or Fighter (Page isn't nearly as useful). In GlobalMS, the fighter isn't as useful because there are new pots that gives 12 Weapon Attack, but they are expensive, so only use it in the Alishar combat. The pots are sold in Masteria.
- 1x Bandit - Maxed Savage Blow
- 1x Bandit-Assassin Hybrid - Maxed Keen Eyes and Lucky Seven, has at least 1 full set of stars(Tobis and higher recommended, Kumbis are good too), any decent Savage Blow
TIP: Before killing the ratz you should have someone go all the way to the right and then kill ratz, that way, the person can backstab alishar without getting hurt or inflicted by any status.
TIP 2:While killing the Ratz don't make the pass it drops fall off the platform.
Ludibrium Bonus Stage 1
- Time limit
- 60 seconds!
- Etc
- Money Boxes <Drop mesos between 10 - 60 and also drop bonus prizes>
Everyone choose a direction and heads that way, up or down. Break boxes as fast as you can, you should be using a "fast" or "faster" weapon. The boxes shoot out mesos (usually less than 50 mesos per coin), and various potions. A full list of drops can be found below.
However, note that unlike the Kerning PQ, other parties can enter the first stage once the timer is on 50 seconds. Hence, on a crowded server like Scania, it may be a good idea to skip the stage entirely to attempt to get back in before anyone else.In another server such as Mardia or Kradia it is recommended to do this stage, because gives rare items for them.
Ludibrium Bonus Stage 2
- Time limit
- None
When you're ready to leave, climb to the top and talk to the NPC. You'll get your prize for finishing the PQ, and you'll be returned to the PQ Lobby in Eos Tower, where you can try the PQ again If no one got in while you are in the bonus stage
Prizes
- Equips
- Any color Justice Cape (Level 55)
- Any color Napoleon (Level 50)
- Blue Moon Earrings
- Skull Earrings
- Red hearted earrings
- Use Items
- 100 White Potions
- 100 Blue Potions
- 30 Unagi
- 10 Elixirs
- Maple Throwing Stars
- Scrolls
- 10% Bottomwear DEF
- 10% Glove DEX
- 10% Helmet DEF
- 10% Topwear DEF
- 10% Overall DEF
- 60% Bottomwear DEF
- 60% Bow ATT
- 60% Claw ATT
- 60% Crossbow ATT
- 60% Cape DEX
- 60% Cape INT
- 60% Cape LUK
- 60% Cape STR
- 60% Cape HP
- 60% Dagger ATT
- 60% Earring INT
- 60% Glove DEX
- 60% Helmet DEF
- 60% Helmet HP
- 60% Overall DEF
- 60% Overall DEX
- 60% Overall INT
- 60% One-Handed Axe ATT
- 60% Two-Handed BW ATT
- 60% Polearm ATT
- 60% Shoe DEX
- 60% Spear ATT
- 60% Staff MATT
- 60% Topwear DEF
- 60% Wand MATT
- 100% Glove ATT
- Etc. Items
- (Numbers may vary)
- Aquamarine Ore (15)
- Black Crystal Ores (3-6)
- Diamond Ores (4-6)
- Garnet Ores(15)
- Gold Ores (5)
- Mithril Ores (12-15)
- Sapphire Ores (12)
- Silver Ores (15)
- Steel Ores (15)
- Topaz Ores (15)
- Screws (5)
- Bonus Stage Prize
- Pop Soda (2000 HP)
- Watermelon (1000 HP + 1000 MP)
- Red Bean Sundae (2000 MP)
- Orange Juice (450 MP)
- Grape Juice (900 MP)
- Sunrise Dew (4000 MP)
- Sunset Dew (5000 MP)
- Power Elixirs (Full HP/MP)
- Napoleon (any color)
- Skull Earrings
- Heart-Shaped Earrings
- Blue Moon Earrings
EXP Chart
EXP is awarded for completing each stage. Throughout this entire PQ you can accumulate 30,309 exp (or 43,300) just for clearing all the stages, plus the experience from killing monsters. In truth you earn about 10 ~ 20% when you're lv. 42 ~ 45 and around 5 ~ 8% when you're lv. 46 ~ 50 however for an average of 40 minutes of training that's actually pretty good seeing as some people just don't know how to train until they are higher levels.
NOTE: The exp you get from subsequent PQ stages will be reduced once you get the reward after Bonus. The number in parenthesis shows exp for each stage before completing Bonus. (This decrease has been removed in several versions, and will likely be removed in the remaining versions in the near future.) To avoid losing future exp, after the timer completes in Bonus and you get moved to the reward area, logoff and quickly log back on. You will be in the PQ exit. Click on the NPC and you will be ready to start again still getting full exp. (If you logoff before the timer expires, when you login you will be in the Reward area, so wait.)
- Stage 1: 2100 EXP (3000)
- Stage 2: 2520 EXP (3600)
- Stage 3: 2940 EXP (4200)
- Stage 4: 3360 EXP (4800)
- Stage 5: 3779 EXP (5400)
- Stage 6: 0 EXP
- Stage 7: 4620 EXP (6600)
- Stage 8: 5040 EXP (7200)
- Stage 9: 5950 EXP (8500)
- =====================
- Total: 30309 EXP (43300)
Amorian Challenge Party Quest
This party quest takes place in Amoria, requires 6 people over the level of 40 who are married, and the party must be made up of both genders (though not necessarily in equal proportions). Bringing the spouse is optional, but recommended. All party members must fit these criteria. This is by far the most difficult party quest, with one of the strongest bosses for a Party Quest. To enter, collect 10 Liplock Keys from Indigo Eye or Crystal Boar at Purplewood Forest 1 or 2, and trade them in to Amos for an Entrance Ticket. Be warned, however, that the ticket can be exchanged without a full party, and if this happens then the player will not be able to attempt the Party Quest again until 6 hours have passed.
- You can obtain a ticket every 6 hours. The time limit starts from when you receive your ticket, not when you enter the quest. Therefore, it is possible to do two PQ's in a row by getting a ticket in advance and using it after the 6 hours, then collecting another 10 keys and getting a new ticket to enter again. This method is beneficial in the newer, less crowded servers where it may be hard to find parties at certain times of day.
Stage 1: Magik Mirror


This is the first stage, which can seem quite confusing at first. Don't go through the glowing blue portals, as they lead nowhere. instead, have the leader of the party talk to Amos. He will explain something, and 3 portals will open up. Only one works, however, and it leads down to the central area of the "pyramid" like map. From there, talk to Glimmer Man. There are signs pointing to two warps: One for females and one for Males. Defeat every monster on both sides, and then talk to Glimmer Man again. He will allow you to warp up to the magik Mirror located in the center. By pressing up, it will inform the party that they have missed one Magik Fiarry, the giant one. It is easily distinguished because it is the only monster in this stage which gives EXP when killed. Kill it, and it will drop the Wing Hammer. Place the Wing Hammer on top of the mirror, and the mirror will shatter; grab a shard of the mirror and hand it to the Glimmer Man. Talk to him again, and he will warp you back to the top of the Pyramid with Amos the Strong. Speak to him once more to progress to the next stage.
- Note that the screen will go black during these warps; this is normal.
This stage awards 2000 experience.
Stage 2: Heart Strings

This stage is very much like Kerning City's stage 2. However, the ropes that must be hung on are far into the sky, suspended from a Star, Moon, and Sun. To reach them, go through one of the three blue warps. Then, jump and press (and hold) the up button. The player will be warped high into the sky and fall past the rope. By holding up, the player can grab onto the rope. The best strategy for this stage is to send 5 people on the star rope, then gradually move them outwards. After a certain number of failures, a huge number of monsters are summoned, however they are incredibly weak and can be defeated with ease. Numbers of people for each rope are often called out, in the form "032", which would mean for 0 people to be on the star rope, 3 people to be on the moon rope, and 2 people to be on the sun rope. While this stage can be time consuming, it isn't particularly difficult. The leader will receive hints that indicate how many, if any, of the ropes have the right number of people on them. Also, this stage can change, between Daytime, Twilight, and night time, and with these changes, the stage layout also changes.
- This stage awards 4000 EXP.
Stage 3: Twisted Switcher

It is like an enhanced version of Ludibrium PQ's stage 8. There are a number of spring loaded platforms which the players must stand on. These aren't only numbered, but lettered as well. They are, from top left to bottom right,
- A 2 B 3
- C 6 D 9 5
- The reasons for this number and letter arrangement aren't clear, but the same strategy as Ludi PQ can be used, though it's incredibly time consuming with this many boxes. This is generally known as the "Brute Force" method. Also, with each failure, a large number of monsters are summoned. 4 colors of slimes can appear, however these slimes are incapable of dealing damage; the real threat comes from the Crystal Boars, which knock players off of their platform causing them to lose track of where they are in the pattern. Don't go out of your way to defeat the slimes, since they are harmless. Large area attacks are very helpful, like a Dragon Knight's roar or a Crusader's Shout. Haste is also a useful as the platforms are higher than a normal jump can reach.
- A GM commented that in Stage 3, the number of slimes that appear indicate how many players are standing on correct platforms. Have one person then move off their platform. If the number of slimes decrease, then that person was standing on the right one. If the number of slimes remain the same, then that person was on the wrong platform, or it could also mean that both of them were right. If the number of slimes increases, then the one they moved to is right. The most slimes that can appear is 4. The lowest possible is 1 slime, because there are only 9 platforms and 5 must be correct. Since 5 people must stand on them, it's impossible that every player is on an incorrect platform.
It's best to check all the platforms on the bottom before moving people on to the correct boxes that are down there, since the leader could be moving that person off of a correct box. Once the party knows how many correct platforms there are on the bottom, move people from the beginning boxes first (A, 2, etc.) to the correct ones that were found on the bottom. Once again, if the number of slimes goes down then that person was moved off of a correct box, and thus they should be sent back to where they were. Using this method it's possible to pretty much finish the combination in a few turns. This is a lot more like a stage from Orbis PQ than it is Ludibrium PQ's stage 8.
- This stage awards 6000 EXP.
Stage 4: Last Man Standing

This is by far the easiest stage. Merely defeat the monsters present and collect 50 Cupid Code Pieces. Various monsters spawn here, including Curse Eyes, Zombie Lupins, and Toy Trojan Soldiers.
- The reward for this stage is 8,000 EXP.
Stage 5: Fluttering Hearts

This stage is rather confusing and has a very intense feeling to it. After passing through Stage 4's gate, it has suddenly become night time, and dozens of monsters have begun pouring out. First come Skeledogs, Dirty Ratz, and Wraiths capable of flight. Players must hit the gate with their regular attacks to bust it open in time, before an army of angry Rombots come and destroy them. These Rombots are not the pushovers found in Eos Tower or Ludibrium PQ; They can inflict 10,000 touch damage. Open the gate quickly by having each member of the party hit the gate, and run toward the exit. After the first gate, lava plumes begin to appear, which can deal about 300 damage each. These aren't much of a threat, nor do they slow down the PQ very much. However, mages will need to be careful as Magic Guard doesn't protect from environmental damage. Everyone must survive this stage to progress on.
- This stage awards 9000 EXP upon completion.
Stage 6: Love Hurts

After dashing through the gate in stage 5, the party spawns on an isolated platform where an invisible barrier marked by trees stops them from dropping down to where the Balrog is waiting. Once the leader is done talking to Amos, the whole party will be sent down into the area where the Balrog spawned. The bottom of the map is filled with spikes on the ground, dealing about 40 damage on contact. Several platforms are floating, each with one or two spikes which are warp points linking to each other. After defeating the Jr. Balrog, a Crimson Balrog will spawn. Once this is defeated, the Balrog changes into the Geist balrog, signaled by a color change from dark to purple and white. The Balrog does no more than 700 bump damage and around 1,400 with a magic slash attack. A slash is signaled by the Balrog 'Disappearing', immediately followed by the attack. Upon defeating it, it drops the Geist Fang and by turning it in to Amos, the party can proceed to the bonus.
- This stage awards 11000 EXP upon completion.
Stage 7: Amos' Vault for Couples

This is the Bonus Stage for a party that is made up of three couples. In this stage, the three couples are split up and must compete to see who can kill 35 monsters first. The monsters are summoned from boxes, and drop cupid code pieces from stage 4. The couple must collect all 35 and turn them in. Each couple to accomplish this receives 4000 EXP. If no couple gets all 35, then EXP is awarded according to which couple gathers the most. The couple that finishes collecting first and has all 35 pieces will earn a special chance to get something besides EXP, which are the following capes:
- For males
- Legendary Elias Cape 1 (untradeable, 7 slots)
- Legendary Elias Cape 2 (untradeable, 7 slots)
- Legendary Elias Cape 3 (untradeable, 7 slots)
- For females
- Cecelia Cloak 1 (untradeable, 7 slots)
- Cecelia Cloak 2 (untradeable, 7 slots)
- Cecelia Cloak 3 (untradeable, 7 slots)
Unfortunately, in order for one member of the couple to get a prize, the other must sacrifice their chance. This is to honor the story of Elias and Cecelia, detailed on the Amoria page. The odds of getting a cape are extremely low, and since few parties attempt to do the Couples stage, they are among the rarest items in the game.
Stage 7: Amos' Vault

Another bonus stage room. This follows the preceding one in an all-couples Party, or the boss fight if the party is not made up exclusively of couples. Items can be found by popping boxes, just like in Ludibrium PQ and the Guild Quest.
- Rewards include
- Amorian Relaxer
- Celestial Earrings
- Cecelia Earrings
- Moonstar Earrings
- Amos Royal Cape
- Amos Spirit Cape
- Onyx Apple
- Amorian Rice Cookie
- Crystallized Pineapple Chew
- Gold Plate
- Diamond
- Black Crystal Ore
- Power Elixir
- Victoria's Amorian Basket
- Grape Juice
- Reindeer Milk
- Mushroom Miso Ramen
- Scrolls
- 60% Glove ATT
- 30% Cape LUK
- 30% Cape STR
- 30% Cape DEX
- 30% Cape INT
- 10% Helmet HP
 Sharenian Guild Quest
This Quest requires a guild (parties don't matter but are recommended) to complete.
- Requirements
- Many strong (level 80+ recommended) players to fight.
- Thief with dark sight
- Magician with maxed teleport or an Assassin with flash jump maxed
- Ranged Character
- One character under level 30
- Thief with max haste

First you must hit the purple gems that are stuck to the wall after that a earring will drop, this you must wear for the remainder of the Guild Quest. If you take it off, you will die instantly and be teleported back to the entry stage again. Off to the First stage.

A big map with lots of statues. They will flash in a certain order, and your party must hit the statues in the same order. People in the group will have to split up and watch different statues. Whenever someone sees a statue flash, they should call it out and remember which it was.
It is recommended that you get two guild members to watch either side of the map, and each calls out the number of the statue in the sequence when they see one flash (i.e. when the first statue flashes, the one who sees it shouts "one", so the other person knows that the next statue is the second, and not the first). All other guild members should refrain from talking during this stage to make it easier for those doing the statues to see the other's shouts.
This must be done 3 times, first with 4, then 5, and finally 6 statues flashing.

- Required classes
- Magician with Teleport
- Thief with Dark Sight
- Hermit with max Flash Jump or Magician with max Teleport
You have to collect 4 Spears of Longinus to pass this stage.
For the first spear:
- You have to kill Muscle Stone Golems
- The magician teleports past the rubble to get some keys
- Then the thief with dark sight has to take the keys past some super strong monsters (similar to the high damage monsters in the Ludibrium PQ) and go through the door
The other spears are reached after passing some jumping quests. Then they need to be put in another room that requires MORE jumping. You may only carry one spear at a time.
NOTE:To pick up a spear you must jump and press z to pick it up.

You need to collect four items by:
- Killing Black and Myst Knights
- Breaking boxes and bottles
The next part is similar to a game of Mastermind. You have to place the items, one in front of each statue, until you find the correct ordering. If you get it wrong, the NPC will tell you how many items are in the correct location, and a few enemies will spawn. Failing 7 times will reset the ordering required to something else, and many enemies will spawn.
Tips:
- Correct means item is in right spot
- Incorrect means item is in the combination but in the wrong spot
- Unknown means that the item is not in the combination at all.
- Only the GPQ leader can see what is wrong or right.
- The maps are made so that only the person who picked up the items first can pick it up, like the Christmas Trees.

- Required classes
- Character less than level 30
Collect 4 items for a skeleton to pass this stage Room requirements:
- Character less than level 30 has to enter and kill enemies (Devil Slimes)
- Jumping puzzle
- Killing enemies
- Gargoyles on the bottom will continue to spawn until the top gargoyle is killed
- Another jumping puzzle
The items have to be dropped in front of the skeleton one at a time, waiting between each for the skeleton to wear the item. They have to be dropped in the following order: Shoes, Pants, Jacket, Crown, but its been tested that you don't need to drop them in that specific order, Sharen III's Skeleton is now smart enough to rightly consume the things in order.
- The top gargoyle can be reached not only by flash jump, but also by a sin with maxed haste and Keen eyes, as well as an archer with maxed Eye of the Amazon. This method takes a bit longer but is useful if a hermit is not available. Haste is also unnecessary, provided the character has the equivalent amount of speed and jump from their equipments or potions (The new item, Victoria's Amorian Basket, adds 40 speed.).
One character drops their earrings for the door (dying in the process). It is recommended that the character below level 30 is used for this since EXP will be lost, and it will have the least impact on them since they can't aid in the boss fight anyway. Unlike most PQs, The character that dies may walk back to the throne room to continue fighting.
Ergoth
- Level: 115
- HP/MP: 1,700,000/150,000
- EXP: 150,000
To summon the boss, destroy the crystal above his throne. Then kill him.
As long as one character is still alive in the boss room, other Guild members may return to the map after death. Tips:
- Four statues surround the boss, killing these is not mandatory but will make your life easier.
- Each of the statues has a special attack. For example Knight Statue B has an attack that reduces HP and MP to 1.
- If you have a Level 110+ Chief Bandit with Meso Explosion, your Guild can spare about 700,000 mesos for him to use Meso Explosion. Drop them in sacks of 25,000 mesos, but it might take some time. Almost guaranteed to kill Ergoth in about 5 seconds.
- There is a special "mouse hole" that appears in the room directly outside the Throne room, and can be used to access a special safe platform that is located in the boss room. Low level players can stay safe up here and be used as the last character in the throne room should all attackers die. Hitting the chain will cause the chandelier above Ergoth to drop down and deal minor damage. The only way out of this area is by hitting the iron maiden and dying, so don't go up if you want to participate in the boss fight, or if you're the leader of the quest (the one who registered).
- WARNING: While with maxed Haste turned on, DO NOT drop the Rubian right below the ledge on the left in mid-jump, or it may just end up on the ledge, irretrievable.
40 seconds to break boxes in the bonus stage, just like the Ludibrium party quest. Prizes are similar to the Ludi PQ bonus prizes, except that the boxes may drop scrolls and boss summoning sacks. In versions with 4th job advancement, they can sometimes drop Mastery books which are required to raise the skill level cap for skills.
 Orbis Party Quest

The portal to this quest is located at the map "Entrance to Orbis Tower" just to the right of the portal into the actual tower. Completing each stage will award you a special item (for a total of 6). These items must be saved for the end to access the final boss. In many ways, it more closely resembles the Sharenian Guild Quest than any of the other 3 previous Party Quests. The progression through stages is not entirely linear, and depends more on the Leader's preferences than direct stage-to-stage movement. Experience per stage will lower more and more as you pass each stage again and again.
- Requirements
- Level 51-70
- 6 Members
- One Magician with Maxed Teleport
- One Thief with Maxed Haste
Tower of Goddess <Entrance>
Eak, Chamberlain Of the Goddess, has been trapped and lost his true form. To restore it, the party must collect 20 cloud pieces and drop them in front of a glowing light at the entrance. The pieces are broken off of clouds that must be whacked by each player's weapon. Once the cloud pieces are found, the leader must drop all of them at once onto the Glowing Light at the entrance point. An NPC will spawn, and when the leader talks to him, a CLEAR will be achieved, warping players to the door of the Goddess's Tower.
Tower of Goddess

This room is the center of the Goddess's Tower. The statue is located here, missing many pieces. There are a number of portals leading to the other stages here, and the leader must choose which order to do the stages in. Once the leader enters some stages, monsters that resemble Jr. Boogie, but are much tougher and capable of flying, run about the room. These must be killed.
There is a hidden room with is above the portal to the Lobby. This is a room which has Jr. Grupins, Jr. Lioners and Jr. Celleons that have little buffs on thier stats from the normal ones. Sometime they drop the Godness diary pages. Give them all to the leader and the diary book from the Godness is formed. You can read the diary if you have the item. But this is important to complete Wiz request.
Tower of Goddess <Sealed Room>
This room consists of attempts at the Scales. The room begins like a jump quest, and as such it has no benefits such as Haste or Teleport allowed. This part is similar to the Sharenian Guild Quest's positioning of the items, where it must be completed in less than 7 attempts. If 7 attempts are made and none are successful, players are kicked from the room and must start over. Each of three platforms must have a certain number of players on it to balance the weight. Chamberlain Eak tells the leader how to split the party, and the leader will inform via a "different" or "same", telling his party members whether to split up or stand on one platform. Once this is complete, the leader can ascend further, climb a rope and grab the Piece of Goddess.
One strategy to complete this is to first have the 5 members on the highest platform. Then have someone move to the left platform. Check and repeat until you get something right. Then have a person go on the right platform. Repeat the process. If you lose the one that's right, then have the person you moved right go back and have someone from the other platform move.
Combo 1: 050 - 500 - 005
Combo 2: 500 - 410 - 320 - 230 - 131 - 005
Combo 3: 410 - 401
Combo 4: 320 - 302 - 311
Combo 5: 230 - 203 - 212 - 221
Combo 6: 131 - 113 - 140 - 104 - 122
Combo 7: 005 - 014 - 041 - 032 - 023
Tower of Goddess <Lounge>
This stage is just one room made up of a number of smaller rooms. Many rubble-like pieces of the statue must be gathered and put back together to form the complete piece. Each sub stage will be described below.
Tower of Goddess <Room 301>
This room consists of overpowered Cellions. Kill them and collect the pieces they drop. Beware, as they can cast Super Defense Up and Super Magic Defense Up.
Tower of Goddess <Room 302>
This room consists of overpowered Grupins. Kill them and collect the pieces they drop. Beware, as they can cast Super Defense Up and Super Magic Defense Up.
Tower of Goddess <Room 303>
This room consists of overpowered Lioners. They appear and disappear, making them hard to hit. It is recommended to freeze them. Kill them and collect the pieces they drop. Beware, as they can cast Super Defense Up and Super Magic Defense Up.
Tower of Goddess <Room 304>
This is a dark room, similar to those in Ludibrium PQ. Instead of shadow monsters, however, there are boxes hidden in the darkness. These boxes must be destroyed to acquire rubble pieces. Navigating the Dark room can be difficult.
Tower of Goddess <Storage>
Cellions spawn at random locations on this map one at a time. They must be killed continuously until one drops the necessary piece. The locations are distributed along a VERY long ladder, making finding the newest Cellion difficult.
You have to kill the Cellion 15 times to have it drop the piece.
This is a possibly order of the Cellions: 1-10-9-13-11-6-12-2-5-15-8-4-7-3-14
Tower of Goddess <Walkway>

This area is located outside of the tower. Pixies of all kinds swarm on 6 platforms located along the edges of the map. Party Members must jump to the door in the center tower that warps to the area they must reach. When killed, the pixies drop the rubble pieces. To get out, the leader must be in possession of 40 pieces. When the pixies are defeated, they release their souls and become Death Pixies, which are now unrestrained by gravity and fly about the map. These are very powerful, featuring an 800 damage magic attack. It is highly recommended that no one go AFK (away from Keyboard) in this stage. Clerics must also be wary, as the Death Pixies are weak to heal.
Tower of Goddess <Lobby>

| Red | Sunday |
| Orange | Monday |
| Yellow | Tuesday |
| Purple | Wednesday |
| Blue | Thursday |
| Light Blue | Friday |
| Green | Saturday |
Climb the steps to reach the upper platforms. It features many of the aspects of ordinary jump quests, however haste and teleport still work. Spears will emerge from the platforms, and throwing stars sweep back and forth. Teleport is, in fact, required to reach two of the platforms. Once at the top, break the boxes to obtain the record disc. Upon finding the correct disc for the day(arrangement of discs in boxes is random for each PQ), drop the disc in front of the Record Player at the middle of the map.
Note: Do not drop a different disc while the correct one is playing. There is no backup, unless you smuggled one in, and you will have to restart the PQ.
Tower of Goddess <On the way Up>

This is probably the hardest stage. It involves finding the proper warp spot to progress. If you step on the wrong warp, you will be sent back to the beginning. It resembles Ludibrium PQ stage 6 in many ways. The best tactic here is to send one party member ahead, have that person find the proper warp, and then send a second to mark the right platform with a coin, arrow, or other junk item. Then everyone follows it and repeats until reaching the top. Here, there are 5 switches that can be changed by hitting them. The party must find the two switches that need to be down. The party leader must remain at the bottom to click on Chamberlain Eak. Success is denoted by a CLEAR.
Tower of Goddess

Now that all of the other rooms have been cleared, and the pieces collected, the statue must be restored. The leader, or any party member in possession of pieces, must find where his or her piece goes and drop it on the appropriate platform. Once this is done, the piece will be absorbed and the missing pieces of the statue will reappear. This stage is completed when all pieces are reintegrated into the statue of the Goddess.
Tower of Goddess <Garden>

Nependeath are located on various clouds floating outside the tower. Once defeated, the Nependeath drop seeds, which look similar to those used to transport to Leafre. They must be dropped on to flowerpots on solid platforms along the edges of the map. Once this is done, either a Nependeath or a Dark Nependeath will spawn. Once the Dark Nependeath has been defeated, drop its item on a statue and Papa Pixie Will spawn.
Tower of Goddess <Garden> (Boss Stage)
Papa Pixie roams the floor of the Garden map. Any undefeated Nependeath remain. It is advisable for any weakened party members to flee to the upper areas, which are now relatively safe. Papa Pixie is probably the hardest PQ boss ever. He has Darkness and Skill Seal, like Alishar, and is capable of summoning Star, Lunar, and Sun Pixies. Once these pixies are killed, they become Death Pixies that pose a threat to the weaker members hiding at the top. Papa Pixie's most dangerous skill by far is Dispel, as a mage without Magic Guard cannot withstand a hit from it, either physical or magical. Once defeated, the party must find the proper plant that appeared in the flowerpots to go to the bonus stage.
Tips:
- Lure Papa Pixie to one of the two platforms on the bottom level, preferably the higher one. There, you can easily hit him without taking physical damage.
- Get at least 3 Level 60 and above attackers for your party, along with 1 or more Clerics. Attackers have to include one Spearman with a decent level of Hyper Body.
- Always watch your power-ups and skills, located at the right-top corner of the screen, especially Magicians.
 Ludibrium Maze Party Quest
Starting the Party Quest
Requirements: Level 51-70, and a party of 3 or more people.
Ludibrium Maze PQ is unique among the Party Quests for several reasons. First, there is no boss monster lurking at the end, however there are a few monsters that stand out as being powerful. Second, unlike most PQ's, with the exception of Orbis PQ, the stages do not progress in a linear fashion. Instead, the party spawns at a random location and must progress from this point. Additionally, this PQ does not give a set amount of EXP upon completion; the amount gained is determined solely by the number of passes collected while inside. This is also one of the few party quests that was created by a version other than KoreaMS, as it was made by JapanMS.
Basically, a party attempting this PQ has 15 minutes to break boxes located in different rooms of the maze to summon monsters. These monsters drop Mana Elixirs and tickets. The more tickets the leader has at the end, the more exp the whole party will get. There is also an ordinary prize at the end of the PQ, like a scroll or potions. There are 16 rooms in total, and some rooms do not have boxes containing monsters. To enter, click on Nana, who looks like a tour guide, at the top of the Ludibrium Clock Tower.
The Maze
To finish the PQ, head for Pietri the Clown, who is located in room 16. The simplest way is to simply keep going through the center portal in each room. To succeed in this party quest, the top priority should be to kill the Tauromacis since they drop fifty tickets each, whereas all other monsters drop only one. To skip some rooms, after fighting the second group of Tauromacis in room 6, take the middle door, continuing to take the door immediately to the left of where you spawn in each room.
The [*] counts as door portals from left to right.
| Room 1 [5] [8] [13] |
Room 2 [6] [9] [14] |
Room 3 [7] [10] [15] |
| Room 4 [8] [11] [1] |
Room 5 [9] [12] [2] |
Room 6 [10] [13] [3] |
| Room 7 [11] [14] [4] |
Room 8 [12] [15] [5] |
Room 9 [13] [16] [6] |
| Room 10 [14] [2] [7] |
Room 11 [15] [3] [8] |
Room 12 [1] [4] [9] |
| Room 13 [2] [5] [10] |
Room 14 [3] [6] [11] |
Room 15 [4] [7] [12] |
Rooms 3, 4 and 9: Master Chronos and Dark Jr. Yeti
Rooms 2 and 10: Stone Golem and Dark Stone Golem
Rooms 5 and 8: Zeta Gray and Ultra Gray
Room 6 and Room 7: Tauromacis and Flyeyes
Room 1 and Room 11: Coolie Zombie and Minor Zombie
Rooms 12, 13, 14 and 15 have no monsters.
Basically the left portal is the room number plus 4, the middle portal is the room number plus 7 (or minus 8) and the right portal is the room number minus 3. This excludes room 16.
Here's a chart to navigate the maze. Find your origin in the left hand column and then go over to your destination.
| 1 | 2 | 3 | 4 | 5 | 6 | 7 | 8 | 9 | 10 | 11 | 12 | 13 | 14 | 15 | |
|---|---|---|---|---|---|---|---|---|---|---|---|---|---|---|---|
| 1 | L1, R1 | L2, R2 | L1, C2 | L1 | L2, R1 | R3 | C1 | L2 | R2 | L1, C3 | L1, C1 | R1 | L1, R2 | C2 | |
| 2 | L2, R3 | L1, R1 | L2, R2 | L1, C2 | L1 | L2, R1 | R3 | C1 | L2 | R2 | L1, C3 | L1, C1 | R1 | L1, R2 | |
| 3 | L1, R2 | C2 | L1, R1 | L2, R2 | L1, C2 | L1 | L2, R1 | R3 | C1 | L2 | R2 | L1, C3 | L1, C1 | R1 | |
| 4 | R1 | L1, R2 | C2 | L1, R1 | L2, R2 | L1, C2 | L1 | L2, R1 | R3 | C1 | L2 | R2 | L1, C3 | L1, C1 | |
| 5 | C1, L1 | R1 | L1, R2 | C2 | L1, R1 | L2, R2 | C2, L1 | L1 | L2, R1 | R3 | C1 | L2 | R2 | C3, L1 | |
| 6 | C3, L1 | L1, C1 | R1 | L1, R2 | C2 | L1, R1 | L2, R2 | L1, C2 | L1 | L2, R1 | R3 | C1 | L2 | R2 | |
| 7 | R2 | L1, C3 | L1, C1 | R1 | L1, R2 | C2 | L1, R1 | L2, R2 | L1, C2 | L1 | L2, R1 | R3 | C1 | L2 | |
| 8 | L2 | R2 | L1, C3 | L1, C1 | R1 | L1, R2 | C2 | L1, R1 | L2, R2 | L1, C2 | L1 | L2, R1 | R3 | C1 | |
| 9 | L1, C2, L1 | L2 | R2 | L1, C3 | L1, C1 | R1 | L1, R2 | L2, R3 | L1, R1 | L2, R2 | L1, C2 | L1 | L2, R1 | R3 | |
| 10 | R3 | C1 | L2 | R2 | L1, C3 | L1, C1 | R1 | L1, R2 | C2 | L1, R1 | L2, R2 | L1, C2 | L1 | L2, R1 | |
| 11 | L2, R1 | R3 | C1 | L2 | R2 | L1, C3 | L1, C1 | R1 | L1, R2 | C2 | L1, R1 | L2, R2 | L1, C2 | L1 | |
| 12 | L1 | L2, R1 | R3 | C1 | L2 | R2 | L1, C3 | L1, C1 | R1 | L1, R2 | C2 | L1, R1 | L2, R2 | L1, C2 | |
| 13 | C2, L1 | L1 | L2, R1 | R3 | C1 | L2 | R2 | C3, L1 | L1, C1 | R1 | L1, R2 | C2 | L1, R1 | L2, R2 | |
| 14 | L2, R2 | L1, C2 | L1 | L2, R1 | R3 | C1 | L2 | R2 | L1, C3 | L1, C1 | R1 | L1, R2 | C2 | L1, R1 | |
| 15 | L1, R1 | L2, R2 | L1, C2 | L1 | L2, R1 | R3 | C1 | L2 | R2 | L1, C3 | L1, C1 | R1 | L1, R2 | C2 |
L=Left, C=Center, R=Right
Prizes
Note: The list of prizes is currently being updated. Feel free to add prizes that aren't listed yet.
- Equips
- Red Hearted Earrings
- Gold Drop Earrings
- Blood Snowboard
- Emergency Rescue Tube
- Yellow Umbrella
- Fan
- Green Strap Shoes
- Scrolls
- 70% Dark Scroll Cape Def
- 70% Dark Scroll Cape Str
- 70% Dark Scroll Cape Dex
- 70% Dark Scroll Cape Int
- 70% Dark Scroll Cape Luk
- 70% Dark Scroll Helmet Def
- 70% Dark Scroll Bottomwear Def
- 70% Dark Scroll Topwear Def
- 70% Dark Scroll Overall Def
- 70% Dark Scroll Shield Def
- 60% Scroll Cape Def
- 60% Scroll Helmet Def
- 60% Scroll Overall Def
- 60% Scroll Topwear Def
- 60% Scroll Bottomwear Def
- 30% Dark Scroll Cape Def
- 30% Dark Scroll Helmet Def
- 30% Dark Scroll Overall Def
- 30% Dark Scroll Topwear Def
- 30% Dark Scroll Bottomwear Def
- 30% Dark Scroll Shield Def
- 10% Scroll Cape Str
- 10% Scroll Cape Dex
- 10% Scroll Cape Int
- 10% Scroll Cape Luk
- 10% Scroll Cape Def
- 10% Scroll Helmet Def
- 10% Scroll Overall Def
- 10% Scroll Topwear Def
- 10% Scroll Bottomwear Def
- Usable
- 5 Elixirs
- 50 Watermelons
- 20 Fat Sausages
- 20 Grape Juice
- 100 Mana Elixirs
- 100 Dried Squids
- 100 Orange juices
- 50 Kinoko Ramen (Pig Head)
- 50 Pure Waters
- 5 Red Bean Sundaes
- 5 Ice Cream Pops
- 1 Power Elixir
- 50 Watermelons
- 20 Coffee Milks (return to Nearest Town.)
- 20 Fruit Milks (Return to Showa Town. Only works in Zipangu)*
- 20 Strawberry Milks (Return to Mushroom Shrine. Only works in Zipangu)
This Party Quest is currently only avaliable in JapanMS and GlobalMS.
 Herb Town Party Quest
Requirements: Party of 3-6 players between the levels of 55 and 100.
It's very different from the other party quests, since there are many tie-in quests that are outside of the PQ, and several optional stages. The majority of the quest is simply killing hundreds of monsters. Because of the structure of the maps, classes with Area of Effect (AoE) attacks do best here. Consider bringing along higher level Rangers, Snipers, and Mages of both varieties. Also, haste and Dark Sight will make many stages of the PQ much easier, so grab a thief as well. Warriors don't fare as well here, but Dragon Knights with Roar and Crusaders with Shout can be useful.
Before attempting this Party Quest, consider starting the following Ordinary quests, as they involve either defeating monsters found inside the PQ, or collecting items from them.
- Finding Ingredients for Tae Sang
- Outlaw in the Sea
- Eliminating the Pirates
- Captain Lord Pirate
- Pirate's Map (must be started in Lith Harbor of Victoria)
Stage 1: On the way to the Pirate Ship
Time limit: 4 minutes

Stage 1
The Party Quest starts out on regular Herb Town bamboo planks. Your party must rush to reach the pirate ship before it sets sail. To get on board, all of the monsters in the area must be destroyed. Bellflowers and Pots roam around. In this stage, there are also a number of treasure chests. These chests sometimes contain Ginseng Concentrates, and sometimes release more monsters. It is not necessary to destroy the chests here, or in any subsequent stages.
Stage 2: Through the Head of the Ship!
Time limit: 6 minutes

Stage 2
In this stage, Guon will say that Lord Pirate has sealed 3 barriers against you. To break them, the leader of the party needs to collect 20 gray Mark of the Rookie Pirate badges dropped by Mr. Alli, then talk to Guon to disable the first barrier. Once it is broken, the Mr. Alli will die. Talk to Guon again and Kru will begin to spawn. Collect 20 blue Mark of the Rising Pirate badges dropped by Kru to disable the second barrier. Repeat and Captains begin to spawn. Collect another 20 red Mark of the Veteran Pirate badges dropped by Captain. Once all the badges are turned in, the party can proceed through the right portal onto the next stage.
Stage 3: Through the Deck I
Time limit: 6 minutes
Stage 3
The party has reached the center of the ship. This stage is about as straightforward as it gets; simply wipe out every single monster on the map. There are also two portals which lead to the optional stages: the one on the left, to Bellflowers, and the one on the right, to devoted Kru and Captains.
Stage 3A: Garden of the 100 Year Old Bellflowers I
Time limit: 5 minutes, 45 seconds
Stage 3A
This room is filled with Bellflowers. In order to rescue them, they must be defeated. They are stronger than normal and they can appear and fade. Once the party has killed them all, a chest will appear. To open it, you need a key which Lord Pirate drops. This is the first of two chests in the PQ. Opening one chest will aggravate Lord Pirate, transforming him into an Angry Lord Pirate. Opening both chests will aggravate Lord Pirate into an Enraged Lord Pirate.
Stage 3B: Lord Pirate's Servant I
Time Limit: 1 minute
Stage 3B
This room is filled with Lord Pirate's Devoted Krus and Devoted Captains. They are much, much more powerful than normal. Additionally, if they are not defeated in 10 seconds, they will disappear, rendering your damage worthless. These monsters must be killed as a part of a quest outside the PQ requiring you to kill 200 of each kind. Be aware that if you do not make it out in time, you will be sent to the exit map of the party quest.
Stage 4: Through the Deck II
Time limit: 6 minutes
Stage 4
The party has passed the center of the ship. This stage is the same as before; simply wipe out every single monster on the map. There are also two portals which lead to the optional stages: the one on the left, to devoted Kru and Captains, and the one on the right, to Bellflowers.
Stage 4A: Lord Pirate's Servant II
Time Limit: 1 minute
Stage 4A
This room is filled with Lord Pirate's Devoted Krus and Devoted Captains. They are much, much more powerful than normal. Additionally, if they are not defeated in 10 seconds, they will disappear, rendering your damage worthless. These monsters must be killed as a part of a quest outside the PQ requiring you to kill 200 of each kind. Be aware that if you do not make it out in time, you will be sent to the exit map of the party quest
Stage 4B: Garden of the 100 Year Old Bellflowers II
Time limit: 5 minutes, 45 seconds
Stage 4B
This room is filled with Bellflowers. In order to rescue them, they must be defeated. They are stronger than normal and they can appear and fade. Once the party has killed them all, a chest will appear. To open it, you need a key which Lord Pirate drops. This is the second of two chests in the PQ. Opening one chest will aggravate Lord Pirate, transforming him into an Angry Lord Pirate. Opening both chests will aggravate Lord Pirate into an Enraged Lord Pirate.
Stage 5: Eliminate Pirates!
Time limit: 6 minutes

Stage 5
In this stage, pirates are starting to retreat. Four different types of pirates will come out of 4 doors: Kru from the upper left, Ginseng Jars from the upper right, Mr. Alli from the bottom left, and Captain from the bottom right. Some of these occasionally drop keys. The party must seal every door in this stage by dropping a key on it. Since the monsters usually spawn very close to the door, it is better to have a thief go into Dark Sight and drop the key on the door that way. In order to exit the map, all the monsters must also be defeated.
Stage 6: The Captain's Dignity
Time limit: 8 minutes

Stage 6
Finally, it is time for the Boss fight. The boss, Lord Pirate, is different depending on how many of the optional boxes you opened during the PQ in stage 3B and 4B. There's a quest that requires you to kill all 3 different forms. Currently, it is unknown on what summons the Peeking Lord Pirate form, but it may be triggered by a party with no characters over 70.
Rewards
The possible rewards of the Herb Town party quest are few. There is no bonus stage, and no prize awarded for completion. It does present the possibility to gain the Lord Pirate hat, a powerful helmet. It comes in 4 varieties:
- Level 60 - 30 PQs completed --> (2 STR, 2 DEX, 2 INT, 2 LUK, 30 HP, 30 MP, 45 DEF, 45 M. DEF, 3 Speed, 1 Jump, 7 Slots)
- Level 70 - 80 PQs completed, total --> (3 STR, 3 DEX, 3 INT, 3 LUK, 40 HP, 40 MP, 60 DEF, 60 M. DEF, 4 Speed, 1 Jump, 7 Slots)
- Level 80 - 200 PQs completed, total --> (3 STR, 3 DEX, 3 INT, 3 LUK, 60 HP, 60 MP, 70 DEF, 70 M. DEF, 5 Speed, 2 Jump, 7 Slots)
- Level 90 - 350 PQs completed, total --> (5 STR, 5 DEX, 5 INT, 5 LUK, 90 HP, 90 MP, 90 DEF, 90 M. DEF, 7 Speed, 4 Jump, 7 Slots)
If anyone in the party is over level 70, the possible EXP is reduced. In a party of 6 with anyone over 70 (even if all 6 are), the normal EXP is 20,000. If a party with less than 6 members has at least one character over 70, the reward is 28,000. Other amounts are possible as well (such as 10,000 EXP) but it is unknown as to exactly what triggers these numbers yet. There is also a rare chance that Lord Pirate will drop a Pirate Key, which is used to summon the two other different forms of Lord Pirate.
Lord Pirate drops:
- Use Items
- White Potions
- Blue Potions
- Sunrise Dews
- Sunset Dews
- Reindeer Milk
- Elixirs
- Scrolls
- 60% Shoes Speed
- 60% Two-Handed Axe ATT
- 60% Two-Handed BW ATT
- 10% Overall Armor DEF
 Monster Carnival
This is a competitive Party Quest for characters between levels 30 and 50. You can access to this Party Quest only from Kerning City, Ludibrium and Orbis. Two parties enter a Ludibrium-themed map and compete at killing monsters for CP, or Carnival Points. These CP, in turn, can be used to either slow down the other team, summon monsters on them, or can simply be held. At the end of the time limit, the team with the most CP wins. CP can also be used to summon Monsters on the other team, make the creatures stronger, faster, or make the other players damage decrease. Items dropped in this PQ, will be used once picked up, but etc items will be kept for exchange for weapons and necklaces.
If you tie with another team then you will have an addition of 2 minutes to get more points to beat the other team.
Forming up
There are 6 fields on each channel, so there can be up to 6 fights on each channel. Parties consist of 2-6 users. The first 4 fields are 2-4 users. Others are 3-6 users. The way it works is, one party creates the lobby waiting room. From there the party leader accepts or declines invitations from other parties. Other parties can only face if the number of users are equal (or in some cases, a strong party, vs a weaker party with more people). After a party is picked to fight, the party enters and the fighting starts.
Battlefield
You may not use the potions you carry around with you in the battlefield. Instead, the monsters drop potions and you use the potions immediately when you pick them up. All of the potions have the same effect as the ones you carry around with you. Additional items found in the battlefield:
- Carnival Points 1, 2 or 3(blue, red, or purple sphere respectively)- Gives you 1, 2, or 3 CP on pick up
- Party Mana Elixir - Recovers 300 MP for all members of your party.
- Party Elixir - Recovers 50% of HP and MP for all members of your party.
- Party Power Elixir - Recovers all HP and HP for all members of your party.
- Party All Cure Poison - Cures any abnormal state affecting any members of your party.
- Mini Cube of Darkness - One of the members in the opposing party will be inflicted with darkness, poison, seal, weakness, or curse.
- Cube of Darkness - Everyone in the opposing party will be inflicted with darkness, poison, seal, weakness, or curse.
- Stunner - One of the members of the opposing party will be stunned.
- Maple Coin - These you keep in your inventory and used to redeem for equips from Spiegelmann.
Parties win by having the most accumulated CP by the end of 10 minutes. If you use the CP, it won't be counted against how you win, only the total CP collected will show if you win.
CPs are used to summon monsters, use skills, or summon protectors.
Each item has a set CP cost. Players can access them quickly using Tab and the F keys.
| Name | CP | Hotkey |
|---|---|---|
| Brown Teddy | 7 | F1 |
| Bloctopus | 7 | F2 |
| Retz | 8 | F3 |
| Chronos | 8 | F4 |
| Toy Trojan | 9 | F5 |
| Tick-Tock | 9 | F6 |
| Robo | 10 | F7 |
| King Block Golem | 11 | F8 |
| Master Chronos | 12 | F9 |
| Rombot* | 22/30 | F10 |
- 22 CP on in Room 5 and 6, 30 the rest.
Rewards
Unlike other party quests, the Carnival PQ does not have a bonus stage, nor a set reward. However, Maple Coins can be found from the various monsters inside, redeemed to Spiegelmann (the Carnival NPC) for prizes. Also, the experience that is rewarded to both the winning and losing team varies depending on the Rank received; the Rank received depends upon how much CP the party gathers:
| Rank | CP Required |
|---|---|
| A Rank | 500+ CP |
| B Rank | 250-499 CP |
| C Rank | 50-249 CP |
| D Rank | 0-49 CP |
| Winning | EXP | Losing | EXP |
|---|---|---|---|
| A Rank | 30,000 | A Rank | 10,000 |
| B Rank | 25,500 | B Rank | 8,500 |
| C Rank | 21,000 | C Rank | 7,000 |
| D Rank | 3,000 | D Rank | 1,000 |
Prizes
| Maple Coins | Prize |
|---|---|
| 50 | Spiegelmann's Necklace |
| 40 | Spiegelmann's Marble |
Along with the special rewards above, there are also weapons for each class available to redeem their Maple Coins for. The lowest level weapons cost 7 coins, the highest up to 20 coins:
Warrior weapons:
| Maple Coins | Weapon |
|---|---|
| 7 | Cutlus |
| 7 | Lionheart |
| 10 | Traus |
| 10 | Zard |
| 20 | Jeweled Katar |
| 20 | Lion's Fang |
| 7 | Dankke |
| 7 | Niam |
| 10 | Blue Counter |
| 10 | Sabretooth |
| 20 | Buck |
| 20 | The Rising |
| 7 | Heavy Hammer |
| 7 | Sledgehammer |
| 10 | Jacker |
| 10 | Titan |
| 20 | Knuckle Mace |
| 20 | Golden Mole |
| 7 | Nakamaki |
| 7 | Axe Pole Arm |
| 10 | Zeco |
| 10 | Crescent Polearm |
| 20 | The Nine Dragons |
| 20 | Serpent's Tongue |
Magician weapons:
| Maple Coins | Weapon |
|---|---|
| 7 | Wizard Wand |
| 7 | Petal Staff |
| 10 | Crystal Wand |
| 10 | Hall Staff |
| 20 | Arc Staff |
| 20 | Cromi |
Bowmen weapons:
| Maple Coins | Weapon |
|---|---|
| 7 | Red Viper |
| 10 | Vaulter 2000 |
| 20 | Olympus |
| 7 | Heckler |
| 10 | Silver Crow |
| 20 | Rower |
Thief weapons:
| Maple Coins | Weapon |
|---|---|
| 7 | Dark Guardian |
| 10 | Dark Avarice |
| 20 | Dark Slain |
| 7 | Gephart |
| 10 | Bazlud |
| 20 | Sai |
| 20 | Shinkita |
 Ariant Coliseum
This is another Competitive Party Quest for character between 20 and 30. Characters from 20-26 may compete against each other, and characters from 27-30 may compete against each other, for fairness. It can be accessed from Ariant, Ludibrium, Henesys, Nautilus Port, Perion, and other towns. There are three possible rooms per channel that the competition can take place in.
Signup Area
This is the equivalent of Spiegelman's office for Monster Carnival. Upon talking to the NPC in one of the towns, players arrive here, where they can meet up with potential opponents. Players can choose one of the rooms to enter, and determine the number of opponents they would like to face. A match can range from 1 versus 1 to a full out free-for-all between 6 players.
Waiting Room
Upon selecting the number of opponents and what map they would like to fight on, the player enters this waiting room. If another player decides to fight on that map with the same number of opponents, they will also appear in the waiting room. The player that creates the room is also able to throw other players out that enter by talking to the NPC. Once the appropriate number of opponents have arrived, the first player to enter must talk to the NPC to begin the match.
Coliseum Battle
Once everyone has entered a room, the players must talk to the NPC to receive Element Rocks and Bombs, both of which are Use items. After these are obtained, a number of Scorpions will spawn. The goal is to collect as many Scorpions as possible by weakening them with ordinary attacks and then using an Element Rock. The lower the scorpion's health, the more likely it is that a capture stone will succeed. After a Scorpion is successfully captured, it will appear as a shiny Spirit Jewel in the ETC inventory.
Bombs can be used to attack the other players and cause them to drop about a third of their own scorpion gems. A bomb will also stun anyone in range, including the person who set it, so one must be careful to get away from a bomb after they set it. While the opponent is stunned, quickly run around and pick up his dropped gems. If the gems are not picked up by the person who set off the bomb before the stun wears off, then the victim may grab them again.
If one starts to run out of bombs, the scorpions can also be killed. When they die, they will drop Bombs and buff or debuff items. The possible items are as follows:
- Power Punch - A fist used during the Hunting Tournament. Boosts weapon and magic attack.
- Wing of the Wind - A set of wings used during the Hunting Tournament. Boosts speed and jump.
- Shield - A shield used during the Hunting Tournament. Protects the owner from the bomb once.
- Crazy Skull - An eyeball-rotating skull used during the Hunting Tournament. Inverts directions. Down must be held to jump.
Crazy Skull affects a random opponent (In GlobalMS it affects all the opponents). The other three items affect the player who picked them up. All items are used as soon as they are looted.
Reward Area
After the time is up, players talk to the queen. She will take the Spirit Jewels and grant experience based on how many Scorpions were captured and what place the player ranked amongst the competitors. The points are based on 1 per 10 jewels, the maximum being 3 for 2 players and 8 or more for at least 5 players. The last place player gets only 1 point, unless they are unable to get 5 jewels. Additionally, after gaining 200 points from Coliseum battles, players can obtain a Palm Tree Beach chair from the King, which is tradeable.
| Number of Players | Max Points Acquirable |
|---|---|
| 2 | 3 |
| 3 | 4 |
| 4 | |
| 5 | |
| 6 |
 Magatia Party Quest
- Location: Magatia
- Requirements:4~6 Characters in a party.
This party quest involves uniting the two lovers, Romeo and Juliet, who belong to the opposing Alchemy groups, the Alcadno and the Jenumists. It is for at least 4 characters between level 71 and 85. The boss is a strange Frankenstein monster which has two forms. Like the Herb Town PQ, there are many quests that relate to items inside the Party Quest. Note:You will need at least a Mage with maxed Teleport and a Thief with Haste to finish Magatia Party Quest and there are two kinds of Magatia Party Quest,such as Juliet Party Quest,who is related to the Alcadno Laboratory and Romeo Party Quest,that is related to Jenumist Laboratory.
The Waiting Room
To get on each waiting room for the Magatia Party Quest you only need to enter on the Jenumist or Alcadno Laboratory.and enter in a door on the top of the map. There will be an NPC there, Romeo or Juliet. Romeo is the guide of the Jenumist version of Magatia Party Quest.and Juliet takes you to the Alcadno version of Magatia Party Quest.
First Stage
Ask your leader to start clicking on hidden NPCs. They are the secret books on the first room of the laboratory. When the leader click one book that gives a different message,A door will rise from the floor and will let you proceed to the next stage.
Second Stage
You will be in a dark room. Just kill the monsters inside and tell your leader to click on the books. After killing all monsters, another door will rise from the floor and will let you proceed.
Third Stage
There will be lots of Homunculus at the main floor, so, kill them and get a Green Liquid Bottle. There will be some Empty Bottles there; just drop the Green Liquid there and keep doing it until all Empty Bottles are full. Note:If you drop Green Liquid Bottles,you have some seconds to drop another, because there is a Crack on each Bottle, so be careful.
Fourth Stage
This stage is a little hard, at first. Your party members should start killing the monsters inside the room, they will drop an item called Card Key, ask any member to get the card and drop it in front of each door. There will be two doors in this map, the right one must be done with a magician with maxed teleport. start hitting the boxes until you get a Jenumist Document, ask any member to drop the card again, so you can leave the map. On the other door, you will need a member with Haste. Open the door and enter there, do the jump quest and break the boxes until you get a Alcadno Document. Note:Once you enter in any room here, your hp will be reduced by 100 each 10 seconds.
Fifth Stage
This stage is a bit easy, just kill the monsters inside this room and proceed to the next stage. Note:These monsters are dangerous: they do about 300 damage and have skills to make you only hit 1 on them, so bring a priest with dispel,so he can cancel them.
Sixth Stage
There will be 4 doors. Each door provides a jump quest, with 10 floors. Each floor has 4 platforms, but only 1 will let you go to the next floor. The rest will take you to the entrance of the map. Note:If the party haves more than 4 people. 2 of them must wait until the others finish the jump quest to proceed.
Boss Stage
This is the Boss stage. The boss is the Franken Roid. It appears in 2 kinds,Angry and Normal Franken Roid. You must protect Romeo or Juliet to get your reward.So,some party members will kill the boss and one will protect them. Once you kill the Boss,Monsters will disappear.If Romeo or Juliet died,you will get 90.000 Experience,but if they are alive you will get 100.000 Experience. Note:But, if they are alive you will get a reward,if they're dead you will lose the reward stage and will be outside the party quest.
Reward Area
This is the Reward Area, it doesn't have a bonus stage like most of the Party Quests. However, if you kept Romeo and Juliet alive, you will get a stone of Alcadno or Jenumist and your prize. Just click on the Romeo and Juliet NPC and you will be out.
Note:These stones are needed to make a Eye of Horus,the untradeable pendant that you get from this party quest.
Final Note:This party quest have special quests, like the Pirate Party Quest. Some that you will need to kill the Boss,Get items from the monsters inside,Etc.
 Elin Forest Party Quest
This is a level 45-55 Party Quest, located in Victoria Island's past, Elin Forest. It's also known as the "Forest of Poison Fog Party Quest". The party must stop the poisoning of the forest caused by the Black Magician. In order to enter this party quest, it is necessary for the party to consist of at least 4 members, which may be of any class. Upon entering, the party will be transformed to look like the Legendary heroes, based on their job: Athena Pierce (Archers), Kanderun (Warriors), Pergen (Magicians), Lord(Thieves), and Euryth(Pirates - Currently glitched and not available). This Party Quest is only available on KoreaMS.
Stage 1

Stage 1
The first stage of the Elin Forest Party Quest has a simple goal: merely defeat all of the Poisoned Tree Lords. Once they are all defeated, you may advance to the next stage through the portal on the right side. The Poisoned Tree Lords are mostly on platforms above the floor, so it's a good idea to split up the party into one person per platform for the most efficient method of clearing it.
Stage 2

Stage 2
In this room is an enormous poisoned tree with a bulbous green growth near the base. As you enter, numerous Poisoned Stone Bugs will begin to spawn. These bugs have Super Weapon Defense up ability, however this isn't as much of a liability as you might believe; in order to clear this stage, you must lure the slow-moving Stone Bugs to the tree, and then defeat them. If they are killed before reaching the tree, they will drop a useless purple Venomous poison. When defeated in front of the tree, the Stone Bugs will cause pink Diluted Poison items to appear. After around 4 of the antidotes have spawned, you must take them to a thorn bush at the far right of the stage. Each diluted poison heals the thorns some, until they finally disappear, and you may continue on your way.
Stage 3

Stage 3
This stage contains no monsters, however it presents a maze of portals. In order to progress, the party must split up and find the route to the bottom right corner of the map. Only one member of the party must reach the end, and upon talking to Fairy Elin, will proceed to the next stage.
Stage 4

Stage 4
Stage 4 of the Poison Forest is populated by the Poison Sprites. In order to clear this stage, the party must capture at least 20 of these poison sprites, in hopes that Elin may be able to purify one and return it to its original state as a disinfecting Sprite. To catch them, each party member first needs to talk to Elin upon entering the stage, and then take her first option. Provided the character has at least 1 free USE slot, they will be given 10 Transparent Marbles. To capture a Poison Sprite, the party needs to lower the monster's HP, and then use a marble. The marble will then be converted into an ETC item. After collecting 20 Poison marbles, the party leader must give them all to Elin, who will then purify a Poison Sprite into a regular Sprite. The leader will talk to the Sprite to move to the next stage.
Stage 5

Stage 5
This stage is a jump quest with false platforms. First, the party must climb up ropes in order to reach the jump quest area. Then, they need to split up and jump to one of 3 ropes at the top of the map. Players climbing the ropes must take care to avoid the flying throwing stars. Upon climbing all the ropes, the party member must destroy all the wooden boxes up here in search of a Purple Magic Stone. Once it is found, the party can proceed to the next stage. This means that if the first person up finds the stone, the other parts of the jump quest won't be necessary to complete.
Stage 6 - Boss

Stage 6 Boss Area
This is the boss area. To summon Poison Golem, drop the Purple Magic Stone on the bound golem statue. Poison Golem's first form will appear. The first form is rather weak, and so it should not take more than a minute to destroy. The second form is much more annoying, as it can cast large poison clouds, which deal 50 damage per second, making it difficult for melee classes, particularly infighters and bandits, to attack. It also casts darkness and weakness on the entire party. Finally, the third form is the most dangerous of all. In addition to having the abilities of the second form, it can summon Poisoned Tree Lords, Poisoned Sprites, and Poisoned Stone Bugs. It can heal itself for about 3,000-4,000, as well as all surrounding monsters. The most dangerous ability of all is the "invert controls" skill, similar to the one inflicted in Ariant Coliseum. This causes the left arrow to move your character right, right to move left, and worst of all it cannot be dispelled by using a Cure-all. After defeating the Poison Golem, it will drop a number of potions, like Lord Pirate and Frankenroid. The party can now exit the area through a portal on the right side of the map.
Exit
In here, simply talk to Elin to exit. You will already have changed back to your normal appearance. The reward for completion of the party quest is 52,000 EXP, which is about 5% even at the maximum level. There is no bonus stage, nor is there a prize upon completion.
 Zakum Party Quest (Stage 1)
The Zakum Party Quest is available to players over level 50. The party can consist of 1 to 6 members. The time limit is 30 minutes. The goal is to collect 7 keys. Additionally, the party has the option of collecting 30 document pieces. It is located at the end of the Dead Mine, at the furthest point from El Nath. In certain versions, this part of the quest is limited to three runs per party leader. This must be completed in order to fight Zakum.
Adobis Mission I

Once inside, there are 15 doors. Speed and Teleport do not work here. Each of these leads to a room which is made up of 1 or two parts. Inside rocks and treasure chests are scattered on the floor. These must be destroyed to get the Keys or Documents. Documents are always found in rocks, and Keys are usually found in Chests, though there are exceptions. A small note, the word Documents is blocked in game, so they're usually referred to as "Docs".
Unknown Dead Mine
- The rooms are labeled 1-1, 1-2, 2-1, 3-1, 3-2, 4-1, 4-2, 5-1, 6-1, 7-1, 7-2, 8-1, 9-1, 9-2, 10-1, 10-2, 11-1, 12-1, 13-1, 14-1, 15-1. They are located as follows:
- Two rooms, 10 and 7, lead to a further room which more closely resembles the first room than any others, called Area 16 <A Dead Mine Somewhere>, which has 6 rooms branching off of it, like so:
- Documents and Keys are always found in certain rooms, though not always in the same rock or chest. Keys can be found in these rooms (It's located in a chest unless noted):
4-2 (rock), 9-2, 11-1, 14-1, 16-2, 16-3, 16-5 (rock).

- Once all the keys are collected, they must be combined into one stack and dropped onto the large treasure chest located randomly at 16-5. This causes the chest to open, and a complete Fire Ore is released. The Fire Ore must be returned to Aura located in the first room. In order to receive a prize, however, at least 30 Documents must be collected. The Documents are located in rocks, in these rooms:
- There is one Document in:
1-1, 1-2, 2-1, 3-1, 4-2, 5-1, 6-1, 7-1, 9-1, 10-1, 11-1, 12-1, 14-1, 15-1, 16-4, 16-5*, 16-6
- *= This Document is located in a chest.
- The following rooms all have 2 Documents:
3-2, 7-2, 8-1, 9-2, 10-2, 13-1
- In addition, there's 3 documents located near the starting point. There's more than 30 documents, so get the ones that are easiest, which is personal preference. It's recommended that one person focus on collecting keys while the others gather documents. Once everything is collected, hand it in to Aura, and walk through the portal. Anyone who does not make it through the portal will not receive a prize. Additionally, the leader must exit through the portal last, or the party members who had not yet passed through will not receive prizes. This is a recent change, so it is unknown whether it is intentional or a glitch.
Although it is fastest to complete with a larger party, it is possible, but much slower, to solo the quest. However, not always will one have someone else to party with, so at times the best option may be to solo the quest, or not do it at all.
Rewards
If completing the quest alone with just keys, the reward is 12000 EXP. If completing it alone with both Keys and documents, the reward is 20000 EXP. If completing it in a party, even if it is only made up of two members, with only keys, the EXP is 15000. If the party has both Keys and Documents, the reward is 20000 EXP. Any time that all Documents are collected, all players who finish are awarded with 5 Return to Dead Mine Scrolls.
This quest is not available in EuropeMS.
El Nath Party Quest
This party quest unlike the others require a level 120 warrior as a party leader to start this quest.
The 4th job warrior must be attempting to complete his/her Stance Quest.
- Hunt for "Crimson Balrog's Plan" storybook from a Crimson Balrog, then talk to your 4th job instructor.
- Now talk to Spiruna found in Cloud Park in Orbis. Give her the "Crimson Balrog's Plan".
- Talk to your fourth job instructor. He will instruct you to find a "Bluish paper" that drops from Lycanthropes.
- Once you acquire the Blue Paper, talk to your fourth job instructor again.
- Venture to El Nath and talk to your 3rd job instructor. He will give you another quest to find a Gold Medal.
- Enter the El Nath PQ and complete it successfully to obtain the Gold Medal.
- Return to your fourth job instructor, and he will trade you a skillbook for Stance for your Gold Medal.
It involves protecting Tylus from monsters to obtain 4th job skillbooks.
The mobs that spawn in this map are Crimson Balrog, Lycanthrope and Werewolf.
Each mob has a chance of dropping the lvl 10 storybooks for Dragon Pulse, Showdown, Infinity. They drop frequently.
You need to either continually kill all mobs. Preferably with a party composition consisting of at least 2 archmages/bishops with their Blizzard/Meteo/Genesis.
The alternative solution is to lure all mobs to one side of the map (extreme right portal). that way no mobs will be touching tylus at all. (thus a solo warrior can do this with sufficient potions)
You need to maintain this until the timer reaches around 3 minutes left, then exit by the bottom right portal.
This will complete the quest for the 4th job warrior. He/she will not be able to start another El Nath PQ henceforth.
 Cave of Life Party Quest
This Party Quest is located in the Cave of Life in the Leafre Canyons. It leads up to the fight with the most powerful boss monster in the game, Horntail. To enter, one must be in a party of 6, and be over the level of 80. They also must have completed the Secret Medicine of Transformation quest, which will immediately transform them into cornians once they have spoken to Moira and given her the quest items. The time limit is 30 minutes.
The reasons for performing the Cave of Life Party Quests are…
- Obtaining Life Root for Bishop's Genesis Storybook
- Obtaining Holy water for Paladins Divine/Holy Charge
- Completing the Badge of Members of Squad quest
- To fight Horned Tail
Room of Maze
Room of Maze
This is a room full of Cornians, the first in the PQ. Each party member needs to be in possession of one Key to proceed. Keys are dropped by the cornians, so simply defeat them as quickly as possible. Once everyone has a key, move to the portal on the right side and have the leader talk to the NPC to proceed. Leave one party member here to catch the keys in the future as you send them back.
1st Room of Maze
1st Room of Maze
This is the first in a series of small maze rooms. The goal is to defeat the monsters, collect the key, and drop it on the shining blue portal on the right side. Once it disappears, it will reappear in the previous map (Room of Maze) and the party member who remained must collect it and hand it to the NPC, allowing for the 5 in this room to move forward. The monsters in this room are Cornians.
2nd Room of Maze
2nd Room of Maze
This is the Second in a series of small maze rooms. The goal is to defeat the monsters, collect the key, and drop it on the shining blue portal on the right side. Once it disappears, it will reappear in the previous map and the party member who remained must collect it and hand it to the NPC, allowing for the 5 in this room to move forward. The monsters in this room are also Cornians.
3rd Room of Maze
This is the Third in a series of small maze rooms. The goal is to defeat the monsters, collect the key, and drop it on the shining blue portal on the right side. Once it disappears, it will reappear in the previous map (Room of Maze) and the party member who remained must collect it and hand it to the NPC, allowing for the 5 in this room to move forward.
4th Room of Maze
4th Room of Maze
This is the Fourth in a series of small maze rooms. The goal is to defeat the monsters, collect the key, and drop it on the shining blue portal on the right side. Once it disappears, it will reappear in the previous map (Room of Maze) and the party member who remained must collect it and hand it to the NPC, allowing for the 5 in this room to move forward. The monsters in this room are Wyverns.
5th Room of Maze
5th Room of Maze
This is the Fifth in a series of small maze rooms. The goal is to defeat the monsters, collect the key, and drop it on the shining blue portal on the right side. Once it disappears, it will reappear in the previous map (Room of Maze) and the party member who remained must collect it and hand it to the NPC, allowing for the 5 in this room to move forward. The monsters in this room are also Wyverns.
Room of Maze
Room of Maze
This is the first room again. Here, you collect your 6th party member who waited behind. Now you can proceed.
Cave of Choice
Cave of Choice
Once all 6 members are reunited, they will proceed together into a new map. this map consists of a lamp which will change color when hit with a normal attack. If the party attacks until the bulb turns black, the party leader can enter the Cave of Light, where skelegons are the only monsters. If the bulb is white and the party leader enters the portal, then it will lead to the Cave of Darkness, where the monsters are Jr. Newties and Nest Golems. It's necessary to enter the Cave of Light to proceed.
Cave of Light
Cave of Light
This is the Cave of Light mentioned in the previous stage. All the Skelegons must be defeated to proceed, as well as collecting red keys that they drop. Upon completing this section by killing all mobs, the party leader can speak to the npc and thus exit and end the quest. The next map will be the map to horntail itself as well the holy water on its extreme right.
Entrance to Horned Tail's Cave
Entrance to Horned Tail's Cave
This is the "exit stage" of this Party Quest. Here, you can either choose to fight Horned Tail, or leave the area. The Holy Water needed for a Paladin quest is located on the extreme right of this map.
English School Party Quiz
- Location: English School Town
- Requirements:1~6 Characters in a Party.
The English School Party Quiz is a special quest only available on TaiwanMS and ChinaMS. To enter on the Party Quest you just need to create a Party.(This quest is like the Zakum Quest,you can do with a party or solo). You must talk with Dr.Mushrooms,He can be found at Henesys,Perion,Lith Harbor,Orbis,Ludibrium and Leafre. There are 3 stages for this quest. Once you enter the Map, a question will appear on the top of the screen. and you will have 5 minutes to solve the question. You will have to pay 3000 mesos to enter in any level of the Party Quest.
Easy Level

This is the first level of the English School Party Quest,here you can find some monsters,they drop letters. You will need them to answer the question that appears in the top of the screen. Once you know the answer,start getting letters from the monsters inside. Then,talk with the NPC on the map and you will be on the Reward Area.
Normal Level
This stage is like others,but the question asked here is even harder than questions asked on the Easy Level,and theres more monsters here. Once you finish this stage,click on the NPC and you will be on the Reward Area.
Hard Level
This stage has lots of monsters and the question asked is a lot harder than others. You will need to answer the question within 5 minutes or you will be forced to get out from the Party Quest.
Reward Area
Once you finish the Quest,Talk to Dr.Mushrooms and you will receive your reward. You will be rewarded with some Experience.
Other Party Quests/Bosses
Zakum
- Location: El Nath, Last Mission : Zakum's Altar
- Summoning Requirement: Eye of Fire
This quest is not in the European version of MapleStory.

This quest involves a giant stone boss at the end of The Caves of Trial. In order to face this huge boss, it is required that challengers first do Adobi's Mission (Stage 1), then an extremely hard jump quest, and finally gather 30 Gold Teeth from Minor Zombies in order to forge the Eye of Fire. The boss has eight arms which all need to be eliminated in order to take out the main body, you also have to fight the main body three times. To kill Zakum you need a party of at least level 100 people, with a good mix of classes, especially priests. This boss is considered the toughest boss in all of MapleStory, excluding the Korean, Japanese, Thailand, SEA and Global versions of MapleStory.
- Zakum is based on the Muslim belief in Zaqqum, a tree said to grow in hell which provides the only fruit that the damned may eat. This is consistent with the Zakum of MapleStory, as a giant tree can be seen in the background when fighting it, and it must be summoned with a "seed". The boss is supposed to be the physical representation of this tree.
Tips'
- Closing ALL Programs and lowering your resolution is a definite must. Zakum has a tendency to majorly lag/DC people.
- Have a decent computer processor, graphic card and RAM. People are known to DC even if they have usually lagless connections, as the image frame loading is extremely high.
- You may enter the room with Zakum twice a day (Only once in several versions). The leader of the party has to go in last.
*At least 10 people are required before Zakum's Altar can be entered.
- An Eye of Fire is required to summon Zakum, which can be received from the Zakum Dungeon Quest.
- The people who go in must have a certain level of accuracy, it is however recommended that you go to Zakum at level 100.
- Zakum will be easier to kill if the healing and status arm (third from top, left and right) are destroyed first. Healing arm (third from top at right) heals Zakum 50,000 to 55,000 hp about every 30 seconds.
- Meso explosion may cost lots of mesos but can save lots of time if you leave the physical arms and get chief bandits to drop mesos while people kill the remaining arm.
- Get at least 8 L135+ Hermits/Night Lords in the Squad.
- After all the arms are down, Zakum begins summoning monsters (Puco, Pachu, Punco, Cuzco, Opachu)and drains HP and MP to 1.
- Zakum gives 7,000,000 Exp when its final form is killed, split accordingly among all who damaged it, when defeated.
- Zakum drops the fabled Zakum Helmet 1 (2 in JMS) when defeated.
- In several versions of MapleStory, there are "squad" systems, where a number of parties will assign one overall leader, and registers to wait in line to fight Zakum. Recently implemented MapleGlobal.
- A recent update to Zakum made it drop Lv 100 Weapons/Armor instead of lv 90 Equips in certain versions (kMS, jMS, cMS, MSEA). The mastery book drops remain unchanged.
- Aside from the Zakum Helmet, it is also hunted very actively in versions with 4th Job due to the drop of two elusive skillbooks.
Pianus
- Location: Aqua Road, Aqua Road : Pianus's Cave
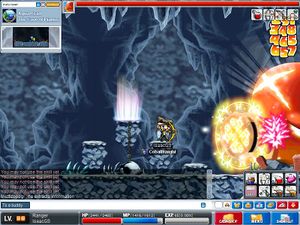
Pianus' wrath. - Summoning Requirement: Spawns naturally

This monster is not in the European version of MapleStory.
A giant fish named Pianus lies deep in the Aqua Dungeon inside a cavern.
Pianus can shoot out a beam across the map and drop tons on players.
It also has the ability to summon Blood Boom, which do not move at all. They usually reside on platforms, possibly to knock off Assassins and Bowmen with their high damage. Blood Blooms may also explode when attacked, like Jr. Effies, but in this case they can do up to 8,000 damage (26,000 in some versions) with their explosions! Other than that, it can also cancel out all of a character's power-up skills, causing the character to activate them again.
Tips
- Right Pianus always spawns first.
- Left Pianus can be spawned if the Right Pianus is not defeated with in 5 - 8 hours. Left Pianus has much less hp, does less damage but dispels much more frequently than the Right Pianus.
- All players in the room can pick up Pianus' drops.
- Pianus drops the Level 100 Armors and some skillbooks/mastery guides.
- In GlobalMS, Pianus drops an item called Pianus's Scale, used to forge Bosshunter equipment.
Papulatus
- Location: Ludibrium, Ludibrium : Origin of Clocktower
- Summoning Requirement: Piece of Cracked Dimension
A ghost plant named Papulatus lies deep in Ludibrium with a robot clock.
Protecting Ludibrium is a highly difficult series of quests which requires at least level 80+ characters to complete it. Upon accepting the last quest, one must fight the Gatekeeper or Thanatos and receive the Ludibrium Medal, which is a key to enter the power generating room of the clock tower, where Papulatus resides. Papulatus Clock is like a Yeti-and-Pepe combination. It has a large amount of HP, and cycles through an active and inactive mode. When it is inactive, the whole clock sits still, everything retracts and nothing much can be done about it. It cannot attack anybody, and neither can anybody attack it.
It also has the ability to summon High Darkstars and Low Darkstars, which move rarely or do not move at all. They usually reside on platforms, possibly to knock off Assassins and Bowmen with their high damage, and can explode for massive damage. Other than that, it can also use dispel, which can pose a threat to characters with Low HP (Mages losing Magic Guard is one of the main dangers.) and stun.
Tips
- When the main clock is defeated, Papulatus itself ejects from the clock and begins to fly around the map. It also has to be killed for the quest to be complete. This time, the weapon stat is higher compared to the clock, but it has a much lower HP.
- Before defeating the first form, make sure to clear some of the Darkstars from the map. If the map reaches maximum monster population when the first form is defeated, the second form will not spawn.
- A Piece of Cracked Dimension is required to summon Papulatus, which can be received from the saving Ludibrium Quest.
- For Chief Bandits, if you do not mind using millions of Mesos to speed up the process, use the method as stated: Firstly, summon the Time Sphere, but do not damage it. Drop a test coin at the right edge of the highest platform on the right, and then immediately start dropping sacks of mesos on the left side of that platform after 10 seconds, and do not stop. Once the test coin disappears, enable all support skills and use Savage Blow [not Assaulter] to kill Time Sphere. Bring Papulatus Clock directly under the mesos by jumping to the gap in the middle and using Assaulter in mid-air, towards the right. Once it is under the mesos, keep using Mesos Explosion until all the mesos have been used up, or Papulatus Clock/Papulatus is out of range. For this method to work best, it is preferably used only with at least 3 Chief Bandits. For a clearer illustration, visit this link. http://youtube.com/watch?v=AKtj37vNZRM
- For rangers or Snipers, it is possible to solo the Papulatus at high levels. Use the opportunity provided by the rest mode to run through the clock and place a puppet on the opposite side of the room. then, when it comes out of its rest mode, strafe it until the puppet is defeated. Repeat until the first form is destroyed.
- For warriors, it is also possible to solo Papulatus, but this is not recommended for players below level 120, as it will burn quite a fair number of potions.
- A Recent update to this boss made it drop lv 100 Weapons/Armor instead of its lv 90 counterparts. It also drops Elixirs now.
This boss is available in all versions except HongKongMS.
Lovers' PQ/Grandma Tree
- Location: Korean Folk Town
- Requirements: a male and female character partied together
- This Quest is currently only available in ChinaMS and TaiwanMS.

Much like Papulatus, this is a series of quests culminating in a boss fight. It is available to all players, but only if in a party of 2 with a character of the opposite gender. The first step is to talk to Xiao Di, in Korean Folk Town. She's located in between the Well and the Helios entrance. She gives the quest only if in a party of two with a character of the opposite sex. The first task in her series is to collect 50 Pink Teddy Omok pieces. The next Quest needs the pair to gather 50 Sea Horse Horns. The third quest is to get 50 Star Pixie's Starpieces. Lastly, get 20 Fierry tentacles. The reward for all that is a safety charm. She then asks a series of questions about a famous Chinese poem. Provided these are all answered correctly, the pair can move on. For completing this part, each person gets a special Pendant that adds 20 Defense and Magic defense and has 5 slots.
- Finally, it's the PQ part. The male and female companions have to party to enter the map. Xiao Di will then send them to the Boss room. The boss has a lot of defense, but a very low knockback. It does a fair amount of damage, so archers and assassins may want to consider bringing a Dragon Knight for Hyperbody. The object is to kill the Grandma Tree, and get a ghost spirit it drops. The boss respawns every 10 minutes, and once in the special event map, players can change channels. This quest is also repeatable. At last, the pair get the final prize, 100% Shield ATT scrolls.
Bosshunter Challenge
This is a unique Party Quest in which one enters a Perion themed map with a NPC which resembles the cat from the cheese warehouse monster. From there, you can organize parties, with 3~6 people, or solo this PQ. The objective of this PQ is to kill every boss in the game one by one from the lowest level boss (grandpa snail) to the strongest boss. Currently there are no World Tour bosses involved in this PQ but there is a chance that there would be more bosses added in this PQ. After every 5 bosses killed, you will reenter the perion themed map with the cat like npc given the choice on whether to continue or quit. This PQ is currently only available in KoreaMS.
In KoreaMS, this event consist on killing bosses to win Boss Points. You give them to the Cat NPC after you have 200, and you'll have a hat equip which gives +2 to all stats. You win the Boss Points by killing bosses. Each one gives out points. The stronger the boss is, more points it will give, for example:
Mano: +1 BP Stumpy: +2 BP Deu: +3 BP King Slime: +4 BP Faust: +5 BP
- ↑ A party quest located in Crimsonheart Castle of Tynerum. It is very similar to Crimsonwood Keep PQ, but with a few noticeable differences.
- ↑ This version of Alien Visitor Party Quest is drastically different and in no way ties with the previous version.
- ↑ Similar to the Grand Athenaeum in that they are episodic content, this content allows you to play through the story of the ship from Gelimer, Black Heaven.