| Name | Monster Info | Notes |
|---|---|---|
Angler Robot Type A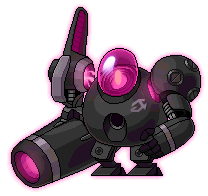
|
Auto-aggressive
|
A robot sent by the Angler family in the siege on Odium. Found in Odium: Captured Alley, an area which requires 160 Sacred Power / Authentic Force to deal full damage.
|
Angler Robot Type B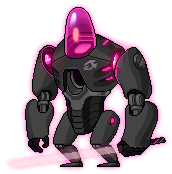
|
Auto-aggressive
|
A robot sent by the Angler family in the siege on Odium. Found in Odium: Captured Alley, an area which requires 160 Sacred Power / Authentic Force to deal full damage.
|
Angler Robot Type C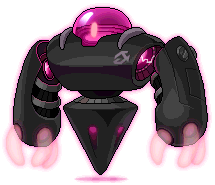
|
Auto-aggressive
|
A robot sent by the Angler family in the siege on Odium. Found in Odium: Captured Alley, an area which requires 160 Sacred Power / Authentic Force to deal full damage.
|
Guard Corundum
|
Auto-aggressive
|
A guard robot found in Odium: Sunny Laboratory, an area which requires 180 Sacred Power / Authentic Force to deal full damage.
|
Guard Agate
|
Auto-aggressive
|
A guard robot found in Odium: Sunny Laboratory, an area which requires 180 Sacred Power / Authentic Force to deal full damage.
|
Disintegrating Test Subject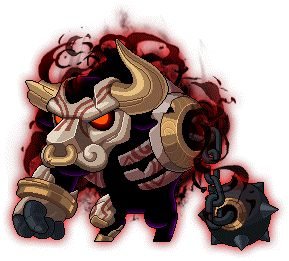
|
Auto-aggressive
|
A rejected test subject found in Odium: Laboratory Behind Locked Door, an area which requires 200 Sacred Power / Authentic Force to deal full damage.
|
Failed Subject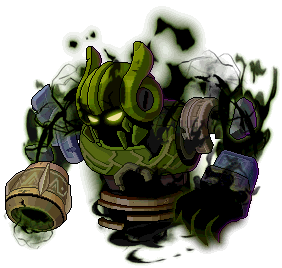
|
Auto-aggressive
|
A rejected test subject found in Odium: Laboratory Behind Locked Door, an area which requires 200 Sacred Power / Authentic Force to deal full damage.
|
Withered Spring Researcher
|
Auto-aggressive
|
A corrupted researcher of Shangri-La. Found in Shangri-La: Blooming Spring, an area which requires 230 Sacred Power / Authentic Force to deal full damage.
|
Ink-Shaded Butterfly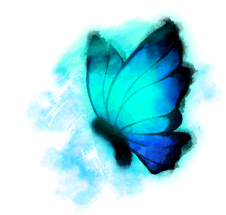
|
Auto-aggressive
|
A butterfly drawn with ink. Found in Shangri-La: Blooming Spring, an area which requires 230 Sacred Power / Authentic Force to deal full damage.
|
Shangri-La Skylark
|
Auto-aggressive
|
A fast-flying skylark drawn with ink. Found in every hunting ground in Shangri-La. These will automatically follow you upon entering a map and deal 10% HP touch damage, as well as lock your ability to use potions, so don't go AFK! Reappears 5 minutes after being defeated.
|
Black Mage (Hard 1)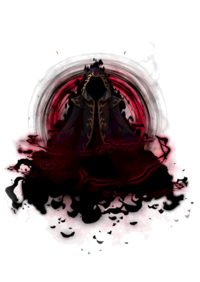
|
Auto-aggressive
|
The second phase of the Hard Black Mage boss battle will have you fight the Black Mage directly on his Throne of Darkness. For more information on the boss battle, visit this page. (Image is shrunken down, click to view full size).
|
Black Mage (Hard 2)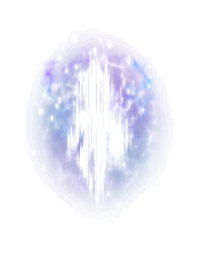
|
Auto-aggressive
|
For the third phase of the Hard Black Mage boss battle, he will pull you into his inner universe, where he has transformed into a god, a being made of pure light. The battle will now take place at The In-Between, a space-themed battlefield. For more information on the boss battle, visit this page. (Image is shrunken down, click to view full size).
|
Qiongqi (Easy)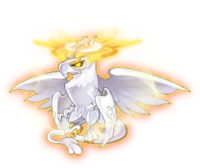
|
Auto-aggressive
|
One of Kaling's 3 Perils, which must be fought in the first phase of the Easy Kaling boss battle. For more information on the boss battle, visit this page. (Image is shrunken down, click to view full size).
|
Taowu (Easy)
|
Auto-aggressive
|
One of Kaling's 3 Perils, which must be fought in the first phase of the Easy Kaling boss battle. For more information on the boss battle, visit this page. (Image is shrunken down, click to view full size).
|
Hundun (Easy)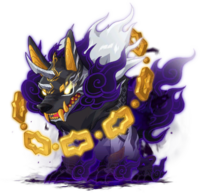
|
Auto-aggressive
|
One of Kaling's 3 Perils, which must be fought in the first phase of the Easy Kaling boss battle. For more information on the boss battle, visit this page. (Image is shrunken down, click to view full size).
|
Kaling (Easy)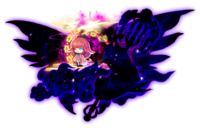
|
Auto-aggressive
|
After Kaling's 3 Perils are defeated, she absorbs their powers for the second phase of the Easy Kaling boss battle. For more information on the boss battle, visit this page. (Image is shrunken down, click to view full size).
|
Death-Gripped Qiongqi (Easy)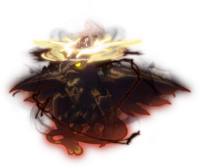
|
Auto-aggressive
|
An augmented version of Qiongqi, which appears in the third phase of the Easy Kaling boss battle. For more information on the boss battle, visit this page. (Image is shrunken down, click to view full size).
|
Death-Gripped Taowu (Easy)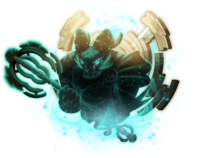
|
Auto-aggressive
|
An augmented version of Taowu, which appears in the third phase of the Easy Kaling boss battle, visit this page. (Image is shrunken down, click to view full size).
|
Death-Gripped Hundun (Easy)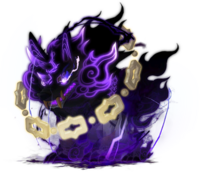
|
Auto-aggressive
|
An augmented version of Hundun, which appears in the third phase of the Easy Kaling boss battle. For more information on the boss battle, visit this page. (Image is shrunken down, click to view full size).
|
Frenzied Kaling (Easy)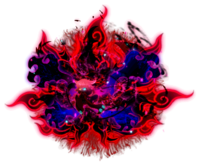
|
Auto-aggressive
|
For the third phase of the Easy Kaling boss battle, Kaling is now enraged and summons all 3 of her Perils, which must be defeated before Kaling can be finished off. For more information on the boss battle, visit this page. (Image is shrunken down, click to view full size).
|
Chosen Seren (Hard)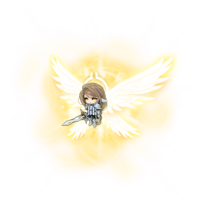
|
Auto-aggressive
|
The first phase of Hard Chosen Seren / Serene, under the control of the Sun God Mitra, where you will fight her in Cernium: Palace Main Hall. For more information on the boss battle, visit this page. (Image is shrunken down, click to view full size).
|
Chosen Seren (Hard)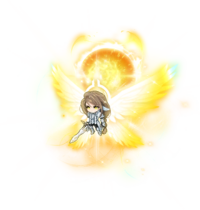
|
Auto-aggressive
|
The second phase of Hard Chosen Seren / Serene in her Midday / Noon form, where you will fight her in Cernium: Barrier Between Worlds. During this phase, her form will cycle throughout Midday / Noon -> Dusk / Sunset -> Twilight / Midnight -> Dawn based on the time dictated by the Sun Gauge. For more information on the boss battle, visit this page. (Image is shrunken down, click to view full size).
|
Chosen Seren (Hard)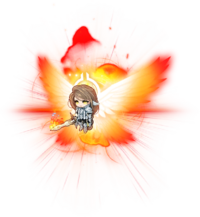
|
Auto-aggressive
|
The second phase of Hard Chosen Seren / Serene in her Dusk / Sunset form, where you will fight her in Cernium: Barrier Between Worlds. During this phase, her form will cycle throughout Midday / Noon -> Dusk / Sunset -> Twilight / Midnight -> Dawn based on the time dictated by the Sun Gauge. For more information on the boss battle, visit this page. (Image is shrunken down, click to view full size).
|
Chosen Seren (Hard)
|
Auto-aggressive
|
The second phase of Hard Chosen Seren / Serene in her Twilight / Midnight form, where you will fight her in Cernium: Barrier Between Worlds. During this phase, her form will cycle throughout Midday / Noon -> Dusk / Sunset -> Twilight / Midnight -> Dawn based on the time dictated by the Sun Gauge. For more information on the boss battle, visit this page. (Image is shrunken down, click to view full size).
|
Chosen Seren (Hard)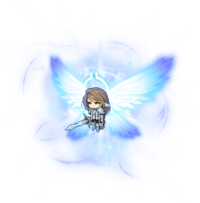
|
Auto-aggressive
|
The second phase of Hard Chosen Seren / Serene in her Dawn form, where you will fight her in Cernium: Barrier Between Worlds. During this phase, her form will cycle throughout Midday / Noon -> Dusk / Sunset -> Twilight / Midnight -> Dawn based on the time dictated by the Sun Gauge. For more information on the boss battle, visit this page. (Image is shrunken down, click to view full size).
|
Nerota's Power (Hard)
|
Auto-aggressive
|
A monster summoned by Hard Chosen Seren in her Dawn form. It will explode if it comes near a player, which deals 25% HP damage and inflicts Seal on the player.
|
Kalos the Guardian (Normal)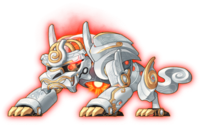
|
Auto-aggressive
|
The first phase of Normal Kalos, under T-Boy's control, where you will fight him atop the Summit of Karote the Unending Tower. For more information on the boss battle, visit this page. (Image is shrunken down, click to view full size).
|
Chosen Seren (Extreme)
|
Auto-aggressive
|
The first phase of Extreme Chosen Seren / Serene, under the control of the Sun God Mitra, where you will fight her in Cernium: Palace Main Hall. For more information on the boss battle, visit this page. (Image is shrunken down, click to view full size).
|
Aeonian Rise (Extreme)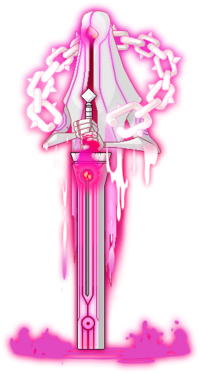
|
Auto-aggressive
|
The first phase of the Extreme Black Mage boss battle will have you fight the Knights of Creation (Aeonian Rise) and Destruction (Tanadian Ruin). For more information on the boss battle, visit this page. (Image is shrunken down, click to view full size).
|
Tanadian Ruin (Extreme)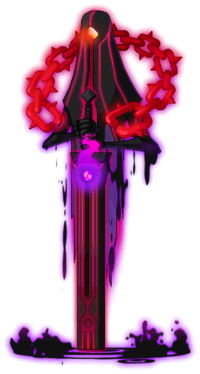
|
Auto-aggressive
|
The first phase of the Extreme Black Mage boss battle will have you fight the Knights of Creation (Aeonian Rise) and Destruction (Tanadian Ruin). For more information on the boss battle, visit this page. (Image is shrunken down, click to view full size).
|
Gentle Summer Researcher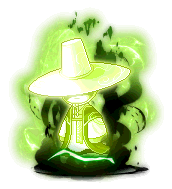
|
Auto-aggressive
|
A corrupted researcher of Shangri-La. Found in Shangri-La: Gentle Summer, an area which requires 260 Sacred Power / Authentic Force to deal full damage.
|
Ink-Shaded Red-Crowned Crane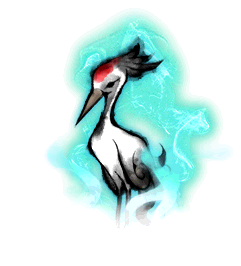
|
Auto-aggressive
|
A crane drawn with ink. Found in Shangri-La: Gentle Summer, an area which requires 260 Sacred Power / Authentic Force to deal full damage.
|
Drowsy Autumn Researcher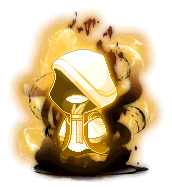
|
Auto-aggressive
|
A corrupted researcher of Shangri-La. Found in Shangri-La: Drowsy Autumn, an area which requires 280 Sacred Power / Authentic Force to deal full damage.
|
Inkblot Sable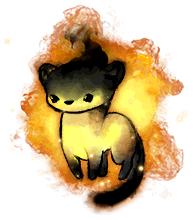
|
Auto-aggressive
|
A sable drawn with ink. Found in Shangri-La: Drowsy Autumn, an area which requires 280 Sacred Power / Authentic Force to deal full damage.
|
Harsh Winter Researcher
|
Auto-aggressive
|
A corrupted researcher of Shangri-La. Found in Shangri-La: Harsh Winter, an area which requires 300 Sacred Power / Authentic Force to deal full damage.
|
Ink-Winged Owl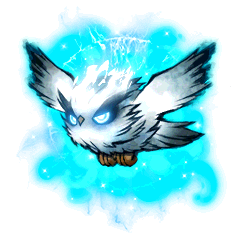
|
Auto-aggressive
|
An owl drawn with ink. Found in Shangri-La: Harsh Winter, an area which requires 300 Sacred Power / Authentic Force to deal full damage.
|
High Flora Foot Soldier
|
Auto-aggressive
|
An elite soldier of the Flora army, attacking Ereve. Found near Arteria in Empress Road: Outskirts, an area which requires 330 Sacred Power / Authentic Force to deal full damage.
|
High Flora Reconnaissance Drone
|
Auto-aggressive
|
A fast-flying drone of the Flora army. Found in every hunting ground in Arteria. These will automatically follow you upon entering a map and deal 10% HP touch damage, as well as lock your ability to use potions, so don't go AFK! Reappears 5 minutes after being defeated.
|
Kalos the Guardian (Normal)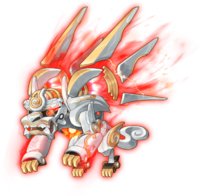
|
Auto-aggressive
|
The second phase of Normal Kalos in Form 1, under T-Boy's control, where you will fight him atop the Battleworn Summit of Karote the Unending Tower. Players can only damage up to 75% of Kalos's total HP until the first segment is cleared, after which the shoulder wing detaches itself to attack you separately as Form 2 replaces this form, allowing Kalos's HP to be reduced beyond 75%. Note that his HP is shared across all 4 forms. For more information on the boss battle, visit this page. (Image is shrunken down, click to view full size).
|
Kalos the Guardian (Normal)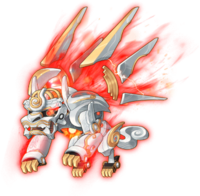
|
Auto-aggressive
|
The second phase of Normal Kalos in Form 2, under T-Boy's control, where you will fight him atop the Battleworn Summit of Karote the Unending Tower. Players can only damage up to 50% of Kalos's total HP until the second segment is cleared, after which the back wings detach themselves to attack you separately as Form 3 replaces this form, allowing Kalos's HP to be reduced beyond 50%. Note that his HP is shared across all 4 forms. For more information on the boss battle, visit this page. (Image is shrunken down, click to view full size).
|
Kalos the Guardian (Normal)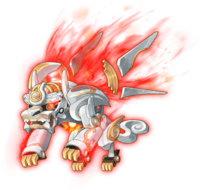
|
Auto-aggressive
|
The second phase of Normal Kalos in Form 3, under T-Boy's control, where you will fight him atop the Battleworn Summit of Karote the Unending Tower. Players can only damage up to 25% of Kalos's total HP until the third segment is cleared, after which the armguard detaches itself to attack you separately as Form 4 replaces this form, allowing Kalos's HP to be reduced beyond 25%. Note that his HP is shared across all 4 forms. For more information on the boss battle, visit this page. (Image is shrunken down, click to view full size).
|
Kalos the Guardian (Normal)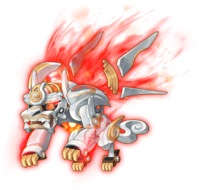
|
Auto-aggressive
|
The second phase of Normal Kalos in Form 4, under T-Boy's control, where you will fight him atop the Battleworn Summit of Karote the Unending Tower. This Form will be fought for the last 25% of Kalos's total HP after clearing the third segment. Note that his HP is shared across all 4 forms. For more information on the boss battle, visit this page. (Image is shrunken down, click to view full size).
|
Guardian's Servant (Normal)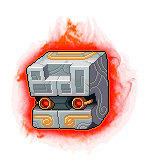
|
Auto-aggressive
|
A monster summoned by Normal Kalos in Forms 3 and 4. It will explode if it comes near a player, dealing 20% HP damage.
|
Black Mage (Extreme 1)
|
Auto-aggressive
|
The second phase of the Extreme Black Mage boss battle will have you fight the Black Mage directly on his Throne of Darkness. For more information on the boss battle, visit this page. (Image is shrunken down, click to view full size).
|
Black Mage (Extreme 2)
|
Auto-aggressive
|
For the third phase of the Extreme Black Mage boss battle, he will pull you into his inner universe, where he has transformed into a god, a being made of pure light. The battle will now take place at The In-Between, a space-themed battlefield. For more information on the boss battle, visit this page. (Image is shrunken down, click to view full size).
|
Black Mage (Extreme 3)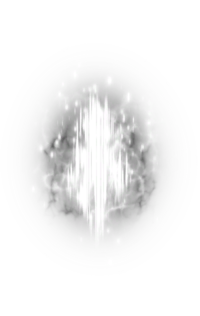
|
Auto-aggressive
|
For the fourth phase of the Extreme Black Mage boss battle, you will be transported Beyond Existence, an area that is entirely black and white. For more information on the boss battle, visit this page. (Image is shrunken down, click to view full size).
|
Chosen Seren (Extreme)
|
Auto-aggressive
|
The second phase of Extreme Chosen Seren / Serene in her Midday / Noon form, where you will fight her in Cernium: Barrier Between Worlds. During this phase, her form will cycle throughout Midday / Noon -> Dusk / Sunset -> Twilight / Midnight -> Dawn based on the time dictated by the Sun Gauge. For more information on the boss battle, visit this page. (Image is shrunken down, click to view full size).
|
Chosen Seren (Extreme)
|
Auto-aggressive
|
The second phase of Extreme Chosen Seren / Serene in her Dusk / Sunset form, where you will fight her in Cernium: Barrier Between Worlds. During this phase, her form will cycle throughout Midday / Noon -> Dusk / Sunset -> Twilight / Midnight -> Dawn based on the time dictated by the Sun Gauge. For more information on the boss battle, visit this page. (Image is shrunken down, click to view full size).
|
Chosen Seren (Extreme)
|
Auto-aggressive
|
The second phase of Extreme Chosen Seren / Serene in her Twilight / Midnight form, where you will fight her in Cernium: Barrier Between Worlds. During this phase, her form will cycle throughout Midday / Noon -> Dusk / Sunset -> Twilight / Midnight -> Dawn based on the time dictated by the Sun Gauge. For more information on the boss battle, visit this page. (Image is shrunken down, click to view full size).
|
Chosen Seren (Extreme)
|
Auto-aggressive
|
The second phase of Extreme Chosen Seren / Serene in her Dawn form, where you will fight her in Cernium: Barrier Between Worlds. During this phase, her form will cycle throughout Midday / Noon -> Dusk / Sunset -> Twilight / Midnight -> Dawn based on the time dictated by the Sun Gauge. For more information on the boss battle, visit this page. (Image is shrunken down, click to view full size).
|
Nerota's Power (Extreme)
|
Auto-aggressive
|
A monster summoned by Hard Chosen Seren in her Dawn form. It will explode if it comes near a player, which deals 25% HP damage and inflicts Seal on the player.
|
< MapleStory | Monsters
