PirateIzzy (talk | contribs) (Snowman and Riche were both renamed) |
|||
| (472 intermediate revisions by 64 users not shown) | |||
| Line 1: | Line 1: | ||
{{Header Nav|game=MapleStory|custom={{MapleStory/TOC}}{{ | {{Header Nav|game=MapleStory|custom={{MapleStory/TOC/Monsters}}}} | ||
{{floatingtoc}} | |||
This is a listing of all the bosses in the game. | This is a listing of all the bosses in the game. | ||
== | |||
=== | ==Area Bosses/Theme Dungeon Bosses== | ||
Area Bosses are boss monsters which spawn on their own in a hunting area near a town. Theme Dungeon Bosses are bosses of their respective theme dungeon, found in an instanced map to prevent kill stealing. They are usually themed after the monsters they spawn with in that town. Most players are capable of soloing these bosses when they are close to its level. | |||
{| | |||
|[[ | ===Victoria Island=== | ||
These are the bosses found on Victoria Island, the first continent where bosses are located. Every main town and theme dungeon on Victoria Island has a boss associated with it, with the exception of Nautilus Harbor, even though it is connected to Florina Beach. | |||
====[[File:MS Mob Icon Mano.png]]Lith Harbor==== | |||
Found at "Port Road: Forest Trail 2" near [[MapleStory/Lith Harbor|Lith Harbor]]. | |||
{|{{prettytable|notwide=1}} | |||
|[[File:MS Monster Mano.png|center]] | |||
|- | |- | ||
|[[MapleStory/Monsters/Level | |[[MapleStory/Monsters/Level 1-10#Mano|Mano]] | ||
|} | |} | ||
{| | ====[[File:MS Mob Icon Mushmom.png]][[File:MS Mob Icon Blue Mushmom.png]]Henesys==== | ||
|[[ | Mushmom is found at "Singing Mushroom Forest: Mushmom Forest Trail", directly accessible by walking right from [[MapleStory/Henesys|Henesys]]. It is one of the oldest bosses in the game. Blue Mushmom spawns at "Blue Mushmom Forest" and is slightly stronger than the ordinary Mushmom. | ||
{|{{prettytable|notwide=1}} | |||
|[[File:MS Monster Mushmom.png|center]] | |||
|[[File:MS_Monster_Blue Mushmom.png|center]] | |||
|- | |||
|[[MapleStory/Monsters/Level 11-20#Mushmom|Mushmom]] | |||
|[[MapleStory/Monsters/Level 11-20#Blue Mushmom|Blue Mushmom]] | |||
|} | |||
====[[File:MS Mob Icon Black Viking.png]]Mushroom Castle==== | |||
The boss of Mushroom Castle is the Black Viking, who helps the Prime Minister kidnap Violetta once again. | |||
{|{{prettytable|notwide=1}} | |||
|[[File:MS Monster Black Viking.png|center]] | |||
|- | |||
|[[MapleStory/Monsters/Level 61-70#Black Viking|Black Viking]] | |||
|} | |||
====[[File:MS Mob Icon Stumpy.png]]Perion==== | |||
Found at "North Rocky Mountain: Gusty Peak" near [[MapleStory/Perion|Perion]]. | |||
{|{{prettytable|notwide=1}} | |||
|[[File:MS Monster Stumpy.png|center]] | |||
|- | |||
|[[MapleStory/Monsters/Level 21-30#Stumpy|Stumpy]] | |||
|} | |||
====[[File:MS Mob Icon Dyle.png]]Kerning City==== | |||
Found in "Swamp Region : Unseen Danger" and "Swamp Region : Deep Mire" outside of [[MapleStory/Kerning City|Kerning City]]. | |||
{|{{prettytable|notwide=1}} | |||
|[[File:MS Monster Dyle.png|center]] | |||
|- | |||
|[[MapleStory/Monsters/Level 41-50#Dyle|Dyle]] | |||
|} | |||
====[[File:MS Mob Icon Captain Darkgoo.png]]Gold Beach==== | |||
Found at "Shady Beach" at the end of [[MapleStory/Gold Beach|Gold Beach]]. | |||
{|{{prettytable|notwide=1}} | |||
|[[File:MS Monster Captain Darkgoo.png|center]] | |||
|- | |||
|[[MapleStory/Monsters/Level 41-50#Captain Darkgoo|Captain Darkgoo]] | |||
|} | |||
====[[File:MS Mob Icon Zombie Mushmom.png]][[File:MS Mob Icon Jr. Balrog.png]]Sleepywood==== | |||
Zombie Mushmom is found at Ant Tunnel Square near the Swamps of Sleepywood. Jr. Balrog are found at the Cursed Sanctuary at the end of [[MapleStory/Sleepywood|Sleepywood]]. It, too, is one of the oldest bosses. Snack Bar is located at Drake Cave: Cave Exit. | |||
{|{{prettytable|notwide=1}} | |||
|[[File:MS Monster Zombie Mushmom.png|center]] | |||
|[[File:MS Monster Jr. Balrog.png|center]] | |||
|[[File:MS Monster Snack Bar.png|center]] | |||
|- | |||
|[[MapleStory/Monsters/Level 61-70#Zombie Mushmom|Zombie Mushmom]] | |||
|[[MapleStory/Monsters/Level 61-70#Jr. Balrog|Jr. Balrog]] | |||
|[[MapleStory/Monsters/Level 81-90#Snack Bar|Snack Bar]] | |||
|} | |||
===Ossyria=== | |||
====Ellinia-Orbis Ship==== | |||
Crimson Balrogs sometimes appear on the Ship from [[MapleStory/Ellinia|Ellinia]] to [[MapleStory/Towns/Orbis|Orbis]], or vice-versa. Crimson Balrog is a flying enemy that travels in pairs and raids ships trying to carry passengers or cargo between Ossyria and Victoria Island. | |||
{|{{prettytable|notwide=1}} | |||
|[[File:MS Monster Crimson Balrog.png|center]] | |||
|- | |||
|[[MapleStory/Monsters/Level 91-100#Crimson Balrog|Crimson Balrog]] | |||
|} | |||
====[[File:MS Mob Icon Eliza.png]]Orbis==== | |||
Found at "Garden of Darkness 2" in [[MapleStory/Towns/Orbis|Orbis]]' Cloud Park. | |||
{|{{prettytable|notwide=1}} | |||
|[[File:MS Monster Eliza.png|center]] | |||
|- | |||
|[[MapleStory/Monsters/Level 71-80#Eliza|Eliza]] | |||
|} | |||
====[[File:MS Mob Icon Snow Witch.png]][[File:MS Mob Icon Nyalmo.png]][[File:MS Mob Icon Lich.png]]El Nath==== | |||
Snow Witch is found at "Icy Cold Field". Nyalmo is found at "Sharp Cliff 3". Lich is found at "Forest of Dead Trees IV". | |||
{|{{prettytable|notwide=1}} | |||
|[[File:MS Monster Snow Witch.png|center]] | |||
|[[File:MS Monster Nyalmo.png|center]] | |||
|[[File:MS Monster Lich.png|center]] | |||
|- | |||
|[[MapleStory/Monsters/Level 81-90#Snow Witch|Snow Witch]] | |||
|[[MapleStory/Monsters/Level 121-130#Nyalmo|Nyalmo]] | |||
|[[MapleStory/Monsters/Level 121-130#Lich|Lich]] | |||
|} | |||
====[[File:MS Mob Icon Prison Guard Ani.png]]The Lion King's Castle==== | |||
The boss of the theme dungeon part of Lion King's Castle. Found at Ani's Jail. | |||
{|{{prettytable|notwide=1|}} | |||
|[[File:MS Monster Prison Guard Ani.png|MS Monster Prison Guard Ani.png]] | |||
|- | |- | ||
|[[MapleStory/Monsters/Level | |[[MapleStory/Monsters/Level 111-120#Prison Guard Ani|Prison Guard Ani]] | ||
|} | |} | ||
=== | ====[[File:MS Mob Icon Seruf.png]]Aqua Road==== | ||
Found at | Found at [[MapleStory/Towns/Aquarium|Aqua Road]]: Seaweed Tower, very close to town. | ||
{| | {|{{prettytable|notwide=1}} | ||
|[[ | |[[File:MS Monster Seruf.png|center]] | ||
|- | |- | ||
|[[MapleStory/Monsters/Level | |[[MapleStory/Monsters/Level 81-90#Seruf|Seruf]] | ||
|} | |} | ||
====[[File:MS Mob Icon Timer.png]]Ludibrium==== | |||
Rombot is found in the [[MapleStory/Towns/Ludibrium#Eos Tower|Eos Tower]], in a hidden street off the 4th floor. Timer is found at Lost Time <2> in the Clock Tower. | |||
|[[ | {|{{prettytable|notwide=1}} | ||
|[[ | |[[File:MS Monster Rombot.png|center]] | ||
|[[File:MS Monster Timer.png|center]] | |||
|- | |- | ||
|[[MapleStory/Monsters/Level | |[[MapleStory/Monsters/Level 91-100#Rombot|Rombot]] | ||
|[[MapleStory/Monsters/Level | |[[MapleStory/Monsters/Level 111-120#Timer|Timer]] | ||
|} | |} | ||
=== | ====[[File:MS Mob Icon Chao.png]][[File:MS Mob Icon Ephenia.png]]Ellin Forest==== | ||
Chao can be found at "Ellin Forest : Deep Inside the Cave". Ephenia is found at "Ellin Forest : Queen's Hiding Place". | |||
{|{{prettytable|notwide=1}} | |||
|[[ | |[[File:MS Monster Chao.png|center]] | ||
|[[File:MS Monster Ephenia.png|center]] | |||
|- | |- | ||
|[[MapleStory/Monsters/Level | |[[MapleStory/Monsters/Level 101-110#Chao|Chao]] | ||
|[[MapleStory/Monsters/Level 111-120#Ephenia|Ephenia]] | |||
|} | |} | ||
{| | ====[[File:MS Mob Icon Targa.png]][[File:MS Mob Icon Scarlion Boss.png]]Fantasy Theme World==== | ||
|[[ | *Located at the end of Fantasy Theme World in the Fantastic Animal Show. | ||
*Summons [[MapleStory/Monsters/Level 121-130#Ratacula|Ratacula]] and [[MapleStory/Monsters/Level 131-140#Creeper Scarlion|Creeper Scarlion]] respectively. | |||
{|{{prettytable|notwide=1}} | |||
|[[File:MS Monster Targa.png|Center]] | |||
|[[File:MS Monster Angry Targa.png|Center]] | |||
|[[File:MS Monster Ratatula.png|Center]] | |||
|- | |||
|[[MapleStory/Monsters/Level 121-130#Targa|Targa]] | |||
|[[MapleStory/Monsters/Level 121-130#Angry Targa|Angry Targa]] | |||
|'''Summons'''<br />[[MapleStory/Monsters/Level 121-130#Ratacula|Ratacula]] | |||
|- | |||
|[[File:MS Monster Scarlion Boss.png|Center]] | |||
|[[File:MS Monster Angry Scarlion Boss.png|Center]] | |||
|[[File:MS Monster Scaredy Scarlion.png|Center]] | |||
|- | |- | ||
|[[MapleStory/Monsters/Level | |[[MapleStory/Monsters/Level 121-130#Scarlion Boss|Scarlion Boss]] | ||
|[[MapleStory/Monsters/Level 121-130#Angry Scarlion Boss|Angry Scarlion Boss]] | |||
|'''Summons'''<br />[[MapleStory/Monsters/Level 121-130#Creeper Scarlion|Creeper Scarlion]] | |||
|} | |} | ||
=== | ====[[File:MS Mob Icon Manon.png]][[File:MS Mob Icon Griffey.png]][[File:MS Mob Icon Leviathan.png]]Leafre==== | ||
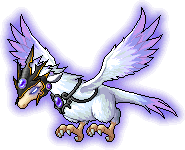
Manon and Griffey are found in [[MapleStory/Towns/Leafre|Leafre]] near Kentauruses. Leviathan is an Area Boss that spawns in its own map, the Leviathan's Gorge. | |||
{| | {|{{prettytable|notwide=1}} | ||
|[[ | |[[File:MS Monster Manon.png|center]] | ||
|[[File:MS Monster Griffey.png|center]] | |||
|[[File:MS Monster Leviathan.png|center]] | |||
|- | |- | ||
|[[MapleStory/Monsters/Level | |[[MapleStory/Monsters/Level 111-120#Manon|Manon]] | ||
|[[MapleStory/Monsters/Level 111-120#Griffey|Griffey]] | |||
|[[MapleStory/Monsters/Level 141-150#Leviathan|Leviathan]] | |||
|} | |} | ||
=== | |||
====[[File:MS Mob Icon Master Dummy.png]][[File:MS Mob Icon Tae Roon.png]][[File:MS Mob Icon King Sage Cat.png]]Mu Lung==== | |||
{| | Master Dummy spawns at the end of the Practice Field in a Mystic Gate located at "Practice Field : Advanced Level", Tae Roon spawns at the end of the Wild Bear area in a map called "Territory of Wandering Bear", and King Sage Cat spawns at the map called "Goblin Forest 1" of [[MapleStory/Towns/Mu Lung|Mu Lung]]. | ||
|[[ | |||
{|{{prettytable|notwide=1}} | |||
|[[File:MS Monster Master Dummy.png|center]] | |||
|[[File:MS Monster Tae Roon.png|center]] | |||
|[[File:MS Monster King Sage Cat.png|center]] | |||
|- | |- | ||
|[[MapleStory/Monsters/Level | |[[MapleStory/Monsters/Level 121-130#Master Dummy|Master Dummy]] | ||
|[[MapleStory/Monsters/Level 121-130#Tae Roon|Tae Roon]] | |||
|[[MapleStory/Monsters/Level 121-130#King Sage Cat|King Sage Cat]] | |||
|} | |} | ||
== | ====[[File:MS Mob Icon Bamboo Warrior.png]][[File:MS Mob Icon Giant Centipede.png]]Herb Town==== | ||
== | Bamboo Warrior spawns at "60-Year-Old Herb Garden". Giant Centipede spawns at "80-Year-Old Herb Garden". | ||
{|{{prettytable|notwide=1}} | |||
|[[ | |[[File:MS Monster Bamboo Warrior.png|center]] | ||
|[[File:MS Monster Giant Centipede.png|center]] | |||
|- | |- | ||
|[[MapleStory/Monsters/Level | |[[MapleStory/Monsters/Level 121-130#Bamboo Warrior|Bamboo Warrior]] | ||
|[[MapleStory/Monsters/Level 131-140#Giant Centipede|Giant Centipede]] | |||
|} | |} | ||
{| | |||
|[[ | ====[[File:MS Mob Icon SnowFro the Fruitnificent.png]][[File:MS Mob Icon Ravana.png]]Golden Temple==== | ||
SnowFro is located at "SnowFro's Lair", at the end of the Forest of Training. Ravana is located at the end of the Goblin Caves. When defeated, a powerful helmet to prove it has been conquered can be acquired. | |||
{|{{prettytable|notwide=1}} | |||
|[[File:MS Monster SnowFro the Fruitnificent.png]] | |||
|[[File:MS Monster Ravana.png]] | |||
|- | |- | ||
|[[MapleStory/Monsters/Level | |[[MapleStory/Monsters/Level 121-130#SnowFro the Fruitnificent|SnowFro the Fruitnificent]] | ||
|[[MapleStory/Monsters/Level 121-130#Ravana|Ravana]] | |||
|} | |} | ||
=== | ====[[File:MS Mob Icon Deo.png]]Ariant==== | ||
Found at | Found at "Dry Desert" in [[MapleStory/Towns/Ariant|Ariant]]. | ||
{| | {|{{prettytable|notwide=1}} | ||
|[[File:MS Monster Deo.png|center]] | |||
|[[ | |||
|- | |- | ||
|[[MapleStory/Monsters/Level | |[[MapleStory/Monsters/Level 81-90#Deo|Deo]] | ||
|} | |} | ||
====[[File:MS Mob Icon Rurumo.png]][[File:MS Mob Icon Chimera.png]]Magatia==== | |||
{| | Rurumo spawns at "Lab - Unit 103" on the Zenumist Side. Security Camera spawns at "Lab - Area C-1" on the Alcadno Side. Chimera spawns at a map linking the Zenumist and Alcadno Laboratories, called "Lab - Secret Basement Path". [[MapleStory/Towns/Magatia|Magatia]]. | ||
|[[ | {|{{prettytable|notwide=1}} | ||
|[[File:MS Monster Rurumo.png|center]] | |||
|[[File:MS Monster Security Camera.png|center]] | |||
|[[File:MS Monster Deet and Roi.png|center]] | |||
|[[File:MS Monster Chimera.png|center]] | |||
|- | |- | ||
|[[MapleStory/Monsters/Level | |[[MapleStory/Monsters/Level 91-100#Rurumo|Rurumo]] | ||
|[[MapleStory/Monsters/Level 91-100#Security Camera|Security Camera]] | |||
|[[MapleStory/Monsters/Level 91-100#Chimera|Chimera]] | |||
|} | |} | ||
=== | ====[[File:MS Mob Icon Dodo.png]][[File:MS Mob Icon Lilynouch.png]][[File:MS Mob Icon Lyka.png]]Temple of Time==== | ||
These are found at the end of their respective element areas in [[MapleStory/Towns/Temple of Time|Temple of Time]]. | |||
{| | {|{{prettytable|notwide=1}} | ||
|[[ | |[[File:MS Monster Dodo.png|center]] | ||
|[[ | |[[File:MS Monster Lilynouch.png|center]] | ||
|[[ | |[[File:MS Monster Lyka.png|center]] | ||
|- | |- | ||
|[[MapleStory/Monsters/Level | |[[MapleStory/Monsters/Level 141-150#Dodo|Dodo]] | ||
|[[MapleStory/Monsters/Level | ;Memory Lane | ||
|[[MapleStory/Monsters/Level | |[[MapleStory/Monsters/Level 151-160#Lilynouch|Lilynouch]] | ||
;Road of Regrets | |||
|[[MapleStory/Monsters/Level 161-170#Lyka|Lyka]] | |||
;Road to Oblivion | |||
|} | |} | ||
=== | ====[[File:MS Mob Icon Ghostwood Stumpy.png]]Twilight Perion==== | ||
Found at "Tempest Grave" at Twilight Perion. | |||
{| | {|{{prettytable|notwide=1}} | ||
|[[File:MS Monster Ghostwood Stumpy.png|center]] | |||
|[[ | |||
|- | |- | ||
|[[MapleStory/Monsters/Level | |[[MapleStory/Monsters/Level 191-200#Ghostwood Stumpy|Ghostwood Stumpy]] | ||
|} | |} | ||
=== | ===Grandis=== | ||
====[[File:MS Mob Icon Treglow.png]][[File:MS Mob Icon Victor.png]][[File:MS Mob Icon Velderoth.png]]Heliseum==== | |||
{| | Each of these bosses can be found at the end of their respective area in the Tyrant's Castle. | ||
|[[ | {|{{prettytable|notwide=1}} | ||
|[[ | |[[File:MS Monster Treglow.png|center]] | ||
|[[ | |[[File:MS Monster Victor.png|center]] | ||
|[[File:MS Monster Velderoth.png|center]] | |||
|- | |- | ||
|[[MapleStory/Monsters/Level | |[[MapleStory/Monsters/Level 111-120#Treglow|Treglow]] | ||
|[[MapleStory/Monsters/Level | |[[MapleStory/Monsters/Level 121-130#Victor|Victor]] | ||
|[[MapleStory/Monsters/Level | |[[MapleStory/Monsters/Level 121-130#Velderoth|Velderoth]] | ||
|} | |} | ||
=== | ===Masteria=== | ||
====[[File:MS Mob Icon Galacto-Drill.png]] Alien Invasion==== | |||
This is the boss of the New Leaf City alien area. | |||
{|{{prettytable|notwide=1}} | |||
![[File:MS Monster Galacto-Drill.png]] | |||
|- | |||
|[[MapleStory/Monsters/Level 101-110#Galacto-Drill|Galacto-Drill]] | |||
|} | |||
====[[File:MS Mob Icon Headless Horseman.png]][[File:MS Mob Icon Bigfoot.png]]Haunted House and Crimsonwood/Phantom Forest==== | |||
Spawns at Phantom Forest: Twisted Paths, near the town of [[MapleStory/Towns/Crimsonwood Keep|Crimsonwood Keep]]. In a rare exception, both these bosses spawn on a large number of maps throughout the forest, to give the illusion that they are one monster moving throughout at random. Headless Horseman also spawns at Phantom Forest: Hollowed Ground, near the town of [[MapleStory/Towns/Haunted House|Haunted House]]. | |||
|[[ | {|{{prettytable|notwide=1}} | ||
|[[ | |[[File:MS Monster Headless Horseman.png|center]] | ||
|[[File:MS Monster Bigfoot.png|center]] | |||
|- | |- | ||
|[[MapleStory/Monsters/Level | |[[MapleStory/Monsters/Level 111-120#Headless Horseman|Headless Horseman]] | ||
|[[MapleStory/Monsters/Level | |[[MapleStory/Monsters/Level 111-120#Bigfoot|Bigfoot]] | ||
|} | |} | ||
==World Tour | ==World Tour== | ||
===Zipangu | |||
===Zipangu=== | |||
The boss of Mushroom Shrine is, fittingly, the most powerful Mushroom monster in the game. | ====Mushroom Shrine==== | ||
{| | The boss of Mushroom Shrine is, fittingly, the most powerful Mushroom monster in the game, and also one of those with the spawn of 23 to 48 hours. | ||
|[[ | {|{{prettytable|notwide=1}} | ||
|[[File:MS Monster Blue Mushmom.png|center]] | |||
|- | |- | ||
|[[MapleStory/Monsters/Level 81-90#Blue Mushmom|Blue Mushmom]] | |[[MapleStory/Monsters/Level 81-90#Blue Mushmom|Blue Mushmom]] | ||
|} | |} | ||
Black Crow is found at the Buddha Shrine/Pine Forest area of [[MapleStory/Towns/Japan|Zipangu]]'s Mushroom Shrine. | |||
{| | {|{{prettytable|notwide=1}} | ||
|[[ | |[[File:MS Monster Black Crow.png|center]] | ||
|[[ | |- | ||
|[[ | |[[MapleStory/Monsters/Level 111-120#Black Crow|Black Crow]] | ||
|[[ | |} | ||
|[[ | |||
====[[File:MS Mob Icon Male Boss.png]]Showa Town==== | |||
The Yakuza are the Japanese version of the Mafia. Found in [[MapleStory/Towns/Japan|Zipangu]]'s Showa Town. Bodyguard A will transform into Bodyguard B and subsequently into The Boss when killed. | |||
{|{{prettytable|notwide=1}} | |||
|[[File:MS Monster Male Boss.png|center]] | |||
|[[File:MS Monster Female Boss.png|center]] | |||
|[[File:MS Monster Bodyguard A.png|center]] | |||
|[[File:MS Monster Bodyguard B.png|center]] | |||
|[[File:MS Monster The Boss.png|center]] | |||
|- | |- | ||
|[[MapleStory/Monsters/Level 91-100#Male Boss|Male Boss]] | |[[MapleStory/Monsters/Level 91-100#Male Boss|Male Boss]] | ||
|[[MapleStory/Monsters/Level | |[[MapleStory/Monsters/Level 121-130#Female Boss|Female Boss]] | ||
|[[MapleStory/Monsters/Level | |[[MapleStory/Monsters/Level 151-160#Bodyguard A|Bodyguard A]] | ||
|[[MapleStory/Monsters/Level | |[[MapleStory/Monsters/Level 151-160#Bodyguard B|Bodyguard B]] | ||
|[[MapleStory/Monsters/Level | |[[MapleStory/Monsters/Level 171-180#The Boss|The Boss]] | ||
*Summons | |} | ||
===Singapore=== | |||
====[[File:MS Mob Icon Krexel.png]]CBD Ulu City==== | |||
*Located at the end of [[MapleStory/Towns/Singapore#Ulu City|Ulu City]] in a special area called Ruin of Krexel. It's so huge that the only way to get close enough to attack it is to actually stand on it. It's even bigger than it appears here. | |||
{|{{prettytable|notwide=1}} | |||
|[[File:MS Monster Krexel Dormant.png|Center]] | |||
|- | |||
|[[MapleStory/Monsters/Level 151-160#Krexel|Krexel]] | |||
|} | |||
{|{{prettytable|notwide=1}} | |||
|[[File:MS Monster Krexel.png|Center]] | |||
|- | |||
|[[MapleStory/Monsters/Level 161-170#Krexel|Krexel]] | |||
|} | |||
{|{{prettytable|notwide=1}} | |||
|[[File:MS Monster Krexel 2 Thumb.png|Center]] | |||
|- | |||
|[[MapleStory/Monsters/Level 161-170#Krexel|Krexel]] | |||
|} | |||
====[[File:MS Mob Icon Captain Latanica.png]]Boat Quay Town==== | |||
*Located at the end of [[MapleStory/Towns/Singapore|Boat Quay Town]] inside the Ghost Ship. | |||
*Summons Selkie Jr. and Mr. Anchor. | |||
{|{{prettytable|notwide=1}} | |||
|[[File:MS Monster Capt. Latanica.png|Center]] | |||
|[[File:MS Monster Selkie Jr..png|Center]] | |||
|[[File:MS Monster Mr. Anchor.png|Center]] | |||
|- | |||
|[[MapleStory/Monsters/Level 151-160#Capt. Latanica|Capt. Latanica]] | |||
|'''Summons'''<br />[[MapleStory/Monsters/Level 151-160#Mr. Anchor|Mr. Anchor]] | |||
|} | |||
===[[File:MS Mob Icon Targa.png]][[File:MS Mob Icon Scarlion Boss.png]]Malaysia=== | |||
====Kampung Village Fantasy Theme Park==== | |||
*Located at the end of [[MapleStory/Towns/Malaysia#Fantasy Theme Park|Fantasy Theme Park]] in an area called "Spooky World". Once defeated, they will drop helmets which have similar stats to the Zakum Helm. | |||
*Summons [[MapleStory/Monsters/Level 131-140#Ratatula|Ratatula]] and [[MapleStory/Monsters/Level 131-140#Scaredy Scarlion|Scaredy Scarlion]] respectively. | |||
{|{{prettytable|notwide=1}} | |||
|[[File:MS Monster Targa.png|Center]] | |||
|[[File:MS Monster Angry Targa.png|Center]] | |||
|[[File:MS Monster Furious Targa.png|Center]] | |||
|[[File:MS Monster Ratatula.png|Center]] | |||
|- | |||
|[[MapleStory/Monsters/Level 141-150#Targa|Targa]] | |||
|[[MapleStory/Monsters/Level 141-150#Angry Targa|Angry Targa]] | |||
|[[MapleStory/Monsters/Level 141-150#Furious Targa|Furious Targa]] | |||
|'''Summons'''<br />[[MapleStory/Monsters/Level 131-140#Ratatula|Ratatula]] | |||
|- | |||
|[[File:MS Monster Scarlion Boss.png|Center]] | |||
|[[File:MS Monster Angry Scarlion Boss.png|Center]] | |||
|[[File:MS Monster Furious Scarlion Boss.png|Center]] | |||
|[[File:MS Monster Scaredy Scarlion.png|Center]] | |||
|- | |||
|[[MapleStory/Monsters/Level 141-150#Scarlion Boss|Scarlion Boss]] | |||
|[[MapleStory/Monsters/Level 141-150#Angry Scarlion Boss|Angry Scarlion Boss]] | |||
|[[MapleStory/Monsters/Level 141-150#Furious Scarlion Boss|Furious Scarlion Boss]] | |||
|'''Summons'''<br />[[MapleStory/Monsters/Level 131-140#Scaredy Scarlion|Scaredy Scarlion]] | |||
|} | |||
==Party Quests== | |||
Party Quests are cooperative tasks where a group of people progress through a series of challenges which normally culminates in a boss fight. More specific information on the stages preceding these boss fights can be found on the [[MapleStory/Party Quests|Party Quests]] page. | |||
===[[File:MS Mob Icon King Slime.png]]King Slime=== | |||
The boss of [[MapleStory/First Time Together|First Time Together]], for levels 50 and up. | |||
{|{{prettytable|notwide=1}} | |||
![[File:MS Monster King Slime.png]] | |||
[[MapleStory/First Time Together#King Slime|King Slime]] | |||
|} | |||
===[[File:MS Mob Icon Alishar.png]]Alishar=== | |||
The boss of [[MapleStory/Dimensional Crack|Dimensional Crack]], for levels 50 and up. | |||
{|{{prettytable|notwide=1}} | |||
![[File:MS Monster Alishar.png]] | |||
[[MapleStory/Dimensional Crack#Alishar|Alishar]] | |||
| | |||
;Summons | |||
[[File:MS Monster Chronos.png]] [[MapleStory/Dimensional Crack#Cronos|Cronos]] | |||
[[File:MS Monster Platoon Chronos.png]] [[MapleStory/Dimensional Crack#Platoon Cronos|Platoon Cronos]] | |||
[[File:MS Monster Master Chronos.png]] [[MapleStory/Dimensional Crack#Master Cronos|Master Cronos]] | |||
|} | |||
===[[File:MS Mob Icon Papa Pixie.png]]Papa Pixie=== | |||
The boss of [[MapleStory/Remnant of the Goddess|Remnant of the Goddess]], for levels 70 and up. | |||
{|{{prettytable|notwide=1}} | |||
![[File:MS Monster Papa Pixie.png|center]] | |||
[[MapleStory/Remnant of the Goddess#Papa Pixie|Papa Pixie]] | |||
| | |||
;Summons | |||
[[File:MS Monster Star Pixie.png|center]] [[MapleStory/Remnant of the Goddess#Star Pixie in Tower of Goddess (Summon Boss)|Star Pixie in Tower of Goddess (Summon Boss)]] | |||
[[File:MS Monster Lunar Pixie.png|center]] [[MapleStory/Remnant of the Goddess#Lunar Pixie in Tower of Goddess (Summon Boss)|Lunar Pixie in Tower of Goddess (Summon Boss)]] | |||
[[File:MS Monster Luster Pixie.png|center]] [[MapleStory/Remnant of the Goddess#Luster Pixie in Tower of Goddess (Summon Boss)|Luster Pixie in Tower of Goddess (Summon Boss)]] | |||
|} | |||
===[[File:MS Mob Icon Frankenroid.png]][[File:MS Mob Icon Angry Frankenroid.png]]Frankenroid=== | |||
Two possible bosses of [[MapleStory/Romeo and Juliet|Romeo and Juliet]], for levels 70 and higher. | |||
{|{{prettytable|notwide=1}} | |||
|[[File:MS Monster Frankenroid.png|center]] | |||
|[[File:MS Monster Angry Frankenroid.png|center]] | |||
|- | |||
|[[MapleStory/Romeo and Juliet#Frankenroid|Frankenroid]] | |||
|[[MapleStory/Romeo and Juliet#Angry Frankenroid|Angry Frankenroid]] | |||
|} | |||
;Summons | |||
{|{{prettytable|notwide=1}} | |||
|[[File:MS Monster Reinforced Iron Mutae.png|center]] | |||
|[[File:MS Monster Mithril Mutae.png|center]] | |||
|- | |||
|[[MapleStory/Romeo and Juliet#Reinforced Iron Mutae|Reinforced Iron Mutae]] | |||
|[[MapleStory/Romeo and Juliet#Reinforced Mithril Mutae|Reinforced Mithril Mutae]] | |||
|} | |||
===[[File:MS Mob Icon Poison Golem.png]][[File:MS Mob Icon Strong Poison Golem.png]][[File:MS Mob Icon Super Poison Golem.png]]Poison Golem=== | |||
The boss of the [[MapleStory/Forest of Poison Haze|Forest of Poison Haze]], for levels 100 and up. Defeating one form will cause the next to appear. | |||
{|{{prettytable|notwide=1}} | |||
|[[File:MS Monster Poison Golem.png|center]] | |||
|[[File:MS Monster Charged Poison Golem.png|center]] | |||
|[[File:MS Monster Super-Charged Poison Golem.png|center]] | |||
|- | |||
|[[MapleStory/Forest of Poison Haze#Poison Golem|Poison Golem]] | |||
|[[MapleStory/Forest of Poison Haze#Charged Poison Golem|Charged Poison Golem]] | |||
|[[MapleStory/Forest of Poison Haze#Super-Charged Poison Golem|Super-Charged Poison Golem]] | |||
|} | |} | ||
;Summons | ;Summons | ||
{| | {|{{prettytable|notwide=1}} | ||
|[[File:MS Monster Poisoned Lord Tree.png|center]] | |||
|[[File:MS Monster Poisoned Stone Bug.png|center]] | |||
|[[File:MS Monster Spright.png|center]] | |||
|[[ | |||
|[[ | |||
|[[ | |||
|- | |- | ||
|[[MapleStory/ | |[[MapleStory/Forest of Poison Haze#Poison Golem Level 2|Poison Golem Level 2]] | ||
| | |[[MapleStory/Forest of Poison Haze#Poison Golem Level 3|Poison Golem Level 3]] | ||
|[[MapleStory/ | |[[MapleStory/Forest of Poison Haze#Spright|Spright]] | ||
| | |||
|[[MapleStory/ | |||
|} | |} | ||
===[[File:MS Mob Icon Lord Pirate.png]]Lord Pirate=== | |||
{| | Two possible bosses of the [[MapleStory/Lord Pirate|Lord Pirate]] party quest, for levels 100 and up. | ||
|[[ | {|{{prettytable|notwide=1}} | ||
|[[File:MS Monster Lord Pirate.png|center]] | |||
|[[File:MS Monster Lord Pirate.png|center]] | |||
|- | |- | ||
|[[MapleStory/ | |[[MapleStory/Lord Pirate#Lord Pirate|Lord Pirate]] | ||
|[[MapleStory/Lord Pirate#Angry Lord Pirate|Angry Lord Pirate]] | |||
|} | |} | ||
The | ===[[File:MS Mob Icon Dragonoir.png]][[File:MS Mob Icon Dragon Rider.png]]Dragonoir & Dragon Rider=== | ||
{| | The bosses of the [[MapleStory/Dragon Rider|Dragon Rider]] for levels 120 and up. | ||
|[[ | {|{{prettytable|notwide=1}} | ||
|[[ | |[[File:MS Monster Dragonoir.png|center]] | ||
|[[File:MS Monster Dragon Rider.png|center]] | |||
|- | |- | ||
|[[MapleStory/ | |[[MapleStory/Dragon Rider#Dragonoir|Dragonoir]] | ||
|[[MapleStory/ | |[[MapleStory/Dragon Rider#Dragon Rider|Dragon Rider]] | ||
|} | |} | ||
{| | |||
|[[ | ===[[File:MS Mob Icon Hob King.png]]Rex=== | ||
The boss of the [[MapleStory/Resurrection of the Hoblin King|party quest]] in [[MapleStory/Towns/El Nath|El Nath]], for levels 150 and up. | |||
{|{{prettytable|notwide=1}} | |||
|[[File:MS Monster Rex.png|center]] | |||
|- | |- | ||
|[[MapleStory/ | |[[MapleStory/Resurrection of the Hoblin King#Rex|Rex]] | ||
|} | |} | ||
;Summons | ;Summons | ||
{| | {|{{prettytable|notwide=1}} | ||
|[[ | |[[File:MS Monster Combat Hoblin.png|center]] | ||
|[[File:MS Monster Ferocious Hoblin.png|center]] | |||
|- | |||
|[[MapleStory/Forest of Poison Haze#Combat Hoblin|Combat Hoblin]] | |||
|[[MapleStory/Forest of Poison Haze#Ferocious Hoblin|Ferocious Hoblin]] | |||
|} | |||
===[[File:MS Mob Icon Geist Balrog.png]]Geist Balrog=== | |||
This is the boss of the [[MapleStory/Amorian Challenge]] Party Quest, for married characters over the level of 40. | |||
{|{{prettytable|notwide=1}} | |||
|[[File:MS Monster Geist Balrog.png|center]] | |||
|- | |- | ||
|[[MapleStory/Monsters/Level | |[[MapleStory/Monsters/Level 91-100#Geist Balrog|Geist Balrog]] | ||
|} | |} | ||
=== | ===[[File:MS Mob Icon Margana.png]][[File:MS Mob Icon Red Nirg.png]][[File:MS Mob Icon Rellik.png]][[File:MS Mob Icon Hsalf.png]][[File:MS Mob Icon MV.png]]Twisted Masters=== | ||
These are fought at the very end of the Crimsonwood Keep Party Quest. | |||
{|{{prettytable|notwide=1}} | |||
|[[ | |[[File:MS Monster Margana.png|center]] | ||
|[[File:MS Monster Red Nirg.png|center]] | |||
|[[File:MS Monster Rellik.png|center]] | |||
|[[File:MS Monster Hsalf.png|center]] | |||
|- | |- | ||
|[[MapleStory/Monsters/Level | |[[MapleStory/Monsters/Level 111-120#Margana|Margana]] | ||
|[[MapleStory/Monsters/Level 111-120#Red Nirg|Red Nirg]] | |||
|[[MapleStory/Monsters/Level 111-120#Rellik|Rellik]] | |||
|[[MapleStory/Monsters/Level 111-120#Hsalf|Hsalf]] | |||
|} | |} | ||
After Red Nirg's defeat, two ninjas are summoned | |||
{| | {|{{prettytable|notwide=1}} | ||
|[[File:MS Monster Scarlet Phoenix.png|center]] | |||
|[[ | |[[File:MS Monster Azure Ocelot.png|center]] | ||
|[[ | |||
|- | |- | ||
|[[MapleStory/Monsters/Level | |[[MapleStory/Monsters/Level 111-120#Scarlet Phoenix|Scarlet Phoenix]] | ||
|[[MapleStory/Monsters/Level | |[[MapleStory/Monsters/Level 111-120#Azure Ocelot|Azure Ocelot]] | ||
|} | |} | ||
{| | In the JMS version, Scarlet Phoenix and an Azure Ocelot need to be killed for a entry into the Keep. | ||
|[[ | |||
JMS Version has another Twisted Master, Nagrom. | |||
{|{{prettytable|notwide=1}} | |||
|[[File:MS Monster Nagrom.png|center]] | |||
|- | |- | ||
|[[MapleStory/Monsters/Level | |[[MapleStory/Monsters/Level 111-120#Nagrom|Nagrom]] | ||
|} | |} | ||
==Job Advancement Bosses== | ==Job Advancement Bosses== | ||
===3rd | ===Adventurers=== | ||
Each | ====3rd job==== | ||
{| | Each adventurer must beat their job's trainer to complete the third job advancement. These can only be accessed by players on the Third job test, through a hidden map accessed by a portal to another dimension. | ||
|[[ | {|{{prettytable|notwide=1}} | ||
|[[ | |[[File:MS Monster Dances with Balrog's Clone.png|center]] | ||
|[[ | |[[File:MS Monster Grendel The Really Old's Clone.png|center]] | ||
|[[ | |[[File:MS Monster Athena Pierce's Clone.png|center]] | ||
|[[File:MS Monster Dark Lord's Clone.png|center]] | |||
|[[File:MS Monster Shadow Kyrin's Clone.png|center]] | |||
|- | |- | ||
|[[MapleStory/Monsters/Level | |[[MapleStory/Monsters/Level 61-70#Dances with Balrog's Clone|Dances with Balrog's Clone]] | ||
*Summons [[#Tauromacis|Tauromacis]] | *Summons [[#Tauromacis|Tauromacis]] | ||
|[[MapleStory/Monsters/Level | |[[MapleStory/Monsters/Level 61-70#Grendel The Really Old's Clone|Grendel The Really Old's Clone]] | ||
*Summons [[#Tauromacis|Tauromacis]] | *Summons [[#Tauromacis|Tauromacis]] | ||
|[[MapleStory/Monsters/Level | |[[MapleStory/Monsters/Level 61-70#Athena Pierce's Clone|Athena Pierce's Clone]] | ||
*Summons [[#Tauromacis|Tauromacis]] | *Summons [[#Tauromacis|Tauromacis]] | ||
|[[MapleStory/Monsters/Level | |[[MapleStory/Monsters/Level 61-70#Dark Lord's Clone|Dark Lord's Clone]] | ||
*Summons [[#Tauromacis|Tauromacis]] | *Summons [[#Tauromacis|Tauromacis]] | ||
|[[MapleStory/Monsters/Level 61-70#Shadow Kyrin|Shadow Kyrin]] | |||
*Summons [[#Shadow Kyrin's Clone|Shadow Kyrin's Clone]] | |||
|} | |} | ||
;Summons | ;Summons | ||
{| | {|{{prettytable|notwide=1}} | ||
|[[ | |[[File:MS Monster Tauromacis.png|center]] | ||
|[[File:MS Monster Shadow Kyrin's Clone.png|center]] | |||
|- | |||
|[[MapleStory/Monsters/Level 41-50#Tauromacis|Tauromacis]] | |||
|[[MapleStory/Monsters/Level 61-70#Shadow Kyrin's Clone|Shadow Kyrin's Clone]] | |||
|} | |||
====4th job==== | |||
Each adventurer must beat a special version of Manon and Griffey to complete the fourth job advancement. These can be accessed by entering Manon and Griffey's regular forests. Note, nobody else can enter the map while you are inside it. | |||
{|{{prettytable|notwide=1}} | |||
|[[File:MS Monster Manon.png|center]] | |||
|[[File:MS Monster Griffey.png|center]] | |||
|- | |- | ||
|[[MapleStory/Monsters/Level | |[[MapleStory/Monsters/Level 91-100#Manon, Herald of Heroes|Manon, Herald of Heroes]] | ||
|[[MapleStory/Monsters/Level 91-100#Griffey, Herald of Heroes|Griffey, Herald of Heroes]] | |||
|} | |} | ||
=== | |||
These | ===[[File:MS Mob Icon Schiller.png]][[File:MS Mob Icon Energy Conducting Device.png]][[File:MS Mob Icon Poison Gas Generator.png]]Resistance Bosses=== | ||
{| | These are bosses that are fought by the Resistance to advance their skills. | ||
|[[ | {|{{prettytable|notwide=1}} | ||
|[[ | |[[File:MS Monster Schiller.png|center]] | ||
|[[File:MS Monster Energy Conducting Device.png|center]] | |||
|[[File:MS Monster Poison Gas Generator.png|center]] | |||
|- | |- | ||
|[[MapleStory/Monsters/Level | |[[MapleStory/Monsters/Level 21-30#Schiller|Schiller]] | ||
|[[MapleStory/Monsters/Level 61-70#Energy Conducting Device|Energy Conducting Device]] | |||
|[[MapleStory/Monsters/Level 91-100#Poison Gas Generator|Poison Gas Generator]] | |||
|[[MapleStory/Monsters/Level | |||
|} | |} | ||
==Major Bosses== | ==Major Bosses== | ||
===Pianus=== | These are the most powerful bosses in the game, and the most significant to the lore of the Maple World. All of them drop skills that are crucial to 4th job characters, and several give special items to prove that a player has conquered it. Their release typical marks a major step forward in a version's history. | ||
Pianus is found at the Cave of Pianus through 'A Grave of a Wrecked Ship' at [[MapleStory/Towns/Aquarium|Aqua Dungeon]]. Go to a glowing doorway to enter 'A Dangerous Cave', which, at the end, you'll find Pianus, who spawns every | |||
===[[File:MS Mob Icon Pianus 2.png]][[File:MS Mob Icon Pianus.png]]Pianus=== | |||
Pianus is found at the Cave of Pianus through 'A Grave of a Wrecked Ship' at [[MapleStory/Towns/Aquarium|Aqua Dungeon]]. Go to a glowing doorway to enter 'A Dangerous Cave', which, at the end, you'll find Pianus, who spawns every 36 and 24 hours. The Right Pianus spawns every 24 hours, while his reflection, the weaker Left Pianus, is 36. MapleSEA recently released this description of Pianus: <blockquote> | |||
"A heavenly fish who had once enjoyed the life of immortality, was banished into the world of MapleStory for eating up his friend simply because he was famished. Thrown into The Cave of Pianus, he is all alone, by himself, and would occasionally project an image of himself to relieve his loneliness." | "A heavenly fish who had once enjoyed the life of immortality, was banished into the world of MapleStory for eating up his friend simply because he was famished. Thrown into The Cave of Pianus, he is all alone, by himself, and would occasionally project an image of himself to relieve his loneliness." | ||
</blockquote> | </blockquote> | ||
Pianus can attack with a laser beam and a 10 ton metal block. | Pianus can attack with a laser beam and a 10 ton metal block. He is also known as the Doom Flounder. To prove that a player has conquered Pianus, they can perform a quest which grants them the Red Musketeer Cape. | ||
{| | {|{{prettytable|notwide=1}} | ||
|[[ | |[[File:MS Monster Pianus (Left Side).png|center]] | ||
|[[ | |[[File:MS Monster Pianus (Right Side).png|center]] | ||
|- | |- | ||
|[[MapleStory/Monsters/Level 101-110#Pianus (Left Side)|Pianus (Left Side)]] | |[[MapleStory/Monsters/Level 101-110#Pianus (Left Side)|Pianus (Left Side)]] | ||
*Summons [[MapleStory/Monsters/Level 71-80# | *Summons [[MapleStory/Monsters/Level 71-80#Bloody Boom|Bloody Boom]] | ||
|[[MapleStory/Monsters/Level 101-110#Pianus (Right Side)|Pianus (Right Side)]] | |[[MapleStory/Monsters/Level 101-110#Pianus (Right Side)|Pianus (Right Side)]] | ||
*Summons [[MapleStory/Monsters/Level 71-80# | *Summons [[MapleStory/Monsters/Level 71-80#Bloody Boom|Bloody Boom]] | ||
|} | |} | ||
;Summons | ;Summons | ||
{| | {|{{prettytable|notwide=1}} | ||
|[[File:MS Monster Bloody Boom.png|center]] | |||
{| | |||
|[[ | |||
|- | |- | ||
|[[MapleStory/Monsters/Level | |[[MapleStory/Monsters/Level 71-80#Bloody Boom|Bloody Boom]] | ||
|} | |} | ||
===Papulatus=== | ===[[File:MS Mob Icon Papulatus Clock.png]]Papulatus=== | ||
The Papulatus, and related forms, are all located in the last map of [[MapleStory/Towns/Ludibrium|Ludibrium]]'s dungeon, The Clock Tower, called "Ludibrium: Deep Inside of Clock Tower". MapleSEA recently released this description of Papulatus: | The Papulatus, and related forms, are all located in the last map of [[MapleStory/Towns/Ludibrium|Ludibrium]]'s dungeon, The Clock Tower, called "Ludibrium: Deep Inside of Clock Tower". MapleSEA recently released this description of Papulatus: | ||
<blockquote>"Papulatus Clock Boss is an evil monster who hogs the Time Sphere and likes to steal the power in Ludibrium. With him around in the Clock Tower, Ludibrium will never enjoy the peace and harmony they once had."</blockquote> | <blockquote>"Papulatus Clock Boss is an evil monster who hogs the Time Sphere and likes to steal the power in Ludibrium. With him around in the Clock Tower, Ludibrium will never enjoy the peace and harmony they once had."</blockquote> | ||
:Papulatus is a monster from the Maple World's parallel dimension. It entered through a crack in the dimension caused by Ludibrium's failing power supply, the Time Sphere, with several other monsters. The Time Sphere is made by mixing Tachions and Mysterious Powder, which is Papulatus' energy source as well. Papulatus contaminates these Tachions, draining the Time Sphere's power. Some of the other monsters that followed Papulatus through the Crack are carrying pieces of it, which are needed to seal the hole. Once the pieces have been acquired from these monsters, namely [[MapleStory/Monsters/Level 91-100#Gigantic Spirit Viking|Gigantic Spirit Viking]] and [[MapleStory/Monsters/Level 91-100#Grim Phantom Watch|Grim Phantom Watch]], the crack can be repaired, causing Papulatus' escape route to be blocked and driving it into the open. Once this occurs, players can finally confront the monster that is disturbing the Maple World and end its leeching. However, once Papulatus has been defeated, there is still one last task: Eliminating the evil force that still remains in the contaminated Tachions. The only thing that can destroy such a dark aura is the fires of El Nath's volcanoes, so the Dark Tachions must be taken there. This force is what has caused the normally innocent toys of Ludibrium to transform into monsters. After all this, Ludus Lake will finally be able to return to normal. | |||
Approach Mr. Bouffon at Path of Time in Ludibrium. He will let you know how to get to Papulatus Clock Boss. | Approach Mr. Bouffon at Path of Time in Ludibrium. He will let you know how to get to Papulatus Clock Boss. | ||
Papulatus attack with lightning bolts, a blast of flame and by chances turn players HP and MP to 1 | Papulatus attack with lightning bolts, a blast of flame and by chances turn players HP and MP to 1. It can also dispel everyone on the map, causing deadly situations for low hp classes. Upon completing Mr. Bouffon's quest, a player can obtain the Ludibrium cape as proof they have slain Papulatus. | ||
{| | {|{{prettytable|notwide=1}} | ||
|[[ | |[[File:MS Monster Time Sphere.png|center]] | ||
|[[ | |[[File:MS Monster Papulatus Clock.png|center]] | ||
|[[ | |[[File:MS Monster Papulatus.png|center]] | ||
|'''Summons'''<br />[[File:MS Monster High Darkstar.png|center]] | |||
|- | |- | ||
|[[MapleStory/Monsters/Level 91-100#Time Sphere|Time Sphere]] | |[[MapleStory/Monsters/Level 91-100#Time Sphere|Time Sphere]] | ||
|[[MapleStory/Monsters/ | |[[MapleStory/Monsters/Level_121-130#Papulatus Clock|Papulatus Clock]] | ||
*Summons [[#Low Darkstar|Low Darkstar]] and [[#High Darkstar|High Darkstar]] | *Summons [[#Low Darkstar|Low Darkstar]] and [[#High Darkstar|High Darkstar]] | ||
|[[MapleStory/Monsters/ | |[[MapleStory/Monsters/Level_121-130#Papulatus|Papulatus]] | ||
|[[MapleStory/Monsters/Level 71-80#Low Darkstar|Low Dark Star]] | |||
[[MapleStory/Monsters/Level 71-80#High Darkstar|High Darkstar]] | |||
|} | |} | ||
===[[File:MS Mob Icon Zakum.png]]Zakum=== | |||
|[[ | Zakum is located in the Dead Mines of [[MapleStory/Towns/El Nath|El Nath]], one of the main dungeons. Highly coveted by those above Level 100 for the exclusive Zakum Helmet. In a 4th Job Advancement quest, it tells the story of Zakum's rise. | ||
|[[ | |||
Zakum was a spirit sealed in a tree deep in the mines of El Nath's volcano. A mining town that once existed nearby eventually discovered this tree. At the time, it had no malevolent notions, but the greed of the miners corrupted it. As the spirit was corrupted, it grew smarter, and finally became capable of controlling the town's populace. It forced them to build an enormous statue in tribute to it. The now evil spirit of Zakum possessed the statue, subjugated all the humans and eventually killed everyone in the town. Zakum now rests deep in the lava caves, waiting for powerful players to challenge his might. | |||
{|{{prettytable|notwide=1}} | |||
|colspan="3"|[[File:MS Monster Zakum Whole.gif|center]] | |||
|- | |||
|colspan="3" style="text-align:center"|Zakum (Whole Body) | |||
|- | |||
|[[File:MS Monster Zakum 1.png|center|250px]] | |||
|[[File:MS Monster Zakum 2.png|center|250px]] | |||
|[[File:MS Monster Zakum 3.png|center|250px]] | |||
|- | |||
|[[MapleStory/Monsters/Level 101-110#Zakum 1|Zakum 1]] | |||
|[[MapleStory/Monsters/Level 101-110#Zakum 2|Zakum 2]] | |||
|[[MapleStory/Monsters/Level 101-110#Zakum 3|Zakum 3]] | |||
|- | |||
|colspan="3"| | |||
*Summons [[#Puco|Puco]], [[#Punco|Punco]], [[#Cuzco|Cuzco]], [[#Opachu|Opachu]], and [[#Boogie|Boogie]] | |||
|- | |||
|[[File:MS Monster Zakum's Arm 1.png|center]] | |||
|[[File:MS Monster Zakum's Arm 2.png|center]] | |||
|style="text-align:center"|'''Summons'''<br />[[File:MS Monster Chaos Puko.png|center]] | |||
|- | |||
|[[MapleStory/Monsters/Level 101-110#Zakum's Arm 1|Zakum's Arm 1]] | |||
|[[MapleStory/Monsters/Level 101-110#Zakum's Arm 2|Zakum's Arm 2]] | |||
|[[MapleStory/Monsters/Level 71-80#Puco|Puco]] | |||
|- | |||
|[[File:MS Monster Zakum's Arm 3.png|center]] | |||
|[[File:MS Monster Zakum's Arm 4.png|center]] | |||
|style="text-align:center"|'''Summons'''<br />[[File:MS Monster Chaos Poonko.png|center]] | |||
|- | |||
|[[MapleStory/Monsters/Level 101-110#Zakum's Arm 3|Zakum's Arm 3]] | |||
|[[MapleStory/Monsters/Level 101-110#Zakum's Arm 4|Zakum's Arm 4]] | |||
|[[MapleStory/Monsters/Level 71-80#Punco|Punco]] | |||
|- | |||
|[[File:MS Monster Zakum's Arm 5.png|center]] | |||
|[[File:MS Monster Zakum's Arm 6.png|center]] | |||
|style="text-align:center"|'''Summons'''<br />[[File:MS Monster Cuzco.png|center]] | |||
|- | |||
|[[MapleStory/Monsters/Level 101-110#Zakum's Arm 5|Zakum's Arm 5]] | |||
|[[MapleStory/Monsters/Level 101-110#Zakum's Arm 6|Zakum's Arm 6]] | |||
|[[MapleStory/Monsters/Level 61-70#Cuzco|Cuzco]] | |||
|- | |||
|[[File:MS Monster Zakum's Arm 7.png|center]] | |||
|[[File:MS Monster Zakum's Arm 8.png|center]] | |||
|style="text-align:center"|'''Summons'''<br />[[File:MS Monster Opachu.png|center]] | |||
|- | |||
|[[MapleStory/Monsters/Level 101-110#Zakum's Arm 7|Zakum's Arm 7]] | |||
|[[MapleStory/Monsters/Level 101-110#Zakum's Arm 8|Zakum's Arm 8]] | |||
|[[MapleStory/Monsters/Level 81-90#Opachu|Opachu]] | |||
|- | |||
|colspan="3" style="text-align:center"|'''Summons'''<br />[[File:MS Monster Chaos Boogie.png|center]] | |||
|- | |- | ||
| | |colspan="3" style="text-align:center"|[[MapleStory/Monsters/Level 61-70#Boogie|Boogie]] | ||
|[[MapleStory/Monsters/Level | |||
|} | |} | ||
===Zakum=== | ===[[File:MS Mob Icon Zakum.png]]Chaos Zakum=== | ||
Zakum, | The same as Zakum, but stronger and has more skills such as Seduce, Zombify, Reverse Keys, and Potion Lock. It also drops the better Chaos Zakum Helmet. | ||
{|{{prettytable|notwide=1}} | |||
|colspan="3"|[[File:MS Monster Zakum Whole.gif|center]] | |||
|[[ | |- | ||
|colspan="3" style="text-align:center"|Chaos Zakum (Whole Body) | |||
|- | |- | ||
|[[ | |[[File:MS Monster Zakum 1.png|center|250px]] | ||
|[[File:MS Monster Zakum 2.png|center|250px]] | |||
|[[File:MS Monster Zakum 3.png|center|250px]] | |||
|[[ | |||
|[[ | |||
|- | |- | ||
|[[MapleStory/Monsters/Level | |[[MapleStory/Monsters/Level 131-140#Chaos Zakum 1|Chaos Zakum 1]] | ||
|[[MapleStory/Monsters/Level | |[[MapleStory/Monsters/Level 131-140#Chaos Zakum 2|Chaos Zakum 2]] | ||
|[[MapleStory/Monsters/Level | |[[MapleStory/Monsters/Level 131-140#Chaos Zakum 3|Chaos Zakum 3]] | ||
|- | |- | ||
|colspan="3"| | |colspan="3"| | ||
*Summons [[# | *Summons [[#Chaos Puko|Chaos Puko]], [[#Chaos Poonko|Chaos Poonko]], [[#Chaos Kusko|Chaos Kusko]], [[#Chaos Ooparts|Chaos Ooparts]], and [[#Chaos Boogie|Chaos Boogie]] | ||
|- | |||
|[[File:MS Monster Zakum's Arm 1.png|center]] | |||
|[[File:MS Monster Zakum's Arm 2.png|center]] | |||
|style="text-align:center"|'''Summons'''<br />[[File:MS Monster Chaos Puko.png|center]] | |||
|- | |||
|[[MapleStory/Monsters/Level 101-110#Chaos Zakum's Arm 1|Chaos Zakum's Arm 1]] | |||
|[[MapleStory/Monsters/Level 101-110#Chaos Zakum's Arm 2|Chaos Zakum's Arm 2]] | |||
|[[MapleStory/Monsters/Level 71-80#Chaos Puko|Chaos Puko]] | |||
|- | |||
|[[File:MS Monster Zakum's Arm 3.png|center]] | |||
|[[File:MS Monster Zakum's Arm 4.png|center]] | |||
|style="text-align:center"|'''Summons'''<br />[[File:MS Monster Chaos Poonko.png|center]] | |||
|- | |||
|[[MapleStory/Monsters/Level 101-110#Chaos Zakum's Arm 3|Chaos Zakum's Arm 3]] | |||
|[[MapleStory/Monsters/Level 101-110#Chaos Zakum's Arm 4|Chaos Zakum's Arm 4]] | |||
|[[MapleStory/Monsters/Level 71-80#Chaos Poonko|Chaos Poonko]] | |||
|- | |||
|[[File:MS Monster Zakum's Arm 5.png|center]] | |||
|[[File:MS Monster Zakum's Arm 6.png|center]] | |||
|style="text-align:center"|'''Summons'''<br />[[File:MS Monster Cuzco.png|center]] | |||
|- | |||
|[[MapleStory/Monsters/Level 101-110#Chaos Zakum's Arm 5|Chaos Zakum's Arm 5]] | |||
|[[MapleStory/Monsters/Level 101-110#Chaos Zakum's Arm 6|Chaos Zakum's Arm 6]] | |||
|[[MapleStory/Monsters/Level 71-80#Chaos Kusko|Chaos Kusko]] | |||
|- | |||
|[[File:MS Monster Zakum's Arm 7.png|center]] | |||
|[[File:MS Monster Zakum's Arm 8.png|center]] | |||
|style="text-align:center"|'''Summons'''<br />[[File:MS Monster Opachu.png|center]] | |||
|- | |||
|[[MapleStory/Monsters/Level 101-110#Chaos Zakum's Arm 7|Chaos Zakum's Arm 7]] | |||
|[[MapleStory/Monsters/Level 101-110#Chaos Zakum's Arm 8|Chaos Zakum's Arm 8]] | |||
|[[MapleStory/Monsters/Level 81-90#Chaos Ooparts|Chaos Ooparts]] | |||
|- | |||
|colspan="3" style="text-align:center"|'''Summons'''<br />[[File:MS Monster Chaos Boogie.png|center]] | |||
|- | |- | ||
|colspan="3" style="text-align:center"|[[MapleStory/Monsters/Level 61-70#Chaos Boogie|Chaos Boogie]] | |||
|} | |} | ||
{| | ===[[File:MS Mob Icon Horned Tail.png]]Horntail=== | ||
|[[ | Horntail is a powerful boss in the game. It drops a powerful necklace called the Horntail Necklace, which adds massive amounts to every stat. Located deep in Leafre, in the Cave of Life. Several Leafre quests reveal what has occurred to bring Horntail into battle. | ||
|[[ | |||
The forest of [[MapleStory/Towns/Leafre|Leafre]] is protected by the Nine Spirits dragon, a kind and gentle creature. The Nine Spirits Dragon has set up a barrier which shields the forest from evil. Horntail, a power hungry dragon, began to rebel against the Nine Spirits rule, and started uniting the evil dragons. This group of evil dragons began their assault on the town, almost entirely wiping out the Dragon Squad, a team of human fighters sent to defeat Horntail. This was a horribly disgraceful action coming from a Dragon. During this battle, Horntail gravely injured the old Nine Spirits, and took the egg of the Nine Spirits Dragon. He then hid out deep in the Cave of Life to recover his strength. Horntail's minions still overtook the Dragon Forest in Leafre. His evil power is so great that it has even gained the power to corrupt the other monsters, turning them pitch black. Now, the strongest players must band together to defeat this cruel dragon, save the Nine Spirits Dragon Egg, and protect Leafre once and for all. | |||
{|{{prettytable|notwide=1}} | |||
|colspan="3"|[[File:MS Monster HornTail Whole.png|center]] | |||
|- | |||
|colspan="3" style="text-align:center"|Horntail | |||
|- | |||
|[[File:MS Monster Horntail's Left Head.png|center|250px]] | |||
| | |||
|[[File:MS Monster Horntail's Right Head.png|center|250px]] | |||
|- | |||
|[[MapleStory/Monsters/Level 151-160#Horntail's Left Head|Horntail's Left Head]] | |||
| | |||
|[[MapleStory/Monsters/Level 151-160#Horntail's Right Head|Horntail's Right Head]] | |||
|- | |||
|[[File:MS Monster Horntail's Head A.png|center]] | |||
|[[File:MS Monster Horntail's Head B.png|center]] | |||
|[[File:MS Monster Horntail's Head C.png|center]] | |||
|- | |- | ||
|[[MapleStory/Monsters/Level | |[[MapleStory/Monsters/Level 151-160#Horntail's Head A|Horntail's Head A]] | ||
|[[MapleStory/Monsters/Level | |[[MapleStory/Monsters/Level 151-160#Horntail's Head B|Horntail's Head B]] | ||
|[[MapleStory/Monsters/Level 151-160#Horntail's Head C|Horntail's Head C]] | |||
|- | |- | ||
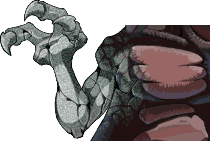
|[[ | |[[File:MS Monster Horntail's Left Hand.png|center]] | ||
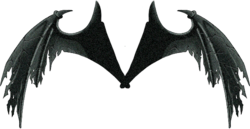
|[[ | ||[[File:MS Monster Horntail's Wings.png|center|250px]] | ||
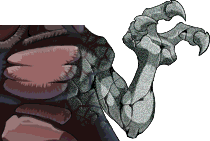
|[[File:MS Monster Horntail's Right Hand.png|center]] | |||
|- | |- | ||
|[[MapleStory/Monsters/Level | |[[MapleStory/Monsters/Level 151-160#Horntail's Left Hand|Horntail's Left Hand]] | ||
|[[MapleStory/Monsters/Level | |[[MapleStory/Monsters/Level 151-160#Horntail's Wings|Horntail's Wings]] | ||
|[[MapleStory/Monsters/Level 151-160#Horntail's Right Hand|Horntail's Right Hand]] | |||
|- | |- | ||
|[[ | |colspan="3"|[[File:MS Monster Horntail's Legs.png|center|250px]] | ||
|- | |- | ||
| | |colspan="3" style="text-align:center"|[[MapleStory/Monsters/Level 151-160#Horntail's Legs|Horntail's Legs]] | ||
|[[MapleStory/Monsters/Level | |||
|- | |- | ||
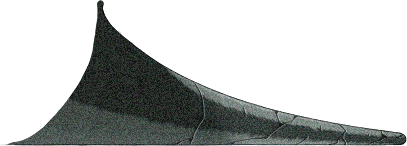
| | |colspan="3"|[[File:MS Monster Horntail's Tails.png|center]] | ||
|[[ | |||
|- | |- | ||
| | |colspan="3" style="text-align:center"|[[MapleStory/Monsters/Level 151-160#Horntail's Tails|Horntail's Tail]] | ||
|[[MapleStory/Monsters/Level | |||
|} | |} | ||
{| | {|{{prettytable|notwide=1}} | ||
|[[ | |colspan="3"|[[File:MS Monster Soul of Horntail.png|center]] | ||
|[[ | |- | ||
|colspan="3" style="text-align:center"|[[MapleStory/Monsters/Level 131-140#Soul of Horntail|Soul of Horntail]] | |||
|[[ | |- | ||
|[[File:MS Monster Dead Horntail's Head A.png|center]] | |||
|[[File:MS Monster Dead Horntail's Head B.png|center]] | |||
|[[File:MS Monster Dead Horntail's Head C.png|center]] | |||
|- | |||
|[[MapleStory/Monsters/Level 131-140#Dead Horntail's Head A|Dead Horntail's Head A]] | |||
|[[MapleStory/Monsters/Level 131-140#Dead Horntail's Head B|Dead Horntail's Head B]] | |||
|[[MapleStory/Monsters/Level 131-140#Dead Horntail's Head C|Dead Horntail's Head C]] | |||
|- | |||
|[[File:MS Monster Dead Horntail's Left Hand.png|center]] | |||
|[[File:MS Monster Dead Horntail's Wings.png|center|250px]] | |||
|[[File:MS Monster Dead Horntail's Right Hand.png|center]] | |||
|- | |||
|[[MapleStory/Monsters/Level 131-140#Dead Horntail's Left Hand|Dead Horntail's Left Hand]] | |||
|[[MapleStory/Monsters/Level 131-140#Dead Horntail's Wings|Dead Horntail's Wings]] | |||
|[[MapleStory/Monsters/Level 131-140#Dead Horntail's Right Hand|Dead Horntail's Right Hand]] | |||
|- | |||
|colspan="3"|[[File:MS Monster Dead Horntail's Legs.png|center|250px]] | |||
|- | |||
|colspan="3" style="text-align:center"|[[MapleStory/Monsters/Level 131-140#Dead Horntail's Legs|Dead Horntail's Legs]] | |||
|- | |||
|colspan="3"|[[File:MS Monster Dead Horntail's Tails.png|center]] | |||
|- | |- | ||
| | |colspan="3" style="text-align:center"|[[MapleStory/Monsters/Level 131-140#Dead Horntail's Tails|Dead Horntail's Tail]] | ||
|[[MapleStory/Monsters/Level | |||
|} | |} | ||
{| | |||
|[[ | ===[[File:MS Mob Icon Horned Tail.png]]Chaos Horntail=== | ||
Chaos Horntail is a stronger version of Horntail. It drops a powerful necklace called the Chaos Horntail Necklace, which adds massive amounts to every stat. Located deep in Leafre, in the Cave of Life. | |||
{|{{prettytable|notwide=1}} | |||
|colspan="3"|[[File:MS Monster HornTail Whole.png|center]] | |||
|- | |||
|colspan="3" style="text-align:center"|Chaos Horntail | |||
|- | |||
|[[File:MS Monster Horntail's Left Head.png|center|250px]] | |||
| | |||
|[[File:MS Monster Horntail's Right Head.png|center|250px]] | |||
|- | |||
|[[MapleStory/Monsters/Level 151-160#Chaos Horntail's Left Head|Chaos Horntail's Left Head]] | |||
| | |||
|[[MapleStory/Monsters/Level 151-160#Chaos Horntail's Right Head|Chaos Horntail's Right Head]] | |||
|- | |||
|[[File:MS Monster Horntail's Head A.png|center]] | |||
|[[File:MS Monster Horntail's Head B.png|center]] | |||
|[[File:MS Monster Horntail's Head C.png|center]] | |||
|- | |||
|[[MapleStory/Monsters/Level 151-160#Chaos Horntail's Head A|Chaos Horntail's Head A]] | |||
|[[MapleStory/Monsters/Level 151-160#Chaos Horntail's Head B|Chaos Horntail's Head B]] | |||
|[[MapleStory/Monsters/Level 151-160#Chaos Horntail's Head C|Chaos Horntail's Head C]] | |||
|- | |||
|[[File:MS Monster Horntail's Left Hand.png|center]] | |||
|[[File:MS Monster Horntail's Wings.png|center|250px]] | |||
|[[File:MS Monster Horntail's Right Hand.png|center]] | |||
|- | |||
|[[MapleStory/Monsters/Level 151-160#Chaos Horntail's Left Hand|Chaos Horntail's Left Hand]] | |||
|[[MapleStory/Monsters/Level 151-160#Chaos Horntail's Wings|Chaos Horntail's Wings]] | |||
|[[MapleStory/Monsters/Level 151-160#Chaos Horntail's Right Hand|Chaos Horntail's Right Hand]] | |||
|- | |||
|colspan="3"|[[File:MS Monster Horntail's Legs.png|center|250px]] | |||
|- | |||
|colspan="3" style="text-align:center"|[[MapleStory/Monsters/Level 151-160#Chaos Horntail's Legs|Chaos Horntail's Legs]] | |||
|- | |||
|colspan="3"|[[File:MS Monster Horntail's Tails.png|center]] | |||
|- | |- | ||
|[[MapleStory/Monsters/Level | |colspan="3" style="text-align:center"|[[MapleStory/Monsters/Level 151-160#Chaos Horntail's Tails|Chaos Horntail's Tail]] | ||
|} | |} | ||
=== | {|{{prettytable|notwide=1}} | ||
|colspan="3"|[[File:MS Monster Soul of Horntail.png|center]] | |||
|- | |||
|colspan="3" style="text-align:center"|[[MapleStory/Monsters/Level 131-140#Soul of Horntail|Soul of Horntail]] | |||
|[[ | |- | ||
|[[File:MS Monster Dead Horntail's Head A.png|center]] | |||
|[[File:MS Monster Dead Horntail's Head B.png|center]] | |||
|[[File:MS Monster Dead Horntail's Head C.png|center]] | |||
|- | |||
|[[MapleStory/Monsters/Level 131-140#Dead Horntail's Head A|Dead Horntail's Head A]] | |||
|[[MapleStory/Monsters/Level 131-140#Dead Horntail's Head B|Dead Horntail's Head B]] | |||
|[[MapleStory/Monsters/Level 131-140#Dead Horntail's Head C|Dead Horntail's Head C]] | |||
|- | |||
|[[File:MS Monster Dead Horntail's Left Hand.png|center]] | |||
|[[File:MS Monster Dead Horntail's Wings.png|center|250px]] | |||
|[[File:MS Monster Dead Horntail's Right Hand.png|center]] | |||
|- | |||
|[[MapleStory/Monsters/Level 131-140#Dead Horntail's Left Hand|Dead Horntail's Left Hand]] | |||
|[[MapleStory/Monsters/Level 131-140#Dead Horntail's Wings|Dead Horntail's Wings]] | |||
|[[MapleStory/Monsters/Level 131-140#Dead Horntail's Right Hand|Dead Horntail's Right Hand]] | |||
|- | |||
|colspan="3"|[[File:MS Monster Dead Horntail's Legs.png|center|250px]] | |||
|- | |||
|colspan="3" style="text-align:center"|[[MapleStory/Monsters/Level 131-140#Dead Horntail's Legs|Dead Horntail's Legs]] | |||
|- | |||
|colspan="3"|[[File:MS Monster Dead Horntail's Tails.png|center]] | |||
|- | |- | ||
| | |colspan="3" style="text-align:center"|[[MapleStory/Monsters/Level 131-140#Dead Horntail's Tails|Dead Horntail's Tail]] | ||
|} | |} | ||
{| | |||
|[[ | ===[[File:MS Mob Icon Pink Bean.png]]Pink Bean=== | ||
|[[ | Found at the end of the [[MapleStory/Towns/Temple of Time|Temple of Time]] of Ossyria. | ||
While a mysterious man named Kirston attempts to summon the Black Mage using the Goddess's Mirror, he accidentally ends up summoning Pink Bean. | |||
{|{{prettytable|notwide=1}} | |||
|[[File:MS Monster Solomon the Wise.png|center]] | |||
|[[File:MS Monster Rex the Wise.png|center]] | |||
|- | |||
|[[MapleStory/Monsters/Level 171-180#Solomon the Wise|Solomon the Wise]] | |||
|[[MapleStory/Monsters/Level 171-180#Rex the Wise|Rex the Wise]] | |||
|- | |||
|[[File:MS Monster Hugin.png|center]] | |||
|[[File:MS Monster Ariel.png|center]] | |||
|[[File:MS Monster Munin.png|center]] | |||
|- | |||
|[[MapleStory/Monsters/Level 171-180#Hugin|Hugin]] | |||
|[[MapleStory/Monsters/Level 171-180#Ariel|Ariel]] | |||
|[[MapleStory/Monsters/Level 171-180#Munin|Munin]] | |||
|- | |||
|[[File:MS Monster Pink Bean.png|center]] | |||
|- | |||
|[[MapleStory/Monsters/Level 171-180#Pink Bean|Pink Bean]] | |||
*Summons [[#Mini Bean|Mini Bean]] | |||
|- | |||
|[[File:MS Monster Mini Bean.png|center]] | |||
|- | |- | ||
|[[MapleStory/Monsters/Level | |[[MapleStory/Monsters/Level 141-150#Mini Bean|Mini Bean]] | ||
|} | |} | ||
{| | ===[[File:MS Mob Icon Pink Bean.png]]Chaos Pink Bean=== | ||
|[[ | Found at the end of the [[MapleStory/Towns/Temple of Time|Temple of Time]] of Ossyria. | ||
|[[ | While a mysterious man named Kirston attempts to summon the Black Mage using the Goddess's Mirror, he accidentally ends up summoning Pink Bean. | ||
|[[ | |||
{|{{prettytable|notwide=1}} | |||
|[[File:MS Monster Solomon the Wise.png|center]] | |||
|[[File:MS Monster Rex the Wise.png|center]] | |||
|- | |||
|[[MapleStory/Monsters/Level 181-190#Chaos Solomon the Wise|Chaos Solomon the Wise]] | |||
|[[MapleStory/Monsters/Level 181-190#Chaos Rex the Wise|Chaos Rex the Wise]] | |||
|- | |||
|[[File:MS Monster Hugin.png|center]] | |||
|[[File:MS Monster Ariel.png|center]] | |||
|[[File:MS Monster Munin.png|center]] | |||
|- | |||
|[[MapleStory/Monsters/Level 181-190#Chaos Hugin|Chaos Hugin]] | |||
|[[MapleStory/Monsters/Level 181-190#Chaos Ariel|Chaos Ariel]] | |||
|[[MapleStory/Monsters/Level 181-190#Chaos Munin|Chaos Munin]] | |||
|- | |||
|[[File:MS Monster Pink Bean.png|center]] | |||
|- | |||
|[[MapleStory/Monsters/Level 181-190#Chaos Pink Bean|Chaos Pink Bean]] | |||
*Summons [[#Chaos Mini Bean|Chaos Mini Bean]] | |||
|- | |||
|[[File:MS Monster Mini Bean.png|center]] | |||
|- | |- | ||
|[[MapleStory/Monsters/Level | |[[MapleStory/Monsters/Level 181-190#Chaos Mini Bean|Chaos Mini Bean]] | ||
|} | |} | ||
{| | ===[[File:MS Mob Icon Balrog.png]]Balrog=== | ||
|[[ | An evil spirit was once sealed in the Underground Temple in [[MapleStory/Towns/Sleepywood|Sleepywood]] by Tristan, a legendary hero who died in place of Manji because of this evil spirit, Balrog. However, Balrog has been resurrected from the Darkness, the reason behind its resurrection is not known. Upon Balrog's death it mentions that one day his full power will be return to him and rule the Maple World again, implying that we will see more of Balrog in the future. | ||
|[[ | {|{{prettytable|notwide=1}} | ||
|colspan="2"|[[File:MS_Monster Balrog.png|center]] | |||
|- | |||
|colspan="2" style="text-align:center"|[[MapleStory/Monsters/Level 41-50#Balrog|Balrog]] | |||
|- | |||
|[[File:MS_Monster Balrog's Left Hand.png|center]] | |||
|[[File:MS_Monster Balrog's Right Hand.png|center]] | |||
|- | |||
|[[MapleStory/Monsters/Level 41-50#Balrog's Left Hand|Balrog's Left Hand]] | |||
|[[MapleStory/Monsters/Level 41-50#Balrog's Right Hand|Balrog's Right Hand]] | |||
|- | |||
|colspan="2"|[[File:MS_Monster Balrog's Soul.png|center]] | |||
|- | |||
|colspan="2" style="text-align:center"|[[MapleStory/Monsters/Level 41-50#Balrog's Soul|Balrog's Soul]] | |||
|- | |||
|[[File:MS_Monster Balrog's Dead Left Hand.png|center]] | |||
|[[File:MS_Monster Balrog's Dead Right Hand.png|center]] | |||
|- | |- | ||
|[[MapleStory/Monsters/Level | |[[MapleStory/Monsters/Level 1-10#Balrog's Dead Left Hand|Balrog's Dead Left Hand]] | ||
|[[MapleStory/Monsters/Level 1-10#Balrog's Dead Right Hand|Balrog's Dead Right Hand]] | |||
|[[MapleStory/Monsters/Level | |} | ||
===[[File:MS Mob Icon Von Leon.png]]Von Leon=== | |||
Von Leon was once the king of an El Nathian village, and ruled alongside his wife Ifia. A century ago, Ifia was murdered, and he found a Cygnus Knight crest on her body, making him believe they murdered her. With this, he seeked revenge, and joined the Black Mage, who set up the murder to make it look like the Cygnus Knights did it. When the Black Mage was sealed, Von Leon cast a spell to kill everyone in his village and to conceal his cancel until the Black Mage's return. Most of the villagers, now ghosts, could not rest in peace due to Von Leon turning into a villain, and decided it was time for his demise. His dead wife, Ifia, tries to talk to Von Leon but he does not see her because he became too much of a villain. | |||
{|{{prettytable|notwide=1}} | |||
![[File:MS Monster Von Leon.png|center]] | |||
[[MapleStory/Monsters/Level 121-130#Von Leon|Von Leon]] | |||
| | |||
;Summons | |||
[[File:MS Monster Mini Castle Golem.png]] [[MapleStory/Monsters/Level 121-130#Mini Castle Golem|Mini Castle Golem]] | |||
[[File:MS Monster Prison Guard Boar.png]] [[MapleStory/Monsters/Level 121-130#Prison Guard Boar|Prison Guard Boar]] | |||
[[File:MS Monster Prison Guard Rhino.png]] [[MapleStory/Monsters/Level 121-130#Prison Guard Rhino|Prison Guard Rhino]] | |||
|} | |||
===[[File:MS Mob Icon Cygnus.png]][[File:MS Mob Icon Mihile.png]][[File:MS Mob Icon Oz.png]][[File:MS Mob Icon Irena.png]][[File:MS Mob Icon Eckhart.png]][[File:MS Mob Icon Hawkeye.png]]Cygnus=== | |||
In the future, Cygnus became interested in the World Tree, and decided to search for it. When she found it, she fell into one of the Black Mage's traps. He corrupted Cygnus and her knights, leading to Ereve descending to Victoria Island due to it not being held up by Cygnus's magic. Empress Cygnus leads her knights on an attack on the rest of the Maple World. | |||
However, according to Shinsoo in the present, this future is not real and is instead one of the Black Mage's dreams. | |||
{|{{prettytable|notwide=1}} | |||
![[File:MS Monster Cygnus.png|center]] | |||
[[MapleStory/Monsters/Level 181-190#Cygnus|Cygnus]] | |||
| | |||
;Summons | |||
[[File:MS Monster Mihile.png]] [[MapleStory/Monsters/Level 181-190#Mihile|Mihile]] | |||
[[File:MS Monster Oz.png]] [[MapleStory/Monsters/Level 181-190#Oz|Oz]] | |||
[[File:MS Monster Irena.png]] [[MapleStory/Monsters/Level 181-190#Irena|Irena]] | |||
[[File:MS Monster Eckhart.png]] [[MapleStory/Monsters/Level 181-190#Eckhart|Eckhart]] | |||
[[File:MS Monster Hawkeye.png]] [[MapleStory/Monsters/Level 181-190#Hawkeye|Hawkeye]] | |||
| | |||
;Summons | |||
[[File:MS Monster Mihile.png]] [[MapleStory/Monsters/Level 181-190#Mihile 2|Mihile 2]] | |||
[[File:MS Monster Oz.png]] [[MapleStory/Monsters/Level 181-190#Oz 2|Oz 2]] | |||
[[File:MS Monster Irena.png]] [[MapleStory/Monsters/Level 181-190#Irena 2|Irena 2]] | |||
[[File:MS Monster Eckhart.png]] [[MapleStory/Monsters/Level 181-190#Eckhart 2|Eckhart 2]] | |||
[[File:MS Monster Hawkeye.png]] [[MapleStory/Monsters/Level 181-190#Hawkeye 2|Hawkeye 2]] | |||
| | |||
;Summons | |||
[[File:MS Monster Advanced Knight A.png]] [[MapleStory/Monsters/Level 181-190#Advanced Knight A|Advanced Knight A]] | |||
[[File:MS Monster Advanced Knight B.png]] [[MapleStory/Monsters/Level 181-190#Advanced Knight B|Advanced Knight B]] | |||
[[File:MS Monster Advanced Knight C.png]] [[MapleStory/Monsters/Level 181-190#Advanced Knight C|Advanced Knight C]] | |||
[[File:MS Monster Advanced Knight D.png]] [[MapleStory/Monsters/Level 181-190#Advanced Knight D|Advanced Knight D]] | |||
[[File:MS Monster Advanced Knight E.png]] [[MapleStory/Monsters/Level 181-190#Advanced Knight E|Advanced Knight E]] | |||
[[File:MS Monster Shinsoo.png]] [[MapleStory/Monsters/Level 181-190#Shinsoo|Shinsoo]] | |||
|} | |} | ||
{| | ===[[File:MS Mob Icon Arkarium.png]][[File:MS Mob Icon Duplicate in Twisted Darkness.png]]Arkarium=== | ||
|[[ | Arkarium is another one of the Black Mage's commanders. He is responsible for the Mystic Gates appearing throughout Maple World. He attempts to unseal the Black Mage by traveling through the Crack in Time in Temple of Time, and must be stopped by the people of Maple World. | ||
{|{{prettytable|notwide=1}} | |||
|[[File:MS Monster Arkarium.png|center]] | |||
|- | |- | ||
|[[MapleStory/Monsters/Level | |[[MapleStory/Monsters/Level 161-170#Arkarium|Arkarium]] | ||
|} | |} | ||
;Summons | |||
{| | {|{{prettytable|notwide=1}} | ||
|[[ | |[[File:MS Monster Netherworld Monk.png|center]] | ||
|[[File:MS Monster Duplicate in Twisted Darkness.png|center]] | |||
|- | |- | ||
|[[MapleStory/Monsters/Level | |[[MapleStory/Monsters/Level 131-140#Netherworld Monk|Netherworld Monk]] | ||
|[[MapleStory/Monsters/Level 121-130#Duplicate in Twisted Darkness|Duplicate in Twisted Darkness]] | |||
|} | |} | ||
{| | ===[[File:MS Mob Icon Hilla.png]]Hilla=== | ||
|[[ | Hilla is another one of the Black Mage's commanders. She used to be a chief shamaness of Azwan until she decided to hand over the city of Azwan to the Black Mage, receiving infinite power, youth, and beauty in return. She revived the dead population of Azwan to use as her army. | ||
{|{{prettytable|notwide=1}} | |||
![[File:MS Monster Hilla.png|center]] | |||
[[MapleStory/Monsters/Level 111-120#Hilla|Hilla (Normal)]] | |||
|style="text-align:center"| | |||
;Summons | |||
[[File:MS Monster Spearman Skeleknight.png]]<br />[[MapleStory/Monsters/Level 101-110#Elite Pikeman Skeleknight|Elite Pikeman Skeleknight]] | |||
[[File:MS Monster Elite Spearman Skeleknight.png]]<br />[[MapleStory/Monsters/Level 101-110#Elite Pikeman Skeleknight|Elite Pikeman Skeleknight]] | |||
|colspan="2" style="text-align:center"| | |||
;Summons | |||
[[File:MS Monster Deadly Altar.png]]<br />[[MapleStory/Monsters/Level 111-120#Deadly Altar|Deadly Altar]] | |||
|- | |- | ||
|[[MapleStory/Monsters/Level | |||
![[File:MS Monster Hilla.png]]<br />[[MapleStory/Monsters/Level 181-190#Hilla|Hilla (Hard)]] | |||
[[File:MS Monster Hilla (Gray Maiden).png]]<br />[[MapleStory/Monsters/Level 181-190#Hilla (Gray Maiden)|Hilla (Gray Maiden)]] | |||
|style="text-align:center"| | |||
;Summons | |||
[[File:MS Monster Spearman Skeleknight.png]]<br />[[MapleStory/Monsters/Level 181-190#Pikeman Skeleknight|Pikeman Skeleknight]] | |||
[[File:MS Monster Azwan Ghost.png]]<br />[[MapleStory/Monsters/Level 181-190#Azwan Ghost|Azwan Ghost]] | |||
|style="text-align:center"| | |||
;Summons | |||
[[File:MS Monster Deadly Altar.png]]<br />[[MapleStory/Monsters/Level 181-190#Deadly Altar|Deadly Altar]] | |||
|style="text-align:center"| | |||
;Summons | |||
[[File:MS Monster Bloodfang.png]]<br />[[MapleStory/Monsters/Level 181-190#Bloodfang|Bloodfang]]<br /> | |||
[[File:MS Monster Elite Bloodfang.png]]<br />[[MapleStory/Monsters/Level 181-190#Bloodfang|Bloodfang]] | |||
|} | |} | ||
===[[File:MS Mob Icon Magnus.png]][[File:MS Mob Icon Magnus Hard.png]]Magnus=== | |||
Magnus is yet another one of the Black Mage's commanders. He has been exiled from Grandis for a century due to abusing his powers. Assisting Darmoor, the Transcendence of Life in Grandis, he weakened Heliseum in exchange for power and leading Specters toward it. The former Kaiser sacrificed himself to destroy Magnus's army, and severely weaken Magnus. However, Darmoor's power helped Magnus recover, eventually reaching his full power again and stealing the former Kaiser's sword, granting him even more power. Now it is up to the current Kaiser, Angelic Buster, and the Maple World to stop him once and for all. | |||
|[[ | {|{{prettytable|notwide=1}} | ||
|[[ | |[[File:MS Monster Magnus.png|center]] | ||
|[[File:MS Monster Magnus.png|center]] | |||
|- | |- | ||
|[[MapleStory/Monsters/Level | |[[MapleStory/Monsters/Level 121-130#Magnus|Magnus (Normal)]] | ||
|[[MapleStory/Monsters/Level 181-190#Magnus|Magnus (Hard)]] | |||
|[[MapleStory/Monsters/Level | |||
|} | |} | ||
===Root Abyss=== | |||
When Damian sealed up Alicia the World Tree in Root Abyss, he left behind four seal guardians to prevent Alicia from escaping and regaining her abilities by contaminating the Root Abyss with darkness. It is up to Maple World to rescue Alicia from these bosses. | |||
|[[ | ====[[File:MS Mob Icon Von Bon.png]]Von Bon==== | ||
*The first of the four seal guardians is Von Bon, the time magician. His trademark attack involves summoning cracks in time, which are large clocks that appear in random spots on the field. The affect on the timer depends on the color of the clock Von Bon is standing on. For each white clock he stands on, the timer decreases by 7 seconds. For each black clock he stands on, the timer increases by 7 seconds. The timer will stay the same if he stands on both at once, however. Once his health is low enough, he stops using these clocks. He can also use a skill that sends you to a spot you were previously standing or located at. This attack can be dangerous depending on the direction his attacks go. | |||
*He has several deadly attacks. One of them involves whacking you with his staff up close. This attack isn't as dangerous, however. Another attack involves firing a white orb from his staff, which takes away a high % of your HP, even killing some people. This can be avoided by ducking (not possible for jobs such as Mechanics) or jumping over it. Another involves him jumping into the air and pounding the ground, which takes away a higher % of your HP. This can be simply avoided by jumping. His last attack involves him teleporting to a random spot and creating a tornado around him which causes super knockback and deals a fixed % of your HP, though not as much. Melee classes will have a hard time with this attack, since they most likely won't be able to get close enough to attack him. | |||
{|{{prettytable|notwide=1}} | |||
|[[File:MS Monster Von Bon.png|center]] | |||
|- | |- | ||
|[[MapleStory/Monsters/Level 111- | |[[MapleStory/Monsters/Level 111-120#Von Bon|Von Bon]] | ||
|} | |} | ||
{{-}} | |||
{| | ====[[File:MS Mob Icon Von Bon.png]]Chaos Von Bon==== | ||
|[[ | {|{{prettytable|notwide=1}} | ||
|[[File:MS Monster Von Bon.png|center]] | |||
|- | |- | ||
| | |Von Bon | ||
|} | |} | ||
{{-}} | |||
{| | ====[[File:MS Mob Icon Pierre.png]][[File:MS Mob Icon Red Pierre.png]][[File:MS Mob Icon Blue Pierre.png]]Pierre==== | ||
|[[ | {|{{prettytable|notwide=1}} | ||
|[[File:MS Monster Pierre.png|center]] | |||
|- | |- | ||
| | |Pierre | ||
|} | |} | ||
{{-}} | |||
{| | ====[[File:MS Mob Icon Crimson Queen.png]]Crimson Queen==== | ||
|[[ | {|{{prettytable|notwide=1}} | ||
|[[File:MS Monster Wrathful Crimson Queen.png|center]] | |||
|- | |- | ||
| | |Crimson Queen | ||
|} | |} | ||
{{-}} | |||
{| | ====[[File:MS Mob Icon Vellum.png]]Vellum==== | ||
|[[ | {|{{prettytable|notwide=1}} | ||
|[[File:MS Monster Vellum.png|center]] | |||
|- | |- | ||
| | |Vellum | ||
|} | |} | ||
{{-}} | |||
{{Footer Nav|game=MapleStory|prevpage=Complete monster list|nextpage=Event monsters}} | |||
Latest revision as of 12:15, 15 February 2024
This is a listing of all the bosses in the game.
Area Bosses/Theme Dungeon Bosses
Area Bosses are boss monsters which spawn on their own in a hunting area near a town. Theme Dungeon Bosses are bosses of their respective theme dungeon, found in an instanced map to prevent kill stealing. They are usually themed after the monsters they spawn with in that town. Most players are capable of soloing these bosses when they are close to its level.
Victoria Island
These are the bosses found on Victoria Island, the first continent where bosses are located. Every main town and theme dungeon on Victoria Island has a boss associated with it, with the exception of Nautilus Harbor, even though it is connected to Florina Beach.
 Lith Harbor
Found at "Port Road: Forest Trail 2" near Lith Harbor.
 |
| Mano |

 Henesys
Mushmom is found at "Singing Mushroom Forest: Mushmom Forest Trail", directly accessible by walking right from Henesys. It is one of the oldest bosses in the game. Blue Mushmom spawns at "Blue Mushmom Forest" and is slightly stronger than the ordinary Mushmom.
 |
 |
| Mushmom | Blue Mushmom |
 Mushroom Castle
The boss of Mushroom Castle is the Black Viking, who helps the Prime Minister kidnap Violetta once again.
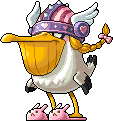 |
| Black Viking |
 Perion
Found at "North Rocky Mountain: Gusty Peak" near Perion.
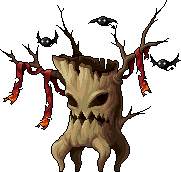 |
| Stumpy |
 Kerning City
Found in "Swamp Region : Unseen Danger" and "Swamp Region : Deep Mire" outside of Kerning City.
 |
| Dyle |
 Gold Beach
Found at "Shady Beach" at the end of Gold Beach.
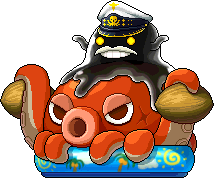 |
| Captain Darkgoo |

 Sleepywood
Zombie Mushmom is found at Ant Tunnel Square near the Swamps of Sleepywood. Jr. Balrog are found at the Cursed Sanctuary at the end of Sleepywood. It, too, is one of the oldest bosses. Snack Bar is located at Drake Cave: Cave Exit.
 |
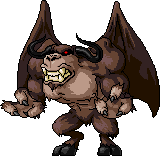 |
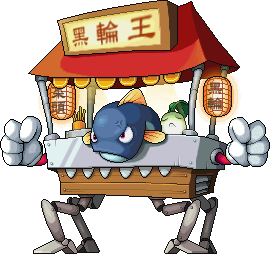 |
| Zombie Mushmom | Jr. Balrog | Snack Bar |
Ossyria
Ellinia-Orbis Ship
Crimson Balrogs sometimes appear on the Ship from Ellinia to Orbis, or vice-versa. Crimson Balrog is a flying enemy that travels in pairs and raids ships trying to carry passengers or cargo between Ossyria and Victoria Island.
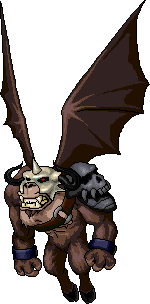 |
| Crimson Balrog |
 Orbis
Orbis
Found at "Garden of Darkness 2" in Orbis' Cloud Park.
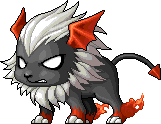 |
| Eliza |


 El Nath
Snow Witch is found at "Icy Cold Field". Nyalmo is found at "Sharp Cliff 3". Lich is found at "Forest of Dead Trees IV".
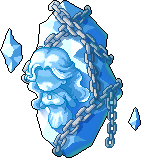 |
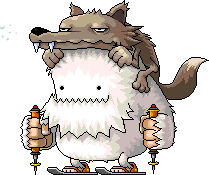 |
 |
| Snow Witch | Nyalmo | Lich |
 The Lion King's Castle
The boss of the theme dungeon part of Lion King's Castle. Found at Ani's Jail.
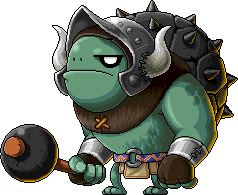
|
| Prison Guard Ani |
 Aqua Road
Found at Aqua Road: Seaweed Tower, very close to town.
 |
| Seruf |
 Ludibrium
Rombot is found in the Eos Tower, in a hidden street off the 4th floor. Timer is found at Lost Time <2> in the Clock Tower.
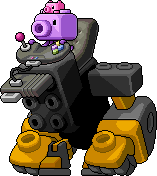 |
 |
| Rombot | Timer |

 Ellin Forest
Chao can be found at "Ellin Forest : Deep Inside the Cave". Ephenia is found at "Ellin Forest : Queen's Hiding Place".
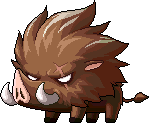 |
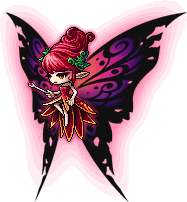 |
| Chao | Ephenia |

 Fantasy Theme World
- Located at the end of Fantasy Theme World in the Fantastic Animal Show.
- Summons Ratacula and Creeper Scarlion respectively.

|

|

|
| Targa | Angry Targa | Summons Ratacula |

|
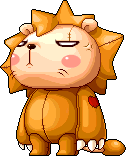
|

|
| Scarlion Boss | Angry Scarlion Boss | Summons Creeper Scarlion |


 Leafre
Manon and Griffey are found in Leafre near Kentauruses. Leviathan is an Area Boss that spawns in its own map, the Leviathan's Gorge.
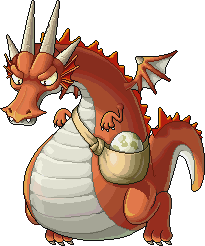 |
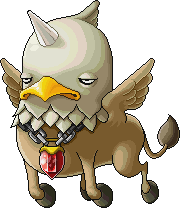 |
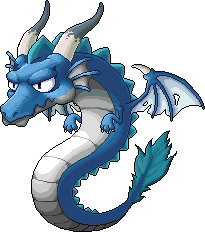 |
| Manon | Griffey | Leviathan |


 Mu Lung
Master Dummy spawns at the end of the Practice Field in a Mystic Gate located at "Practice Field : Advanced Level", Tae Roon spawns at the end of the Wild Bear area in a map called "Territory of Wandering Bear", and King Sage Cat spawns at the map called "Goblin Forest 1" of Mu Lung.
 |
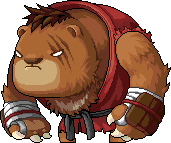 |
 |
| Master Dummy | Tae Roon | King Sage Cat |

 Herb Town
Bamboo Warrior spawns at "60-Year-Old Herb Garden". Giant Centipede spawns at "80-Year-Old Herb Garden".
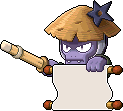 |
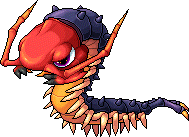 |
| Bamboo Warrior | Giant Centipede |

 Golden Temple
SnowFro is located at "SnowFro's Lair", at the end of the Forest of Training. Ravana is located at the end of the Goblin Caves. When defeated, a powerful helmet to prove it has been conquered can be acquired.

|
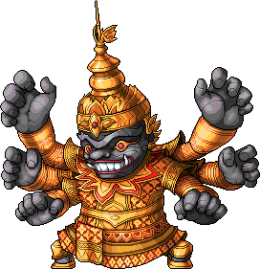
|
| SnowFro the Fruitnificent | Ravana |
 Ariant
Found at "Dry Desert" in Ariant.
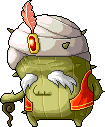 |
| Deo |

 Magatia
Rurumo spawns at "Lab - Unit 103" on the Zenumist Side. Security Camera spawns at "Lab - Area C-1" on the Alcadno Side. Chimera spawns at a map linking the Zenumist and Alcadno Laboratories, called "Lab - Secret Basement Path". Magatia.
 |
 |
 |
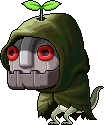 |
| Rurumo | Security Camera | Chimera |


 Temple of Time
These are found at the end of their respective element areas in Temple of Time.
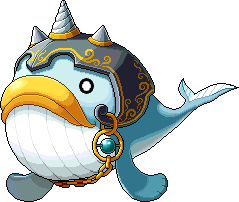 |
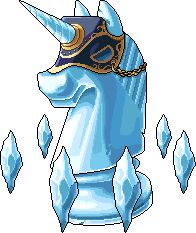 |
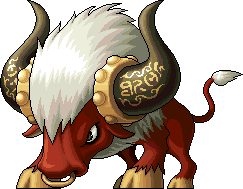 |
Dodo
|
Lilynouch
|
Lyka
|
 Twilight Perion
Found at "Tempest Grave" at Twilight Perion.
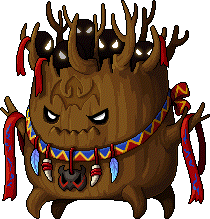 |
| Ghostwood Stumpy |
Grandis


 Heliseum
Each of these bosses can be found at the end of their respective area in the Tyrant's Castle.
 |
 |
 |
| Treglow | Victor | Velderoth |
Masteria
 Alien Invasion
This is the boss of the New Leaf City alien area.
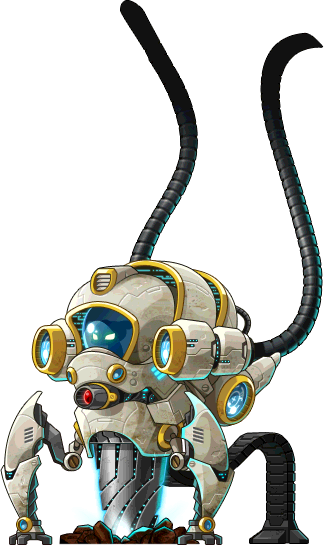
|
|---|
| Galacto-Drill |

 Haunted House and Crimsonwood/Phantom Forest
Spawns at Phantom Forest: Twisted Paths, near the town of Crimsonwood Keep. In a rare exception, both these bosses spawn on a large number of maps throughout the forest, to give the illusion that they are one monster moving throughout at random. Headless Horseman also spawns at Phantom Forest: Hollowed Ground, near the town of Haunted House.
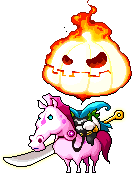 |
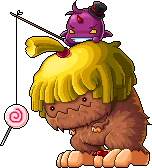 |
| Headless Horseman | Bigfoot |
World Tour
Zipangu
Mushroom Shrine
The boss of Mushroom Shrine is, fittingly, the most powerful Mushroom monster in the game, and also one of those with the spawn of 23 to 48 hours.
 |
| Blue Mushmom |
Black Crow is found at the Buddha Shrine/Pine Forest area of Zipangu's Mushroom Shrine.
| Black Crow |
 Showa Town
The Yakuza are the Japanese version of the Mafia. Found in Zipangu's Showa Town. Bodyguard A will transform into Bodyguard B and subsequently into The Boss when killed.
Singapore
 CBD Ulu City
- Located at the end of Ulu City in a special area called Ruin of Krexel. It's so huge that the only way to get close enough to attack it is to actually stand on it. It's even bigger than it appears here.

|
| Krexel |

|
| Krexel |

|
| Krexel |
 Boat Quay Town
- Located at the end of Boat Quay Town inside the Ghost Ship.
- Summons Selkie Jr. and Mr. Anchor.

|

|

|
| Capt. Latanica | Summons Mr. Anchor |

 Malaysia
Kampung Village Fantasy Theme Park
- Located at the end of Fantasy Theme Park in an area called "Spooky World". Once defeated, they will drop helmets which have similar stats to the Zakum Helm.
- Summons Ratatula and Scaredy Scarlion respectively.

|

|

|

|
| Targa | Angry Targa | Furious Targa | Summons Ratatula |

|

|

|

|
| Scarlion Boss | Angry Scarlion Boss | Furious Scarlion Boss | Summons Scaredy Scarlion |
Party Quests
Party Quests are cooperative tasks where a group of people progress through a series of challenges which normally culminates in a boss fight. More specific information on the stages preceding these boss fights can be found on the Party Quests page.
 King Slime
The boss of First Time Together, for levels 50 and up.
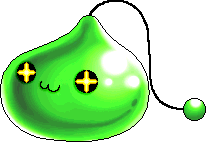
|
|---|
 Alishar
The boss of Dimensional Crack, for levels 50 and up.
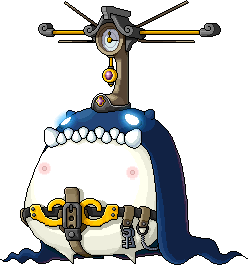
|
|
|---|
 Papa Pixie
The boss of Remnant of the Goddess, for levels 70 and up.
 |
   |
|---|

 Frankenroid
Two possible bosses of Romeo and Juliet, for levels 70 and higher.
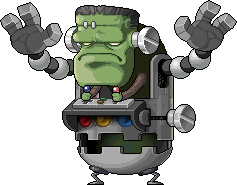 |
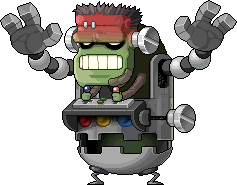 |
| Frankenroid | Angry Frankenroid |
- Summons
 |
 |
| Reinforced Iron Mutae | Reinforced Mithril Mutae |


 Poison Golem
The boss of the Forest of Poison Haze, for levels 100 and up. Defeating one form will cause the next to appear.
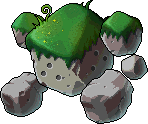 |
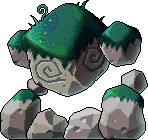 |
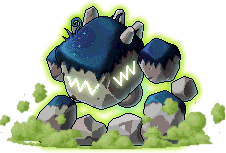 |
| Poison Golem | Charged Poison Golem | Super-Charged Poison Golem |
- Summons
 |
 |
 |
| Poison Golem Level 2 | Poison Golem Level 3 | Spright |
 Lord Pirate
Two possible bosses of the Lord Pirate party quest, for levels 100 and up.
 |
 |
| Lord Pirate | Angry Lord Pirate |

 Dragonoir & Dragon Rider
The bosses of the Dragon Rider for levels 120 and up.
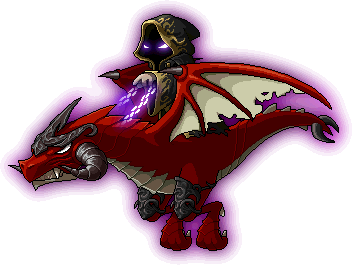 |
 |
| Dragonoir | Dragon Rider |
 Rex
Rex
The boss of the party quest in El Nath, for levels 150 and up.
 |
| Rex |
- Summons
 |
 |
| Combat Hoblin | Ferocious Hoblin |
 Geist Balrog
This is the boss of the MapleStory/Amorian Challenge Party Quest, for married characters over the level of 40.
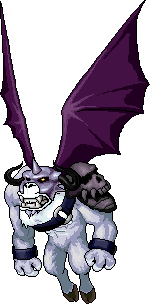 |
| Geist Balrog |


 Twisted Masters
These are fought at the very end of the Crimsonwood Keep Party Quest.
 |
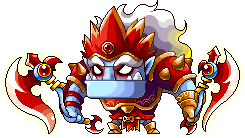 |
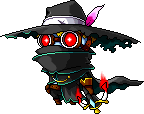 |
 |
| Margana | Red Nirg | Rellik | Hsalf |
After Red Nirg's defeat, two ninjas are summoned
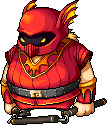 |
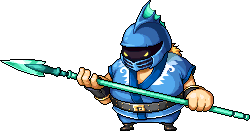 |
| Scarlet Phoenix | Azure Ocelot |
In the JMS version, Scarlet Phoenix and an Azure Ocelot need to be killed for a entry into the Keep.
JMS Version has another Twisted Master, Nagrom.
 |
| Nagrom |
Job Advancement Bosses
Adventurers
3rd job
Each adventurer must beat their job's trainer to complete the third job advancement. These can only be accessed by players on the Third job test, through a hidden map accessed by a portal to another dimension.
- Summons
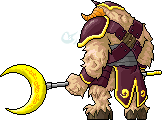 |
 |
| Tauromacis | Shadow Kyrin's Clone |
4th job
Each adventurer must beat a special version of Manon and Griffey to complete the fourth job advancement. These can be accessed by entering Manon and Griffey's regular forests. Note, nobody else can enter the map while you are inside it.
 |
 |
| Manon, Herald of Heroes | Griffey, Herald of Heroes |


 Resistance Bosses
These are bosses that are fought by the Resistance to advance their skills.
 |
 |
 |
| Schiller | Energy Conducting Device | Poison Gas Generator |
Major Bosses
These are the most powerful bosses in the game, and the most significant to the lore of the Maple World. All of them drop skills that are crucial to 4th job characters, and several give special items to prove that a player has conquered it. Their release typical marks a major step forward in a version's history.

 Pianus
Pianus is found at the Cave of Pianus through 'A Grave of a Wrecked Ship' at Aqua Dungeon. Go to a glowing doorway to enter 'A Dangerous Cave', which, at the end, you'll find Pianus, who spawns every 36 and 24 hours. The Right Pianus spawns every 24 hours, while his reflection, the weaker Left Pianus, is 36. MapleSEA recently released this description of Pianus:
"A heavenly fish who had once enjoyed the life of immortality, was banished into the world of MapleStory for eating up his friend simply because he was famished. Thrown into The Cave of Pianus, he is all alone, by himself, and would occasionally project an image of himself to relieve his loneliness."
Pianus can attack with a laser beam and a 10 ton metal block. He is also known as the Doom Flounder. To prove that a player has conquered Pianus, they can perform a quest which grants them the Red Musketeer Cape.
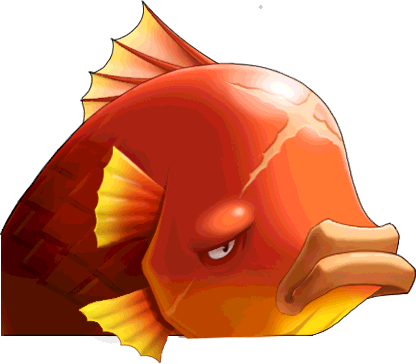 |
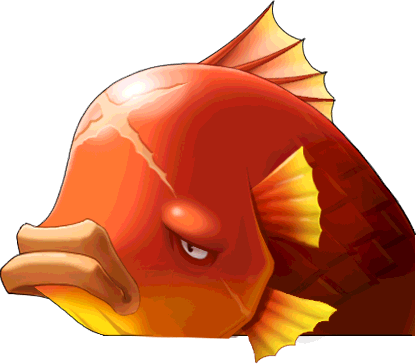 |
Pianus (Left Side)
|
Pianus (Right Side)
|
- Summons
 |
| Bloody Boom |
 Papulatus
The Papulatus, and related forms, are all located in the last map of Ludibrium's dungeon, The Clock Tower, called "Ludibrium: Deep Inside of Clock Tower". MapleSEA recently released this description of Papulatus:
"Papulatus Clock Boss is an evil monster who hogs the Time Sphere and likes to steal the power in Ludibrium. With him around in the Clock Tower, Ludibrium will never enjoy the peace and harmony they once had."
- Papulatus is a monster from the Maple World's parallel dimension. It entered through a crack in the dimension caused by Ludibrium's failing power supply, the Time Sphere, with several other monsters. The Time Sphere is made by mixing Tachions and Mysterious Powder, which is Papulatus' energy source as well. Papulatus contaminates these Tachions, draining the Time Sphere's power. Some of the other monsters that followed Papulatus through the Crack are carrying pieces of it, which are needed to seal the hole. Once the pieces have been acquired from these monsters, namely Gigantic Spirit Viking and Grim Phantom Watch, the crack can be repaired, causing Papulatus' escape route to be blocked and driving it into the open. Once this occurs, players can finally confront the monster that is disturbing the Maple World and end its leeching. However, once Papulatus has been defeated, there is still one last task: Eliminating the evil force that still remains in the contaminated Tachions. The only thing that can destroy such a dark aura is the fires of El Nath's volcanoes, so the Dark Tachions must be taken there. This force is what has caused the normally innocent toys of Ludibrium to transform into monsters. After all this, Ludus Lake will finally be able to return to normal.
Approach Mr. Bouffon at Path of Time in Ludibrium. He will let you know how to get to Papulatus Clock Boss. Papulatus attack with lightning bolts, a blast of flame and by chances turn players HP and MP to 1. It can also dispel everyone on the map, causing deadly situations for low hp classes. Upon completing Mr. Bouffon's quest, a player can obtain the Ludibrium cape as proof they have slain Papulatus.
 |
 |
 |
Summons |
| Time Sphere | Papulatus Clock
|
Papulatus | Low Dark Star |
 Zakum
Zakum
Zakum is located in the Dead Mines of El Nath, one of the main dungeons. Highly coveted by those above Level 100 for the exclusive Zakum Helmet. In a 4th Job Advancement quest, it tells the story of Zakum's rise.
Zakum was a spirit sealed in a tree deep in the mines of El Nath's volcano. A mining town that once existed nearby eventually discovered this tree. At the time, it had no malevolent notions, but the greed of the miners corrupted it. As the spirit was corrupted, it grew smarter, and finally became capable of controlling the town's populace. It forced them to build an enormous statue in tribute to it. The now evil spirit of Zakum possessed the statue, subjugated all the humans and eventually killed everyone in the town. Zakum now rests deep in the lava caves, waiting for powerful players to challenge his might.
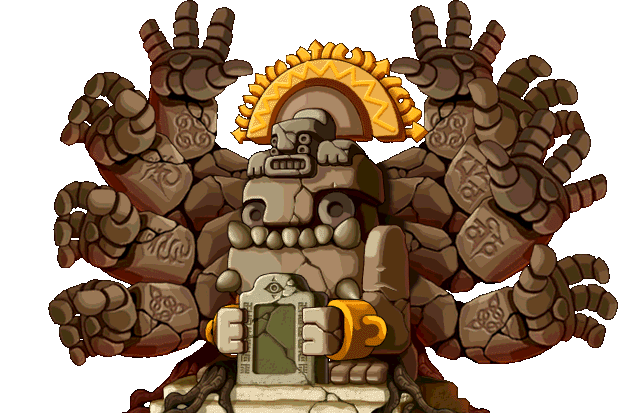 | ||
| Zakum (Whole Body) | ||
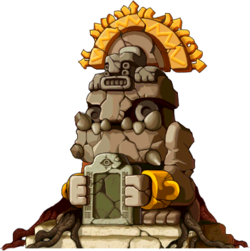 |
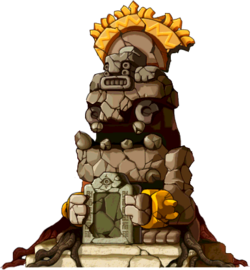 | |
| Zakum 1 | Zakum 2 | Zakum 3 |
 |
 |
Summons |
| Zakum's Arm 1 | Zakum's Arm 2 | Puco |
 |
 |
Summons |
| Zakum's Arm 3 | Zakum's Arm 4 | Punco |
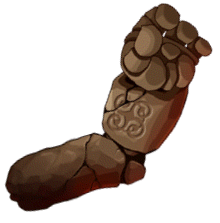 |
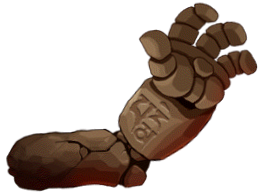 |
Summons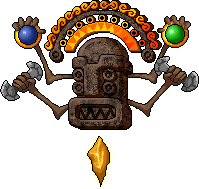 |
| Zakum's Arm 5 | Zakum's Arm 6 | Cuzco |
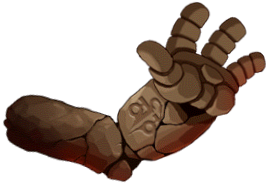 |
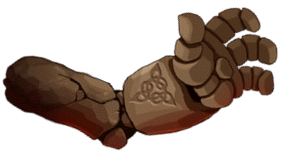 |
Summons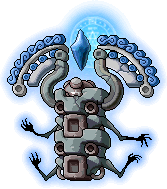 |
| Zakum's Arm 7 | Zakum's Arm 8 | Opachu |
| Summons | ||
| Boogie | ||
 Chaos Zakum
The same as Zakum, but stronger and has more skills such as Seduce, Zombify, Reverse Keys, and Potion Lock. It also drops the better Chaos Zakum Helmet.
 Horntail
Horntail is a powerful boss in the game. It drops a powerful necklace called the Horntail Necklace, which adds massive amounts to every stat. Located deep in Leafre, in the Cave of Life. Several Leafre quests reveal what has occurred to bring Horntail into battle.
The forest of Leafre is protected by the Nine Spirits dragon, a kind and gentle creature. The Nine Spirits Dragon has set up a barrier which shields the forest from evil. Horntail, a power hungry dragon, began to rebel against the Nine Spirits rule, and started uniting the evil dragons. This group of evil dragons began their assault on the town, almost entirely wiping out the Dragon Squad, a team of human fighters sent to defeat Horntail. This was a horribly disgraceful action coming from a Dragon. During this battle, Horntail gravely injured the old Nine Spirits, and took the egg of the Nine Spirits Dragon. He then hid out deep in the Cave of Life to recover his strength. Horntail's minions still overtook the Dragon Forest in Leafre. His evil power is so great that it has even gained the power to corrupt the other monsters, turning them pitch black. Now, the strongest players must band together to defeat this cruel dragon, save the Nine Spirits Dragon Egg, and protect Leafre once and for all.
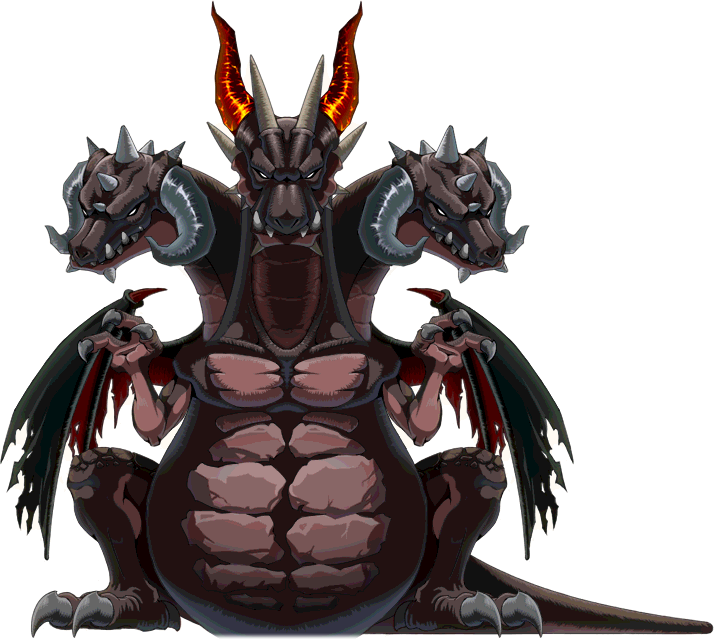 | ||
| Horntail | ||
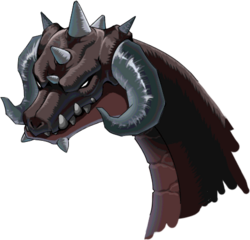 |
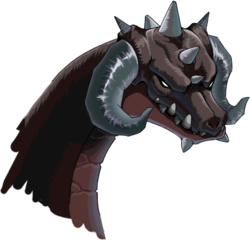 | |
| Horntail's Left Head | Horntail's Right Head | |
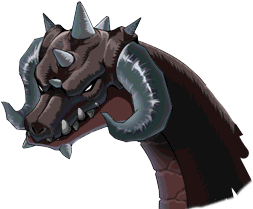 |
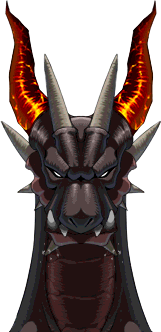 |
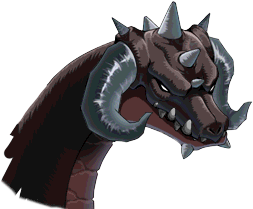 |
| Horntail's Head A | Horntail's Head B | Horntail's Head C |
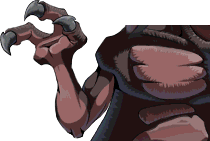 |
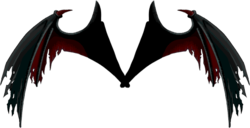 |
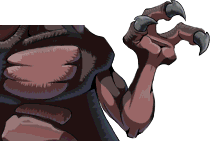 |
| Horntail's Left Hand | Horntail's Wings | Horntail's Right Hand |
 | ||
| Horntail's Legs | ||
 | ||
| Horntail's Tail | ||
 Chaos Horntail
Chaos Horntail is a stronger version of Horntail. It drops a powerful necklace called the Chaos Horntail Necklace, which adds massive amounts to every stat. Located deep in Leafre, in the Cave of Life.
 Pink Bean
Found at the end of the Temple of Time of Ossyria. While a mysterious man named Kirston attempts to summon the Black Mage using the Goddess's Mirror, he accidentally ends up summoning Pink Bean.
 |
 | |
| Solomon the Wise | Rex the Wise | |
 |
 |
 |
| Hugin | Ariel | Munin |
 | ||
Pink Bean
| ||
 | ||
| Mini Bean |
 Chaos Pink Bean
Found at the end of the Temple of Time of Ossyria. While a mysterious man named Kirston attempts to summon the Black Mage using the Goddess's Mirror, he accidentally ends up summoning Pink Bean.
 |
 | |
| Chaos Solomon the Wise | Chaos Rex the Wise | |
 |
 |
 |
| Chaos Hugin | Chaos Ariel | Chaos Munin |
 | ||
Chaos Pink Bean
| ||
 | ||
| Chaos Mini Bean |
 Balrog
An evil spirit was once sealed in the Underground Temple in Sleepywood by Tristan, a legendary hero who died in place of Manji because of this evil spirit, Balrog. However, Balrog has been resurrected from the Darkness, the reason behind its resurrection is not known. Upon Balrog's death it mentions that one day his full power will be return to him and rule the Maple World again, implying that we will see more of Balrog in the future.
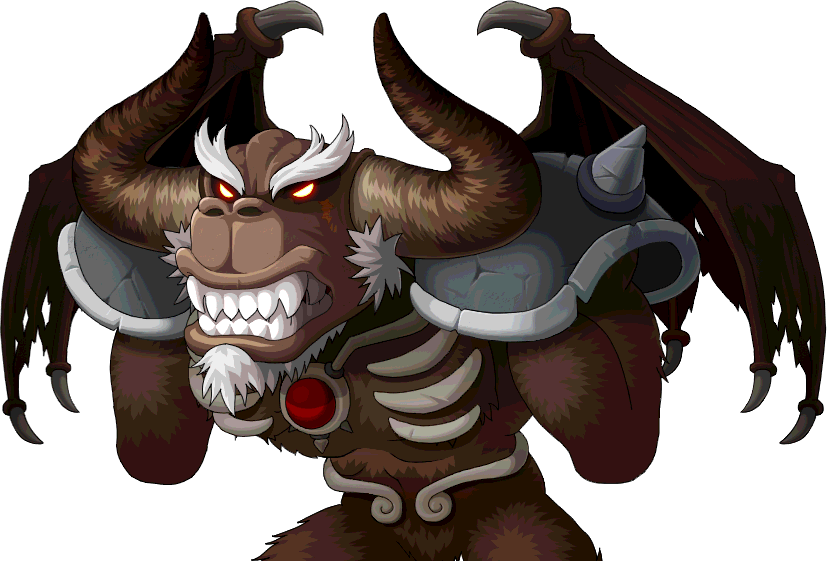 | |
| Balrog | |
 |
 |
| Balrog's Left Hand | Balrog's Right Hand |
 | |
| Balrog's Soul | |
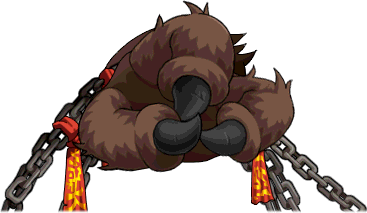 |
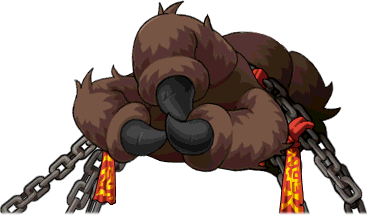 |
| Balrog's Dead Left Hand | Balrog's Dead Right Hand |
 Von Leon
Von Leon was once the king of an El Nathian village, and ruled alongside his wife Ifia. A century ago, Ifia was murdered, and he found a Cygnus Knight crest on her body, making him believe they murdered her. With this, he seeked revenge, and joined the Black Mage, who set up the murder to make it look like the Cygnus Knights did it. When the Black Mage was sealed, Von Leon cast a spell to kill everyone in his village and to conceal his cancel until the Black Mage's return. Most of the villagers, now ghosts, could not rest in peace due to Von Leon turning into a villain, and decided it was time for his demise. His dead wife, Ifia, tries to talk to Von Leon but he does not see her because he became too much of a villain.
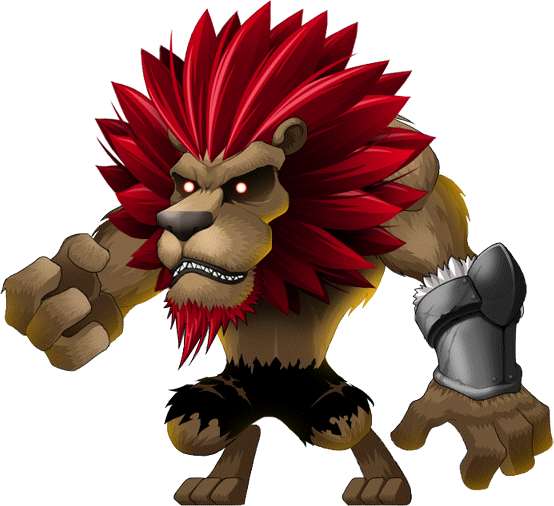 |
|
|---|


 Cygnus
In the future, Cygnus became interested in the World Tree, and decided to search for it. When she found it, she fell into one of the Black Mage's traps. He corrupted Cygnus and her knights, leading to Ereve descending to Victoria Island due to it not being held up by Cygnus's magic. Empress Cygnus leads her knights on an attack on the rest of the Maple World. However, according to Shinsoo in the present, this future is not real and is instead one of the Black Mage's dreams.
 |
|
|
|
|---|

 Arkarium
Arkarium is another one of the Black Mage's commanders. He is responsible for the Mystic Gates appearing throughout Maple World. He attempts to unseal the Black Mage by traveling through the Crack in Time in Temple of Time, and must be stopped by the people of Maple World.
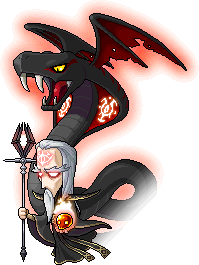 |
| Arkarium |
- Summons
 |
 |
| Netherworld Monk | Duplicate in Twisted Darkness |
 Hilla
Hilla
Hilla is another one of the Black Mage's commanders. She used to be a chief shamaness of Azwan until she decided to hand over the city of Azwan to the Black Mage, receiving infinite power, youth, and beauty in return. She revived the dead population of Azwan to use as her army.
 |
|
| |
|---|---|---|---|
 Hilla (Hard) |
|
|
|

 Magnus
Magnus is yet another one of the Black Mage's commanders. He has been exiled from Grandis for a century due to abusing his powers. Assisting Darmoor, the Transcendence of Life in Grandis, he weakened Heliseum in exchange for power and leading Specters toward it. The former Kaiser sacrificed himself to destroy Magnus's army, and severely weaken Magnus. However, Darmoor's power helped Magnus recover, eventually reaching his full power again and stealing the former Kaiser's sword, granting him even more power. Now it is up to the current Kaiser, Angelic Buster, and the Maple World to stop him once and for all.
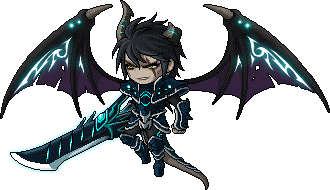 |
 |
| Magnus (Normal) | Magnus (Hard) |
Root Abyss
When Damian sealed up Alicia the World Tree in Root Abyss, he left behind four seal guardians to prevent Alicia from escaping and regaining her abilities by contaminating the Root Abyss with darkness. It is up to Maple World to rescue Alicia from these bosses.
 Von Bon
- The first of the four seal guardians is Von Bon, the time magician. His trademark attack involves summoning cracks in time, which are large clocks that appear in random spots on the field. The affect on the timer depends on the color of the clock Von Bon is standing on. For each white clock he stands on, the timer decreases by 7 seconds. For each black clock he stands on, the timer increases by 7 seconds. The timer will stay the same if he stands on both at once, however. Once his health is low enough, he stops using these clocks. He can also use a skill that sends you to a spot you were previously standing or located at. This attack can be dangerous depending on the direction his attacks go.
- He has several deadly attacks. One of them involves whacking you with his staff up close. This attack isn't as dangerous, however. Another attack involves firing a white orb from his staff, which takes away a high % of your HP, even killing some people. This can be avoided by ducking (not possible for jobs such as Mechanics) or jumping over it. Another involves him jumping into the air and pounding the ground, which takes away a higher % of your HP. This can be simply avoided by jumping. His last attack involves him teleporting to a random spot and creating a tornado around him which causes super knockback and deals a fixed % of your HP, though not as much. Melee classes will have a hard time with this attack, since they most likely won't be able to get close enough to attack him.
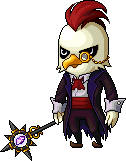 |
| Von Bon |
 Chaos Von Bon
 |
| Von Bon |


 Pierre
 |
| Pierre |
 Crimson Queen
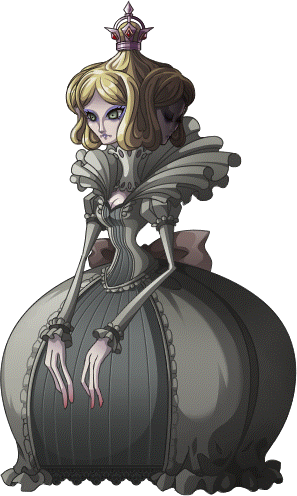 |
| Crimson Queen |
 Vellum
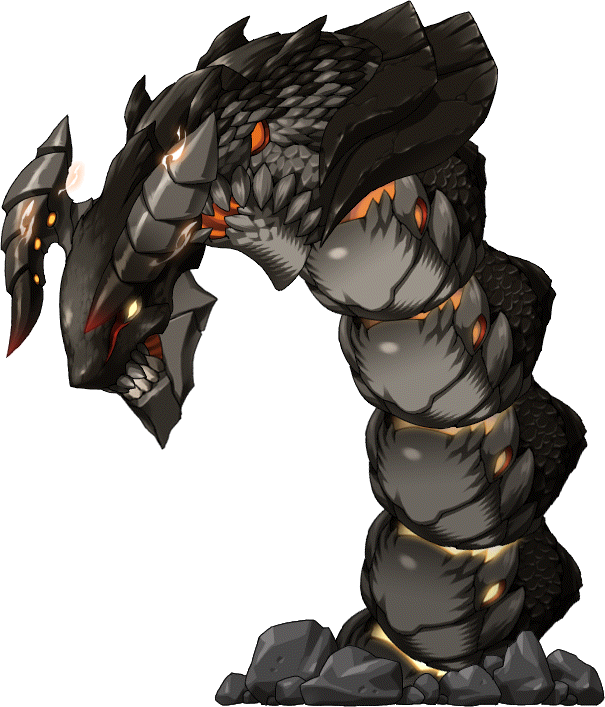 |
| Vellum |


