From StrategyWiki, the video game walkthrough and strategy guide wiki
Jump to navigation Jump to search
(Adding most of Dimension Invade PQ mobs)
(Fixing images)
 
(48 intermediate revisions by 5 users not shown)
Line 1: Line 1:
{{subpage|The content on this page should be only listed on each Party Quest's page, so move the sections there.}}
{{Header Nav|game=MapleStory|custom={{MapleStory/TOC/Monsters}}}}


{{floatingtoc}}
The monster stats vary based on your level, and the cores you use, going up to level 160.
These monsters can only be found in party quests. Their base stats are listed on this page, but they change based on the average level of the party. So just because a monster may have 2000 HP listed here, does NOT mean it will have that little HP inside the PQ.
 
The monsters are listed in order of appearance in the Party Quest, instead of by level.
The level range is the recommended range for doing these PQs, and the levels that the monsters can be (for example: for level 50-69, the monsters cannot go above 69.)
{{-}}
 
==Moon Bunny (Henesys PQ) Level 50-69==
{|{{prettytable}}
!Name||Monster Info||Notes
 
{{MapleStory/Monster|Pig||7|80|10|0|10|12|This version of Pig drops Primrose Seeds for the Moon Bunny PQ.}}
 
{{MapleStory/Monster|Ribbon Pig||10|125|10|0|10|17|This version of Ribbon Pig drops Primrose Seeds for the Moon Bunny PQ.}}
 
{{MapleStory/Monster|Stirge||6|65|10|0|10|10|In Moon Bunny PQ, you must protect the Moon Bunny from this, Flyeyes, and Goblin Fire.}}
 
{{MapleStory/Monster|Flyeye||9|95|10|0|10|13|In Moon Bunny PQ, you must protect the Moon Bunny from this, Stirges, and Goblin Fire..}}
 
{{MapleStory/Monster|Goblin Fire||11|150|20|1|20|19|In Moon Bunny PQ, you must protect the Moon Bunny from this, Stirges, and Flyeyes..}}
 
{{MapleStory/Monster|Moon Bunny|Ally|30|900|120|4|150|0|Must be protected in order to complete Moon Bunny PQ.|MS Monster Henesys Bunny.png}}
 
|}
 
==First Time Together (Kerning PQ) Level 50-69==
{|{{prettytable}}
!Name||Monster Info||Notes
 
{{MapleStory/Monster|Ligator||23|558|80|4|100|32|This must be killed in order to obtain Coupons for the first stage of Kerning PQ.}}
 
{{MapleStory/Monster|Curse Eye||25|630|80|4|100|36|}}
 
{{MapleStory/Monster|King Slime|Boss|28|23,000|120|4|150|110| The final foe in the Kerning City Party Quest. The King Slime possesses a ground-stomping earthquake attack, and can raise its defense. King Slime was apparently created by Lakelis, who admits players into the party quest, with the same Magic Potion of Growth that created Dile. Work together to defeat it! Drops Squishy Shoes which can only be obtained by defeating King Slime.
Monster Book: ''It is a mutated slime which once was a regular slime before transforming into King Slime due to the three sisters that were experimenting with magic. Though it looks like a regular slime of jelly-like substance, it can probably turn the world upside down with its gigantic, heavy body. The three sisters are busy recruiting adventurers who can defeat this King Slime.''}}
 
|}
 
==Dimensional Schism (Ludibrium PQ) Level 50-69==
{|{{prettytable}}
!Name||Monster Info||Notes
 
{{MapleStory/Monster|Ratz from Another Dimension||34|1,560|200|8|200|60|Must be killed to obtain Dimensional Passes to advance in Ludibrium PQ.|MS Monster Ratz.png}}
 
{{MapleStory/Monster|Black Ratz from Another Dimension||34|1,560|200|8|200|60|Must be killed to obtain Dimensional Passes to advance in Ludibrium PQ.|MS Monster Black Ratz.png}}
 
{{MapleStory/Monster|Shadow Eye from Another Dimension||33|1440|200|8|200|58|}}
 
{{MapleStory/Monster|Dark Eye from Another Dimension||33|1440|200|8|200|58|}}
 
{{MapleStory/Monster|Rombad from Another Dimension||36|1,950|300|8|250|67|Four of these need to be killed in Stage 4. Summons Block Golem from Another Dimension.|MS Monster Rombot.png}}
 
{{MapleStory/Monster|Block Golem from Another Dimension||41|2,400|450|16|300|80| |MS Monster Block Golem.png}}
 
{{MapleStory/Monster|Alishar|Boss|38|55,000|3,000|8|250|980|The final foe of the Ludibrium Party Quest. Compared to the King Slime, this beast is much tougher, packing a hard to avoid magic attack, as well as the ability to summon all three Chronos ranks. However, It can only summon Master Chronos when it is close to death. Those planning to fight it, take caution; Alishar is also able to lock a player's skills and inflict darkness, reducing their accuracy (except for magicians). Its large bulk also gives it a high stamina, so prepare for a long fight. Summons Chronos, Platoon Chronos, and Master Chronos.
Monster Book: ''A peculiar creature that swims the vast sea with its gigantic body. It is a monster that threatens the adverntures lost in the dimensional imbalance, although it, too, is a victim of the Dimensional Schism. It is a creature of powerful strength as well as an invincible monster that cannot be compleately destroyed but only chased away.''}}
 
{{MapleStory/Monster|Cronos|Undead|37|1,600|300|8|250|86|Summoned by Alishar.|MS Monster Chronos.png}}
 
{{MapleStory/Monster|Platoon Cronos|Undead|41|2000|450|16|300|99|Summoned by Alishar.|MS Monster Platoon Chronos.png}}
 
{{MapleStory/Monster|Master Cronos|Undead|46|2,520|600|16|350|116|Summoned by Alishar.|MS Monster Master Chronos.png}}
|}
 
==Curse of the Ice Knight: Level 50-69==
{|{{prettytable}}
!Name||Monster Info||Notes
 
{{MapleStory/Monster|Hector||53|3,600|800|20|400|146|}}
 
{{MapleStory/Monster|White Fang||55|4,000|800|20|400|156|}}
 
{{MapleStory/Monster|Ice Knight|Boss|85|75,000|2,000|64|99,999,999|0| }}
 
|}
 
==Forest of Poison Haze (Ellin PQ) Level 70-119==
{|{{prettytable}}
!Name||Monster Info||Notes
 
{{MapleStory/Monster|Poisoned Lord Tree||43|2,640|450|16|300|85| }}
 
{{MapleStory/Monster|Poisoned Stone Bug||43|2,640|450|16|300|85|Appears in the Forest of Poison Haze Party Quest. It can cast Weapon Defense Up and Cancel Weapon Attack.}}
 
{{MapleStory/Monster|Poisoned Spright||43|2,640|450|16|300|0|Must be killed to obtain Monster Marbles in Stage 4 of the Forest of Poison Haze Party Quest.|MS Monster Spright.png}}
 
{{MapleStory/Monster|Poison Golem||45|24,000|4,500|16|300|0|The first form of the boss of the Forest of Poison Haze Party Quest, accessible from Ellin Forest. It has two attacks, it can either punch the ground to cause knock back (but the distance isn't significant) or cause an earthquake with it's body. It can also make a poison mist which deals 50 damage contsantly. When it dies, it respawns as Charged Poison Golem.}}
 
{{MapleStory/Monster|Charged Poison Golem||46|38,000|6,000|16|350|0|The second form of the boss of the Forest of Poison Haze Party Quest, accessible from Ellin Forest. Its physical attacks are now replaced by a magical attack which deals roughly the same damage. It's Poison Mist now deals 200 damage constantly. When it dies, it respawns as Super-Charged Poison Golem. It can inflict poison, weakness, and darkness on the party, so be sure to bring all cures!|MS Monster Poison Golem Level 2.png}}
 
{{MapleStory/Monster|Super-Charged Poison Golem||48|50,000|6,000|16|350|1,467|The third and final form of the boss of the Forest of Poison Haze Party Quest, accessible from Ellin Forest. It has some of the same skills as the second form, as well as a few new ones.|MS Monster Super Poison Golem.png}}
 
|}
 
==Remnant of the Goddess (Orbis PQ) Level 70-119==
{|{{prettytable}}
!Name||Monster Info||Notes
 
{{MapleStory/Monster|Flying Boogie||52|4,080|800|25|400|113|Spawns at the first map of Remnant of the Goddess PQ. |MS Monster Jr. Boogie.png}}
 
{{MapleStory/Monster|Cellion in Tower of Goddess||55|4,800|800|25|400|125|5 of these must be killed for Stage 2 of the Remnant of the Goddess PQ.|MS Monster Cellion.png}}
 
{{MapleStory/Monster|Star Pixie in Tower of Godess||54|4,560|800|25|400|121|Drops Small Pieces for Stage 3 of the PQ. Revives into Ghost Pixie when killed.|MS Monster Star Pixie.png}}
 
{{MapleStory/Monster|Lunar Pixie in Tower of Godess||54|4,560|800|25|400|121|Drops Small Pieces for Stage 3 of the PQ. Revives into Ghost Pixie when killed.|MS Monster Lunar Pixie.png}}
 
{{MapleStory/Monster|Luster Pixie in Tower of Godess||54|4,560|800|25|400|121|Drops Small Pieces for Stage 3 of the PQ. Revives into Ghost Pixie when killed.|MS Monster Luster Pixie.png}}
 
{{MapleStory/Monster|Ghost Pixie|Undead|48|3,312|600|16|350|99|These Pixies appear when the Orbis PQ's Star, Lunar, and Luster Pixies are killed. Although this monster is 'undead', it surprisingly has a resistance to Holy. Also, unlike other pixies, these are capable of flying around the map, providing a further nuisance while trying to complete the PQ. However, after a certain time, they eventually die themselves.}}
 
{{MapleStory/Monster|Nependeath in Tower of Godess||53|4,320|800|25|400|117|Drops Strange Seeds for the last stage of Orbis PQ.|MS Monster Nependeath.png}}
 
{{MapleStory/Monster|Royal Nependeath in Tower of Godess||53|4,320|800|25|400|117|Must be killed to summon Papa Pixie. |MS Monster Dark Nependeath.png}}
 
{{MapleStory/Monster|Papa Pixie|Boss<br />Summons Star Pixie, Lunar Pixie and Luster Pixie.|58|490,000|10,000|25|450|1,990|The boss of the Orbis Party Quest. It is normally summoned when the Royal Nependeath (Summoned by dropping the seeds on the flower pots) is killed. Since it is the king of all Pixies, it summons all three types which, when killed, are turned into Ghost Pixies.}}
 
{{MapleStory/Monster|Star Pixie in Tower of Goddess (Summon Boss)||55|4,800|800|25|400|125|Summoned by Papa Pixie. Turns into Ghost Pixie when dead.|MS Monster Star Pixie.png}}
 
{{MapleStory/Monster|Lunar Pixie in Tower of Goddess (Summon Boss)||55|4,800|800|25|400|125|Summoned by Papa Pixie. Turns into Ghost Pixie when dead.|MS Monster Lunar Pixie.png}}
 
{{MapleStory/Monster|Luster Pixie in Tower of Goddess (Summon Boss)||55|4,800|800|25|400|125|Summoned by Papa Pixie. Turns into Ghost Pixie when dead.|MS Monster Luster Pixie.png}}
|}
 
==Lord Pirate (Herb Town PQ) Level 70-119==
{|{{prettytable}}
!Name||Monster Info||Notes
 
{{MapleStory/Monster|Lord Pirate's Jar||61|7,080|1,200|36|500|164||MS Monster Jar.png}}
 
{{MapleStory/Monster|Lord Pirate's Ginseng Jar||61|7,080|1,200|36|500|164||MS Monster Ginseng Jar.png}}
 
{{MapleStory/Monster|Lord Pirate's Bellflower||61|7,080|1,200|36|500|164||MS Monster Bellflower Root.png}}
 
{{MapleStory/Monster|Lord Pirate's Ancient Bellflower||61|7,080|1,200|36|500|164||MS Monster Sr. Bellflower Root.png}}
 
{{MapleStory/Monster|Lord Pirate's Enraged Mr. Alli||63|8,040|1,200|36|500|178|Drops Rookie Pirate Marks for Stage 2 of the Lord Pirate PQ.|MS Monster Mr. Alli.png}}
 
{{MapleStory/Monster|Lord Pirate's Enraged Kru||63|8,040|1,200|36|500|178|Drops Rising Pirate Marks for Stage 2 of the Lord Pirate PQ.|MS Monster Watchmen Crew.png}}
 
{{MapleStory/Monster|Lord Pirate's Enraged Captain||63|8,040|1,200|36|500|178|Drops Veteran Pirate Marks for Stage 2 of the Lord Pirate PQ.|MS Monster Watchmen Captain.png}}
 
{{MapleStory/Monster|Lord Pirate's Enraged Ginseng Jar||65|9,000|1,200|36|500|193|Drops Old Metal Key for Stage 3 of the Lord Pirate PQ.|MS Monster Ginseng Jar.png}}
 
{{MapleStory/Monster|Lord Pirate's Furious Mr. Alli||65|9,000|1,200|36|500|193|Drops Old Metal Key for Stage 3 of the Lord Pirate PQ.|MS Monster Mr. Alli.png}}
 
{{MapleStory/Monster|Lord Pirate's Furious Kru||65|9,000|1,200|36|500|193|Drops Old Metal Key for Stage 3 of the Lord Pirate PQ.|MS Monster Watchmen Crew.png}}
 
{{MapleStory/Monster|Lord Pirate's Furious Captain||65|9,000|1,200|36|500|193|Drops Old Metal Key for Stage 3 of the Lord Pirate PQ.|MS Monster Watchmen Captain.png}}
 
{{MapleStory/Monster|Gold Captain||60|4,000|1,000|25|500|156|Rarely spawns in random stages of the Lord Pirate PQ.|MS Monster Gold Captain.png}}
 
{{MapleStory/Monster|Lord Pirate's Devoted Kru||65|9,000|1,200|36|500|193|Rarely spawns in Stage 3 of the Lord Pirate PQ.|MS Monster Watchmen Crew.png}}
 
{{MapleStory/Monster|Lord Pirate's Devoted Captain||65|9,000|1,200|36|500|193|Rarely spawns in Stage 3 of the Lord Pirate PQ.|MS Monster Watchmen Captain.png}}
 
{{MapleStory/Monster|Lord Pirate|Boss|68|469,000|300|36|5,000|7,200|The Lord of the pirates that are attacking Herb Town. He was injured while sailing through the Tornado Sea, also called "the Sea of Storms." Because of these injuries, he decided to hide out in Herb Town's bay, while sending his henchmen out to terrorize the people of the town at the same time. This one usually appears on a normal run through the PQ, when completing no side stages. This form drops an Item called "Lord Pirate's Key", which is used to open the chest that randomly appears in stage 2 in order to tick Lord Pirate off to trigger "Angry Lord Pirate".}}
 
{{MapleStory/Monster|Angry Lord Pirate|Boss|68|518,000|400|36|5,000|8,800|[[MapleStory/Monsters/Level_61-70#Lord Pirate|Lord Pirate]] is now ticked off. This form will only appear if you open the chest found in stage 2 of the PQ. You just need to open 1 chest in order to have to fight Angry Lord Pirate. It's necessary to defeat this form for a quest.|MS Monster Lord Pirate.png}}
 
{{MapleStory/Monster|Enraged Lord Pirate|Boss|70|555,000|500|36|5,000|12,000|Lord Pirate is now furious. Currently, it is unknown how to summon this form, as only one chest is known to appear in the PQ as of the Ascension update.|MS Monster Lord Pirate.png}}
 
{{MapleStory/Monster|Lord Pirate's Kru||65|9,000|1,200|36|500|193|Summoned by all forms of Lord Pirate.|MS Monster Watchmen Crew.png}}
 
{{MapleStory/Monster|Lord Pirate's Captain||65|9,000|1,200|36|500|193|Summoned by all forms of Lord Pirate.|MS Monster Watchmen Captain.png}}
 
|}
 
==Romeo and Juliet (Magatia PQ) Level 70-119==
{|{{prettytable}}
!Name||Monster Info||Notes
 
{{MapleStory/Monster|Homun||74|16,800|1,800|49|700|306| }}
 
{{MapleStory/Monster|Cyti||76|20,400|2,000|49|800|357| }}
 
{{MapleStory/Monster|Homunculus||73|15,600|1,800|49|700|289| }}
 
{{MapleStory/Monster|Neo Huroid||73|15,600|1,800|49|700|289| }}
 
{{MapleStory/Monster|Reinforced Iron Mutae||73|15,600|1,800|49|700|289| }}
 
{{MapleStory/Monster|Reinforced Mithril Mutae||75|18,000|1,800|49|700|323||MS Monster Mithril Mutae.png}}
 
{{MapleStory/Monster|Frankenroid|Boss|77|627,000|2,500|49|6,000|11,000|The results of a terrible attempt at reviving a dead person with the powers of Alchemy. It was created through a combination of Zenumist and Alchadeno techniques by an exiled alchemist, Yulete. Frankenroid still sports the brain of a human and a metallic body full of armaments. The Metallic body's light will remain blue when it's not attacking. It Shifts to red durring an attack. Also, the metallic body preforms most of the attacks. If Frankenroid glows green, he will do an earthquake. Sometimes, the mouth fire a boxing glove. What's annoying is that the fight against Frankenroid takes place with about 20 reinforced Iron Mutates and Mithril Mutates whom know Super weapon and magic defense. It serves as the primary form of the boss for Magatia PQ.}}
 
{{MapleStory/Monster|Angry Frankenroid|Boss|80|809,000|2,500|49|6,000|23,000|The results of a terrible attempt at reviving a dead person with the powers of Alchemy. It serves as the secondary form of the boss for Magatia PQ, similar to Lord Pirate and his alternate forms.}}
 
{{MapleStory/Monster|Neo Huroid||75|18,000|1,800|49|700|323|Must be killed to protect Romeo or Juliet.}}
 
{{MapleStory/Monster|Romeo|Ally|70|12,000|1,500|36|600|0|Must be protected for Romeo and Juliet PQ.}}
 
{{MapleStory/Monster|Juliet|Ally|70|12,000|1,500|36|600|0|Must be protected for Romeo and Juliet PQ.}}
 
|}
 
==Resurrection of the Hoblin King (El Nath PQ) Level 120-200==
{|{{prettytable}}
!Name||Monster Info||Notes
 
{{MapleStory/Monster|Hoblin Hector||83|37,200|2,200|64|900|584| }}
 
{{MapleStory/Monster|Elite Hoblin||83|37,200|2,200|64|900|584| }}
 
{{MapleStory/Monster|Elite Green Hoblin||83|31,000|2,200|64|900|729| }}
 
{{MapleStory/Monster|Combat Hoblin||85|42,000|2,200|64|900|644| }}
 
{{MapleStory/Monster|Ferocious Hoblin||86|44,400|2,400|64|1,000|675| }}
 
{{MapleStory/Monster|Rex|Boss|80|3,300,000|10,000|30|99,999,999|330,000|The boss of Hoblin King PQ. Drops Hobb Warrior Mark. With 50 of these and a certain color of Rex's Earring, you can obtain Rex's Perfect Earring.}}
 
{{MapleStory/Monster|Shammos|Ally|62|400,000|10,000|36|99,999,999|0|Must be protected in order to complete the PQ. If you wander off and don't return within 30 seconds, or if Shammos dies, you will fail the PQ.|MS NPC Shammos.png}}
|}
 
==Dragon's Nest (Leafre PQ) Level 120-200==
{|{{prettytable}}
!Name||Monster Info||Notes
 
{{MapleStory/Monster|Soaring Hawk||103|142,000|3,000|80|1,300|2,862| }}
 
{{MapleStory/Monster|Soaring Eagle||103|142,000|3,000|80|1,300|2,862| }}
 
{{MapleStory/Monster|Soaring Red Wyvern||104|146,000|3,000|80|1,300|2,926| |MS Monster Red Wyvern.png}}
 
{{MapleStory/Monster|Soaring Blue Wyvern||104|146,000|3,000|80|1,300|2,926| |MS Monster Blue Wyvern.png}}
 
{{MapleStory/Monster|Soaring Black Wyvern||104|150,000|3,000|80|1,300|2,990| |MS Monster Dark Wyvern.png}}
 
{{MapleStory/Monster|Soaring Griffey|Boss|120|3,230,000|1,500|97|9,999|13,000| |MS Monster Griffey.png}}
 
{{MapleStory/Monster|Dragonoir|Boss|107|107,000,000|15,000|80|99,999,999|320,000|A boss of the Dragon Rider party quest.}}
 
{{MapleStory/Monster|Dragon Rider|Boss|120|118,000,000|15,000|97|99,999,999|540,000|When Dragonoir is defeated, you must go to Dragon Rider via a cave with falling stones and defeat this monster to complete the party quest. Drops Sky Scales which can be used to exchange for Tablets (10 per tablet).}}
 
|}
 
==Kenta in Danger (Aquarium PQ) Level 120-200==
{|{{prettytable}}
!Name||Monster Info||Notes
 
{{MapleStory/Monster|Squid||100|65,000|2,800|81|1,200|1,334| }}
 
{{MapleStory/Monster|Risell Squid||103|71,000|3,000|100|1,300|1,431| }}
 
{{MapleStory/Monster|Shark||105|75,000|3,000|100|1,300|1,495|Drops Air Bubbles for Stage 2 of Kenta PQ.}}
 
{{MapleStory/Monster|Cold Shark||107|79,000|3,000|100|1,400|1,557|Drops Air Bubbles for Stage 2 of Kenta PQ.}}
 
{{MapleStory/Monster|Bloody Boom 1||75|10,000|200|39|10,000|0|Appears in the 3rd stage of Kenta PQ. Able to fly around.|MS Monster Bloody Boom.png}}
 
{{MapleStory/Monster|Bone Fish|Undead|98|61,000|2,800|81|1,200|1,268|Found in Stage 3 of Kenta PQ.}}
 
{{MapleStory/Monster|Shark||105|75,000|3,000|100|1,300|1,495|This version is found in Stage 3 of Kenta PQ.}}
 
{{MapleStory/Monster|Cold Shark||107|79,000|3,000|100|1,400|1,557|This version is found in Stage 3 of Kenta PQ.}}
 
{{MapleStory/Monster|Kenta|Ally|120|105,000|3,000|97|1,400|0|Must be protected to complete Kenta PQ.}}
 
{{MapleStory/Monster|Pianus (Left Side)|Boss|110|24,000,000|3,000,000|80|10,000|900,000|One of the 2 bosses of Kenta PQ. These versions of Pianus drop Pianus Scale, which is used to obtain Kenta's Goggles. It also summons Bloody Booms.}}
 
{{MapleStory/Monster|Pianus (Right Side)|Boss|110|30,000,000|3,500,000|80|10,000|1,300,000|One of the 2 bosses of Kenta PQ. These versions of Pianus drop Pianus Scale, which is used to obtain Kenta's Goggles. It also summons Bloody Booms.}}
 
{{MapleStory/Monster|Bloody Boom 2||75|10,000|200|39|10,000|0|Summoned by Pianus in Kenta PQ. It is stationary, like regular Bloody Booms.|MS Monster Bloody Boom.png}}
 
|}
 
==Escape: Level 120-200==
{|{{prettytable}}
{|{{prettytable}}
!Name||Monster Info||Notes


{{MapleStory/Monster|Grey Vulture||125|115,000|4,000|115|1,800|2,078| }}
{{MapleStory/Monster|System Monster N1|Mini-Boss|105-160|Varying|Varying|Varying |Varying |Varying|Appears in Link 1 when the Monster Generator is activated. Looks like a Slime but with a green hologram.}}


{{MapleStory/Monster|Castle Golem||127|120,000|4,000|115|2,000|2,149| }}
{{MapleStory/Monster|System Monster N2|Mini-Boss|105-160|Varying|Varying|Varying |Varying |Varying|Appears in Link 2. Looks like Stone Golem but with a green hologram.}}


{{MapleStory/Monster|Blood Reindeer||120|105,000|3,000|97|1,600|1,940| }}
{{MapleStory/Monster|System Monster N3|Mini-Boss|105-160|Varying|Varying|Varying |Varying |Varying|Appears in Link 3. It can fly. Looks like Orange Mushroom but with a green hologram.}}


{{MapleStory/Monster|Prison Guard Boar||70|241,000|3,000|29|6,000|610| }}
{{MapleStory/Monster|Guidance System|Invincible|105-160|Varying|Varying|Varying |Varying |Varying|Appears in Link 3. This attracts System Monster N3 to it, flying around the map. Cannot be attacked.}}


{{MapleStory/Monster|Prison Guard Rhino||70|296,000|3,000|29|1,500|820|Drops Prison Keys for the second to last stage of Escape PQ.}}
{{MapleStory/Monster|System Monster N4|Mini-Boss|105-160|Varying|Varying|Varying |Varying |Varying|Appears in Link 4 and Link 8. In Link 8, sometimes it revives into Division, which must be killed for a quest. It looks like Evil Eye but with a green hologram.}}


{{MapleStory/Monster|Prison Guard Ani|Boss|125|42,500,000|200,000|115|10,000|646,000|Drops Prison Guard Key. 50 keys are needed to obtain a Von Leon Belt of your choice.}}
{{MapleStory/Monster|Infinity|Mini-Boss|105-160|Varying|Varying|Varying |Varying |Varying|Appears in Link 4. When it dies, it revives back into itself. Must be killed 20 times in one minute for a quest. It looks like Evil Eye but with a red hologram.}}


|}
{{MapleStory/Monster|Fabricated Manon|Auto-aggressive<br>Boss|105-160|Varying|Varying|Varying |Varying |Varying|Appears in Link 4 after using a Threat Fabrication - Manon Core, which costs 2.5 million mesos. Drops Manon Cries for entering Horntail. Has the same abilities as the real Manon.|MS Monster Manon.png}}


==Sea of Fog (Ghost Ship PQ) Level 120-159==
{{MapleStory/Monster|Fabricated Pianus|Auto-aggressive<br>Boss|105-160|Varying|Varying|Varying |Varying |Varying|Appears in Link 4 after using a Threat Fabrication - Pianus Core, which costs 2.5 million mesos. Drops Pianus Certificate, Miniature Pianus, and Pianus's Scream. Has the same abilities as the real Pianus.|MS Monster Pianus (Right Side).png}}
{|{{prettytable}}
!Name||Monster Info||Notes


{{MapleStory/Monster|Seaman Recruit Ghost|Undead|60|11,000|1,000|25|450|0| |MS Monster Private First Class Ghost.png}}
{{MapleStory/Monster|Fabricated Griffey|Auto-aggressive<br>Boss|105-160|Varying|Varying|Varying |Varying |Varying|Appears in Link 4 after using a Threat Fabrication - Griffey Core, which costs 2.5 million mesos. Has the same abilities as the real Griffey.|MS Monster Griffey.png}}


{{MapleStory/Monster|Wooden Box||1|1|0|0|999,999|0|Transforms into Seaman Apprentice Ghost when killed.}}
{{MapleStory/Monster|System Monster N5|Mini-Boss|105-160|Varying|Varying|Varying |Varying |Varying|Appears in Link 5. When it dies, System Monster N5-1 appears. Looks like a Ribbon Pig but with a green hologram.}}


{{MapleStory/Monster|Seaman Apprentice Ghost|Undead|61|11,800|1,200|36|500|0| |MS Monster Corporal Ghost.png}}
{{MapleStory/Monster|System Monster N5-1|Mini-Boss|105-160|Varying|Varying|Varying |Varying |Varying|Appears after System Monster N5 is killed.|MS Monster Ribbon Pig.png}}


{{MapleStory/Monster|First Officer|Undead|62|12,600|1,200|36|500|0| |MS Monster Top Officer.png}}
{{MapleStory/Monster|System Monster E10|Mini-Boss|105-160|Varying|Varying|Varying |Varying |Varying|Appears after System Monster N5-1 is killed. Looks like a Mutant Ribbon Pig but with a green hologram.}}


{{MapleStory/Monster|Lieutenant Ghost|Undead|61|11,800|1,200|36|500|0||MS Monster Sergeant Ghost.png}}
{{MapleStory/Monster|System Monster F1|Mini-Boss|105-160|Varying|Varying|Varying |Varying |Varying|Appears in Link 7 with Protectron. Protectron will make these invincible if not destroyed in time. Looks like Stone Golem but with a green hologram.|MS Monster System Monster N2.png}}


{{MapleStory/Monster|1st Lieutenant Ghost|Undead|61|11,800|1,200|36|500|0||MS Monster Staff Sergeant Ghost.png}}
{{MapleStory/Monster|Protectron|Auto-aggressive<br>Mini-Boss|105-160|Varying|Varying|Varying |Varying |Varying|Appears in Link 7 with System Monster F1. If not destroyed in time, Protectron will make System Monster F1 invincible.}}


{{MapleStory/Monster|Lieutenant Commander Ghost|Undead|61|11,800|1,200|36|500|0||MS Monster Sergeant Major Ghost.png}}
{{MapleStory/Monster|Division|Mini-Boss|105-160|Varying|Varying|Varying |Varying |Varying|Appears in Link 8 from time to time after System Monster N4 dies. Must be killed twice for a quest. It looks like Evil Eye but with a red hologram.|MS Monster Infinity.png}}


{{MapleStory/Monster|Ghost Ship Captain|Undead<br />Boss|62|4,000,000|10,000|36|99,999,999|0|Sea of Fog Party Quest Boss.|MS Monster Captain of Ghost Ship.png}}
{{MapleStory/Monster|Standard Model T-1|Mini-Boss|105-160|Varying|Varying|Varying |Varying |Varying|Appears in Link 8 when the Monster Generator is activated to summon these. Otherwise, System Monster N4 will spawn.|MS Monster Tiguru.png}}


|}
{{MapleStory/Monster|Enhanced Model T-2|Auto-aggressive<br>Mini-Boss|105-160|Varying|Varying|Varying |Varying |Varying|Appears in Link 8 when the Monster Generator is activated to summon these. Otherwise, System Monster N4 will spawn.|MS Monster Mutant Tiguru.png}}


==Nett's Pyramid (Pyramid PQ) 60-89 (Normal), 90-109 (Hard)==
{{MapleStory/Monster|System Monster G6|Mini-Boss|105-160|Varying|Varying|Varying |Varying |Varying|Appears in Link 9. It has a lot more HP than System Monster E10, and can 1hko low HP jobs. Looks like a Mutant Ribbon Pig but with a green hologram.|MS Monster System Monster E10.png}}
{|{{prettytable}}
!Name||Monster Info||Notes


{{MapleStory/Monster|Skeledog|Undead<br />Party Bonus<br />Boss|30|100|200|0|9,999,999|6|A skeledog found in the Pyramid at Nihal Desert. Found in waves 1 and 3 of Nett's Pyramid. It is also found in waves 6 and 7, where it has more HP than in waves 1 and 3.|MS Monster Pyramid Skeledog.png}}
{{MapleStory/Monster|Fabricated Mihile|Auto-aggressive<br>Boss|105-160|Varying|Varying|Varying |Varying |Varying|Appears in Link 9 after using a Threat Fabrication - Mihile Core, which costs 300 Evolving Coins. Drops Lionheart Gear, except for Weapons and Shoulders. Has the same abilities as the real Mihile, version 2.|MS Monster Mihile.png}}


{{MapleStory/Monster|Pyramid Skeleton|Undead<br />Party Bonus<br />Boss|30|150|200|0|9,999,999|7|A skeleton found in the Pyramid at Nihal Desert. Found in waves 2 and 3 of Nett's Pyramid. It is also found in waves 5, 6, 8, and 9, where it has more HP than in waves 2 and 3.}}
{{MapleStory/Monster|Fabricated Oz|Auto-aggressive<br>Boss|105-160|Varying|Varying|Varying |Varying |Varying|Appears in Link 9 after using a Threat Fabrication - Oz Core, which costs 300 Evolving Coins. Drops Dragon Tail Gear, except for Weapons and Shoulders. Has the same abilities as the real Oz, version 2.|MS Monster Oz.png}}


{{MapleStory/Monster|Giant Scorpion|Undead<br />Party Bonus<br />Boss|30|1,050|200|0|9,999,999|13|A scorpion found in the Pyramid at Nihal Desert. Found in waves 4 and 5 of Nett's Pyramid. It also spawns in wave 7 (more HP than waves 4 and 5), waves 14 and 15 (more HP than in wave 7), and wave 18 (more HP than waves 14 and 15).}}
{{MapleStory/Monster|Fabricated Irena|Auto-aggressive<br>Boss|105-160|Varying|Varying|Varying |Varying |Varying|Appears in Link 9 after using a Threat Fabrication - Irena Core, which costs 300 Evolving Coins. Drops Falcon Wing Gear, except for Weapons and Shoulders. Has the same abilities as the real Irena, version 2.|MS Monster Irena.png}}


{{MapleStory/Monster|Horus|Undead<br />Party Bonus<br />Boss|30|900|200|0|9,999,999|12|Based on the ancient Egyptian God Horus. Found in the Pyramid at Nihal Desert. He can increase the speed of nearby monsters by 30. Found in wave 8, 13 (more HP than 8), and 17 (more HP than 13) of Nett's Pyramid.}}
{{MapleStory/Monster|Fabricated Eckhart|Auto-aggressive<br>Boss|105-160|Varying|Varying|Varying |Varying |Varying|Appears in Link 9 after using a Threat Fabrication - Eckhart Core, which costs 300 Evolving Coins. Drops Raven Horn Gear, except for Weapons and Shoulders. Has the same abilities as the real Eckhart, version 2.|MS Monster Eckhart.png}}


{{MapleStory/Monster|Advisor Mummy|Undead<br />Party Bonus<br />Boss|30|4,200|200|0|999,999,999|35|A mummy found in the Pyramid at Nihal Desert. It is able to heal around 30,000 health to nearby monsters. Found in wave 9 of Nett's Pyramid, waves 16 and 18 (more HP than wave 9), and wave 19 (more HP than wave 16 and 18).}}
{{MapleStory/Monster|Fabricated Hawkeye|Auto-aggressive<br>Boss|105-160|Varying|Varying|Varying |Varying |Varying|Appears in Link 9 after using a Threat Fabrication - Hawkeye Core, which costs 300 Evolving Coins. Drops Shark Tooth Gear, except for Weapons and Shoulders. Has the same abilities as the real Hawkeye, version 2.|MS Monster Hawkeye.png}}


{{MapleStory/Monster|Pharaoh Yeti|Undead<br />Party Bonus<br />Boss|30|15,000|200|0|9,999,999|110|A "Junior" Yeti wearing a Pharaoh's cap that is found in the Pyramid at Nihal Desert. While it's called a Junior Yeti, it more closely resembles the Yeti pet than it does a true Junior Yeti. Found in the 10th wave of Nett's Pyramid, where 2 of them spawn on each platform. Deals 2 damage to the Obelisk.|MS Monster Pharaoh Jr. Yeti.png}}
{{MapleStory/Monster|Shadow Cygnus|Auto-aggressive<br>Boss|105-160|Varying|Varying|Varying |Varying |Varying|Appears in Link 9 after using a Mission - Shadow Monster, which costs 600 Evolving Coins. Drops Empress Shoulders. Has the same abilities as the real Cygnus, but doesn't summon any knights.|MS Monster Cygnus.png}}
 
{{MapleStory/Monster|Mummydog|Undead<br />Party Bonus<br />Boss|30|1,400|200|0|9,999,999|16|A mummydog found in the Pyramid at Nihal Desert. Found in waves 11 and 13 of Nett's Pyramid, and waves 17 and 18(more HP than waves 11 and 13).|MS Monster Pyramid Mummydog.png}}
 
{{MapleStory/Monster|Pyramid Skeleton Commander|Undead<br />Party Bonus<br />Boss|30|2,000|200|0|9,999,999|20|A skeleton found in the Pyramid at Nihal Desert. Found in waves 12 and 14 of Nett's Pyramid, wave 16(more HP than waves 12 and 14), and waves 19 and 20(more HP than wave 16).}}
 
{{MapleStory/Monster|Pharaoh Snake|Undead<br />Party Bonus<br />Boss|30|2,750|200|0|9,999,999|25|A cobra snake found in the Pyramid at Nihal Desert. It is capable of slowing your attack speed. Found in wave 15 of Nett's Pyramid, and wave 19, where it has more HP than in wave 15.}}
 
{{MapleStory/Monster|Pharaoh Mummy|Undead<br />Party Bonus<br />Boss|30|672,000|200|0|999,999,999|4,668|The final enemy of Nett's Pyramid. Found in wave 20 of Nett's Pyramid, where 2 of them spawn. Deals 5 damage to the Obelisk.}}


|}
|}


==Dimension Invasion (140-200)==
{{Footer Nav|game=MapleStory|prevpage=Event monsters|nextpage=Monsters Level 1-10}}
 
{|{{prettytable}}
!Name||Monster Info||Notes
 
{{MapleStory/Monster|Pikeman Skeleknight||185|1,260,000|50,000|0|10,000|17,970||MS Monster Spearman Skeleknight.png}}
 
{{MapleStory/Monster|Vanguard Bloodfang||140|525,000|10,000|115|2,000|8,985||MS Monster Bloodfang.png}}
 
{{MapleStory/Monster|Large Wooden Horse|Boss|1|?|1|105|1,600|1|}}
 
{{MapleStory/Monster|Pikeman Skeleknight||185|34,500,000|72,500|205|50,000|284,340||MS Monster Spearman Skeleknight.png}}
 
{{MapleStory/Monster|Skeletrooper||50|19,800|10,000|0|300|172|}}
 
{{MapleStory/Monster|Gargoyle||1|1|?|105|1,600|1||MS Monster Gargoyle Knight.png}}
 
{{MapleStory/Monster|Gargoyle Knight||1|1|?|105|1,600|1|}}
 
{{MapleStory/Monster|Obelisk Shield||53|3600|800|20|400|146|}}
 
{{MapleStory/Monster|Spearman Skeleknight||50|15,840|10,000|0|300|164|}}
 
{{MapleStory/Monster|Giant Darkheart|Boss|50|15,840|10,000|0|100,000,000|164|Summoned in the Hilla Bonus Stage. Be careful, as it can zombify, Damage Reflect, and do high damage.}}
 
{{MapleStory/Monster|Blackheart|Boss|1|?|1|105|1,600|1|Giant Darkheart summons 31 of these. Giant Darkheart will be invincibile until all of these are dead.}}
 
{{MapleStory/Monster|Commander Specter||101|670,000|3,000|80|1,300|1,777|Summoned in the Hilla vs. Magnus Bonus Stage.|MS Monster Guerrilla Specter.png }}
 
{{MapleStory/Monster|General Bloodfang||115|525,000|10,000|115|2,000|8,985|Summoned in the Hilla vs. Magnus Bonus Stage.|MS Monster Bloodfang.png}}
 
 
|}
{{Footer Nav|game=MapleStory|prevpage=Monsters/Events|prevname=Event Monster|nextpage=Monsters/Elements|nextname=Elemental List}}

Latest revision as of 17:14, 13 July 2019

subpage
subpage

This page needs to be split into subpages. The content on this page should be only listed on each Party Quest's page, so move the sections there.

Please add some links to the Table of Contents and split this page to separate pages, then remove this template.

The monster stats vary based on your level, and the cores you use, going up to level 160.

Name Monster Info Notes
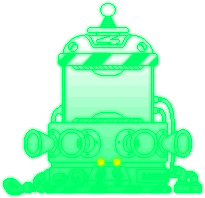
System Monster N1
MS Monster System Monster N1.png

Mini-Boss

  • Level: 105-160
  • HP: Varying
  • MP: Varying
  • PDR: Varying %
  • MDR: Varying %
  • EXP: Varying
Appears in Link 1 when the Monster Generator is activated. Looks like a Slime but with a green hologram.


System Monster N2
MS Monster System Monster N2.png

Mini-Boss

  • Level: 105-160
  • HP: Varying
  • MP: Varying
  • PDR: Varying %
  • MDR: Varying %
  • EXP: Varying
Appears in Link 2. Looks like Stone Golem but with a green hologram.


System Monster N3
MS Monster System Monster N3.png

Mini-Boss

  • Level: 105-160
  • HP: Varying
  • MP: Varying
  • PDR: Varying %
  • MDR: Varying %
  • EXP: Varying
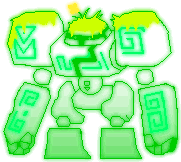
Appears in Link 3. It can fly. Looks like Orange Mushroom but with a green hologram.


Guidance System
MS Monster Guidance System.png

Invincible

  • Level: 105-160
  • HP: Varying
  • MP: Varying
  • PDR: Varying %
  • MDR: Varying %
  • EXP: Varying
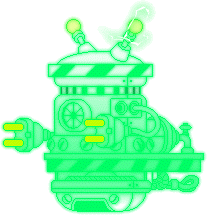
Appears in Link 3. This attracts System Monster N3 to it, flying around the map. Cannot be attacked.


System Monster N4
MS Monster System Monster N4.png

Mini-Boss

  • Level: 105-160
  • HP: Varying
  • MP: Varying
  • PDR: Varying %
  • MDR: Varying %
  • EXP: Varying
Appears in Link 4 and Link 8. In Link 8, sometimes it revives into Division, which must be killed for a quest. It looks like Evil Eye but with a green hologram.


Infinity
MS Monster Infinity.png

Mini-Boss

  • Level: 105-160
  • HP: Varying
  • MP: Varying
  • PDR: Varying %
  • MDR: Varying %
  • EXP: Varying
Appears in Link 4. When it dies, it revives back into itself. Must be killed 20 times in one minute for a quest. It looks like Evil Eye but with a red hologram.


Fabricated Manon
MS Monster Manon.png

Auto-aggressive
Boss

  • Level: 105-160
  • HP: Varying
  • MP: Varying
  • PDR: Varying %
  • MDR: Varying %
  • EXP: Varying
Appears in Link 4 after using a Threat Fabrication - Manon Core, which costs 2.5 million mesos. Drops Manon Cries for entering Horntail. Has the same abilities as the real Manon.


Fabricated Pianus
MS Monster Pianus (Right Side).png

Auto-aggressive
Boss

  • Level: 105-160
  • HP: Varying
  • MP: Varying
  • PDR: Varying %
  • MDR: Varying %
  • EXP: Varying
Appears in Link 4 after using a Threat Fabrication - Pianus Core, which costs 2.5 million mesos. Drops Pianus Certificate, Miniature Pianus, and Pianus's Scream. Has the same abilities as the real Pianus.


Fabricated Griffey
MS Monster Griffey.png

Auto-aggressive
Boss

  • Level: 105-160
  • HP: Varying
  • MP: Varying
  • PDR: Varying %
  • MDR: Varying %
  • EXP: Varying
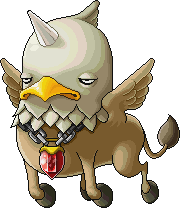
Appears in Link 4 after using a Threat Fabrication - Griffey Core, which costs 2.5 million mesos. Has the same abilities as the real Griffey.


System Monster N5
MS Monster System Monster N5.png

Mini-Boss

  • Level: 105-160
  • HP: Varying
  • MP: Varying
  • PDR: Varying %
  • MDR: Varying %
  • EXP: Varying
Appears in Link 5. When it dies, System Monster N5-1 appears. Looks like a Ribbon Pig but with a green hologram.


System Monster N5-1
MS Monster Ribbon Pig.png

Mini-Boss

  • Level: 105-160
  • HP: Varying
  • MP: Varying
  • PDR: Varying %
  • MDR: Varying %
  • EXP: Varying
Appears after System Monster N5 is killed.


System Monster E10
MS Monster System Monster E10.png

Mini-Boss

  • Level: 105-160
  • HP: Varying
  • MP: Varying
  • PDR: Varying %
  • MDR: Varying %
  • EXP: Varying
Appears after System Monster N5-1 is killed. Looks like a Mutant Ribbon Pig but with a green hologram.


System Monster F1
MS Monster System Monster N2.png

Mini-Boss

  • Level: 105-160
  • HP: Varying
  • MP: Varying
  • PDR: Varying %
  • MDR: Varying %
  • EXP: Varying
Appears in Link 7 with Protectron. Protectron will make these invincible if not destroyed in time. Looks like Stone Golem but with a green hologram.


Protectron
MS Monster Protectron.png

Auto-aggressive
Mini-Boss

  • Level: 105-160
  • HP: Varying
  • MP: Varying
  • PDR: Varying %
  • MDR: Varying %
  • EXP: Varying
Appears in Link 7 with System Monster F1. If not destroyed in time, Protectron will make System Monster F1 invincible.


Division
MS Monster Infinity.png

Mini-Boss

  • Level: 105-160
  • HP: Varying
  • MP: Varying
  • PDR: Varying %
  • MDR: Varying %
  • EXP: Varying
Appears in Link 8 from time to time after System Monster N4 dies. Must be killed twice for a quest. It looks like Evil Eye but with a red hologram.


Standard Model T-1
MS Monster Tiguru.png

Mini-Boss

  • Level: 105-160
  • HP: Varying
  • MP: Varying
  • PDR: Varying %
  • MDR: Varying %
  • EXP: Varying
Appears in Link 8 when the Monster Generator is activated to summon these. Otherwise, System Monster N4 will spawn.


Enhanced Model T-2
MS Monster Mutant Tiguru.png

Auto-aggressive
Mini-Boss

  • Level: 105-160
  • HP: Varying
  • MP: Varying
  • PDR: Varying %
  • MDR: Varying %
  • EXP: Varying
Appears in Link 8 when the Monster Generator is activated to summon these. Otherwise, System Monster N4 will spawn.


System Monster G6
MS Monster System Monster E10.png

Mini-Boss

  • Level: 105-160
  • HP: Varying
  • MP: Varying
  • PDR: Varying %
  • MDR: Varying %
  • EXP: Varying
Appears in Link 9. It has a lot more HP than System Monster E10, and can 1hko low HP jobs. Looks like a Mutant Ribbon Pig but with a green hologram.


Fabricated Mihile
MS Monster Mihile.png

Auto-aggressive
Boss

  • Level: 105-160
  • HP: Varying
  • MP: Varying
  • PDR: Varying %
  • MDR: Varying %
  • EXP: Varying
Appears in Link 9 after using a Threat Fabrication - Mihile Core, which costs 300 Evolving Coins. Drops Lionheart Gear, except for Weapons and Shoulders. Has the same abilities as the real Mihile, version 2.


Fabricated Oz
MS Monster Oz.png

Auto-aggressive
Boss

  • Level: 105-160
  • HP: Varying
  • MP: Varying
  • PDR: Varying %
  • MDR: Varying %
  • EXP: Varying
Appears in Link 9 after using a Threat Fabrication - Oz Core, which costs 300 Evolving Coins. Drops Dragon Tail Gear, except for Weapons and Shoulders. Has the same abilities as the real Oz, version 2.


Fabricated Irena
MS Monster Irena.png

Auto-aggressive
Boss

  • Level: 105-160
  • HP: Varying
  • MP: Varying
  • PDR: Varying %
  • MDR: Varying %
  • EXP: Varying
Appears in Link 9 after using a Threat Fabrication - Irena Core, which costs 300 Evolving Coins. Drops Falcon Wing Gear, except for Weapons and Shoulders. Has the same abilities as the real Irena, version 2.


Fabricated Eckhart
MS Monster Eckhart.png

Auto-aggressive
Boss

  • Level: 105-160
  • HP: Varying
  • MP: Varying
  • PDR: Varying %
  • MDR: Varying %
  • EXP: Varying
Appears in Link 9 after using a Threat Fabrication - Eckhart Core, which costs 300 Evolving Coins. Drops Raven Horn Gear, except for Weapons and Shoulders. Has the same abilities as the real Eckhart, version 2.


Fabricated Hawkeye
MS Monster Hawkeye.png

Auto-aggressive
Boss

  • Level: 105-160
  • HP: Varying
  • MP: Varying
  • PDR: Varying %
  • MDR: Varying %
  • EXP: Varying
Appears in Link 9 after using a Threat Fabrication - Hawkeye Core, which costs 300 Evolving Coins. Drops Shark Tooth Gear, except for Weapons and Shoulders. Has the same abilities as the real Hawkeye, version 2.


Shadow Cygnus
MS Monster Cygnus.png

Auto-aggressive
Boss

  • Level: 105-160
  • HP: Varying
  • MP: Varying
  • PDR: Varying %
  • MDR: Varying %
  • EXP: Varying
Appears in Link 9 after using a Mission - Shadow Monster, which costs 600 Evolving Coins. Drops Empress Shoulders. Has the same abilities as the real Cygnus, but doesn't summon any knights.